> ## Documentation Index
> Fetch the complete documentation index at: https://docs.bytebase.com/llms.txt
> Use this file to discover all available pages before exploring further.
# Entra ID
## Create enterprise application
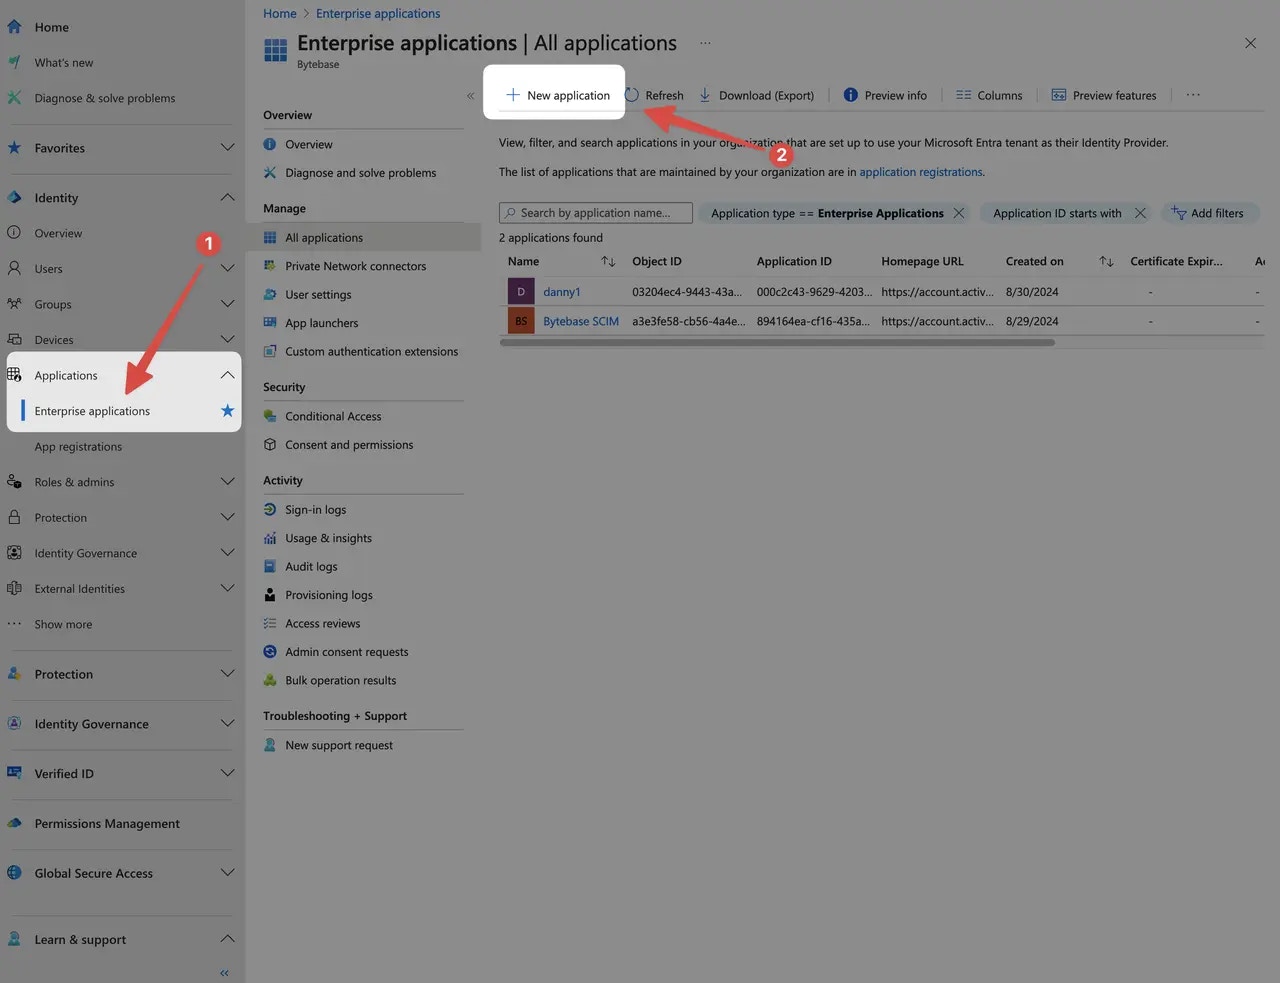
Sign in to the Entra ID Admin Center Dashboard. Select **Enterprise applications** and click **New application**.
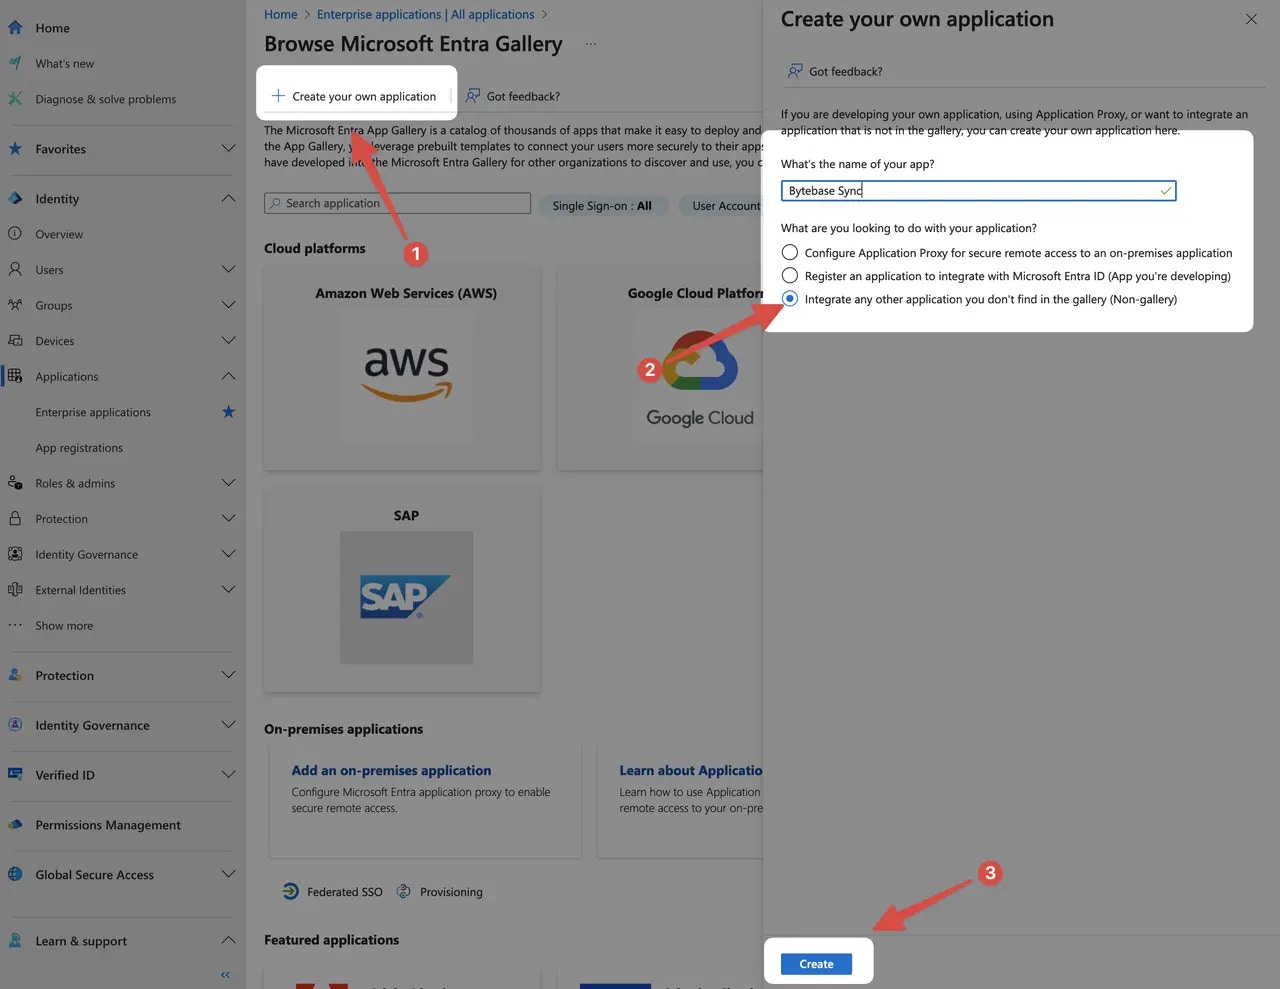
 Select **Create your own application**. Give your application a descriptive name, and select **Integrate any other application you don't find in the gallery (Non-gallery)** option, then click **Create**.
 ## Create provision
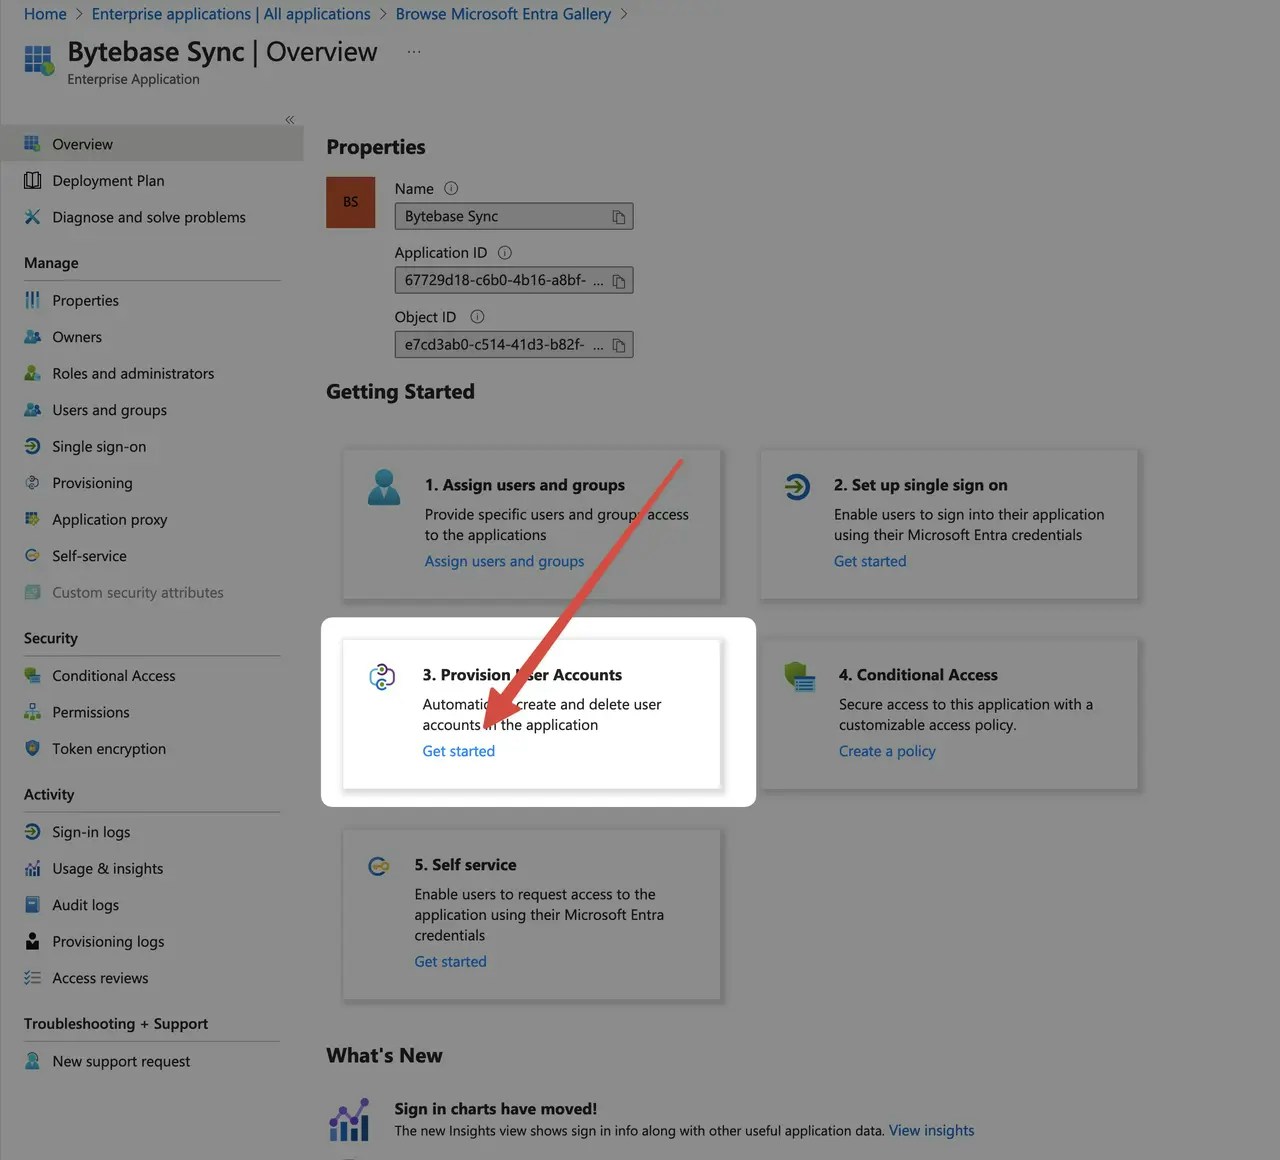
Go to the application detail page. Select **Provision User Accounts**.
## Create provision
Go to the application detail page. Select **Provision User Accounts**.
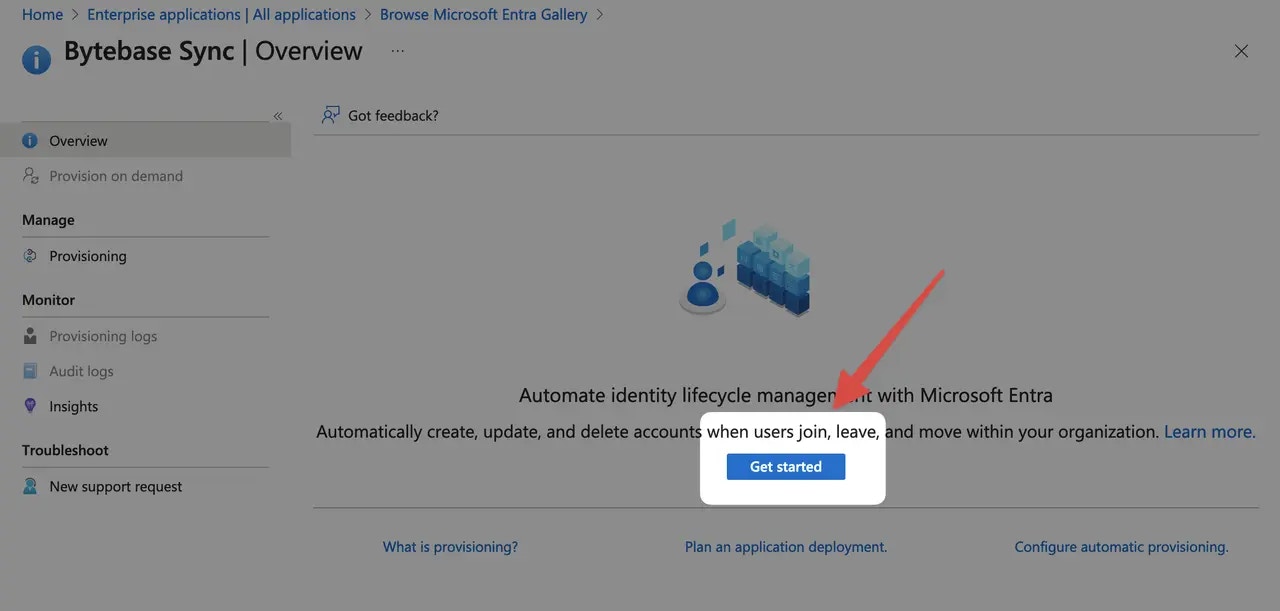
 Click **Get Started** button.
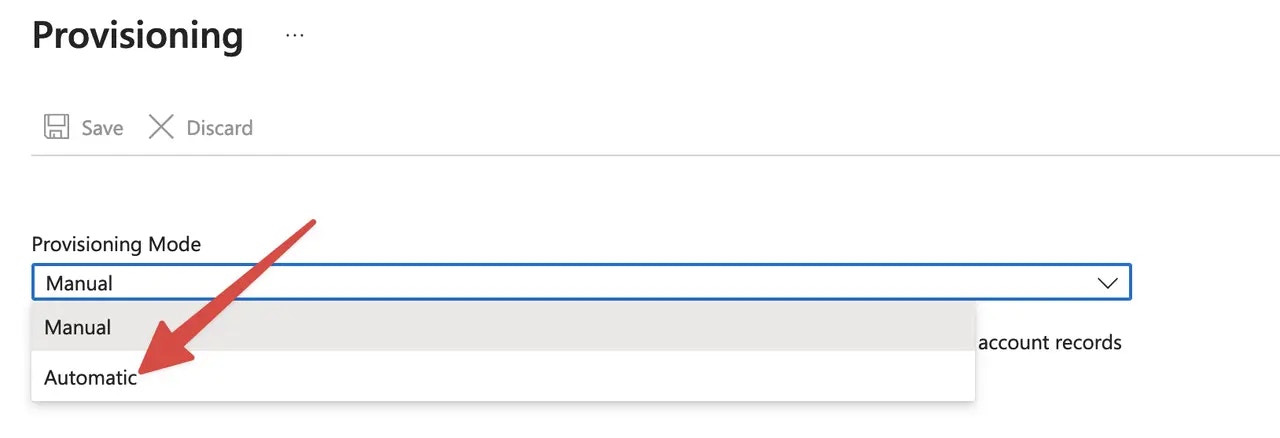
 Change **Provisioning Mode** to **Automatic**.
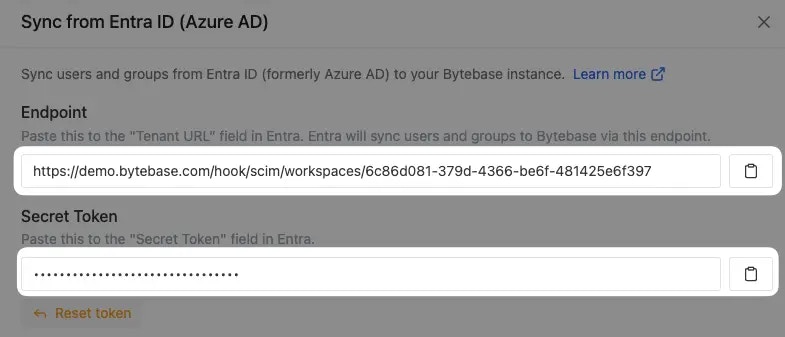
 Go to your Bytebase console, navigate to **Security & Policy** -> **Users & Groups** page. Click **Sync From Entra ID (Azure AD)**.
 Copy the **Endpoint** and **Secret Token**.
Bytebase endpoint implements SCIM protocol, please make sure you have configured [External URL](/get-started/self-host/external-url) and it's network accessible from Entra.
Copy the **Endpoint** and **Secret Token**.
Bytebase endpoint implements SCIM protocol, please make sure you have configured [External URL](/get-started/self-host/external-url) and it's network accessible from Entra.
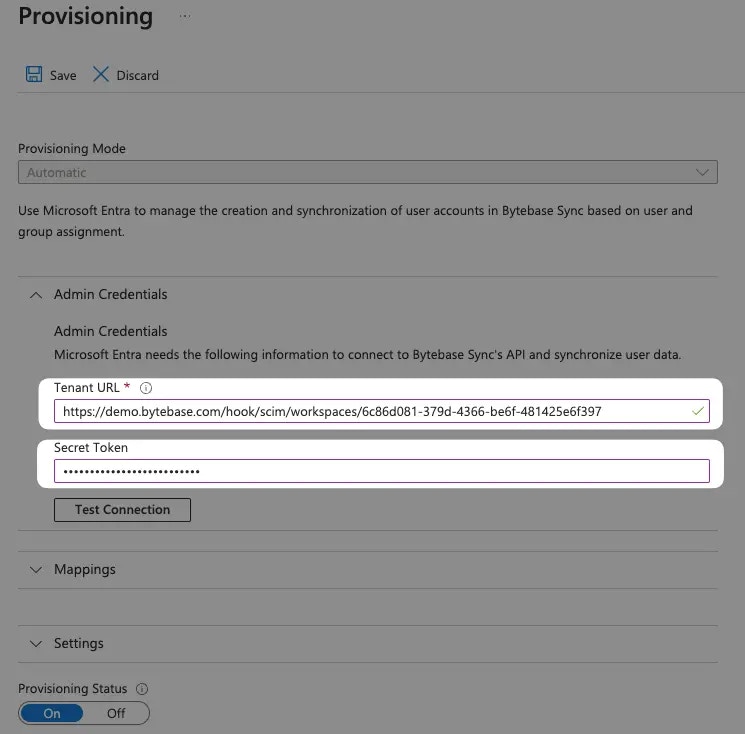
 Go back to Entra console, paste the `Endpoint` and `Secret Token` above to `Tenant URL` and `Secret Token` respectively.
Click **Test Connection** and save upon success.
Go back to Entra console, paste the `Endpoint` and `Secret Token` above to `Tenant URL` and `Secret Token` respectively.
Click **Test Connection** and save upon success.
 ## Edit attribute mapping
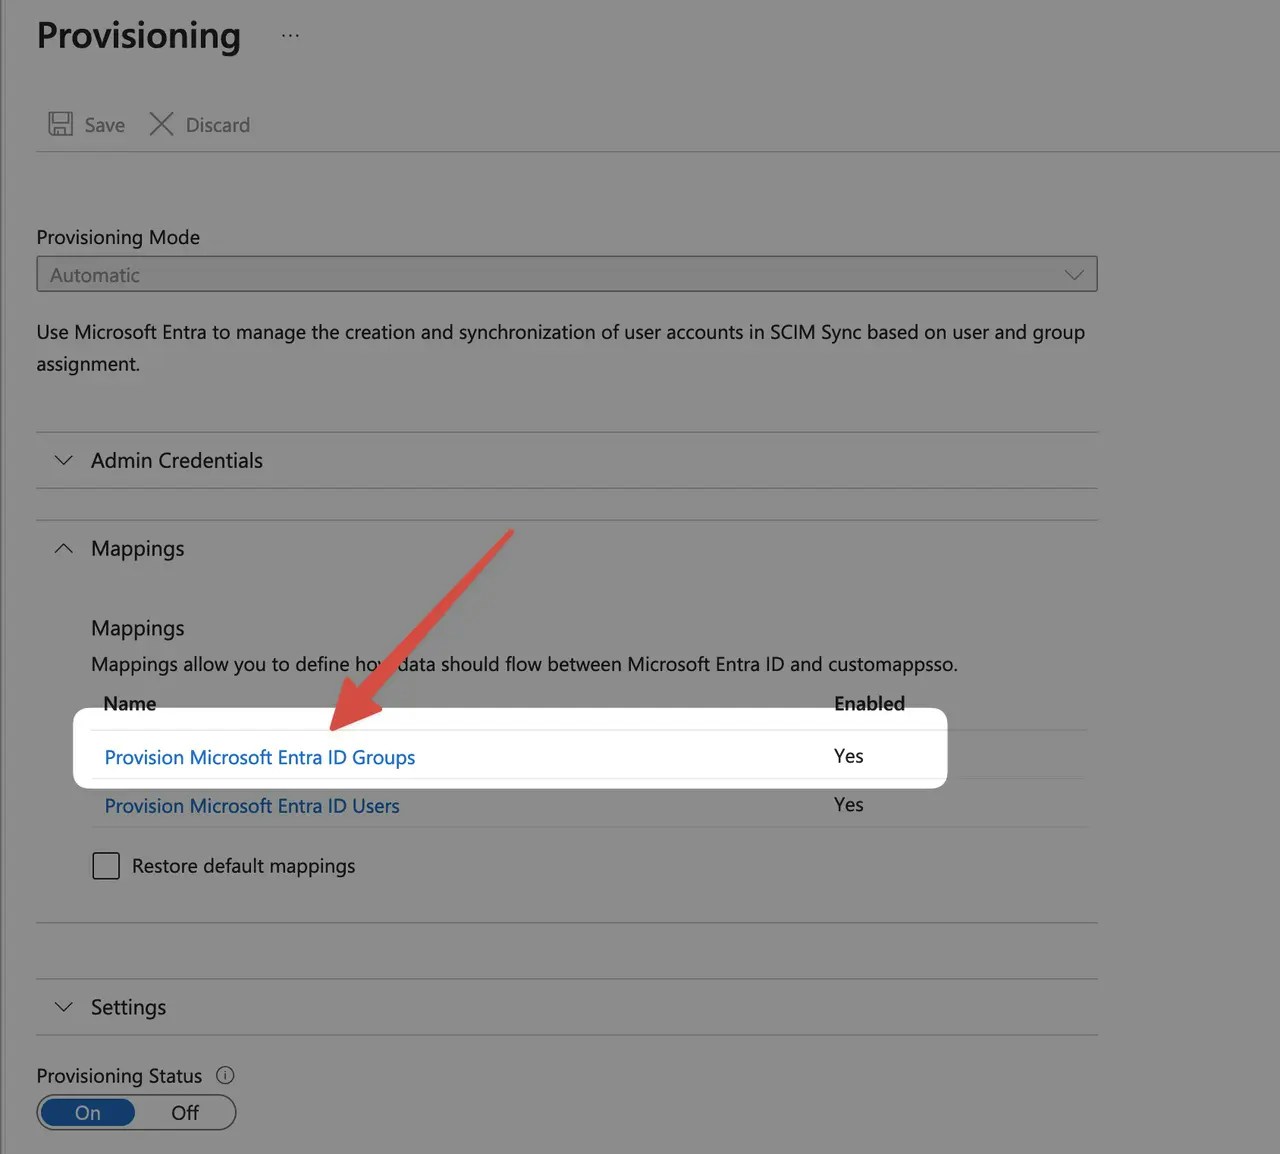
Continue the provision, click **Mappings** and click **Provision Microsoft Entra ID Groups**.
## Edit attribute mapping
Continue the provision, click **Mappings** and click **Provision Microsoft Entra ID Groups**.
 Bytebase uses the group's `externalId` to uniquely identify a group. By default, Entra ID maps `objectId` to `externalId`, which is stable and recommended. You can optionally add a custom `email` attribute to sync the group email to Bytebase.
If you have an existing SCIM configuration that maps `externalId` to `mail`, it will continue to work. However, we recommend switching to the default `objectId` mapping for stability, since object IDs do not change when a group's email is updated.
### Step 1 - Create a new `email` attribute
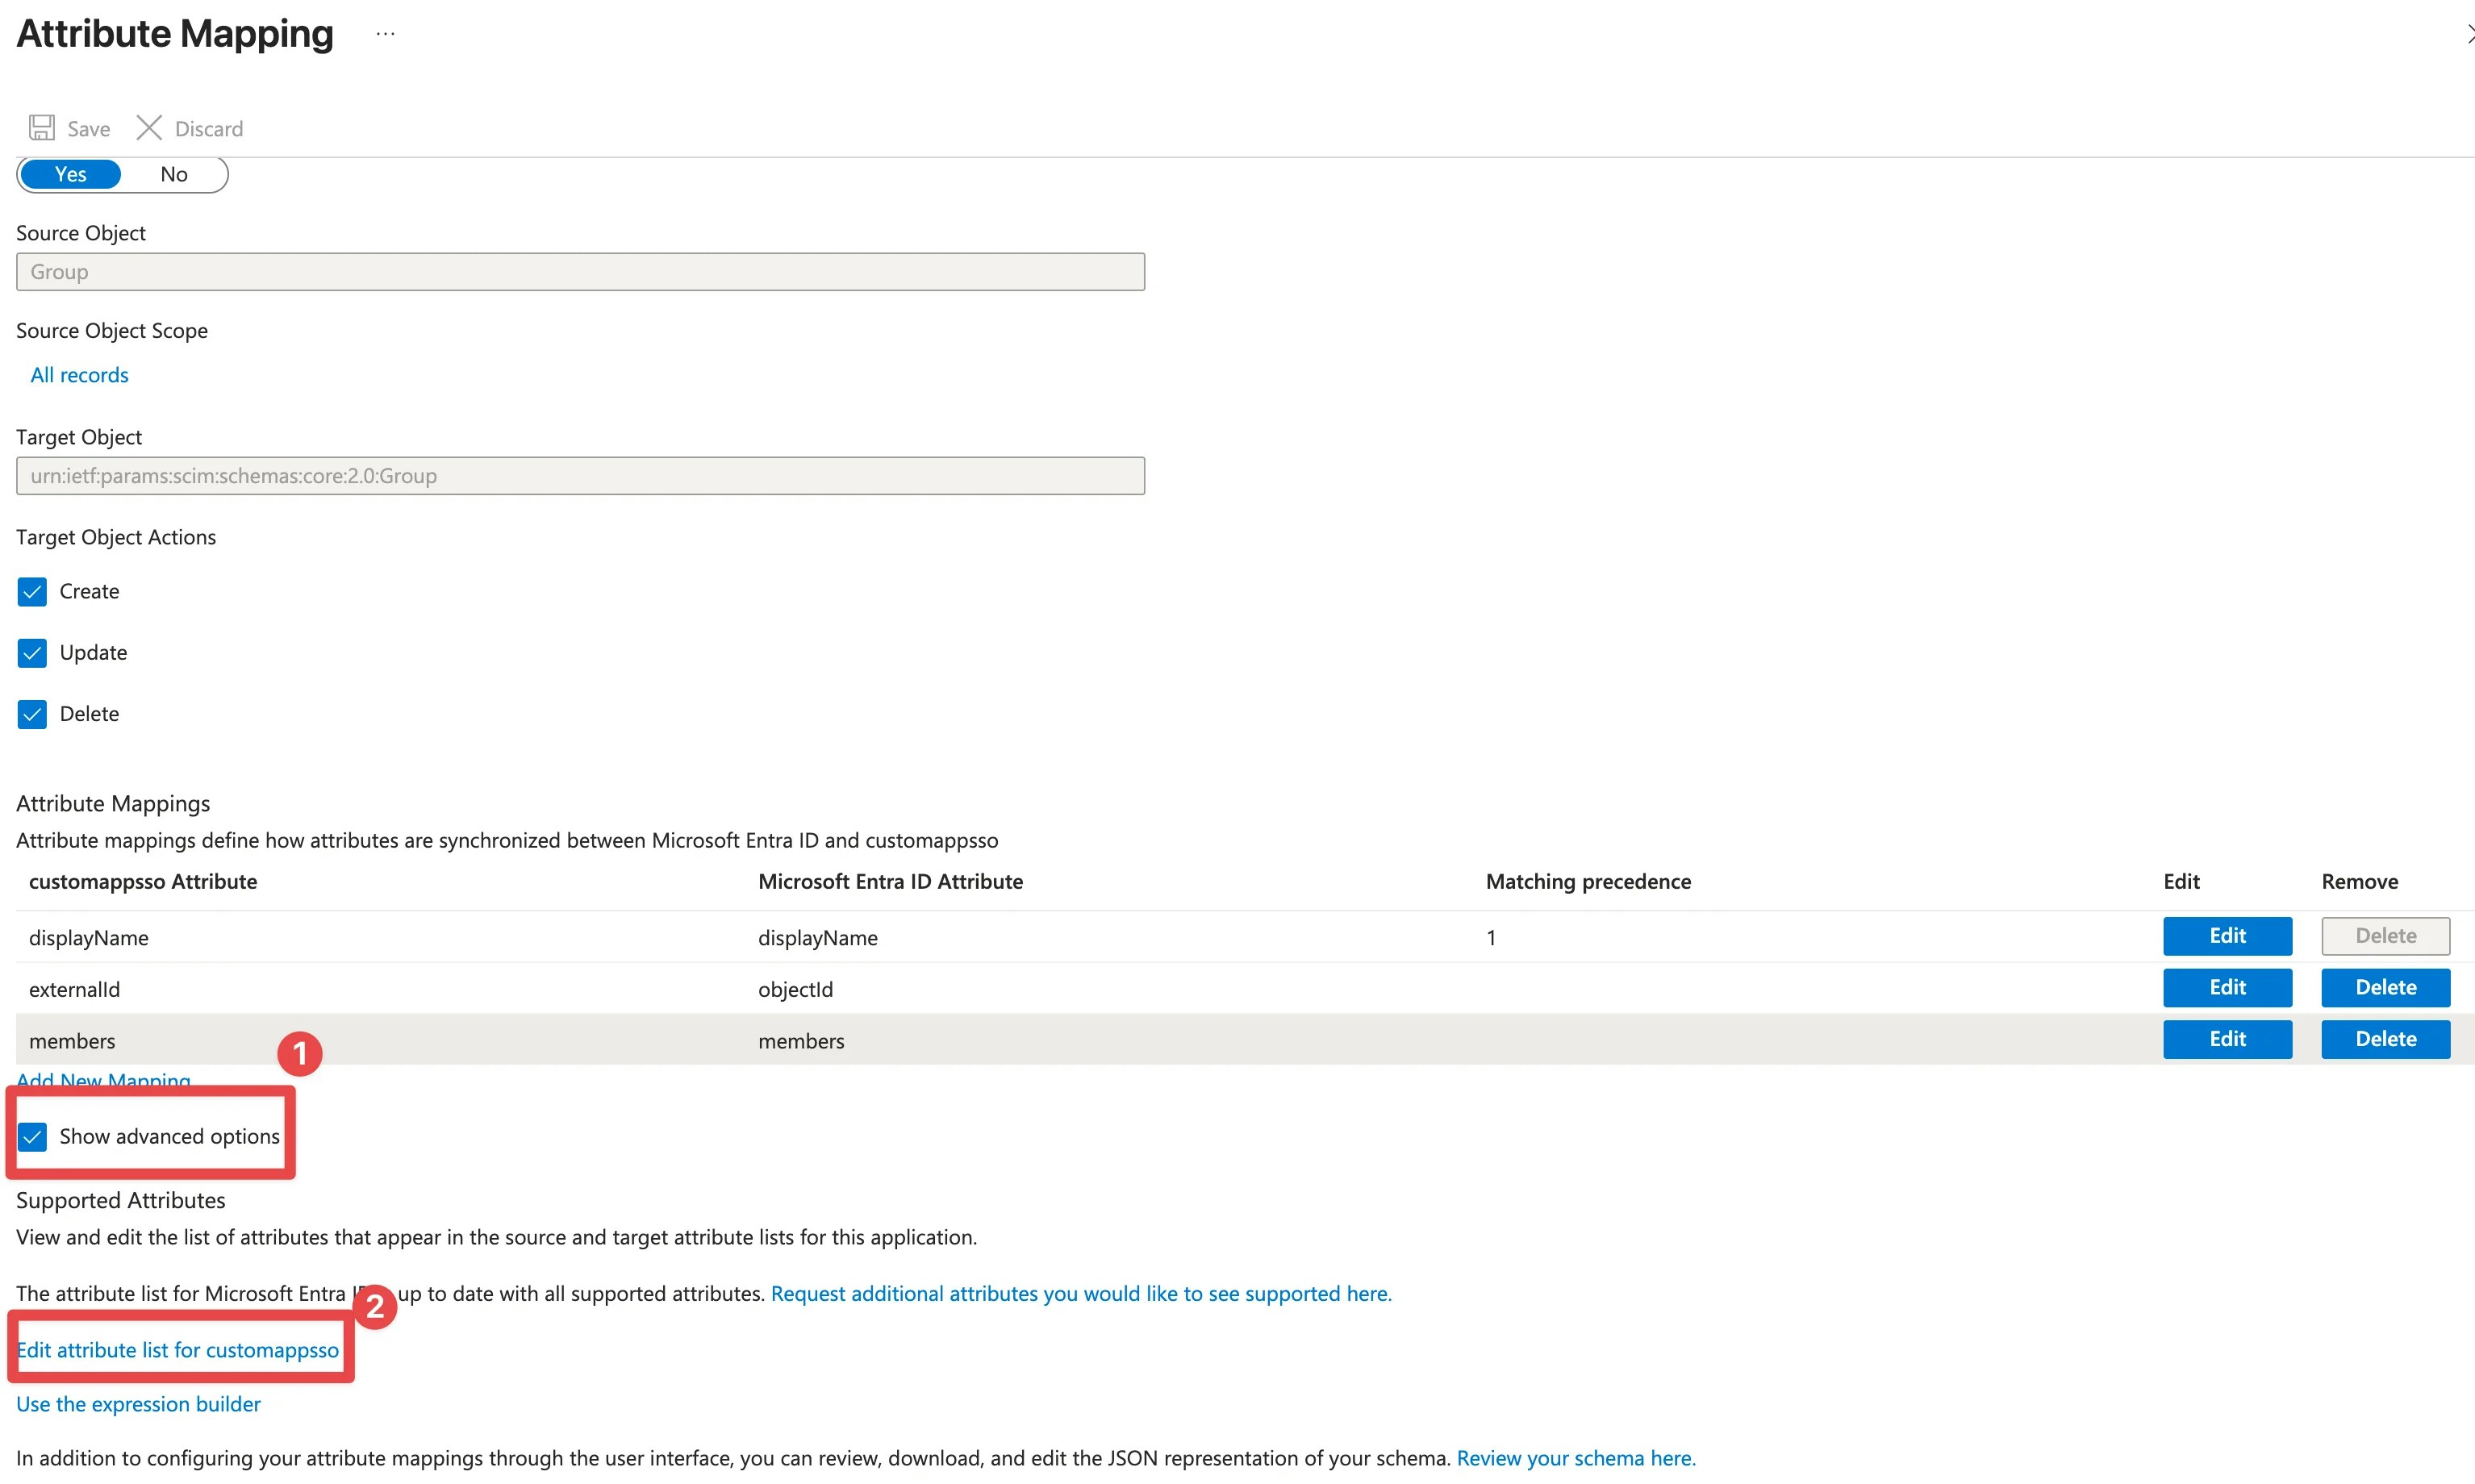
Click **Show advanced options**, then click **Edit attribute list for Bytebase**.
Bytebase uses the group's `externalId` to uniquely identify a group. By default, Entra ID maps `objectId` to `externalId`, which is stable and recommended. You can optionally add a custom `email` attribute to sync the group email to Bytebase.
If you have an existing SCIM configuration that maps `externalId` to `mail`, it will continue to work. However, we recommend switching to the default `objectId` mapping for stability, since object IDs do not change when a group's email is updated.
### Step 1 - Create a new `email` attribute
Click **Show advanced options**, then click **Edit attribute list for Bytebase**.
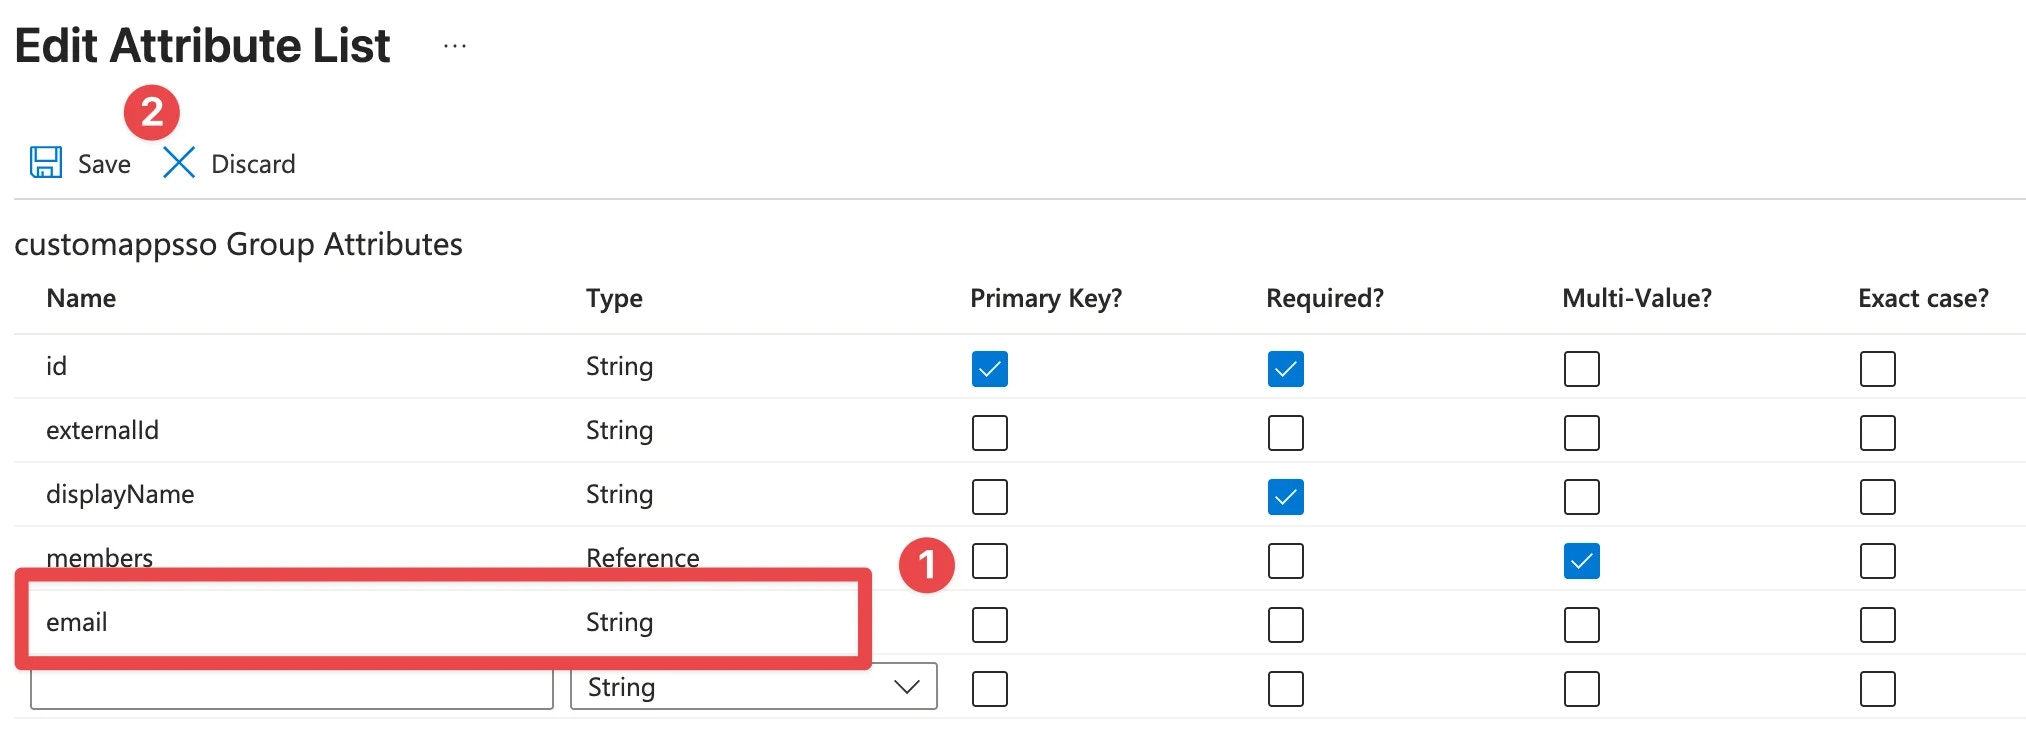
 Add a new attribute `email` with type `String`, then click **Save**.
 ### Step 2 - Edit the mapping
Edit the attribute mapping:
* Click **Edit** for the `displayName` row. Change **Match objects using this attribute** to `No`.
* Click **Edit** for the `externalId` row. Change **Match objects using this attribute** to `Yes` and set **Matching precedence** to `1`.
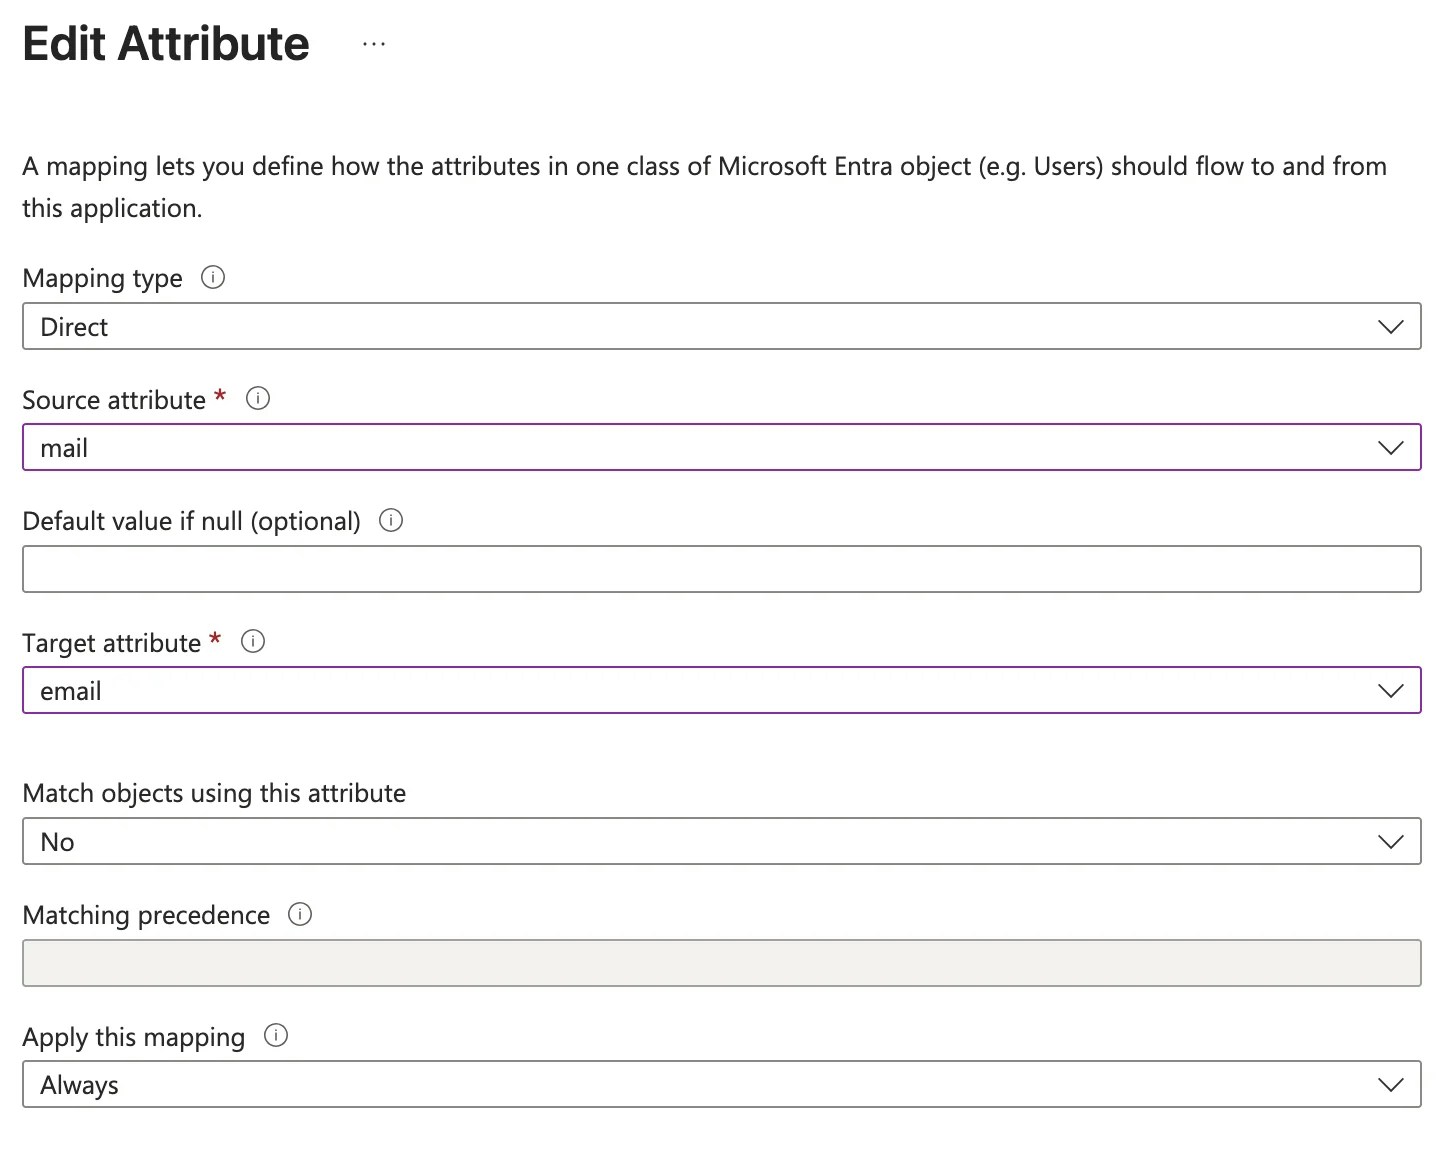
* Add a new mapping row: set **email** to map to **mail**.
### Step 2 - Edit the mapping
Edit the attribute mapping:
* Click **Edit** for the `displayName` row. Change **Match objects using this attribute** to `No`.
* Click **Edit** for the `externalId` row. Change **Match objects using this attribute** to `Yes` and set **Matching precedence** to `1`.
* Add a new mapping row: set **email** to map to **mail**.
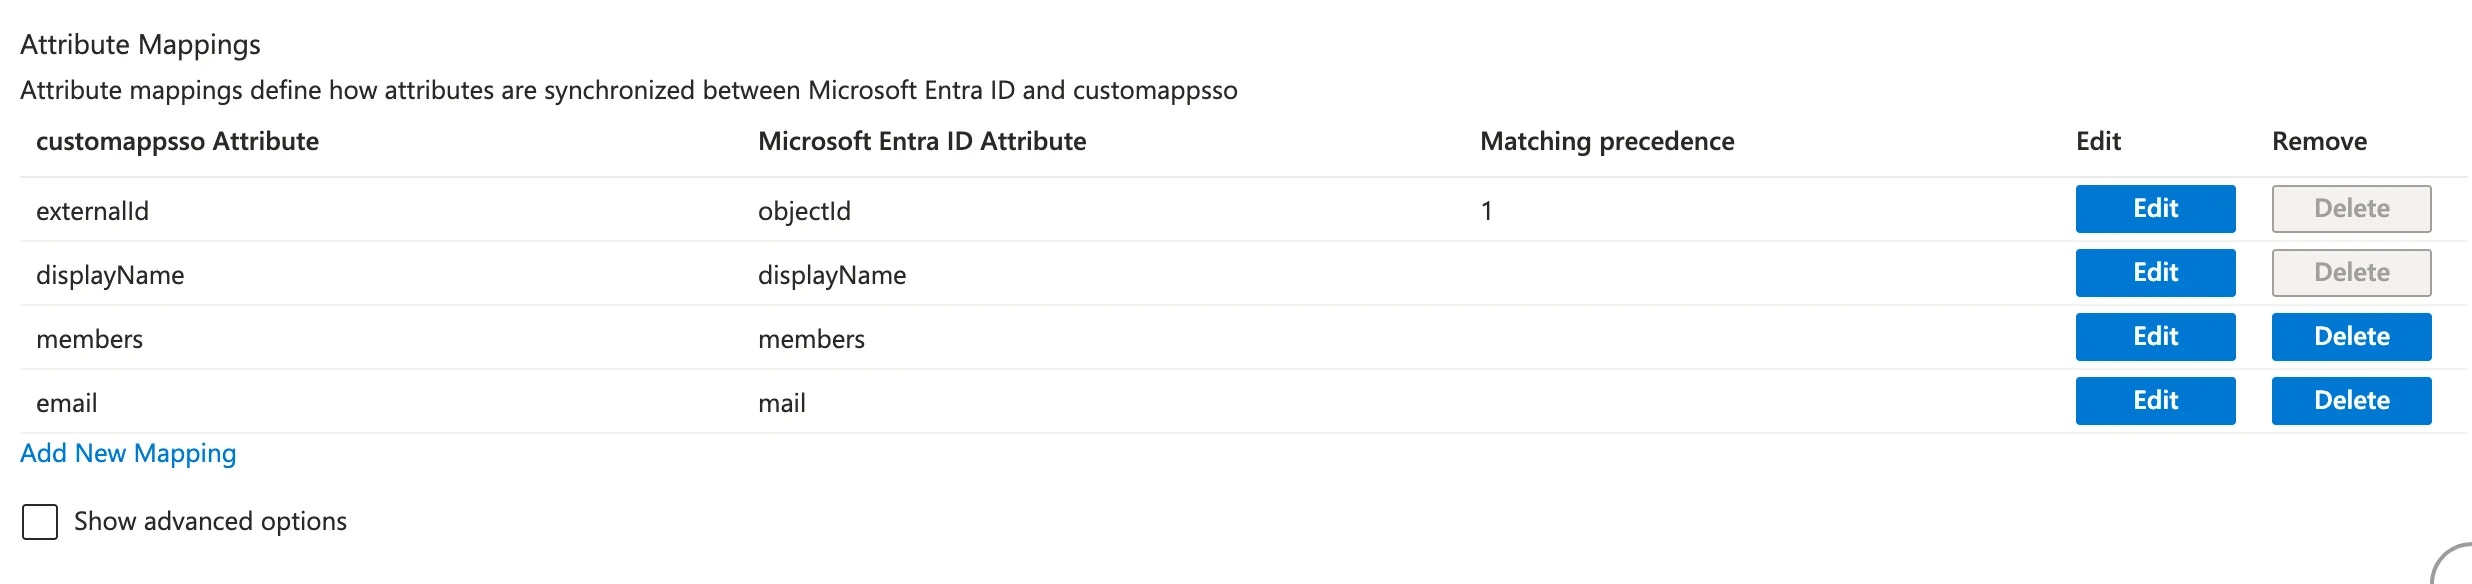
 The final mappings look like this.
 ## Assign users and groups
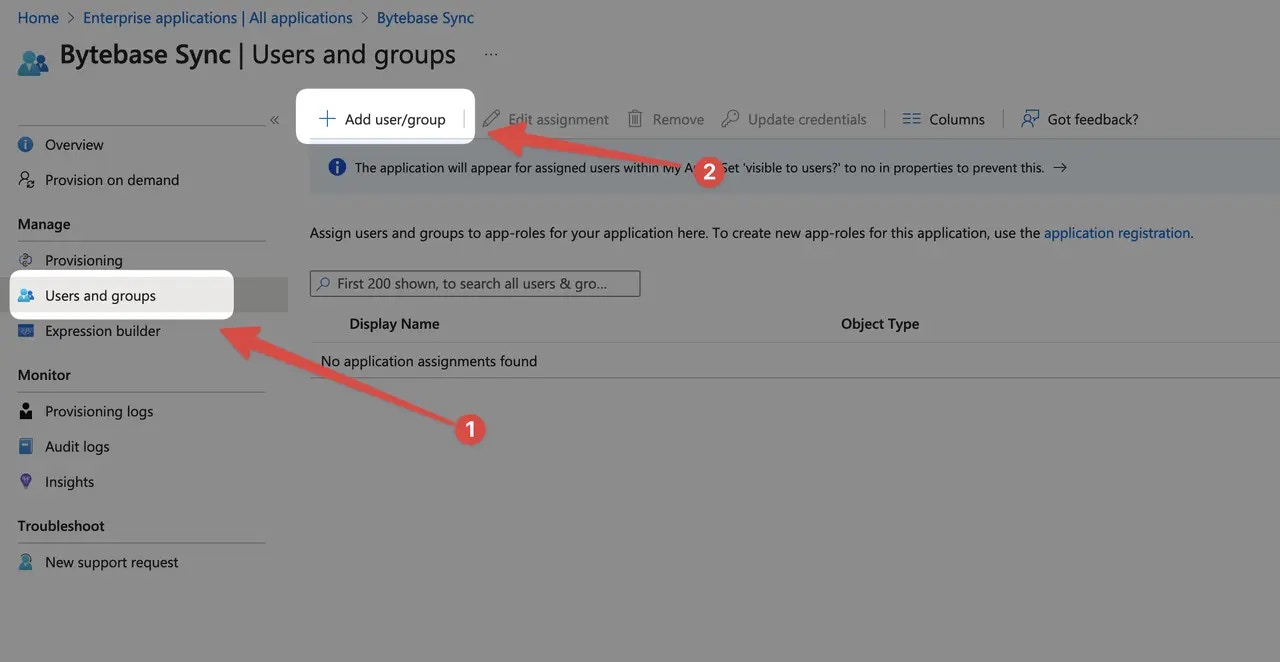
In order for your users and groups to be synced to Bytebase, you will need to assign them to your Entra SCIM application. Select **Users and groups** and click **Add user/group**.
## Assign users and groups
In order for your users and groups to be synced to Bytebase, you will need to assign them to your Entra SCIM application. Select **Users and groups** and click **Add user/group**.
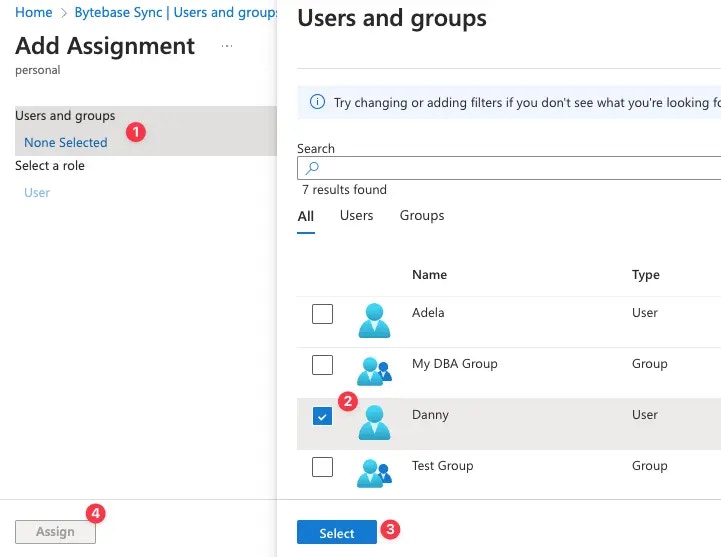
 Click **None selected** under the **Users and Groups**. Select the users and groups that you want to add to the SCIM application, and click **Select** and **Assign**.
 ## Turn on provisioning
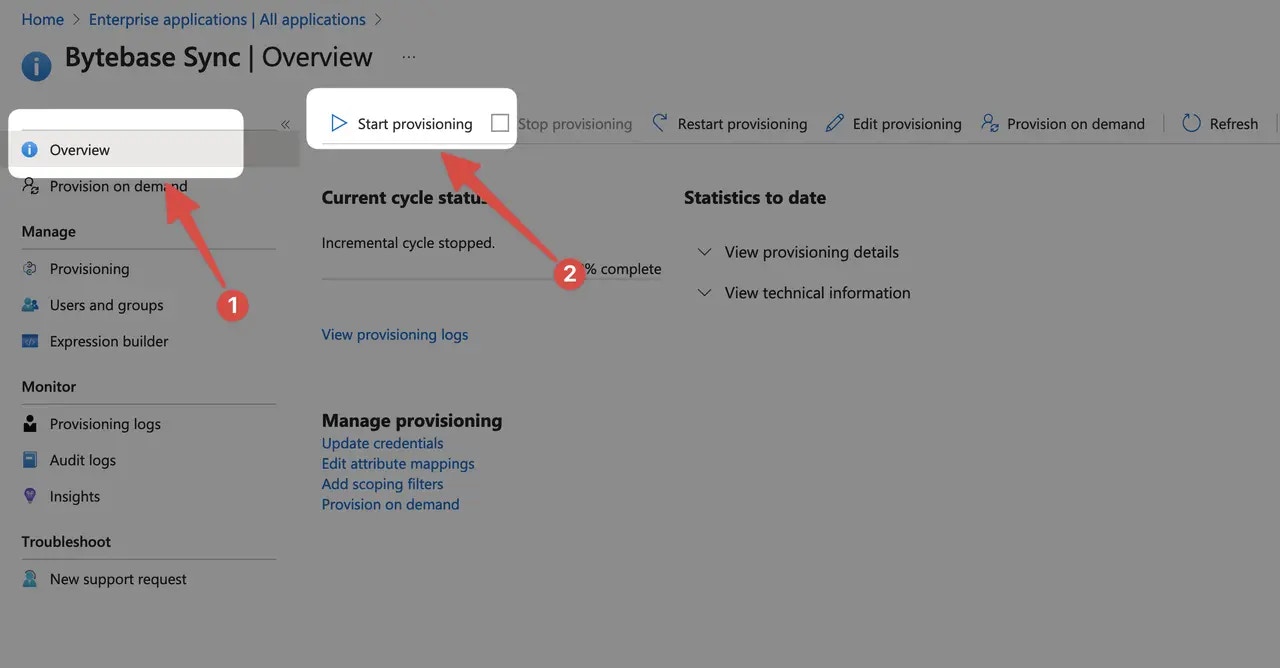
On the application overview page, click **Start provisioning**. To test syncing, we recommend starting with **Provision on demand** for a subset of users or groups.
## Turn on provisioning
On the application overview page, click **Start provisioning**. To test syncing, we recommend starting with **Provision on demand** for a subset of users or groups.
 Afterwards, Entra will sync the users and groups to Bytebase periodically.