> ## Documentation Index
> Fetch the complete documentation index at: https://docs.bytebase.com/llms.txt
> Use this file to discover all available pages before exploring further.
# Batch Change with Database Group
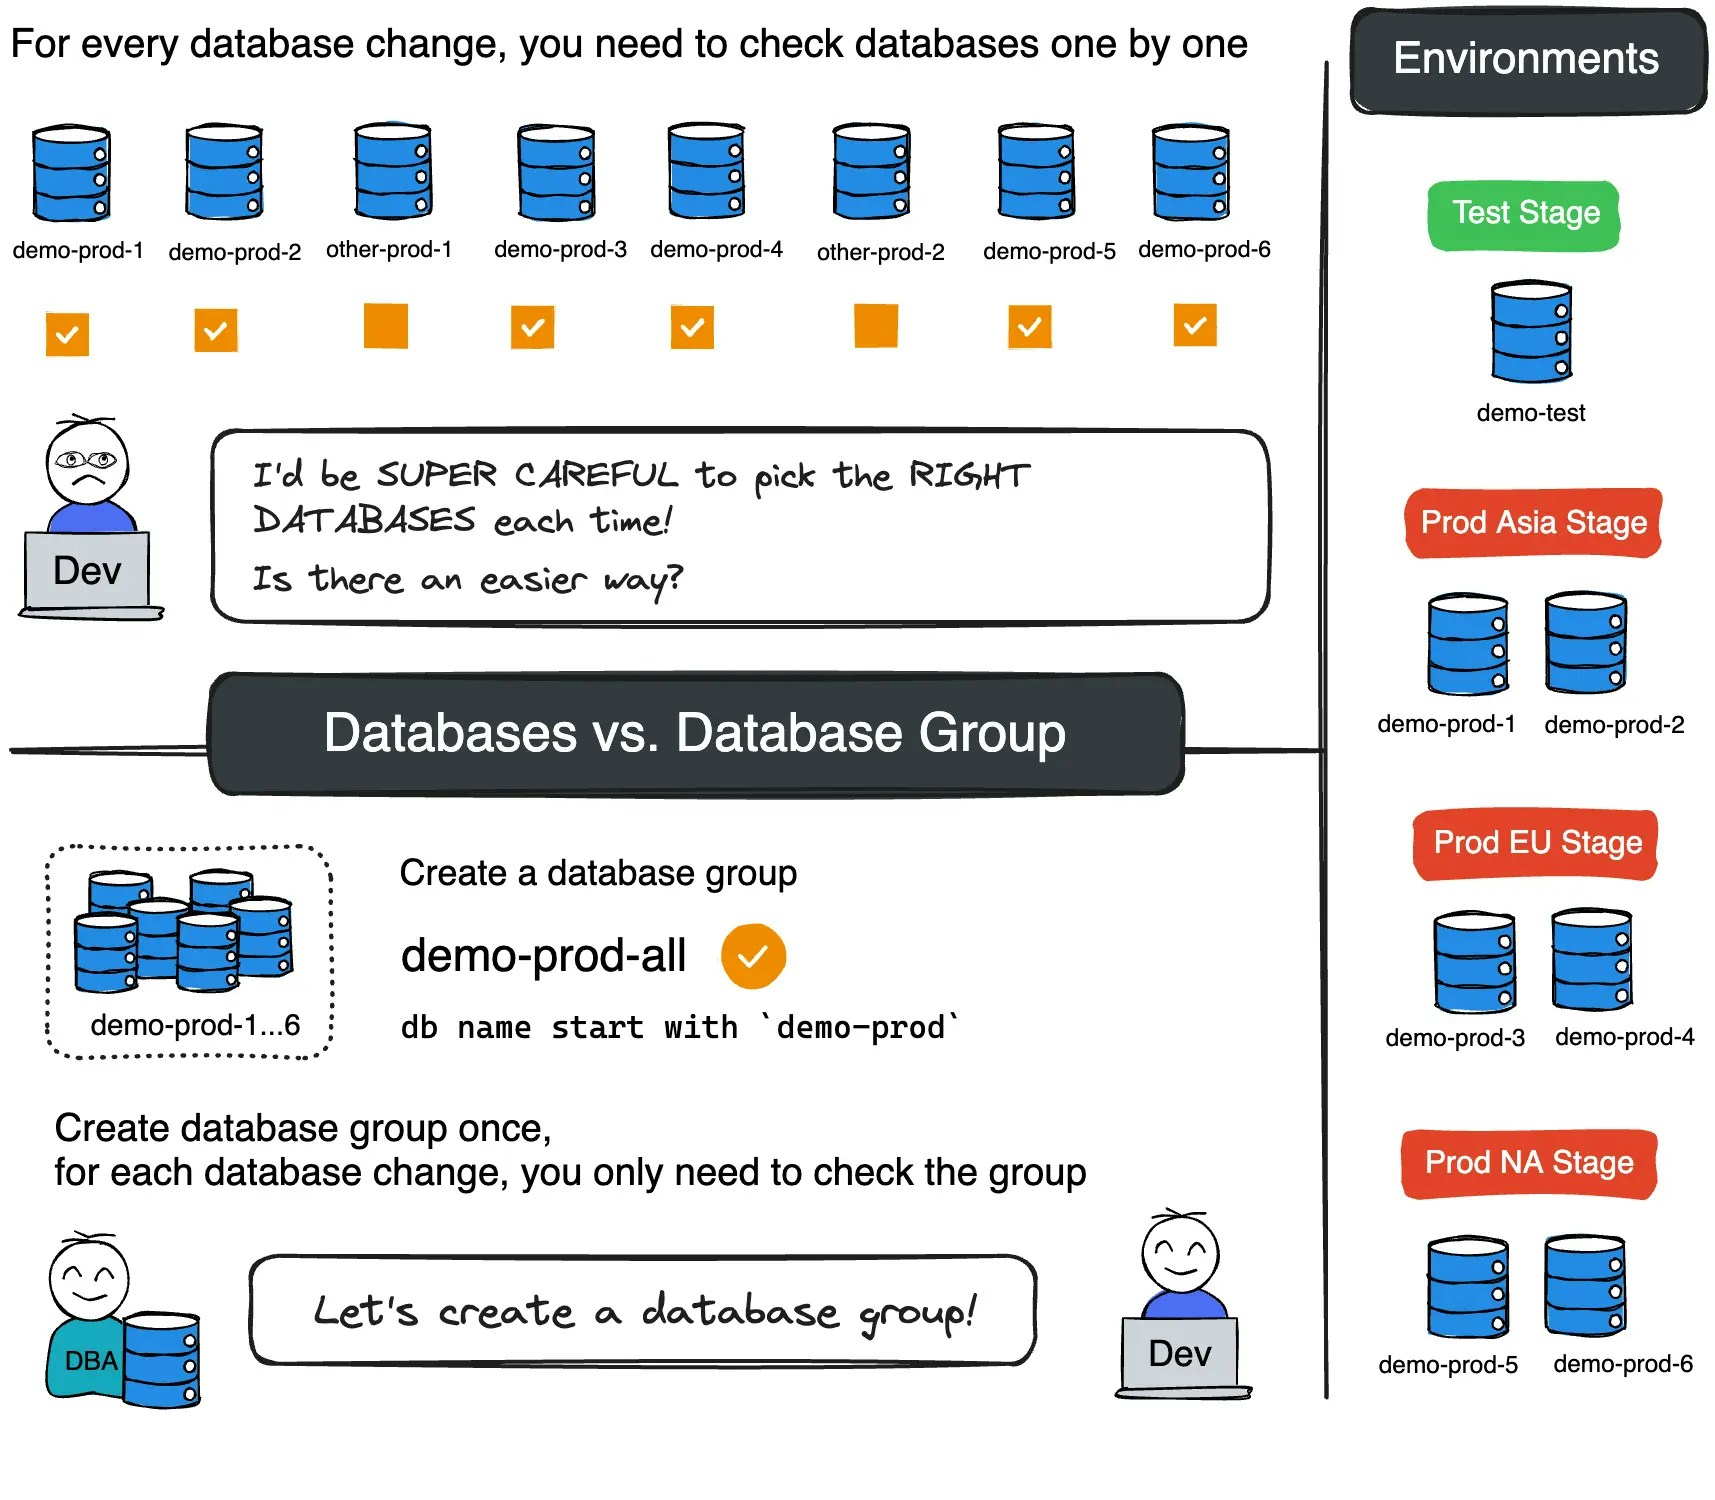
Bytebase simplifies deploying changes across multiple databases simultaneously. This tutorial demonstrates how to use **Environments** and **Database Groups** to efficiently manage batch changes across your database fleet.
 ## Prerequisites
* **Environment**: Available in all plans
* **Database Groups**: Requires Pro Plan or higher ([request trial](https://www.bytebase.com/pricing))
## Procedure
## Step 1 - Start Bytebase with sample data
1. Ensure Docker is running, then start the Bytebase container:
```bash theme={null}
docker run --rm --init \
--name bytebase \
--publish 8080:8080 --pull always \
--volume ~/.bytebase/data:/var/opt/bytebase \
bytebase/bytebase:latest
```
## Prerequisites
* **Environment**: Available in all plans
* **Database Groups**: Requires Pro Plan or higher ([request trial](https://www.bytebase.com/pricing))
## Procedure
## Step 1 - Start Bytebase with sample data
1. Ensure Docker is running, then start the Bytebase container:
```bash theme={null}
docker run --rm --init \
--name bytebase \
--publish 8080:8080 --pull always \
--volume ~/.bytebase/data:/var/opt/bytebase \
bytebase/bytebase:latest
```
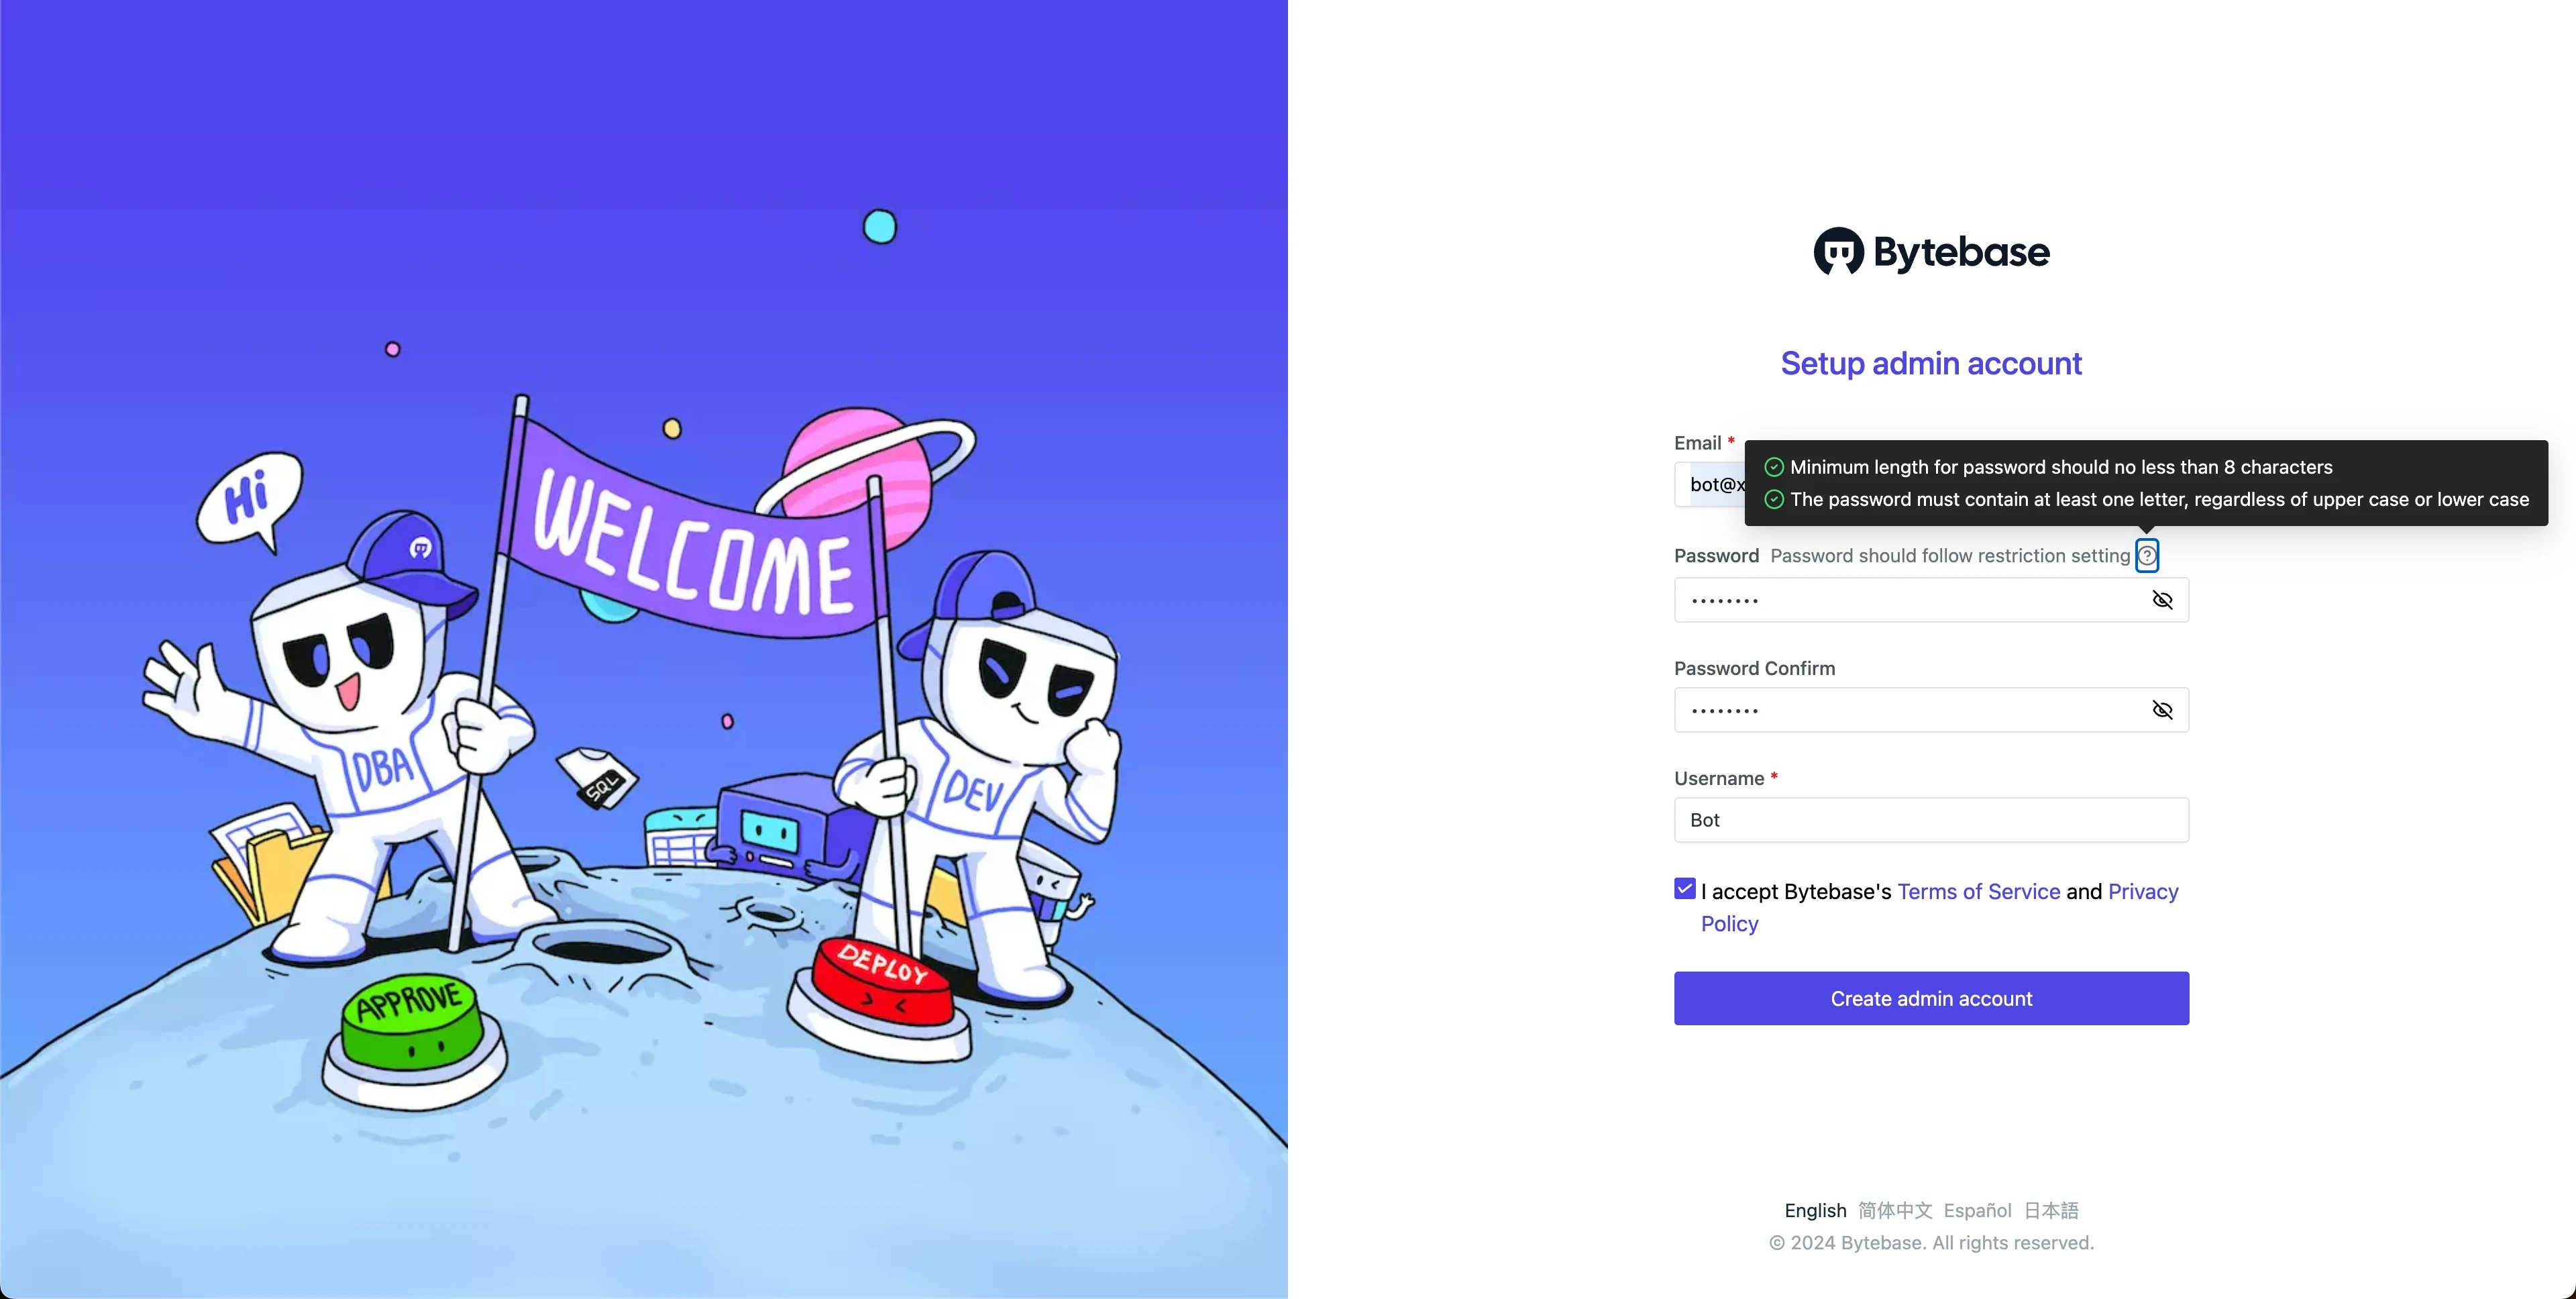
 2. Open Bytebase in [localhost:8080](http://localhost:8080/), fill in the fields and click **Create admin account**. You'll be redirected to Workspace.
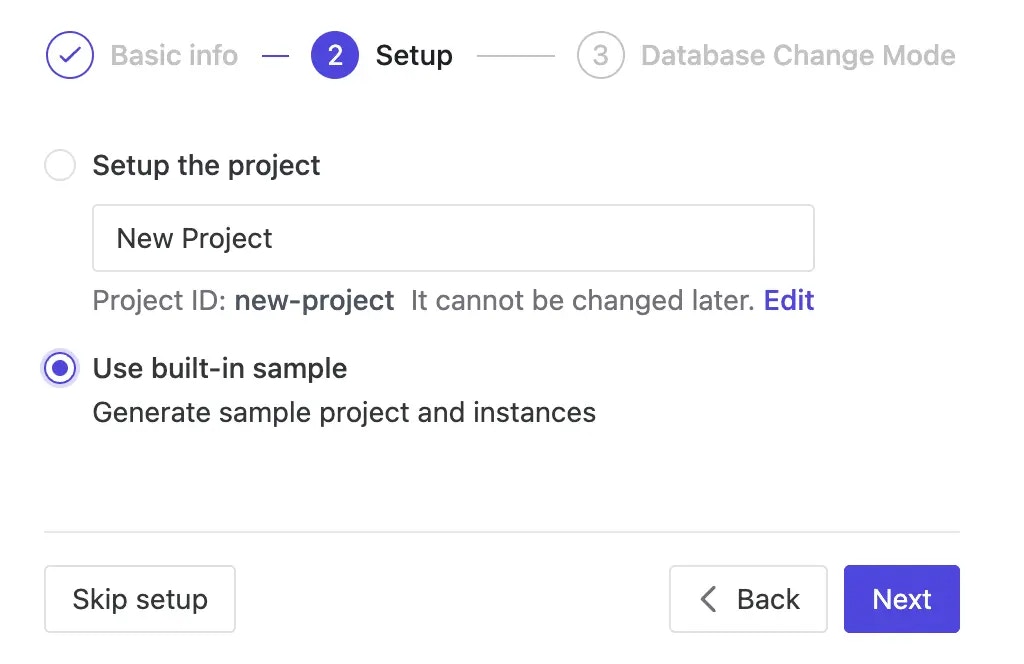
 3. During workspace setup, choose the built-in sample data.
 ## Step 2 - Set up environments and databases
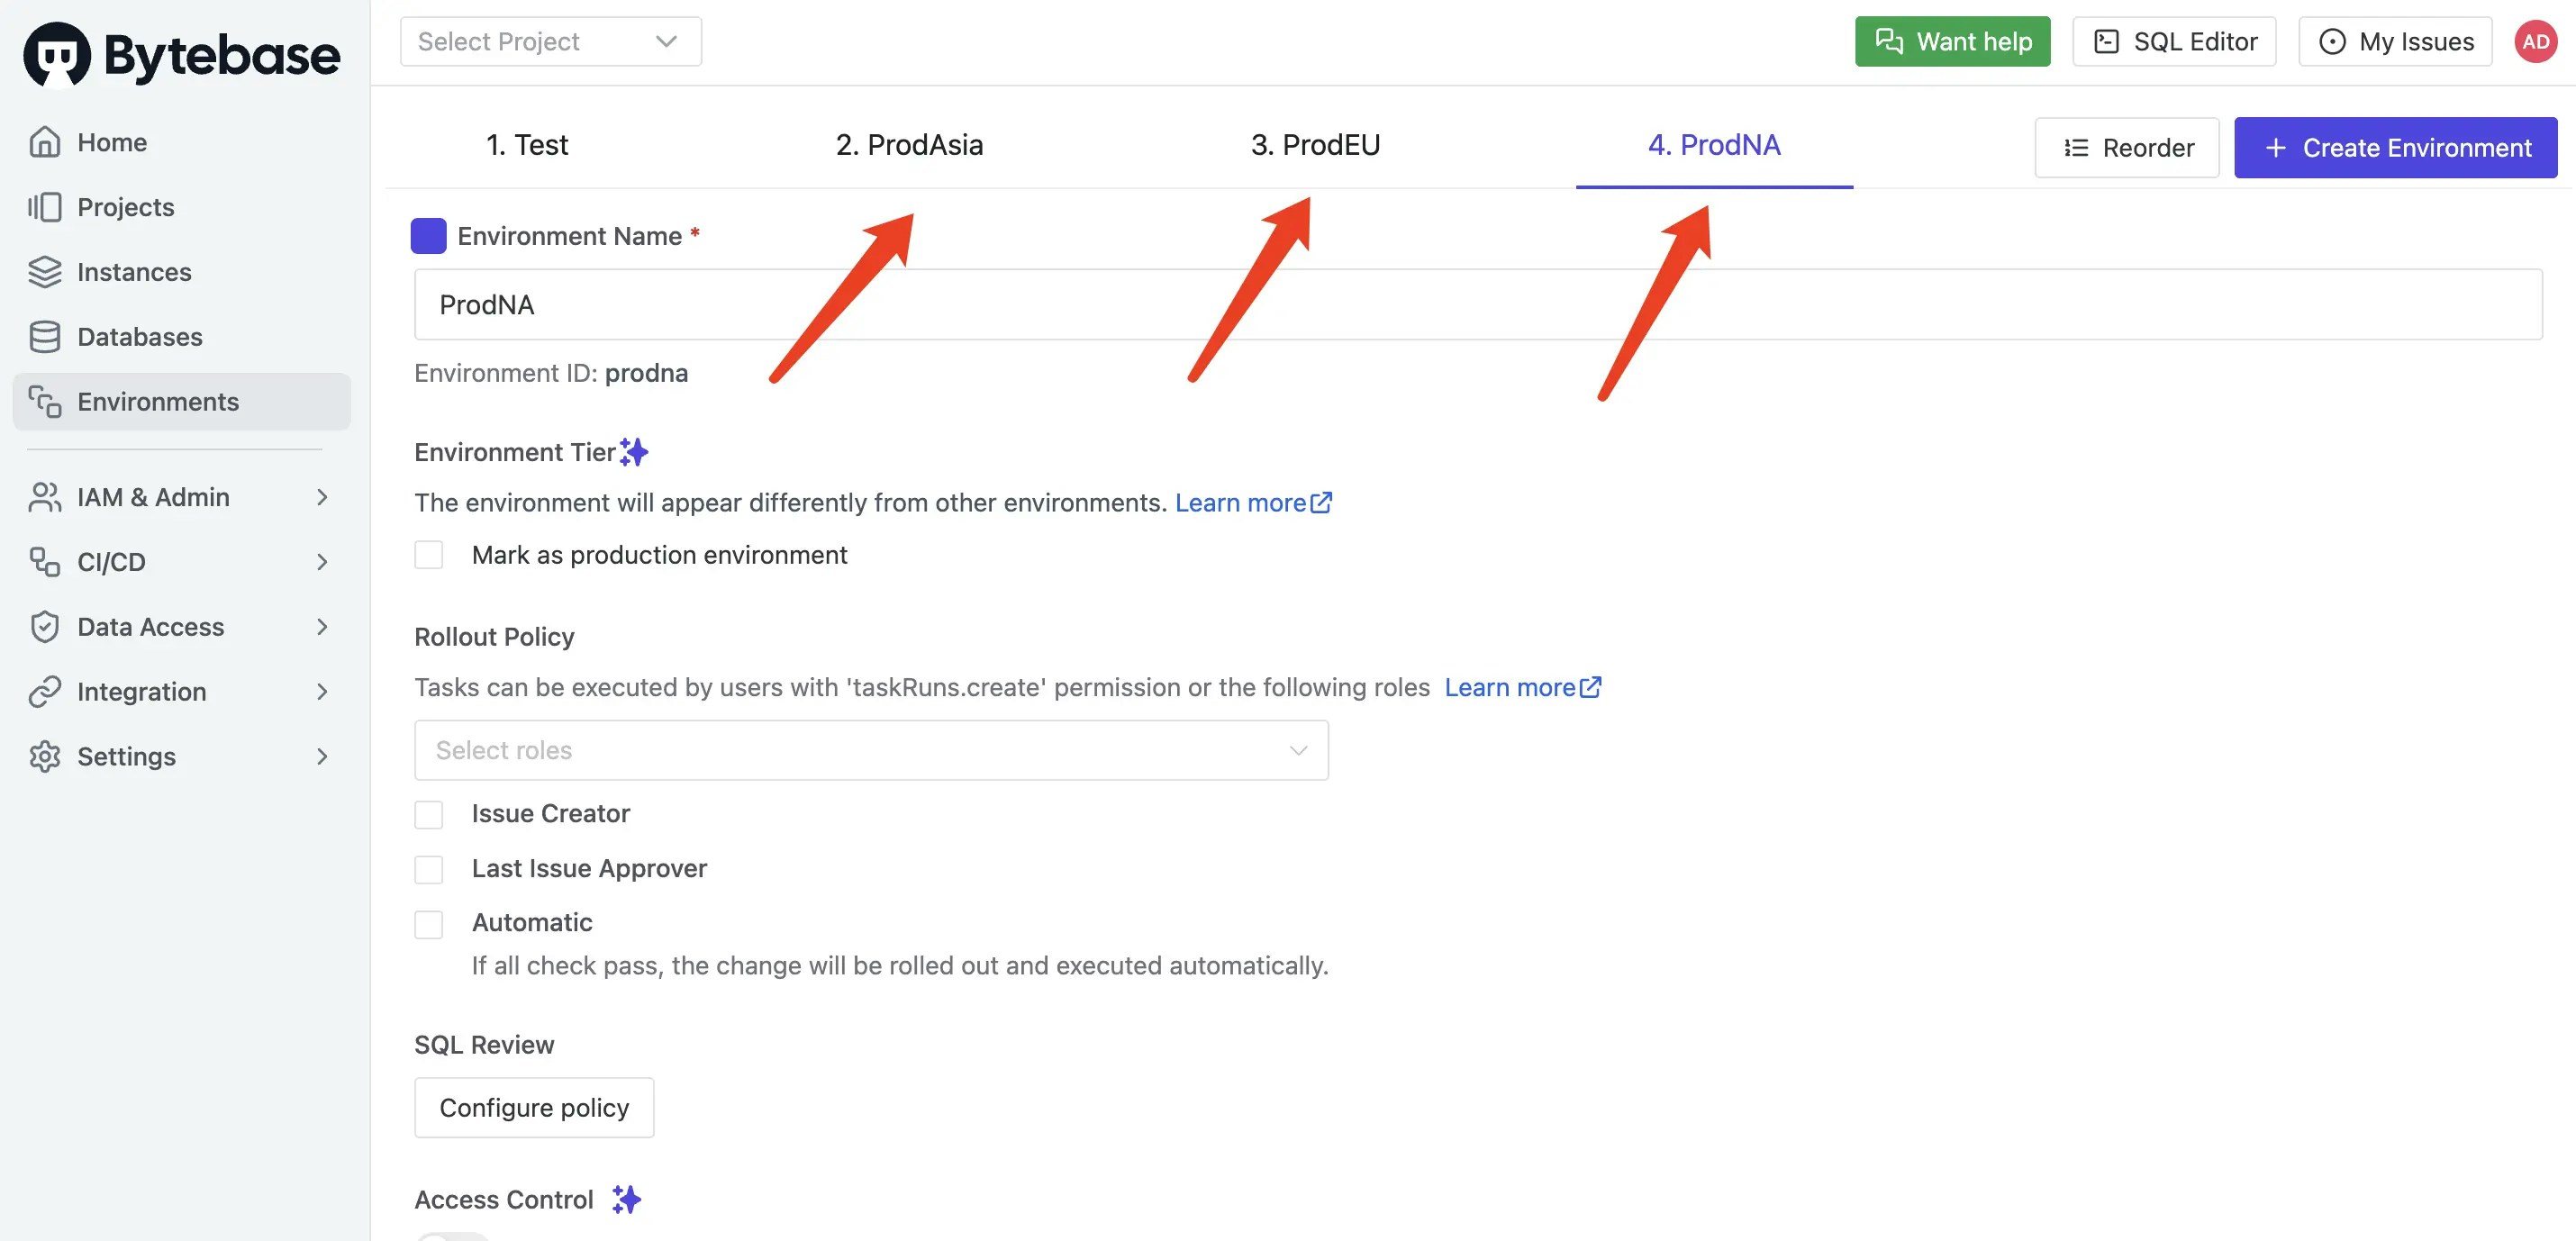
1. Navigate to **Environments**. Rename `Prod` to `ProdAsia`, then create two new environments: `ProdEU` and `ProdNA`.
## Step 2 - Set up environments and databases
1. Navigate to **Environments**. Rename `Prod` to `ProdAsia`, then create two new environments: `ProdEU` and `ProdNA`.
 2. Click **Select Project** in the top bar, then **New Project**. Name it `Batch Change Project` and click **Create**.
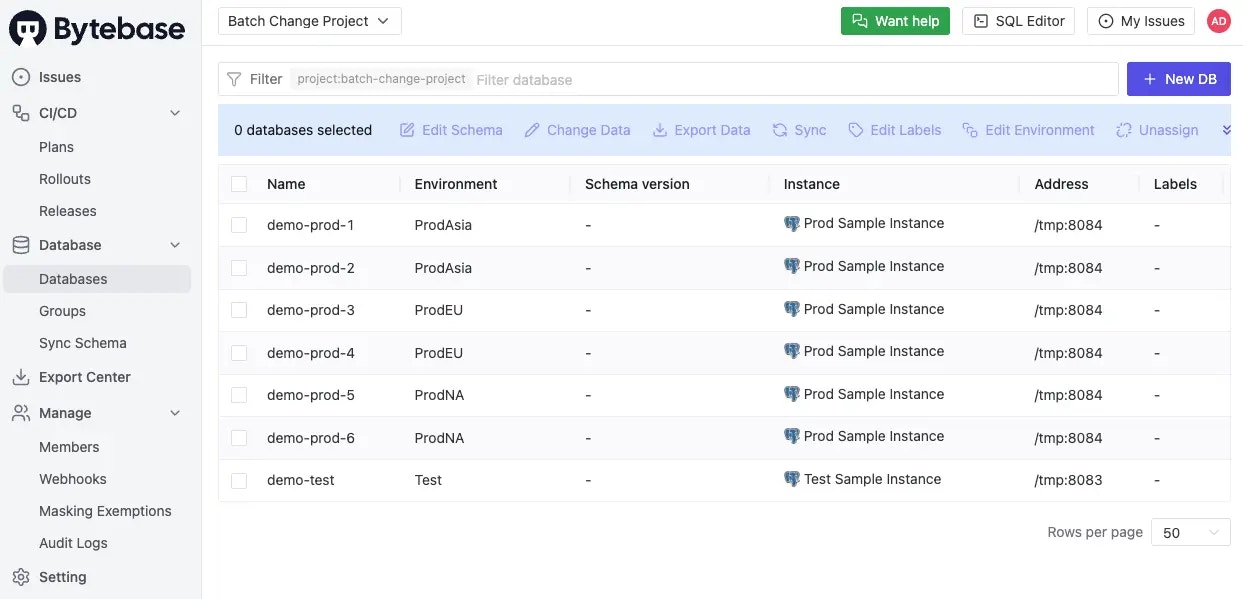
3. In the new project, navigate to **Database > Databases** and click **+ New DB**. Create `demo-test` on the Test instance. Click **Rollout** when the issue appears.
4. Similarly, create the following databases:
* `demo-prod-1` and `demo-prod-2` on `ProdAsia`
* `demo-prod-3` and `demo-prod-4` on `ProdEU`
* `demo-prod-5` and `demo-prod-6` on `ProdNA`
2. Click **Select Project** in the top bar, then **New Project**. Name it `Batch Change Project` and click **Create**.
3. In the new project, navigate to **Database > Databases** and click **+ New DB**. Create `demo-test` on the Test instance. Click **Rollout** when the issue appears.
4. Similarly, create the following databases:
* `demo-prod-1` and `demo-prod-2` on `ProdAsia`
* `demo-prod-3` and `demo-prod-4` on `ProdEU`
* `demo-prod-5` and `demo-prod-6` on `ProdNA`
 ## Step 3 - Execute batch changes by environment (All plans)
1. Navigate to **CI/CD > Plans**, click **+ New Plan**, and select **Schema Change**.
2. Select all databases and click **Confirm**.
3. Enter the following SQL, then click **Create** and **Ready for review**:
```SQL theme={null}
CREATE TABLE t2("id" INTEGER NOT NULL);
```
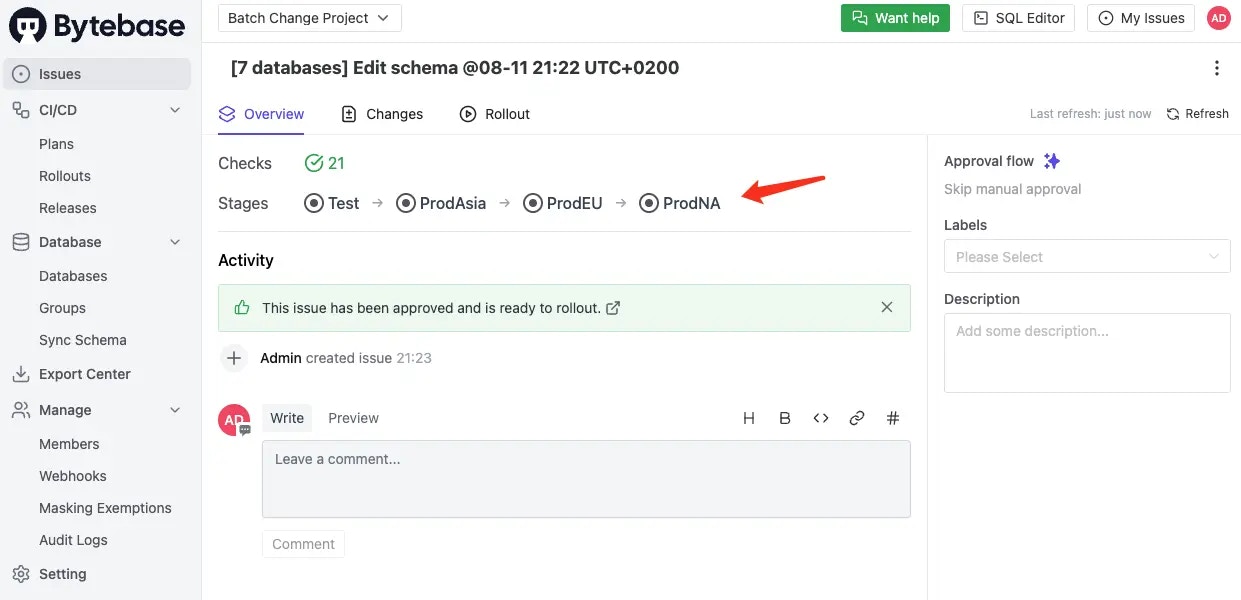
4. The **Overview** and **Rollout** tabs display four stages: Test, ProdAsia, ProdEU, and ProdNA. You can deploy changes to individual databases or entire stages.
## Step 3 - Execute batch changes by environment (All plans)
1. Navigate to **CI/CD > Plans**, click **+ New Plan**, and select **Schema Change**.
2. Select all databases and click **Confirm**.
3. Enter the following SQL, then click **Create** and **Ready for review**:
```SQL theme={null}
CREATE TABLE t2("id" INTEGER NOT NULL);
```
4. The **Overview** and **Rollout** tabs display four stages: Test, ProdAsia, ProdEU, and ProdNA. You can deploy changes to individual databases or entire stages.
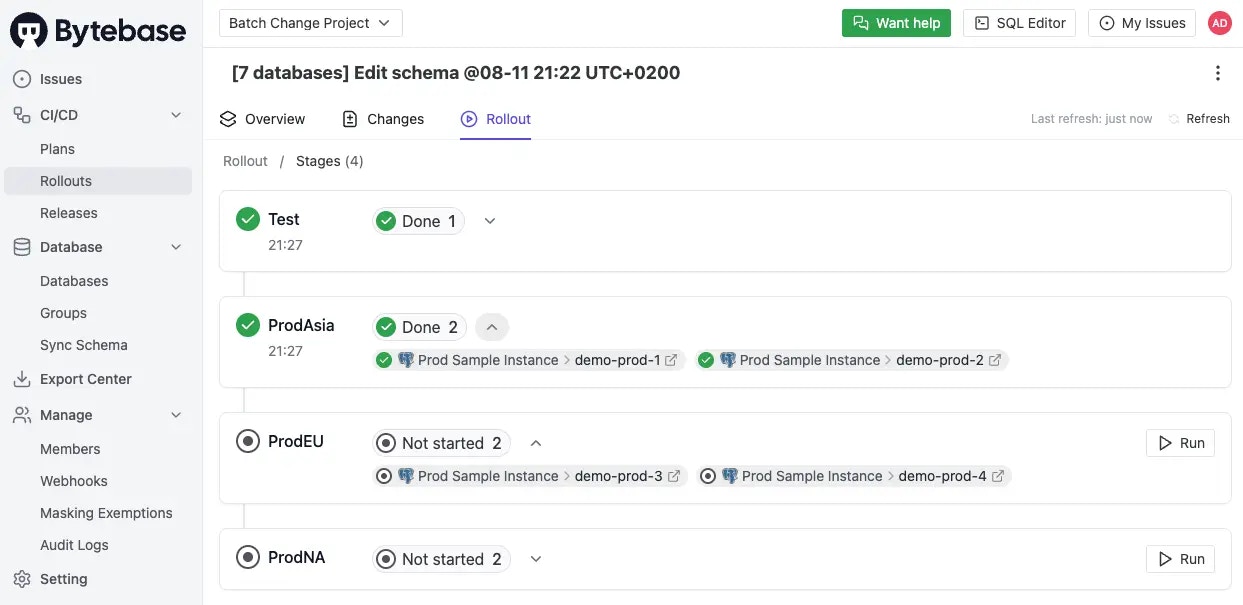
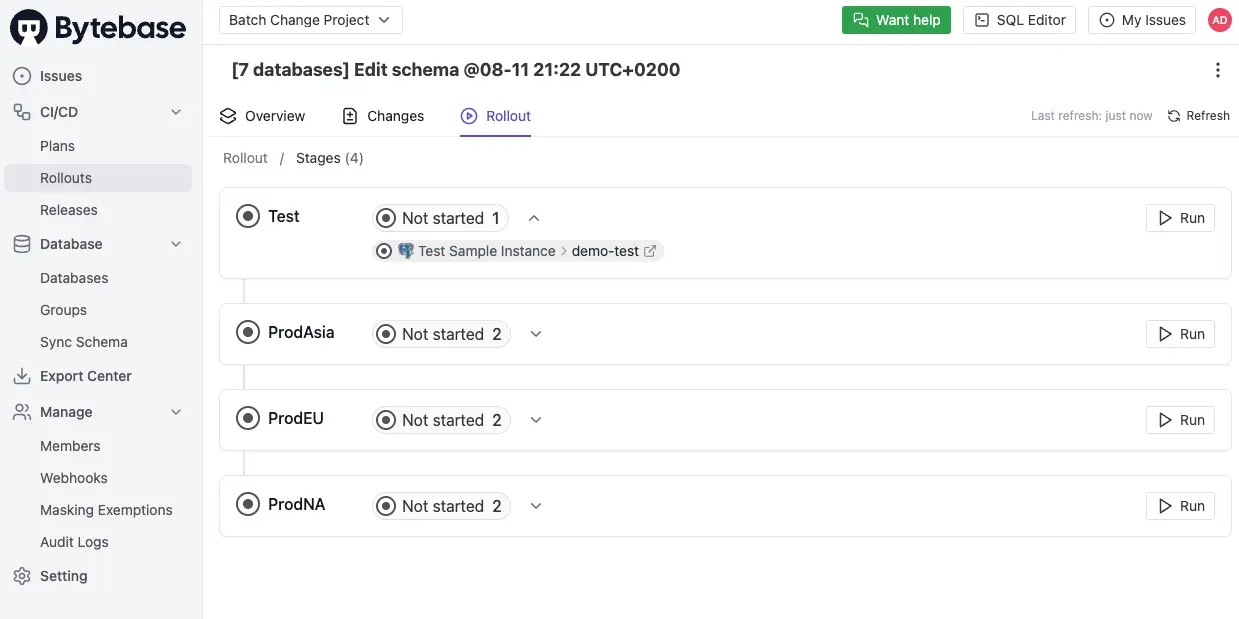 5. Go to the **Rollout** tab and click **Run** in the Test stage to execute.
 ## Step 4 - Use database groups (Pro/Enterprise)
We need first to upgrade to Pro/Enterprise Plan to use Database Group.
1. Click the **Setting icon** on the top right, and then click **Workspace > Subscription** to upload the license.
2. Click the pen icon, select the instances you want to enable Enterprise features , and click **Confirm**.
## Step 4 - Use database groups (Pro/Enterprise)
We need first to upgrade to Pro/Enterprise Plan to use Database Group.
1. Click the **Setting icon** on the top right, and then click **Workspace > Subscription** to upload the license.
2. Click the pen icon, select the instances you want to enable Enterprise features , and click **Confirm**.
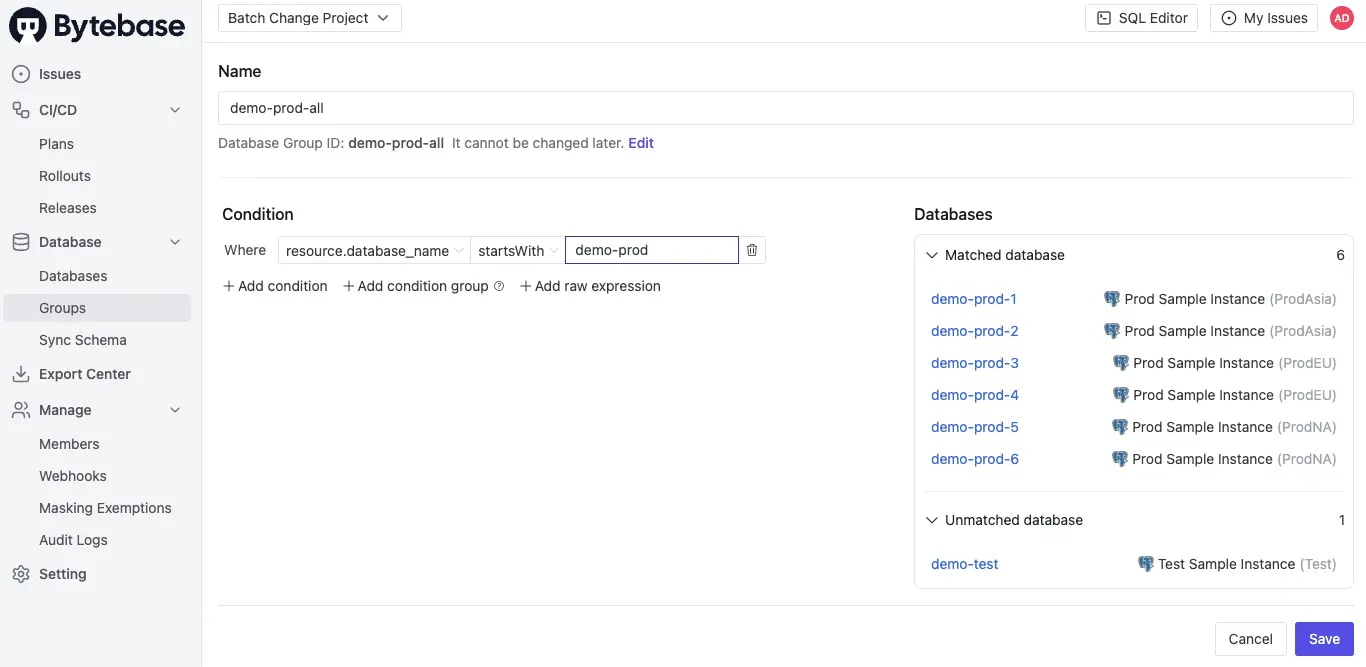
 3. Navigate to **Database > Groups** in your project. Click **+ New database group** and configure:
* **Name:** `demo-prod-all`
* **Condition:** `resource.database_name startsWith demo-prod`
3. Navigate to **Database > Groups** in your project. Click **+ New database group** and configure:
* **Name:** `demo-prod-all`
* **Condition:** `resource.database_name startsWith demo-prod`
 4. Go to **CI/CD > Plans**, click **+ New Plan**, select **Schema Migration**. Switch to the **Database Group** tab, select `demo-prod-all`, and click **Confirm**.
5. Enter the following SQL, then click **Create** and **Ready for review**:
```SQL theme={null}
CREATE TABLE t3("id" INTEGER NOT NULL);
```
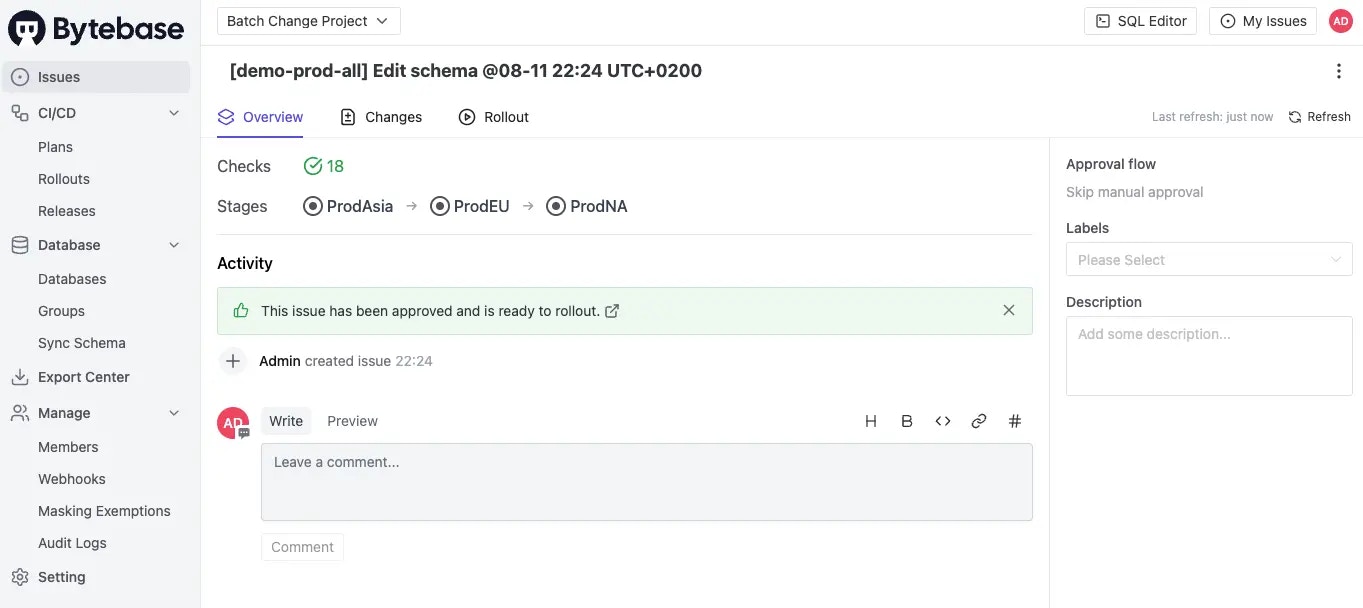
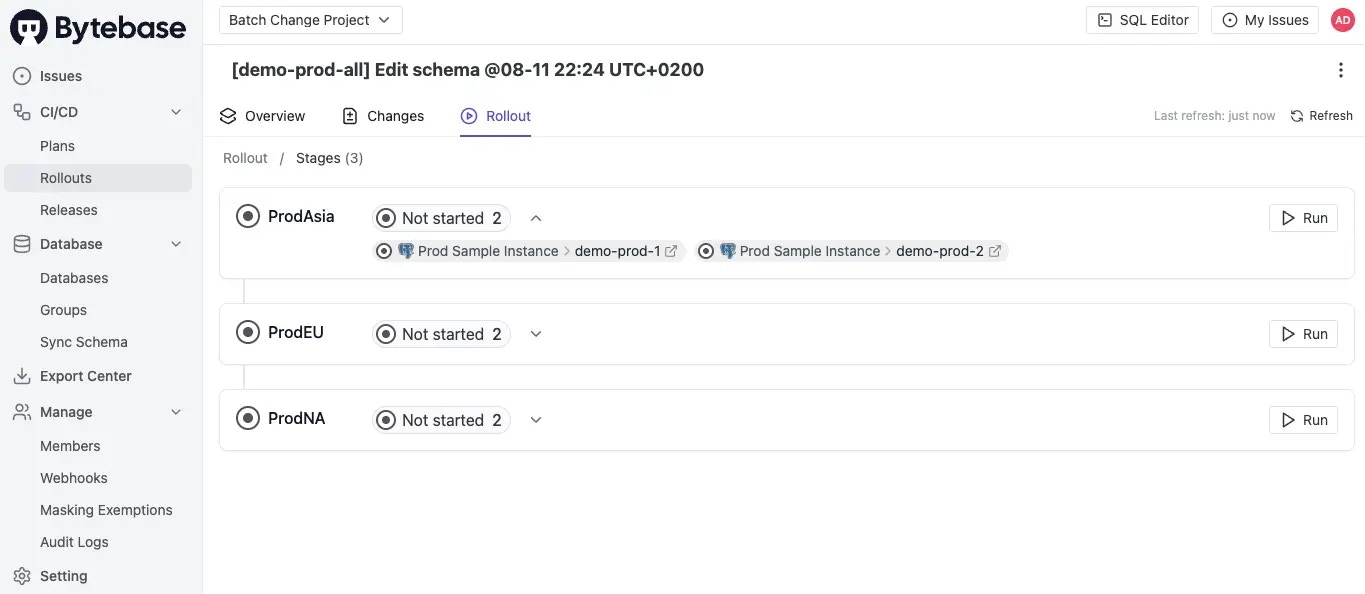
6. The **Overview** and **Rollout** tabs now show 3 production stages. Click **Run** in the ProdAsia stage to execute.
4. Go to **CI/CD > Plans**, click **+ New Plan**, select **Schema Migration**. Switch to the **Database Group** tab, select `demo-prod-all`, and click **Confirm**.
5. Enter the following SQL, then click **Create** and **Ready for review**:
```SQL theme={null}
CREATE TABLE t3("id" INTEGER NOT NULL);
```
6. The **Overview** and **Rollout** tabs now show 3 production stages. Click **Run** in the ProdAsia stage to execute.
 ## Summary
You've learned how to:
* Group databases by environment for staged rollouts
* Use Database Groups to target databases matching specific criteria
* Execute batch changes across multiple databases efficiently
## Summary
You've learned how to:
* Group databases by environment for staged rollouts
* Use Database Groups to target databases matching specific criteria
* Execute batch changes across multiple databases efficiently