> ## Documentation Index
> Fetch the complete documentation index at: https://docs.bytebase.com/llms.txt
> Use this file to discover all available pages before exploring further.
# Connect an AI Assistant to Bytebase with MCP
Use an AI assistant (Claude Code, Cursor, etc.) to query data, inspect schemas, and
propose database changes through Bytebase's built-in
[MCP (Model Context Protocol)](/integrations/mcp) server — all governed by your existing
permissions and review workflows.
In this tutorial, you ask Bytebase questions in plain language, and the assistant picks the
right MCP tool for each request. A human still reviews and approves any change.
## Step 1 - Setup Bytebase
1. Ensure Docker is running, then start the Bytebase container:
```bash theme={null}
docker run --rm --init \
--name bytebase \
--publish 8080:8080 --pull always \
--volume ~/.bytebase/data:/var/opt/bytebase \
bytebase/bytebase:latest
```
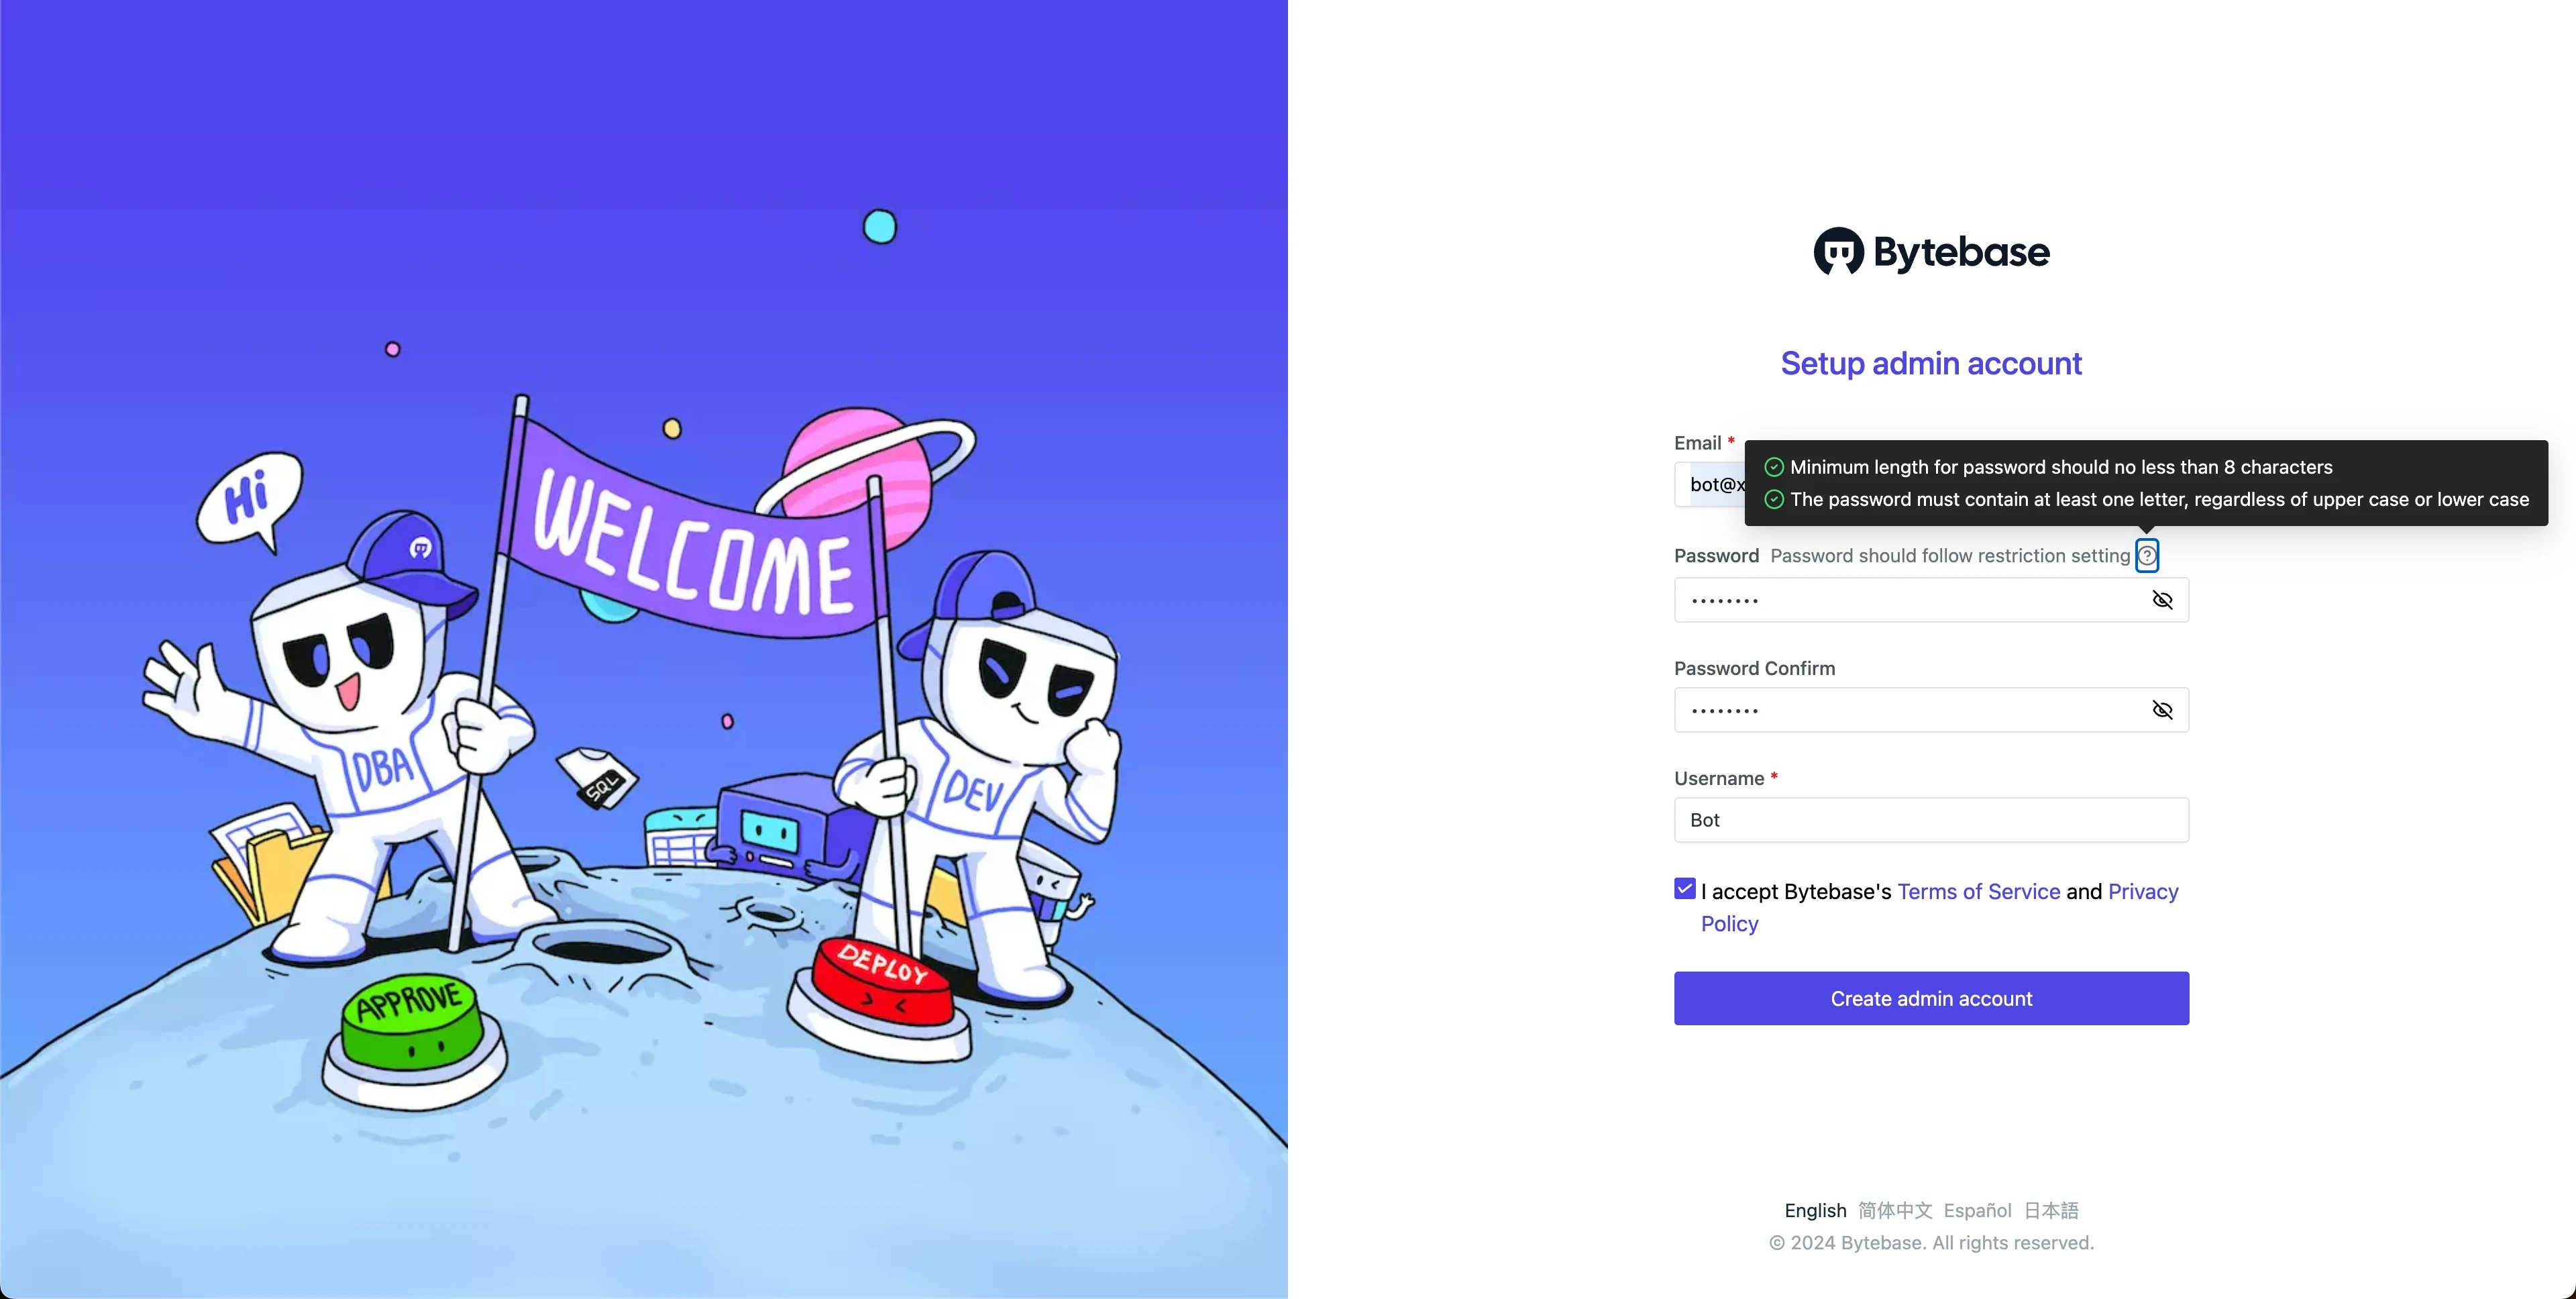
 2. Open Bytebase in [localhost:8080](http://localhost:8080/), fill in the fields and click **Create admin account**. You'll be redirected to Workspace.
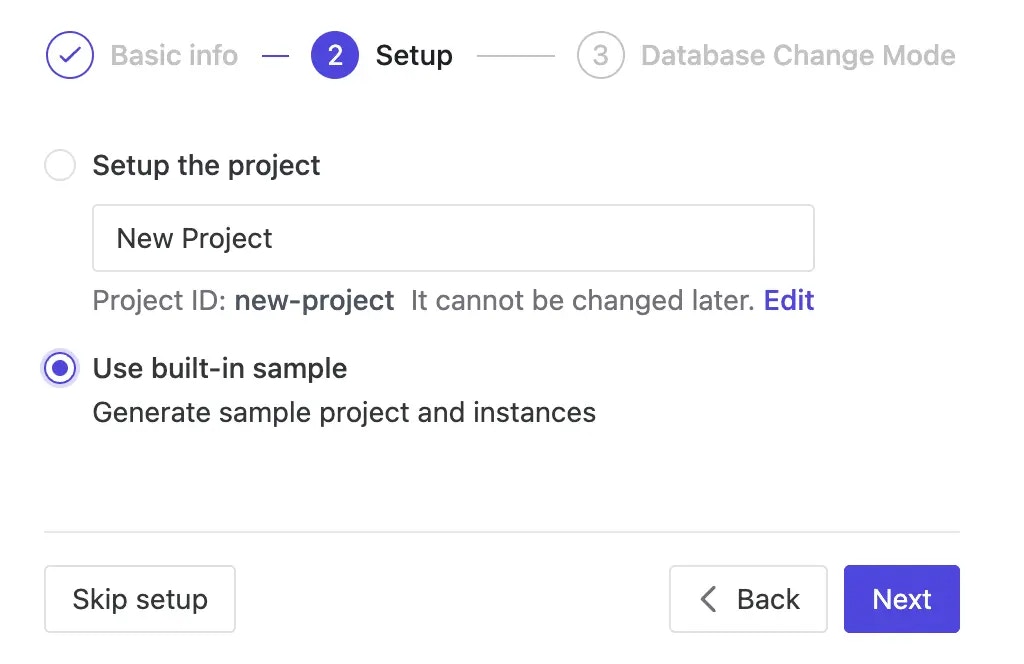
 3. During workspace setup, choose the built-in sample data.
 ## Step 2 - Configure the external URL
The MCP server uses your external URL to tell the AI assistant where to log in. For the
local Docker setup, point it at `localhost`.
1. Navigate to **Settings** > **General** > **External URL**.
2. Set it to `http://localhost:8080` and save.
On a real deployment, set the external URL to the public address your AI assistant can
reach. See [Configure external URL](/get-started/self-host/external-url).
## Step 3 - Connect your AI assistant
The MCP endpoint is your Bytebase URL followed by `/mcp` — here `http://localhost:8080/mcp`.
We use Claude Code as the example client.
1. Add the server:
```bash theme={null}
claude mcp add --transport http bytebase http://localhost:8080/mcp
```
2. Verify it's registered:
```bash theme={null}
claude mcp list
```
You should see `bytebase` listed.
For other clients (Codex, Copilot CLI, Gemini CLI, VS Code) or JSON configuration, see the
[MCP integration page](/integrations/mcp).
## Step 4 - Authenticate
1. Start your assistant:
```bash theme={null}
claude
```
2. The first time a Bytebase tool runs, your browser opens to log in to Bytebase. Sign in
with the admin account you created and click **Allow**.
3. The assistant stores the token and reuses it automatically until it expires.
Once connected, the assistant inherits all of your Bytebase permissions, and every action
it takes is audit-logged under your account. Be cautious when instructing it to apply changes.
## Step 5 - Inspect a schema
From here you interact with Bytebase in plain language. The quoted lines are example
prompts; your wording can differ — just refer to databases by name.
1. Ask the assistant to look at a schema:
> "Using Bytebase, show me the schema of the hr\_test database."
2. Drill into a table:
> "Show me the full definition of the employee table in hr\_test."
## Step 6 - Query data
1. Ask a question that reads data:
> "How many rows are in the employee table in hr\_test?"
2. Try something more specific:
> "List the 10 most recently hired employees in hr\_test."
Query results respect Bytebase's data masking policies — masked values appear as `******`
(full) or `**rn**` (partial).
## Step 7 - Propose a schema change
The assistant doesn't run DDL directly. It creates a Bytebase issue with automatic plan
checks, which then follows your normal review and rollout flow.
1. Ask for a change:
> "In Bytebase, add a nullable `nickname VARCHAR(50)` column to the employee table in
> hr\_test. Title it 'Add nickname to employee'."
The assistant creates the sheet, plan (with plan checks), and issue, and returns a link.
2. Open the returned issue link in Bytebase to review the plan-check results.
3. No approval is required on the free Community plan, so the issue is ready to deploy. By
default rollout is manual, so in the **Rollout** section click **Run** to execute the
change. Once it completes, the issue is marked `Done`.
This walkthrough uses the free **Community** plan, where changes skip the approval step.
The **Enterprise** plan adds a configurable [multi-step approval flow](/change-database/approval)
(for example, routing higher-risk changes to additional approvers) before rollout. Rollout itself is configurable
per environment — manual by default, or set to roll out automatically.
## Next Steps
* [Model Context Protocol (MCP)](/integrations/mcp) - full setup, tools, and limitations
* [First Schema Change in 5 Minutes](/tutorials/first-schema-change/) - the review workflow the assistant plugs into
* [Custom Approval Flow](/tutorials/database-change-management-with-risk-adjusted-approval-flow/) - for adding approvers
## Step 2 - Configure the external URL
The MCP server uses your external URL to tell the AI assistant where to log in. For the
local Docker setup, point it at `localhost`.
1. Navigate to **Settings** > **General** > **External URL**.
2. Set it to `http://localhost:8080` and save.
On a real deployment, set the external URL to the public address your AI assistant can
reach. See [Configure external URL](/get-started/self-host/external-url).
## Step 3 - Connect your AI assistant
The MCP endpoint is your Bytebase URL followed by `/mcp` — here `http://localhost:8080/mcp`.
We use Claude Code as the example client.
1. Add the server:
```bash theme={null}
claude mcp add --transport http bytebase http://localhost:8080/mcp
```
2. Verify it's registered:
```bash theme={null}
claude mcp list
```
You should see `bytebase` listed.
For other clients (Codex, Copilot CLI, Gemini CLI, VS Code) or JSON configuration, see the
[MCP integration page](/integrations/mcp).
## Step 4 - Authenticate
1. Start your assistant:
```bash theme={null}
claude
```
2. The first time a Bytebase tool runs, your browser opens to log in to Bytebase. Sign in
with the admin account you created and click **Allow**.
3. The assistant stores the token and reuses it automatically until it expires.
Once connected, the assistant inherits all of your Bytebase permissions, and every action
it takes is audit-logged under your account. Be cautious when instructing it to apply changes.
## Step 5 - Inspect a schema
From here you interact with Bytebase in plain language. The quoted lines are example
prompts; your wording can differ — just refer to databases by name.
1. Ask the assistant to look at a schema:
> "Using Bytebase, show me the schema of the hr\_test database."
2. Drill into a table:
> "Show me the full definition of the employee table in hr\_test."
## Step 6 - Query data
1. Ask a question that reads data:
> "How many rows are in the employee table in hr\_test?"
2. Try something more specific:
> "List the 10 most recently hired employees in hr\_test."
Query results respect Bytebase's data masking policies — masked values appear as `******`
(full) or `**rn**` (partial).
## Step 7 - Propose a schema change
The assistant doesn't run DDL directly. It creates a Bytebase issue with automatic plan
checks, which then follows your normal review and rollout flow.
1. Ask for a change:
> "In Bytebase, add a nullable `nickname VARCHAR(50)` column to the employee table in
> hr\_test. Title it 'Add nickname to employee'."
The assistant creates the sheet, plan (with plan checks), and issue, and returns a link.
2. Open the returned issue link in Bytebase to review the plan-check results.
3. No approval is required on the free Community plan, so the issue is ready to deploy. By
default rollout is manual, so in the **Rollout** section click **Run** to execute the
change. Once it completes, the issue is marked `Done`.
This walkthrough uses the free **Community** plan, where changes skip the approval step.
The **Enterprise** plan adds a configurable [multi-step approval flow](/change-database/approval)
(for example, routing higher-risk changes to additional approvers) before rollout. Rollout itself is configurable
per environment — manual by default, or set to roll out automatically.
## Next Steps
* [Model Context Protocol (MCP)](/integrations/mcp) - full setup, tools, and limitations
* [First Schema Change in 5 Minutes](/tutorials/first-schema-change/) - the review workflow the assistant plugs into
* [Custom Approval Flow](/tutorials/database-change-management-with-risk-adjusted-approval-flow/) - for adding approvers