> ## Documentation Index
> Fetch the complete documentation index at: https://docs.bytebase.com/llms.txt
> Use this file to discover all available pages before exploring further.
# How to Configure Dynamic Data Masking
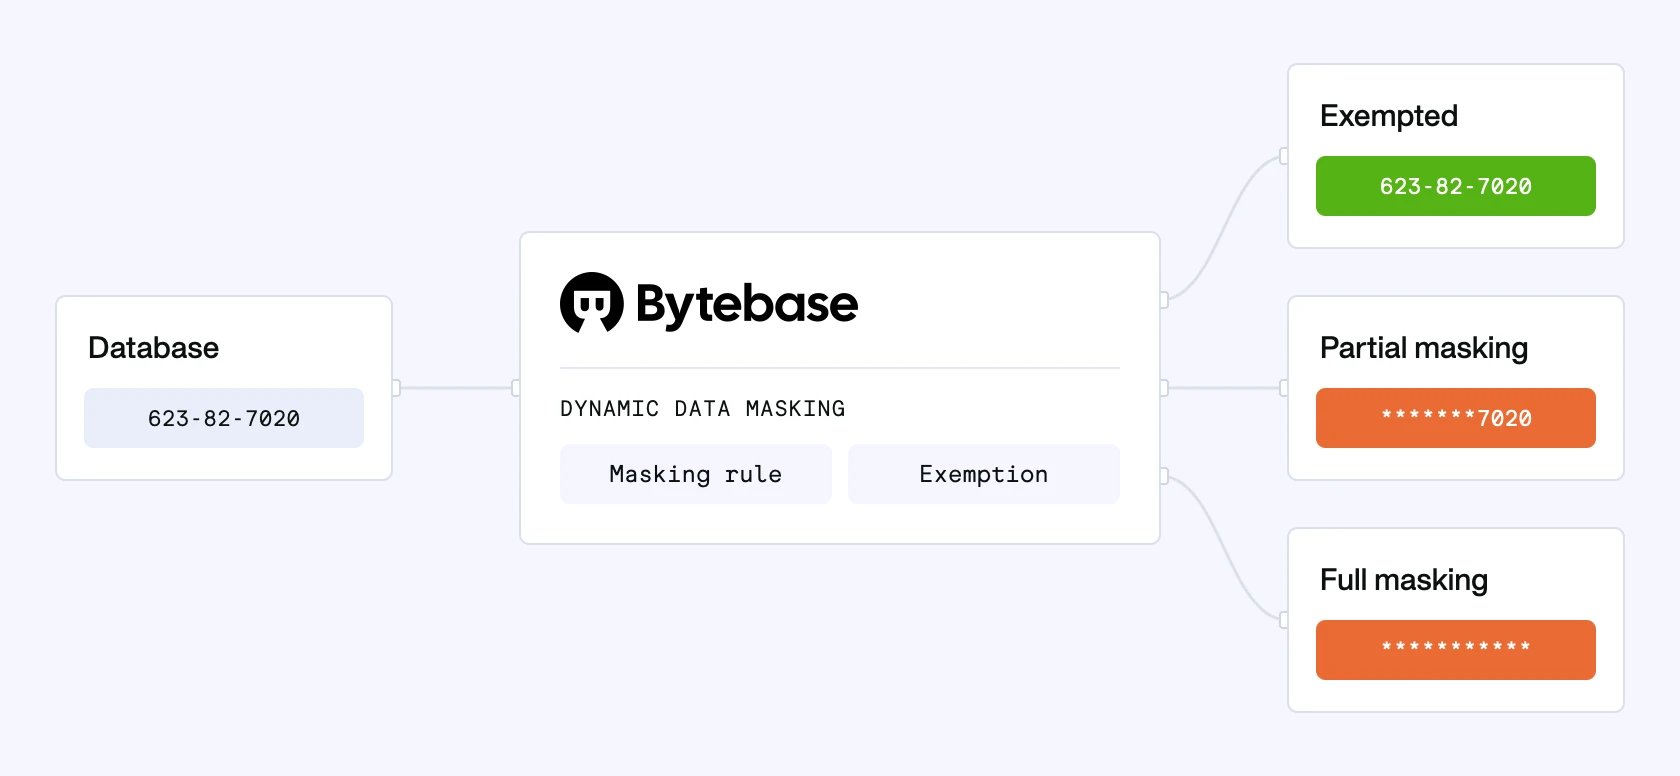
Bytebase [Dynamic Data Masking](/security/data-masking/overview/) can mask sensitive data in
the query result based on the context on the fly. It helps organizations to **protect sensitive data**
from being exposed to unauthorized users.
 This tutorial covers configuration via UI console. You can also codify the masking policies, check
out [this sample](https://github.com/bytebase/example-database-security/tree/main/masking).
## Prerequisites
* [Docker](https://www.docker.com/)
* Bytebase Enterprise plan, you can request a free trial [here](https://www.bytebase.com/contact-us/)
## Preparation
1. Make sure your [Docker](https://www.docker.com/) is running, and start the Bytebase Docker container with command:
```bash theme={null} theme={null} theme={null} theme={null} theme={null} theme={null} theme={null} theme={null} theme={null} theme={null} theme={null} theme={null} theme={null} theme={null} theme={null} theme={null} theme={null}
docker run --rm --init \
--name bytebase \
--publish 8080:8080 --pull always \
--volume ~/.bytebase/data:/var/opt/bytebase \
bytebase/bytebase:latest
```
2. Having Bytebase successfully running in Docker, visit it via `localhost:8080`. Register an admin account and it will be granted the `workspace admin` role automatically.
3. Acquire the Enterprise license. Enter **Instances** on the left. Select both instances to **Assign License**.
### No Masking
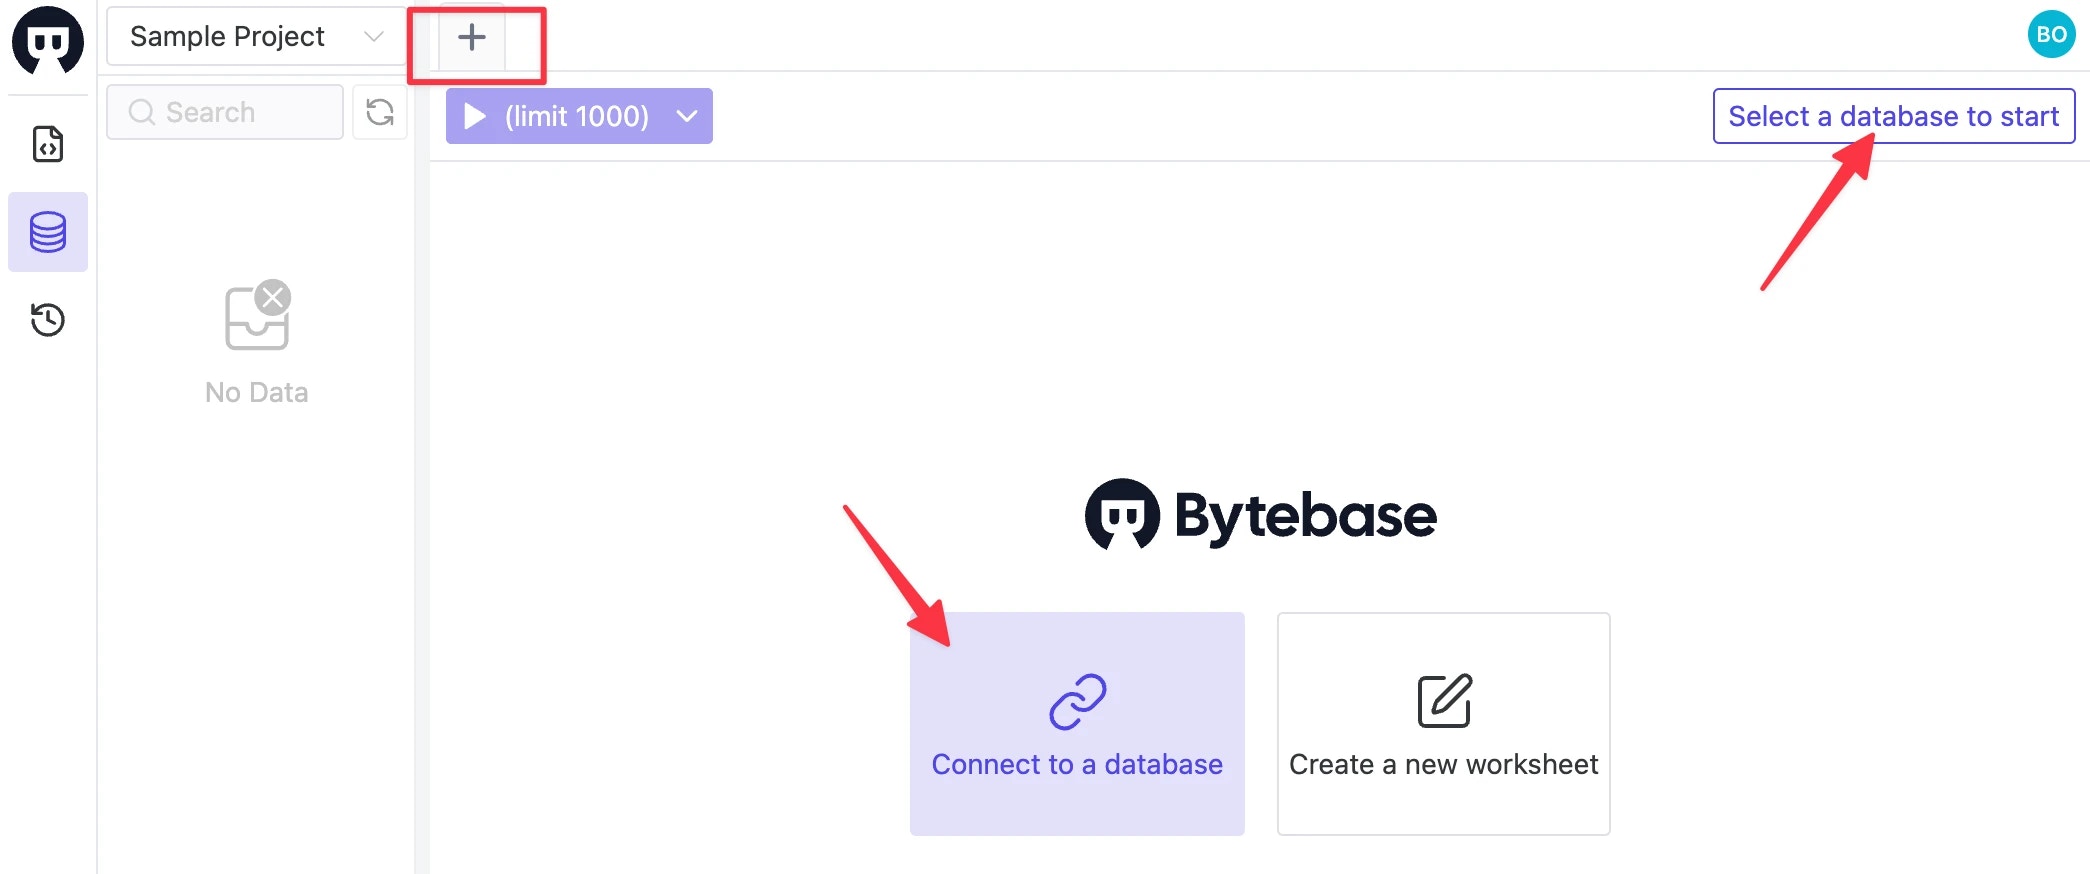
Enter **SQL Editor** on top right. Without any worksheet open (no tab page open on top), click **Connect to a database** or **Select a database to start**.
This tutorial covers configuration via UI console. You can also codify the masking policies, check
out [this sample](https://github.com/bytebase/example-database-security/tree/main/masking).
## Prerequisites
* [Docker](https://www.docker.com/)
* Bytebase Enterprise plan, you can request a free trial [here](https://www.bytebase.com/contact-us/)
## Preparation
1. Make sure your [Docker](https://www.docker.com/) is running, and start the Bytebase Docker container with command:
```bash theme={null} theme={null} theme={null} theme={null} theme={null} theme={null} theme={null} theme={null} theme={null} theme={null} theme={null} theme={null} theme={null} theme={null} theme={null} theme={null} theme={null}
docker run --rm --init \
--name bytebase \
--publish 8080:8080 --pull always \
--volume ~/.bytebase/data:/var/opt/bytebase \
bytebase/bytebase:latest
```
2. Having Bytebase successfully running in Docker, visit it via `localhost:8080`. Register an admin account and it will be granted the `workspace admin` role automatically.
3. Acquire the Enterprise license. Enter **Instances** on the left. Select both instances to **Assign License**.
### No Masking
Enter **SQL Editor** on top right. Without any worksheet open (no tab page open on top), click **Connect to a database** or **Select a database to start**.
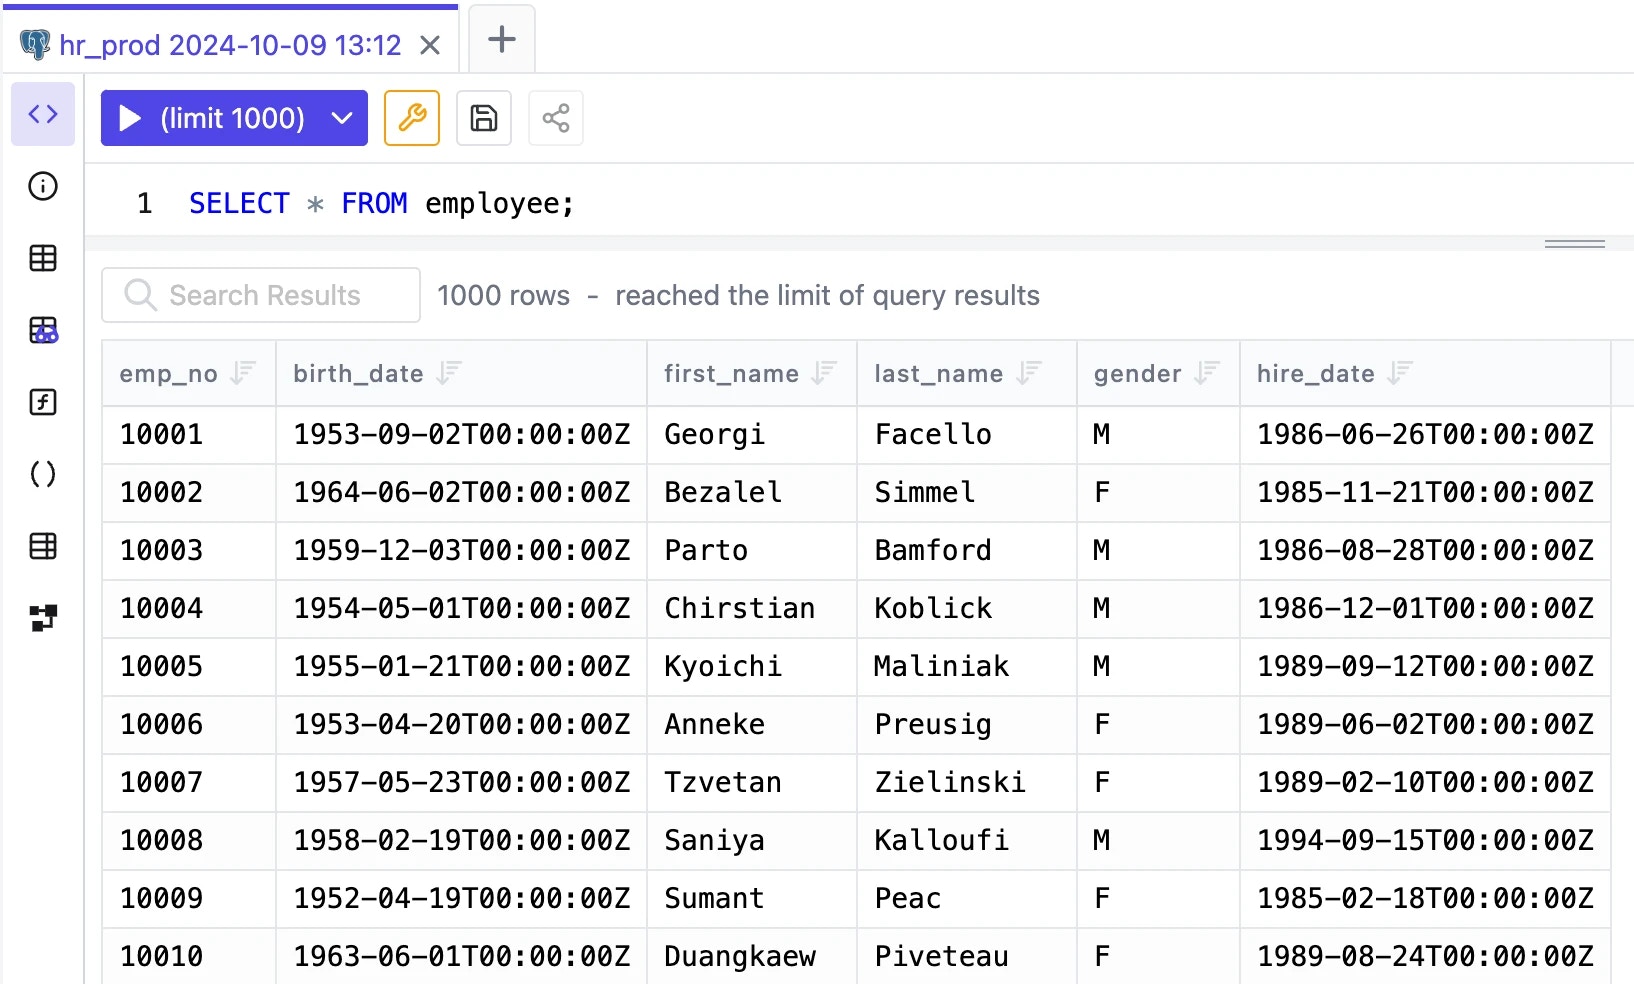
 Choose database `hr_prod` under `Prod Sample Instance` within the Connection detail page. Run `SELECT * FROM employee;`, you'll see the following result without any masking.
 ### Semantic Types
Semantic type is a way to classify data into different categories. You may apply them to columns to apply the same masking rule.
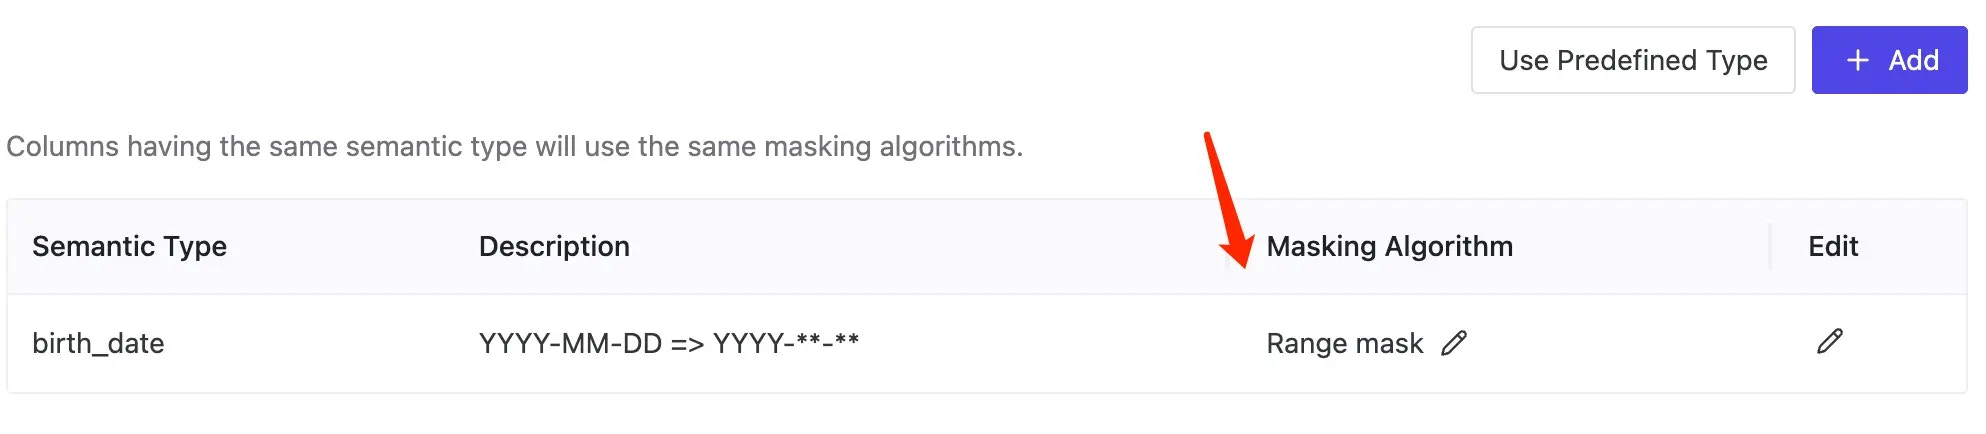
1. Enter **Data Access > Semantic Types**, click **Add**.
2. Fill in the name, description and specify the **Masking Algorithm**. Click the check mark.
### Semantic Types
Semantic type is a way to classify data into different categories. You may apply them to columns to apply the same masking rule.
1. Enter **Data Access > Semantic Types**, click **Add**.
2. Fill in the name, description and specify the **Masking Algorithm**. Click the check mark.
 There are two ways to apply the semantic type and its masking algorithm:
1. Apply to a column directly.
2. Apply according to a global masking rule.
### Column Masking Rule
As a project owner, you may want to apply the semantic type to a column, usually it's a column that you want to mask on production environment.
1. Go into the project `Sample Project`, and click database `hr_prod`.
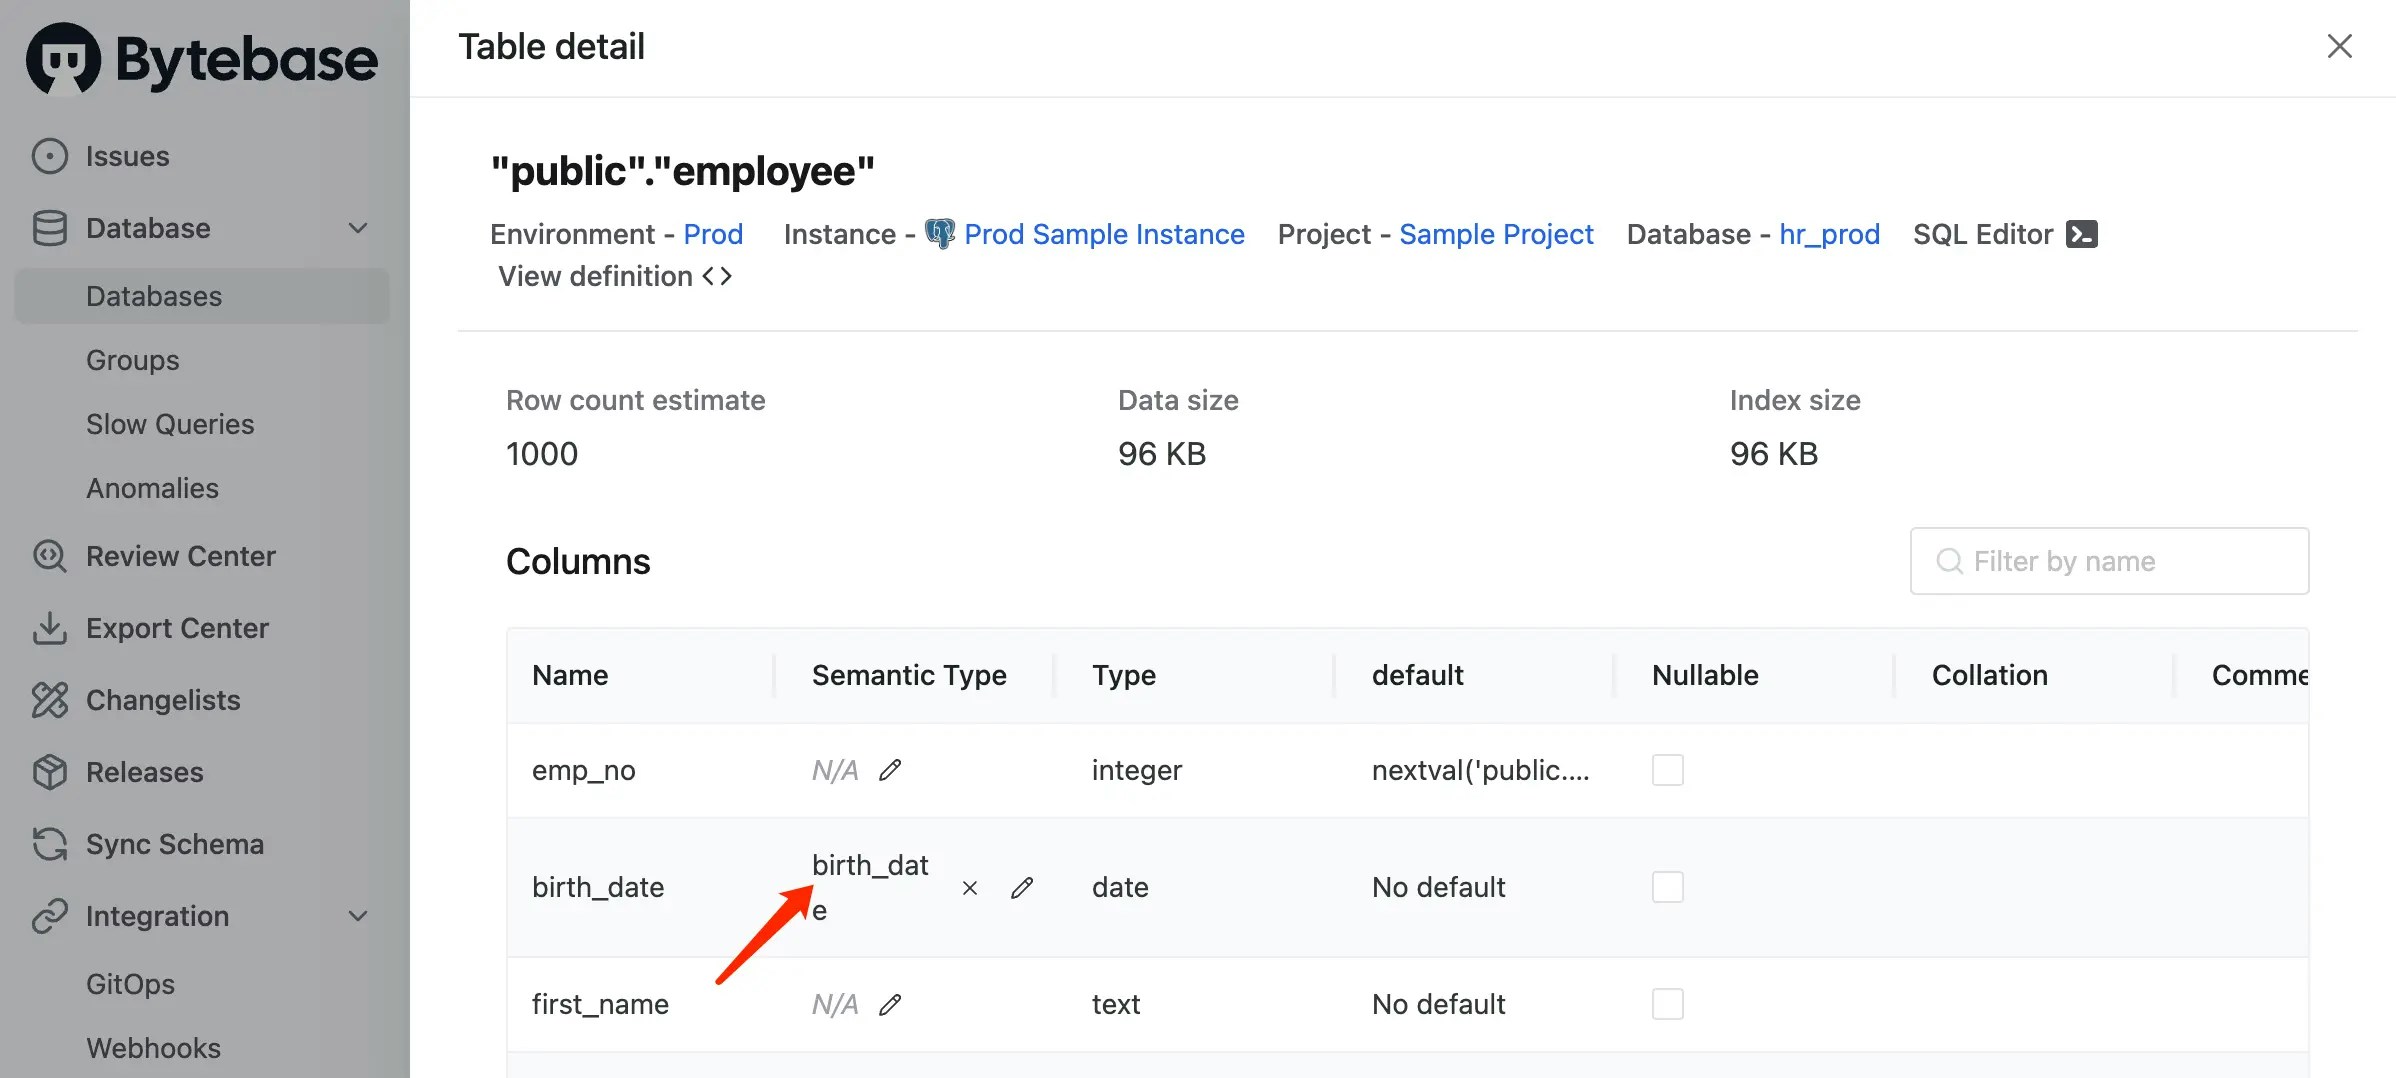
2. Go into the `employee` table, and set the `birth_date` column to apply the `birth_date` semantic type.
There are two ways to apply the semantic type and its masking algorithm:
1. Apply to a column directly.
2. Apply according to a global masking rule.
### Column Masking Rule
As a project owner, you may want to apply the semantic type to a column, usually it's a column that you want to mask on production environment.
1. Go into the project `Sample Project`, and click database `hr_prod`.
2. Go into the `employee` table, and set the `birth_date` column to apply the `birth_date` semantic type.
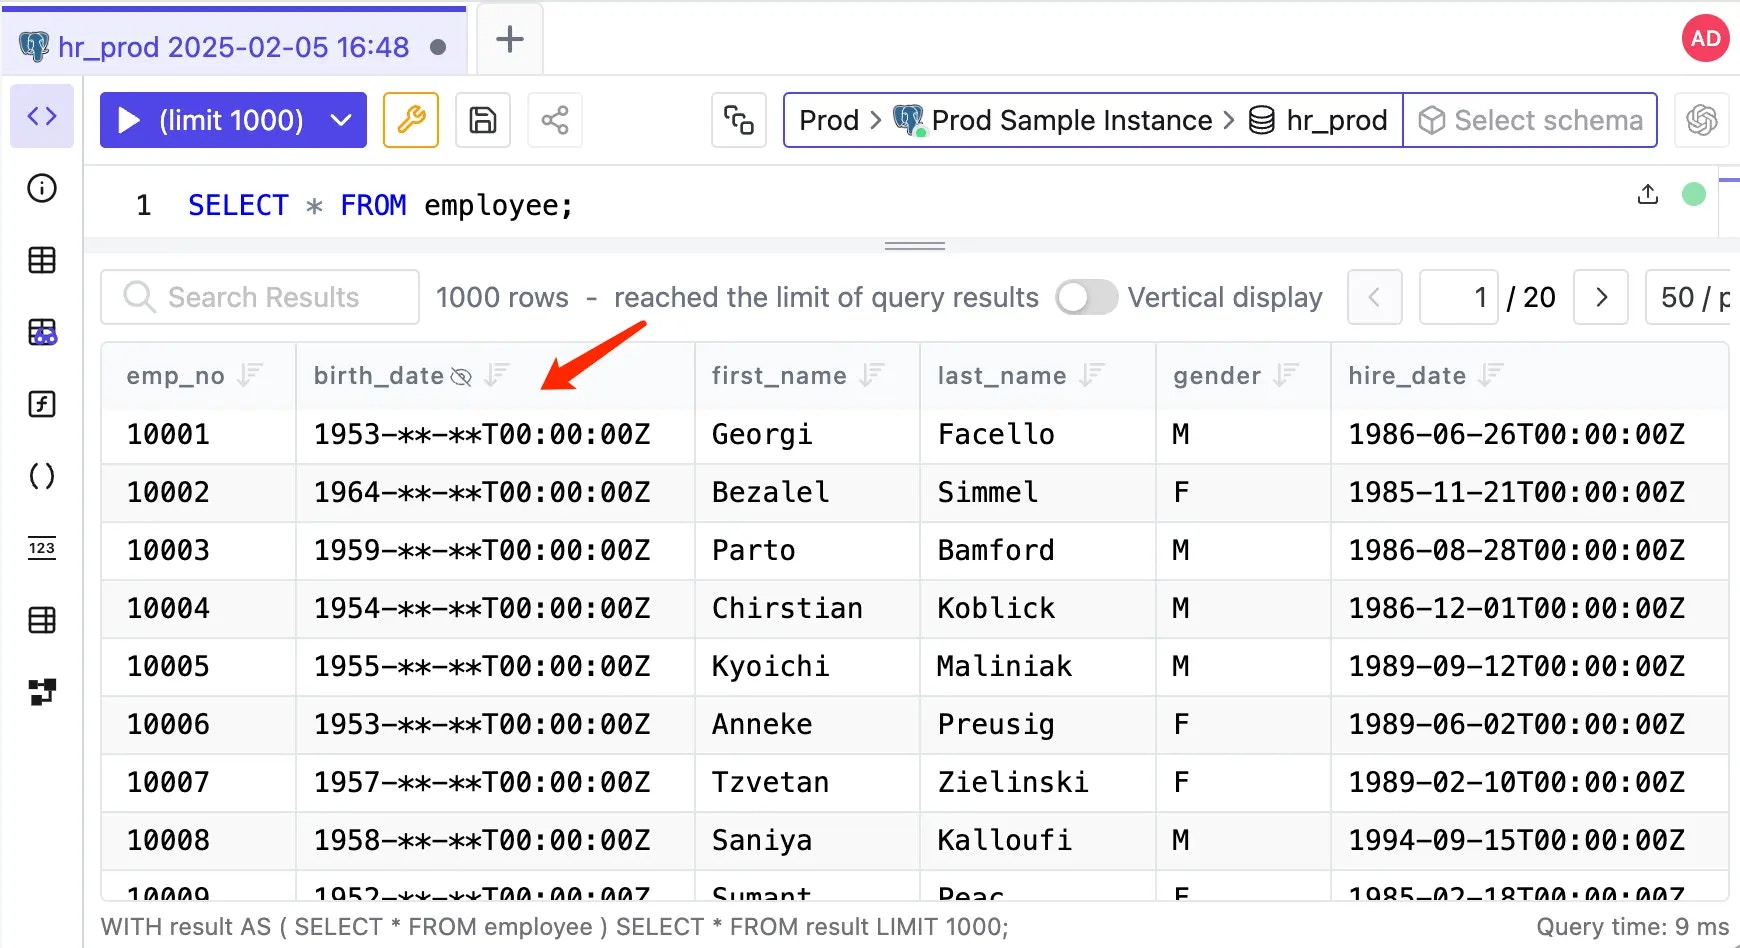
 3. Go back to SQL Editor, run `SELECT * FROM employee;` within `hr_prod`. You'll see the `birth_date` is masked based on the masking algorithm.
 ### Global Masking Rule
As a DBA, you may want to batch apply masking settings. Use [Global Masking Rule](/security/data-masking/global-masking-rule/) to achieve this.
1. Enter **Data Access > Semantic Types**, click **Use Predefined Type**.
2. Add the predefined type `Default`.
3. Enter **Data Access > Global Masking Rule**, click **Add**.
4. Here define a global masking rule to mask all the `birth_date` columns in all tables on production environment with semantic type `Default`, and click **Confirm**.
### Global Masking Rule
As a DBA, you may want to batch apply masking settings. Use [Global Masking Rule](/security/data-masking/global-masking-rule/) to achieve this.
1. Enter **Data Access > Semantic Types**, click **Use Predefined Type**.
2. Add the predefined type `Default`.
3. Enter **Data Access > Global Masking Rule**, click **Add**.
4. Here define a global masking rule to mask all the `birth_date` columns in all tables on production environment with semantic type `Default`, and click **Confirm**.
 5. Go back to SQL Editor, run `SELECT * FROM employee;` within `hr_prod`. You'll see the `birth_date` is masked.
6. You may also notice that the global masking rule take precedence over the column masking rule.
### Export data with masked columns
Exported data is masked in the same way as query results.
1. Stay on the SQL Editor after querying, and click **Export**.
5. Go back to SQL Editor, run `SELECT * FROM employee;` within `hr_prod`. You'll see the `birth_date` is masked.
6. You may also notice that the global masking rule take precedence over the column masking rule.
### Export data with masked columns
Exported data is masked in the same way as query results.
1. Stay on the SQL Editor after querying, and click **Export**.
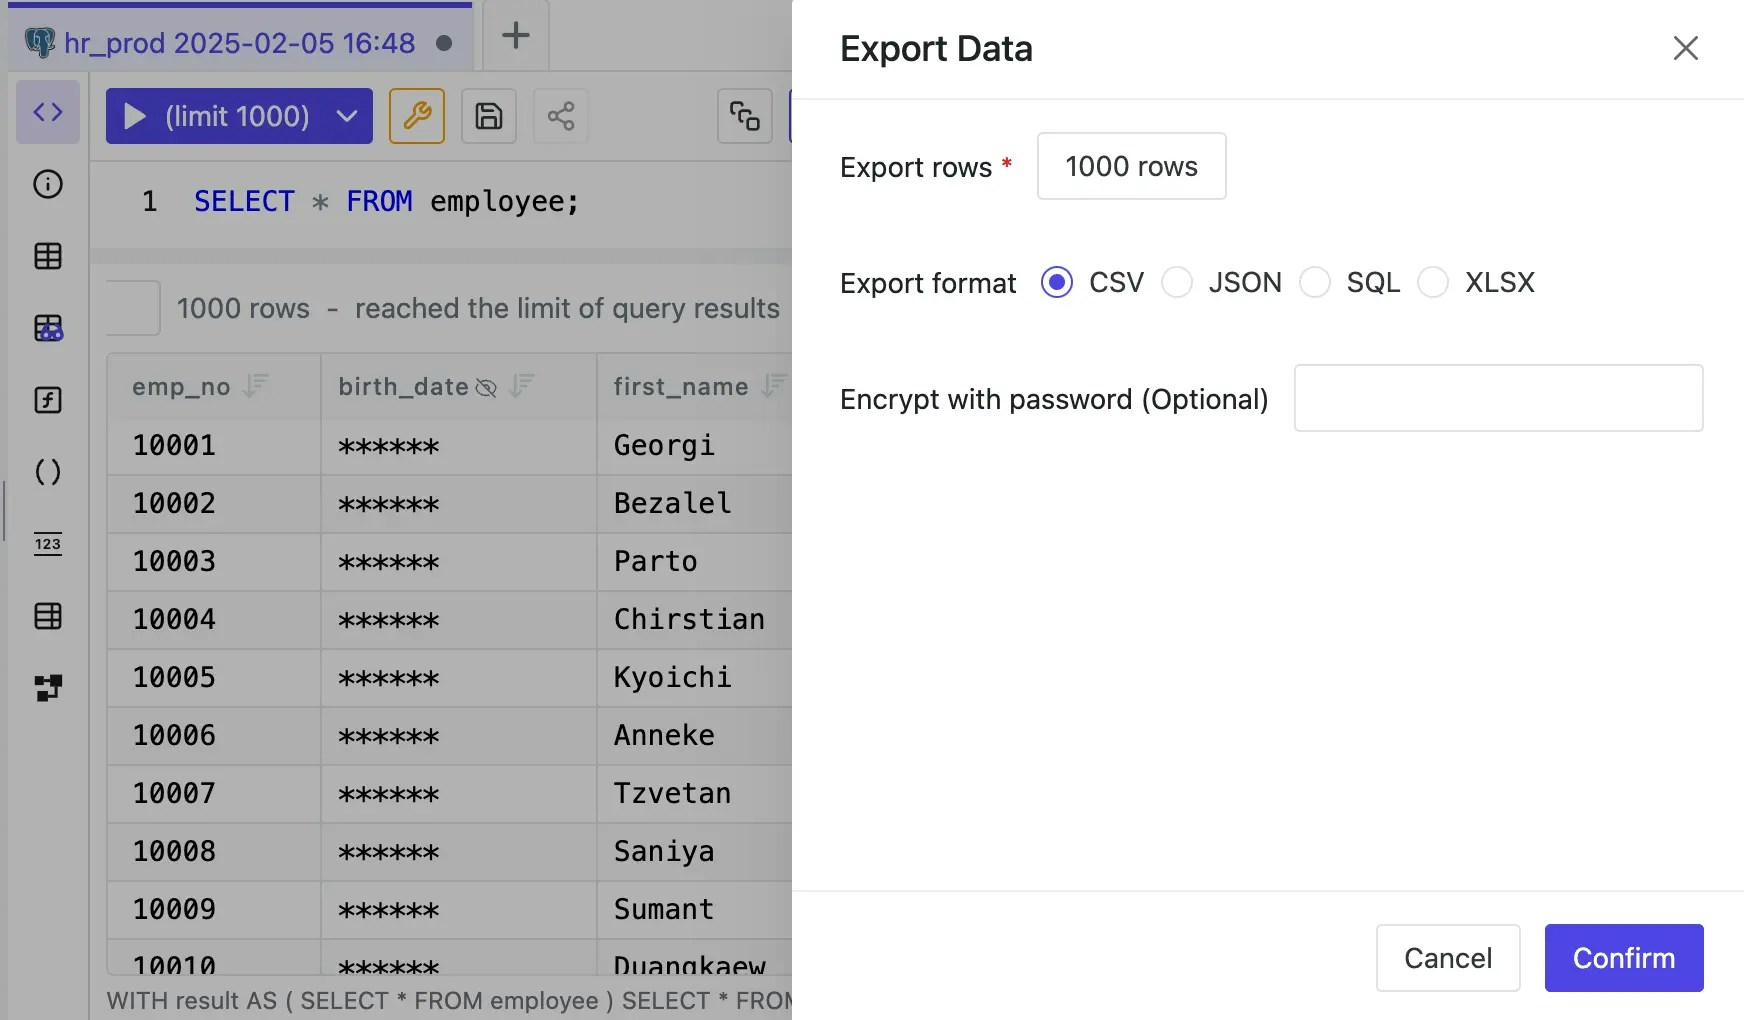 2. Fill in the export rows number, choose the format and click **Confirm**. The file will start downloading.
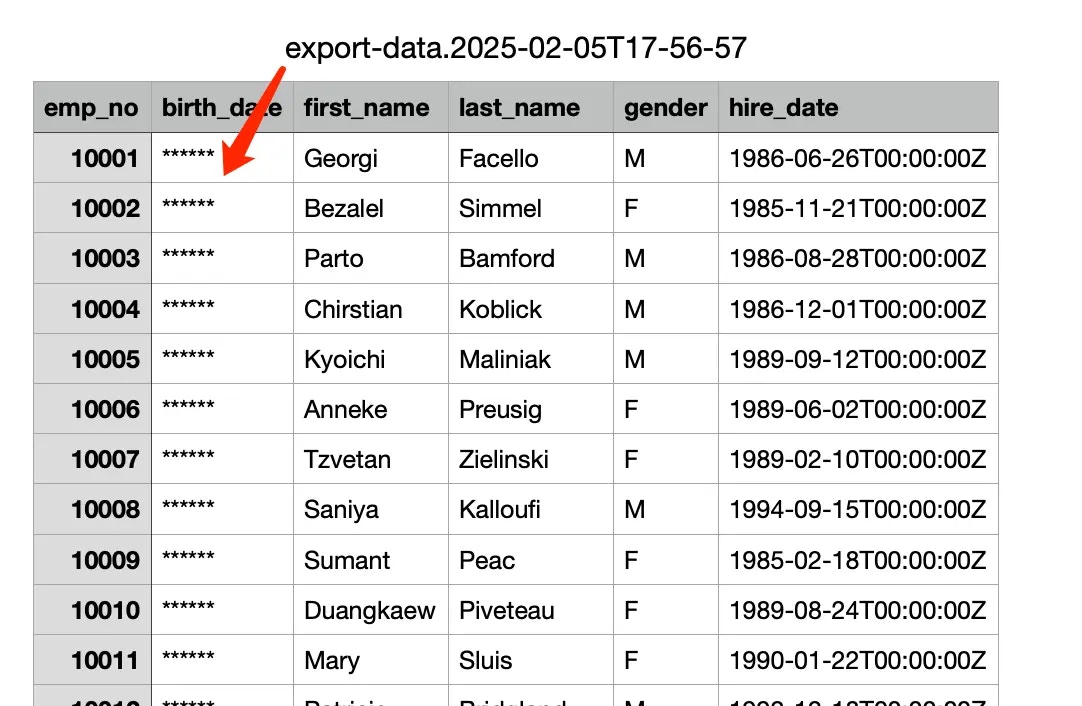
3. Open the downloaded file, you'll see the `birth_date` is masked.
2. Fill in the export rows number, choose the format and click **Confirm**. The file will start downloading.
3. Open the downloaded file, you'll see the `birth_date` is masked.
 ### Masking Exemptions
You can reveal masked data to a specific user by granting masking exemption.
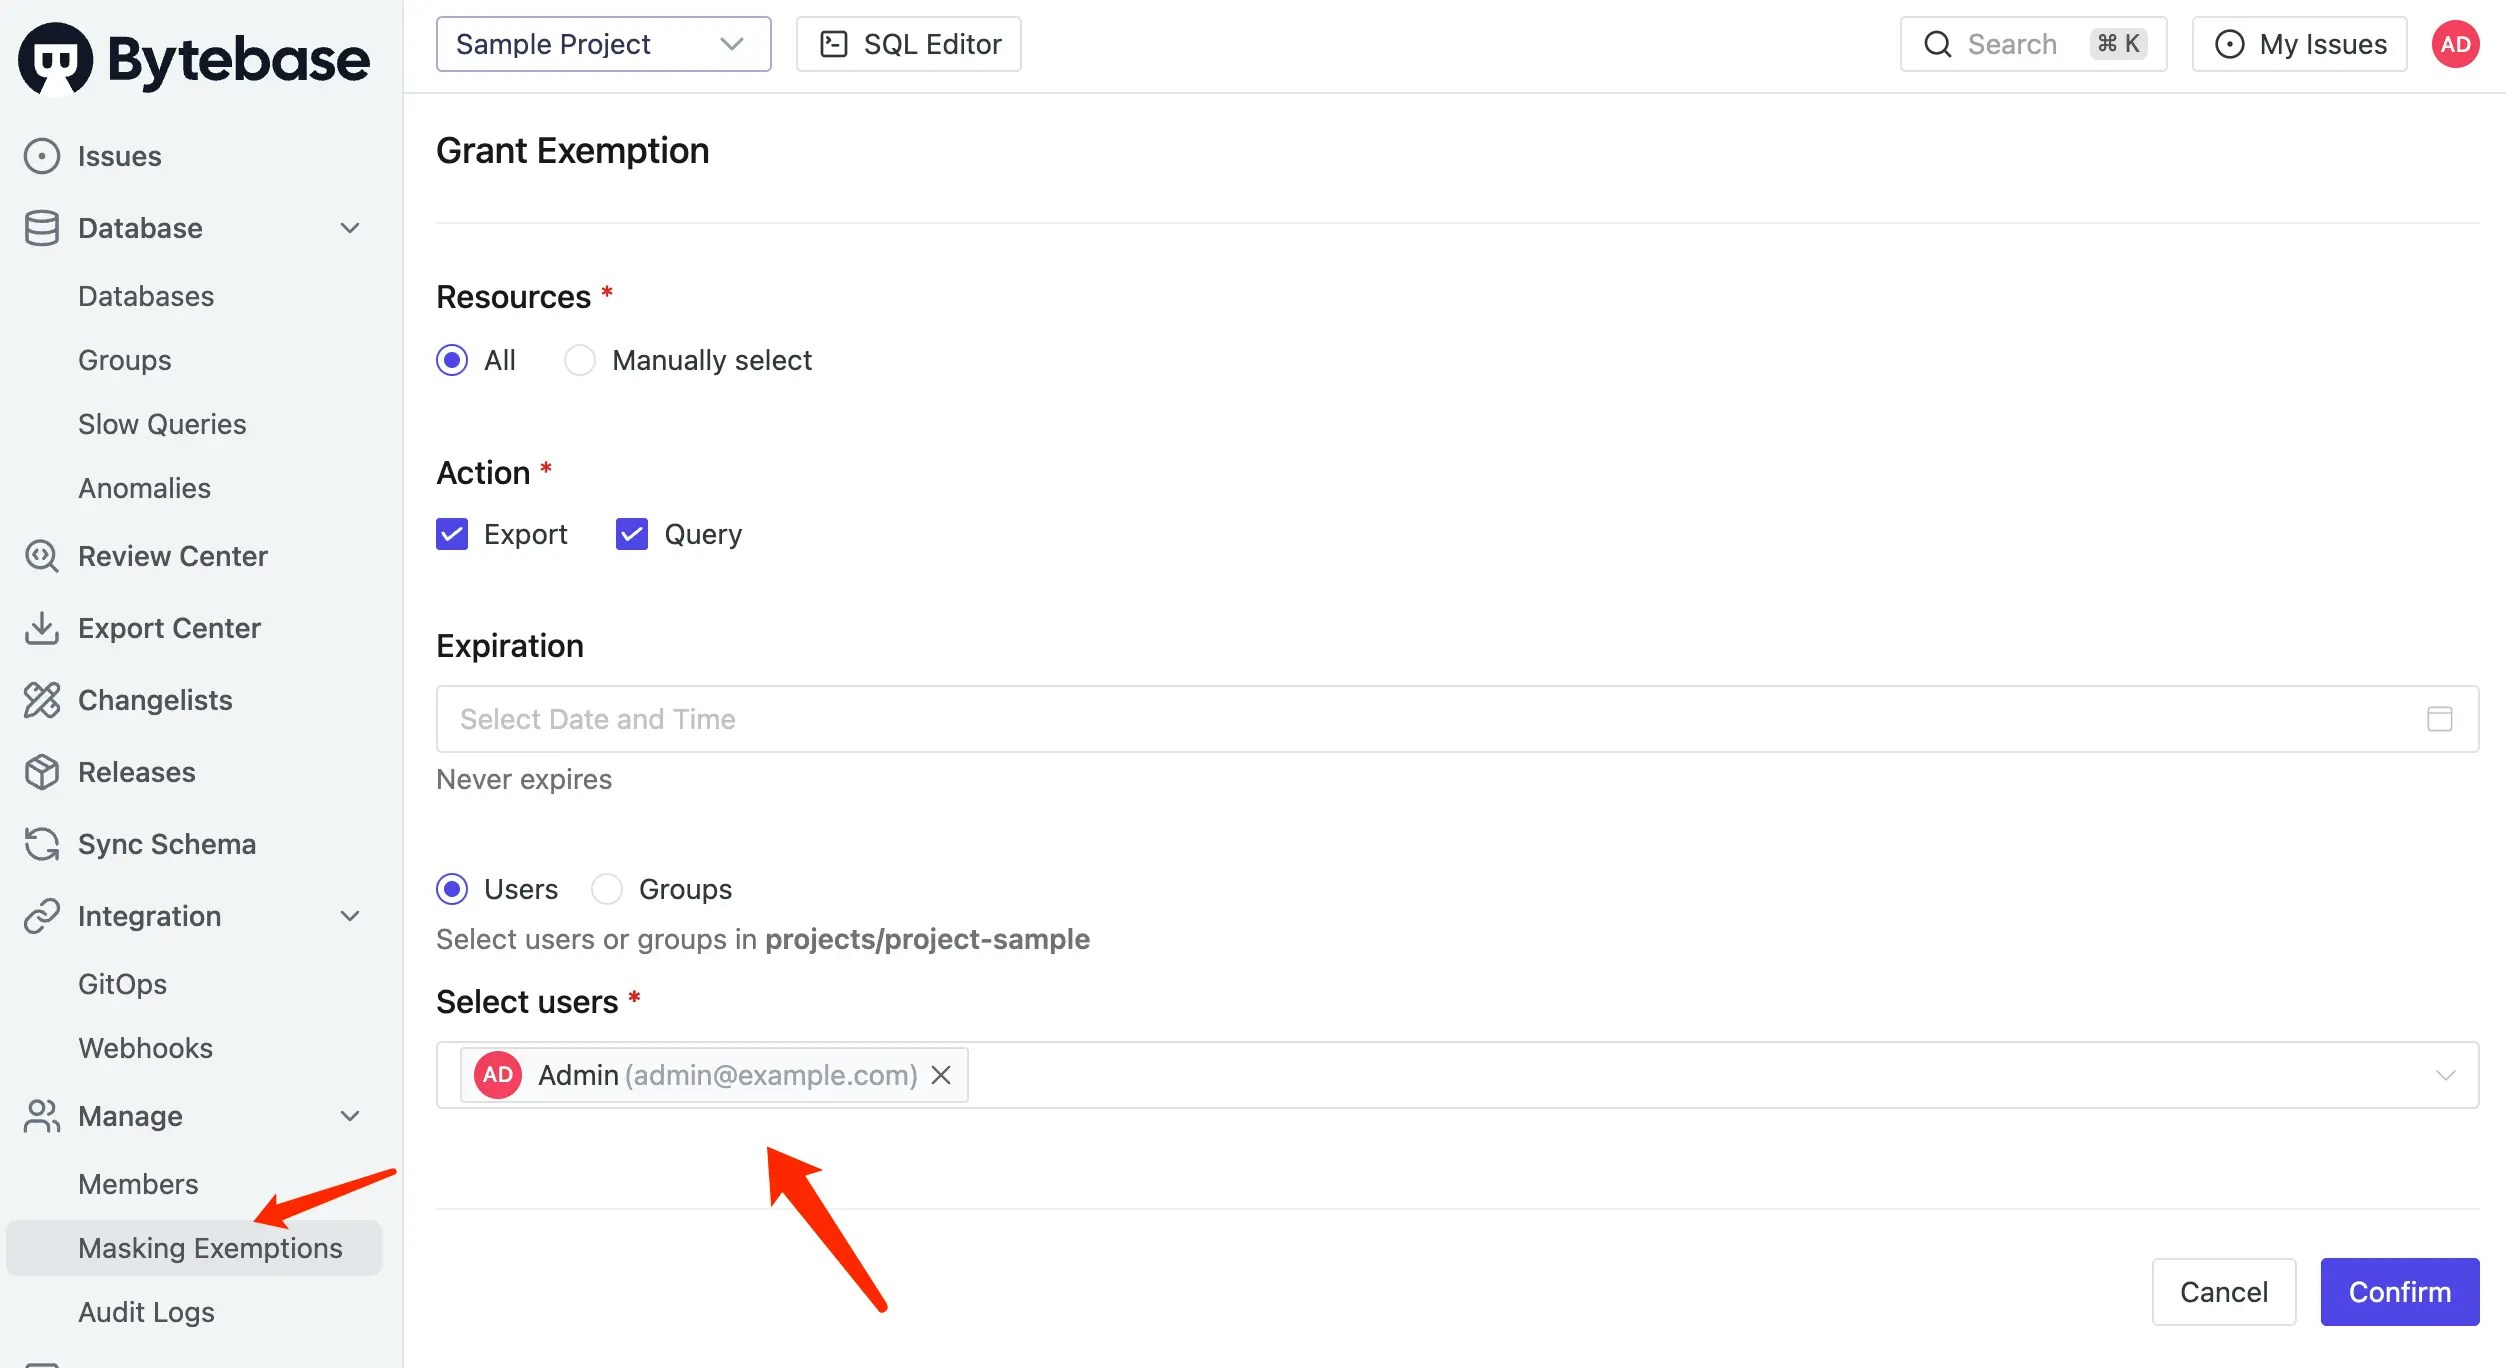
1. Go into the project `Sample Project`, and click **Manage > Masking Exemptions**.
2. Grant exemption to the user and click **Confirm**.
### Masking Exemptions
You can reveal masked data to a specific user by granting masking exemption.
1. Go into the project `Sample Project`, and click **Manage > Masking Exemptions**.
2. Grant exemption to the user and click **Confirm**.
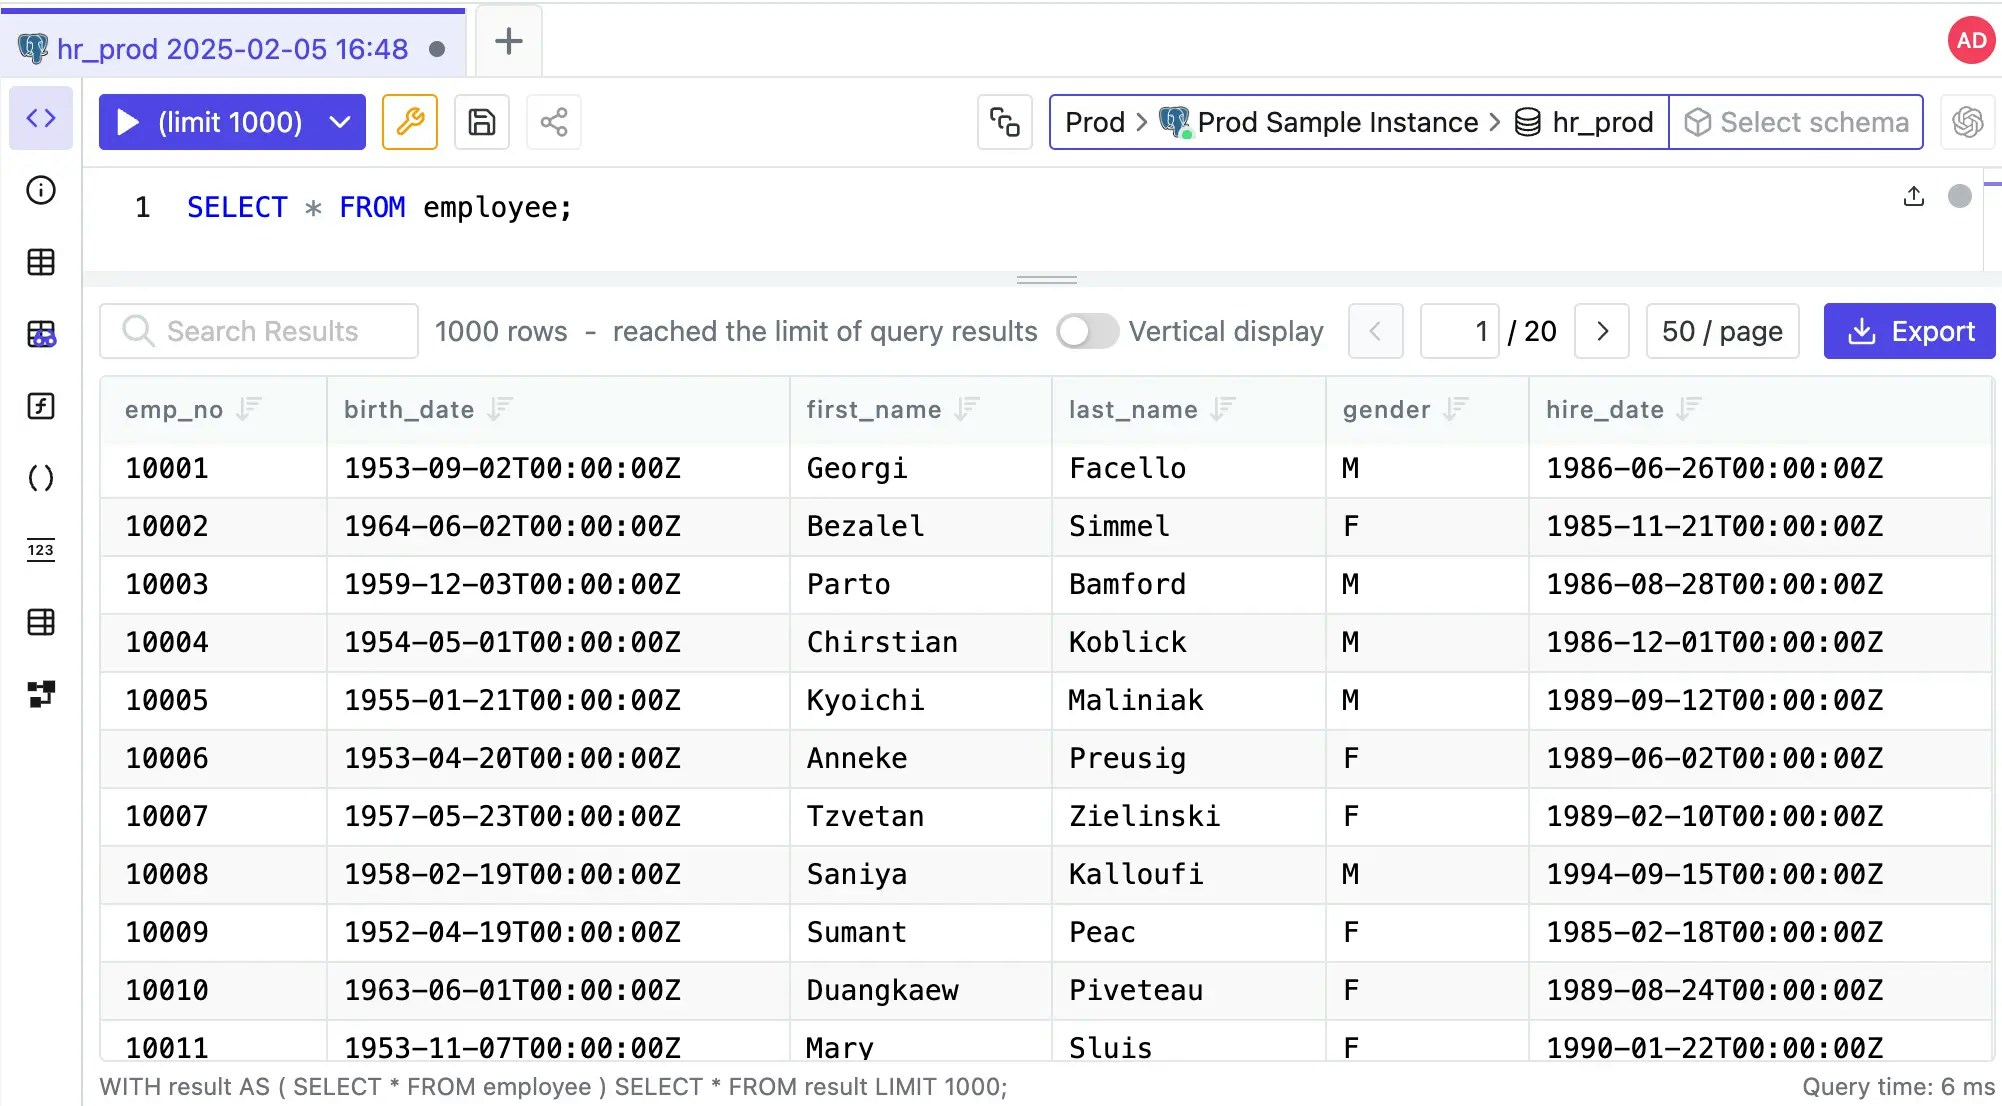
 3. Go back to SQL Editor, run `SELECT * FROM employee;` within database `hr_prod`. You'll see the `birth_date` is unmasked.
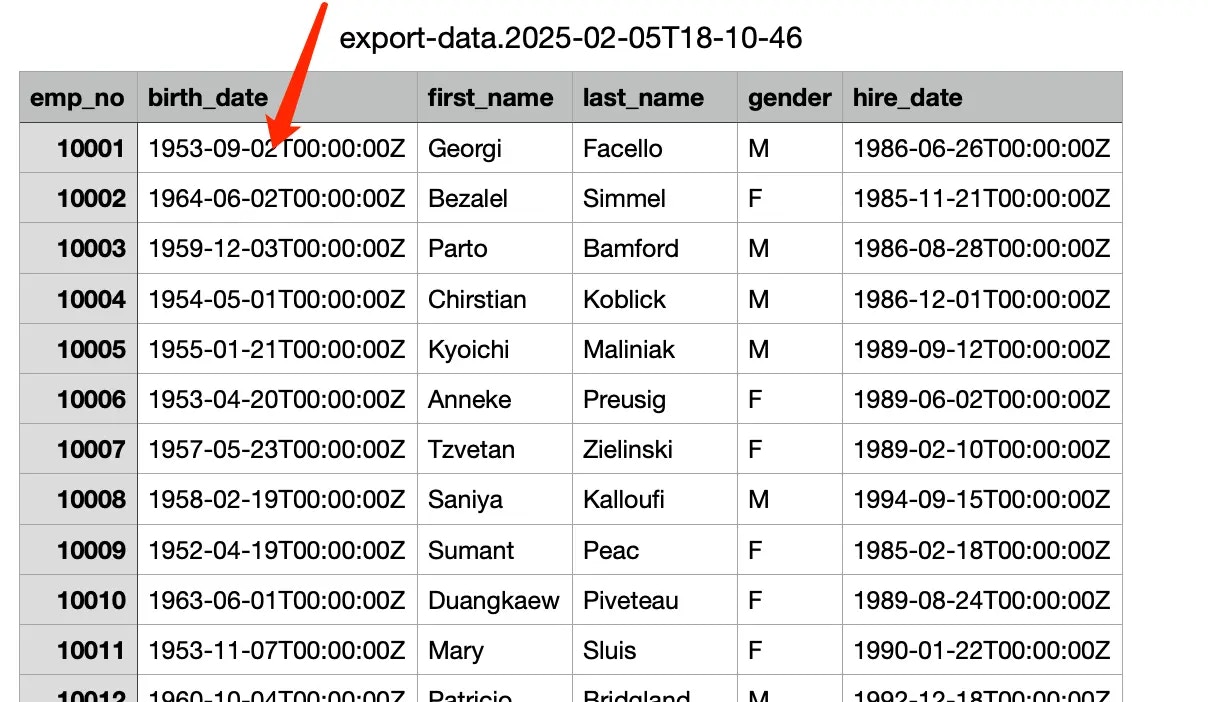
 4. If you export the data, the `birth_date` is also unmasked.
 ## Related content
* [Docs for Dynamic Data Masking](/security/data-masking/overview/)
* [Just-in-Time Database Access](/tutorials/just-in-time-database-access-part1/)
## Related content
* [Docs for Dynamic Data Masking](/security/data-masking/overview/)
* [Just-in-Time Database Access](/tutorials/just-in-time-database-access-part1/)