> ## Documentation Index
> Fetch the complete documentation index at: https://docs.bytebase.com/llms.txt
> Use this file to discover all available pages before exploring further.
# First Schema Change in 5 Minutes
Learn Bytebase's schema change workflow using sample databases.
## Step 1 - Setup Bytebase
1. Ensure Docker is running, then start the Bytebase container:
```bash theme={null}
docker run --rm --init \
--name bytebase \
--publish 8080:8080 --pull always \
--volume ~/.bytebase/data:/var/opt/bytebase \
bytebase/bytebase:latest
```
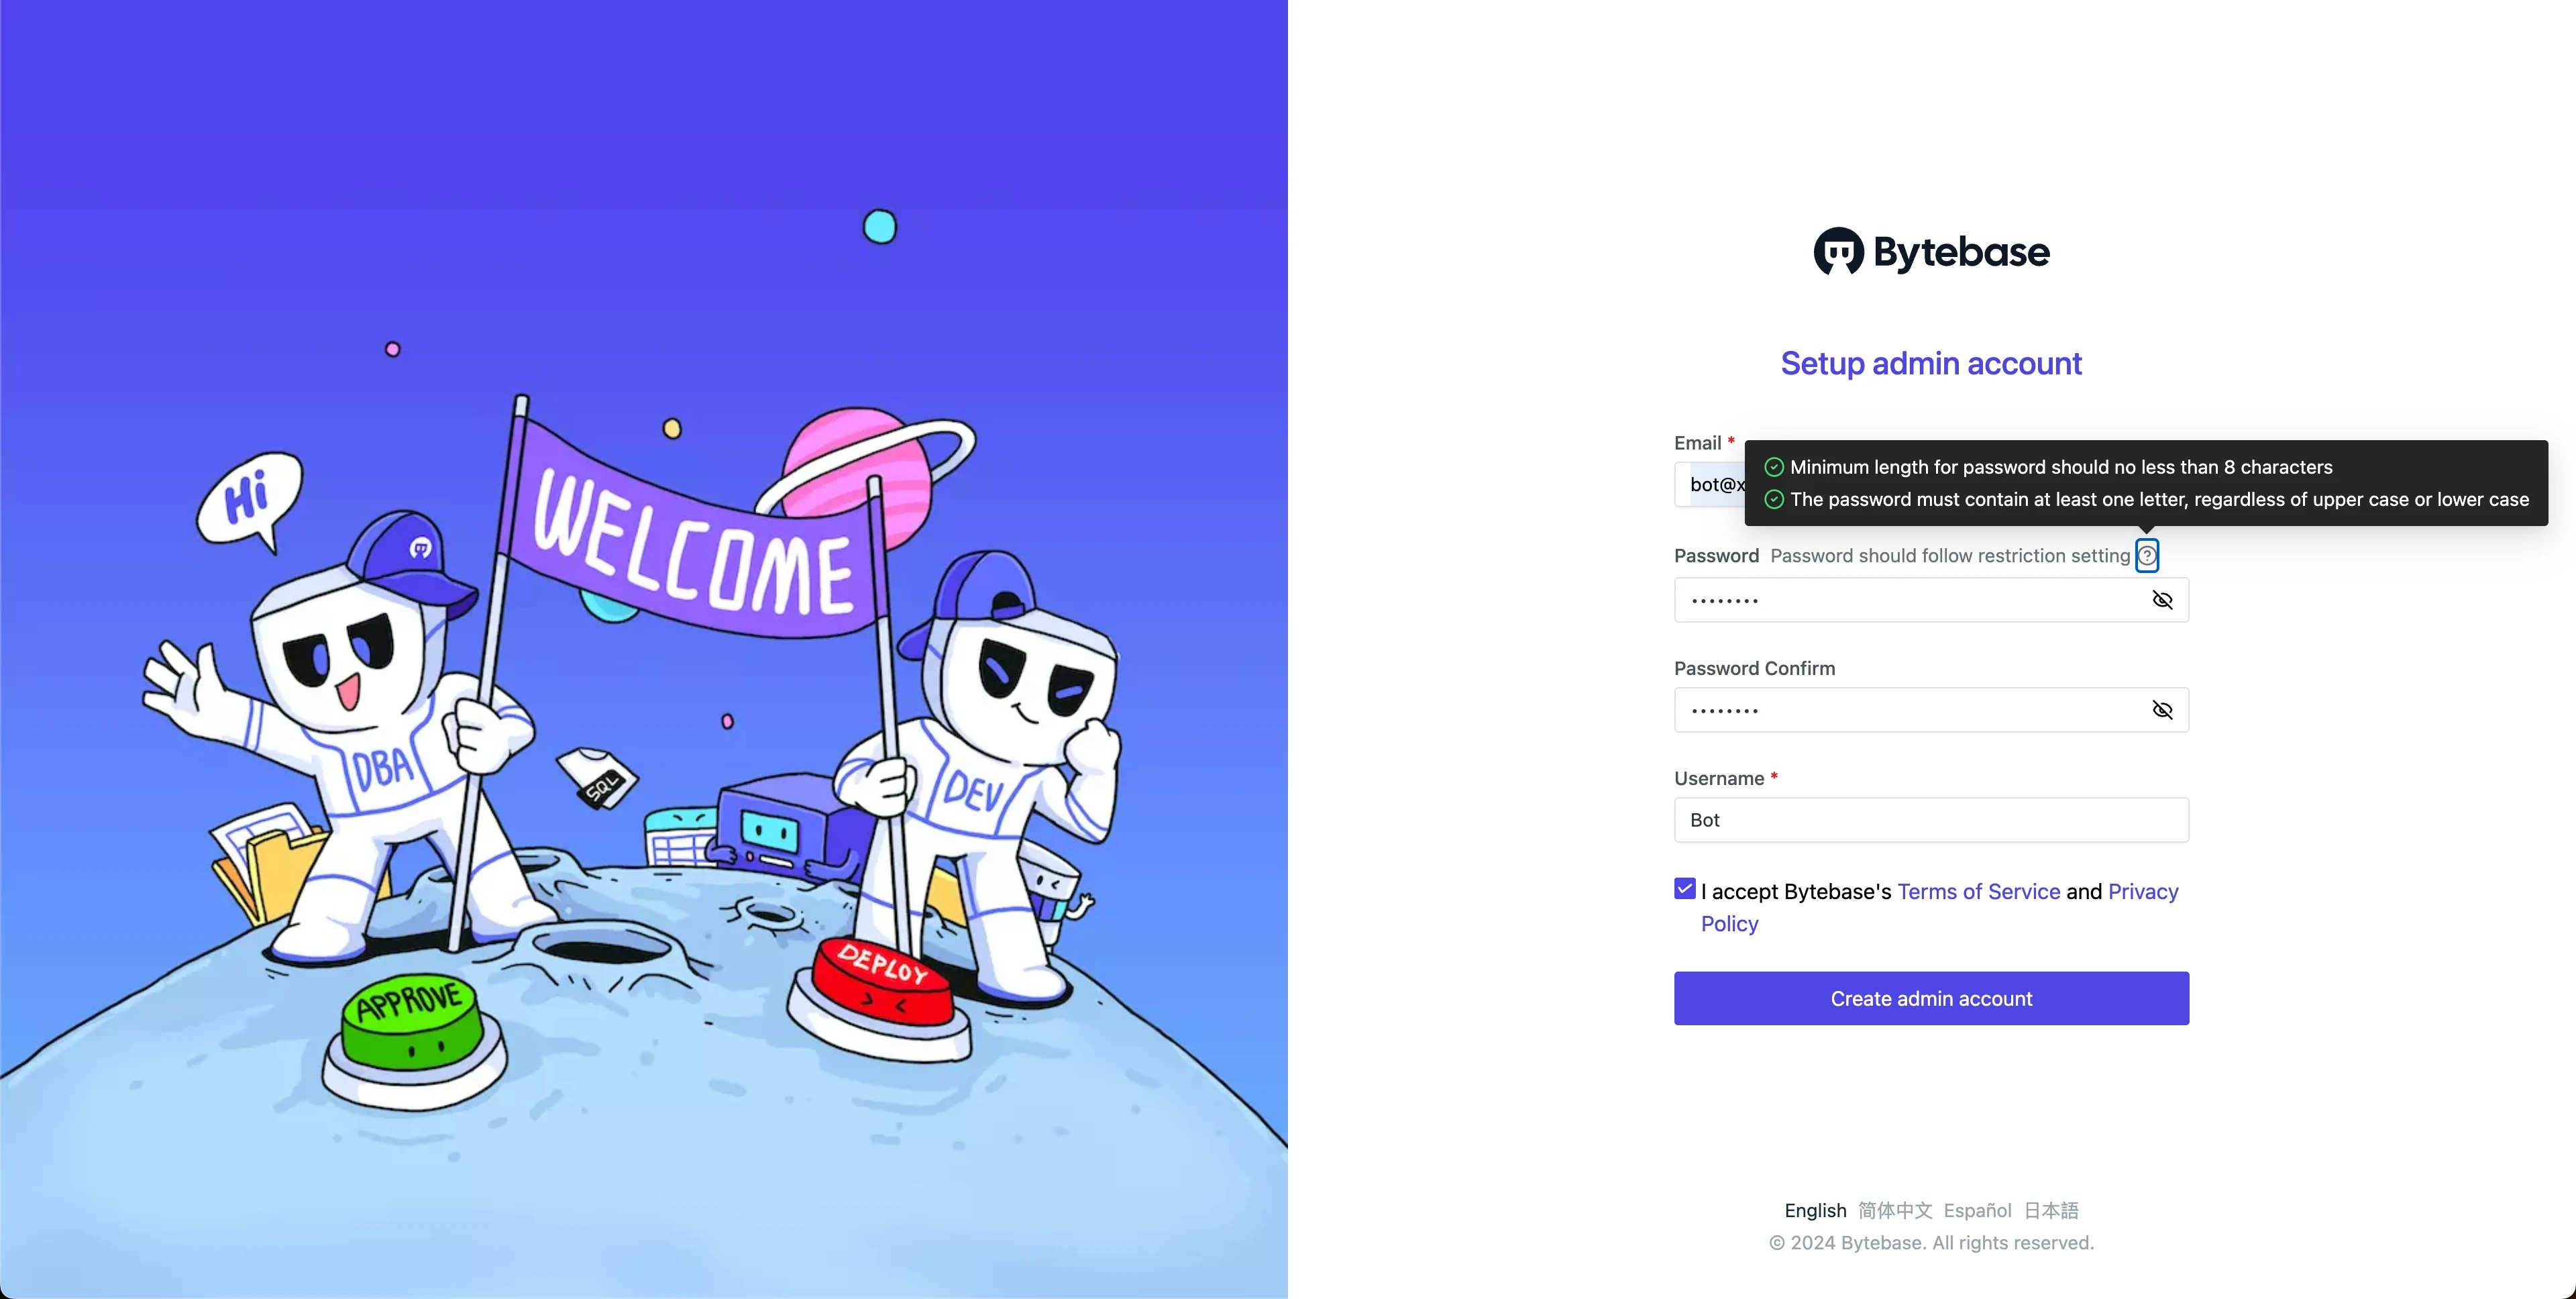
 2. Open Bytebase in [localhost:8080](http://localhost:8080/), fill in the fields and click **Create admin account**. You'll be redirected to Workspace.
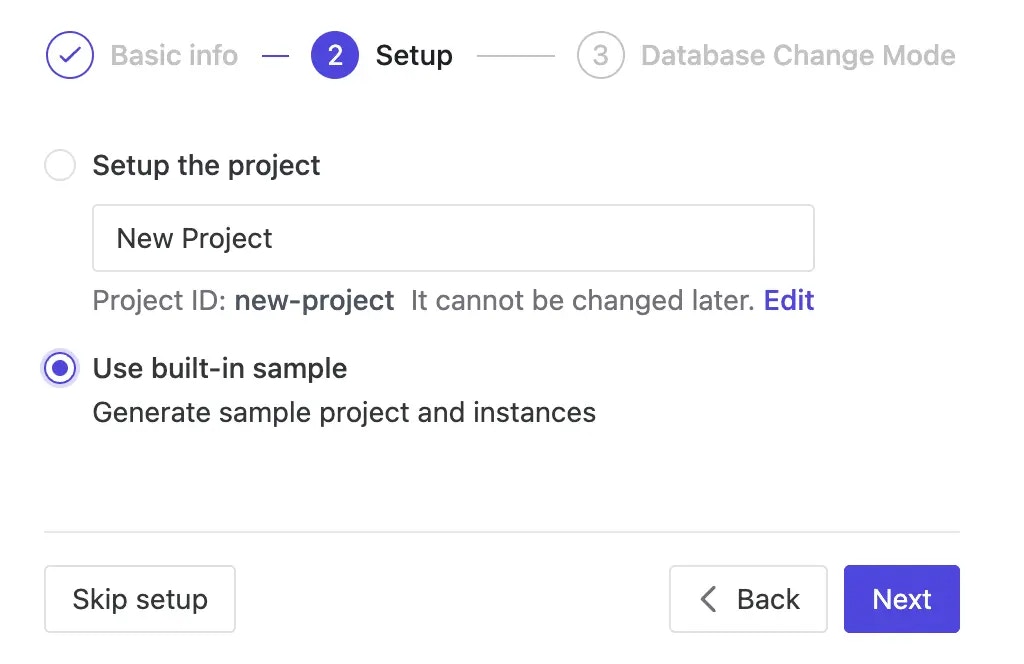
 3. During workspace setup, choose the built-in sample data.
 ## Step 2 - Configure SQL Review
1. Navigate to **CI/CD** > **SQL Review** and click **+ Create SQL review**.
2. Select `Sample Template` (19 enabled rules), click **Next**. Attach to `Prod` environment and confirm.
## Step 3 - Create a Plan
1. Navigate to **CI/CD** > **Plans** and click **+ New Plan**.
2. Select both databases where changes will be applied:
* `hr_test` on `Test Sample instance`
* `hr_prod` on `Prod Sample instance`
Click **Confirm** to proceed.
3. Add this SQL statement (or use **Schema Editor** for visual design):
```sql theme={null}
ALTER TABLE public.employee ADD COLUMN IF NOT EXISTS nickname TEXT;
```
Click **Create**.
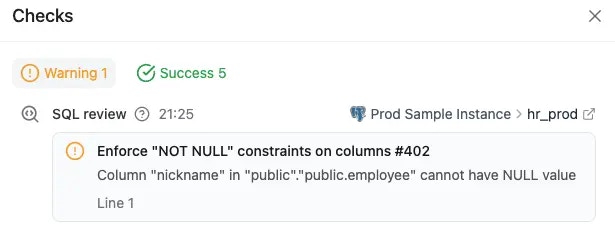
4. The plan is then in `Draft` status. Any SQL review warnings appear because Bytebase automatically checks against your configured policy. Click warnings for details.
## Step 2 - Configure SQL Review
1. Navigate to **CI/CD** > **SQL Review** and click **+ Create SQL review**.
2. Select `Sample Template` (19 enabled rules), click **Next**. Attach to `Prod` environment and confirm.
## Step 3 - Create a Plan
1. Navigate to **CI/CD** > **Plans** and click **+ New Plan**.
2. Select both databases where changes will be applied:
* `hr_test` on `Test Sample instance`
* `hr_prod` on `Prod Sample instance`
Click **Confirm** to proceed.
3. Add this SQL statement (or use **Schema Editor** for visual design):
```sql theme={null}
ALTER TABLE public.employee ADD COLUMN IF NOT EXISTS nickname TEXT;
```
Click **Create**.
4. The plan is then in `Draft` status. Any SQL review warnings appear because Bytebase automatically checks against your configured policy. Click warnings for details.
 ## Step 4 - Review and Approve
1. Fix the warning by adding `NOT NULL DEFAULT ''`:
```sql theme={null}
ALTER TABLE public.employee ADD COLUMN IF NOT EXISTS nickname TEXT NOT NULL DEFAULT '';
```
Click **Save**. The checks rerun and pass.
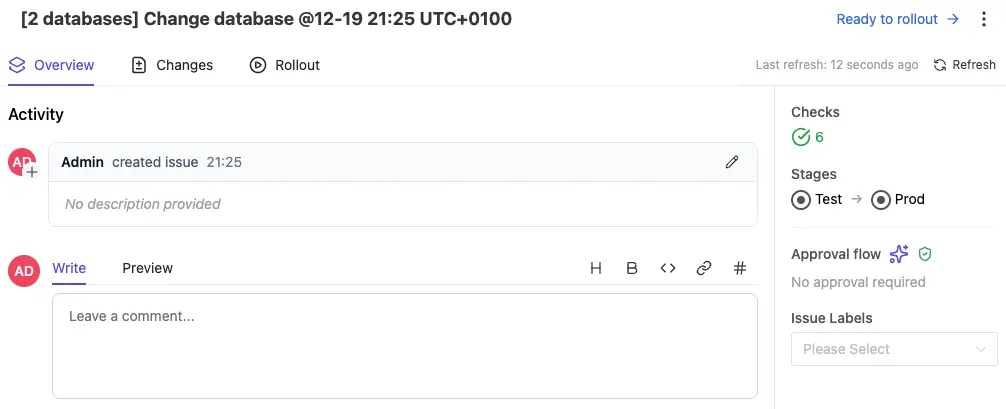
2. Click **Ready for Review** to convert the plan into an issue and submit for approval.
3. No approval is required for this change.
## Step 4 - Review and Approve
1. Fix the warning by adding `NOT NULL DEFAULT ''`:
```sql theme={null}
ALTER TABLE public.employee ADD COLUMN IF NOT EXISTS nickname TEXT NOT NULL DEFAULT '';
```
Click **Save**. The checks rerun and pass.
2. Click **Ready for Review** to convert the plan into an issue and submit for approval.
3. No approval is required for this change.
 ## Step 5 - Deploy Changes
1. In the **Rollout** section, both Test and Prod deployments are ready.
## Step 5 - Deploy Changes
1. In the **Rollout** section, both Test and Prod deployments are ready.
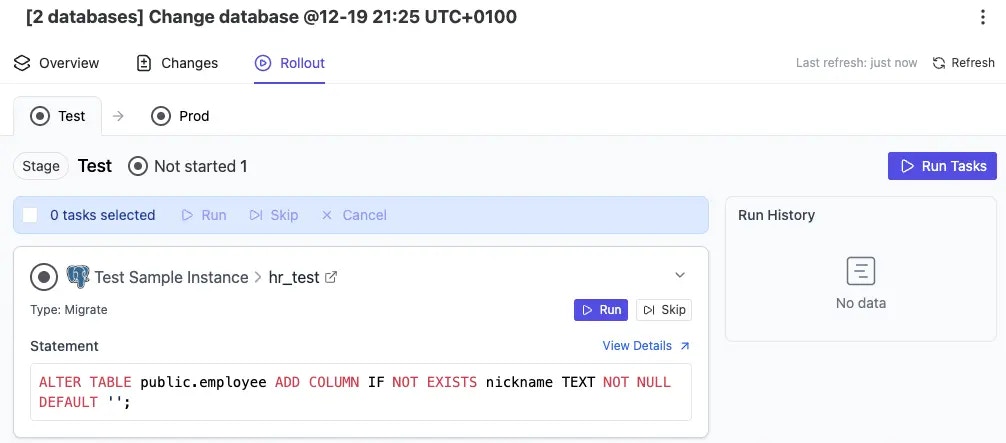 2. Click **Run** for Test, then for Prod after success.
3. Once complete, the issue is marked `Done`.
## Next Steps
You've completed your first schema change. Continue with:
* [Move Schema Changes from Test to Prod](/tutorials/how-to-move-schema-change-from-test-to-prod/) - for environment transitions
* [Deploy with Rollout Policy](/tutorials/deploy-schema-migration/) - for manual rollouts
* [Custom Approval Flow](/tutorials/database-change-management-with-risk-adjusted-approval-flow/) - for adding approvers
2. Click **Run** for Test, then for Prod after success.
3. Once complete, the issue is marked `Done`.
## Next Steps
You've completed your first schema change. Continue with:
* [Move Schema Changes from Test to Prod](/tutorials/how-to-move-schema-change-from-test-to-prod/) - for environment transitions
* [Deploy with Rollout Policy](/tutorials/deploy-schema-migration/) - for manual rollouts
* [Custom Approval Flow](/tutorials/database-change-management-with-risk-adjusted-approval-flow/) - for adding approvers