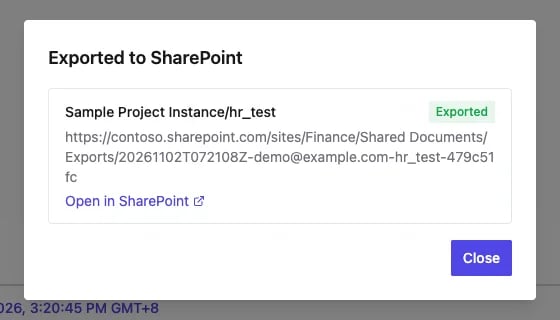

Available only for:
- Enterprise plan
- Self-hosted Bytebase
Register a Microsoft Entra application
Bytebase authenticates to Microsoft Graph with theLists.SelectedOperations.Selected application permission. That permission grants no access on its own; the application can reach only the libraries you grant it in the next step.
- In the Microsoft Entra admin center, go to App registrations and click New registration.
- Enter a name such as
Bytebase Export, keep Accounts in this organizational directory only, and click Register. Leave Redirect URI blank. - On the application’s Overview page, copy the Application (client) ID and the Directory (tenant) ID.
- Go to API permissions, click Add a permission > Microsoft Graph > Application permissions, select
Lists.SelectedOperations.Selected, and click Add permissions. - Click Grant admin consent for your tenant.
- Go to Certificates & secrets > Client secrets, click New client secret, choose an expiration, and click Add. Copy the secret’s Value right away; Entra shows it only once.
Grant the application access to a library
Grant the application thewrite role on each document library that projects will export to. Microsoft documents the grant in Overview of Selected permissions in OneDrive and SharePoint and Create permission on a list.
Make these Microsoft Graph requests as a SharePoint administrator, for example in Graph Explorer.
-
Look up the site ID. Open the library in SharePoint and check its URL. The site path is everything before the library name. In
https://contoso.sharepoint.com/sites/Finance/Shared%20Documents/Forms/AllItems.aspx, the site is/sites/Financeand the library isShared Documents. Request the site, using/teams/instead of/sites/for a team site:Theidin the response is the site ID. -
Look up the library’s list ID:
Find the library by its
webUrl. -
Create the permission:
Configure SharePoint in Bytebase
-
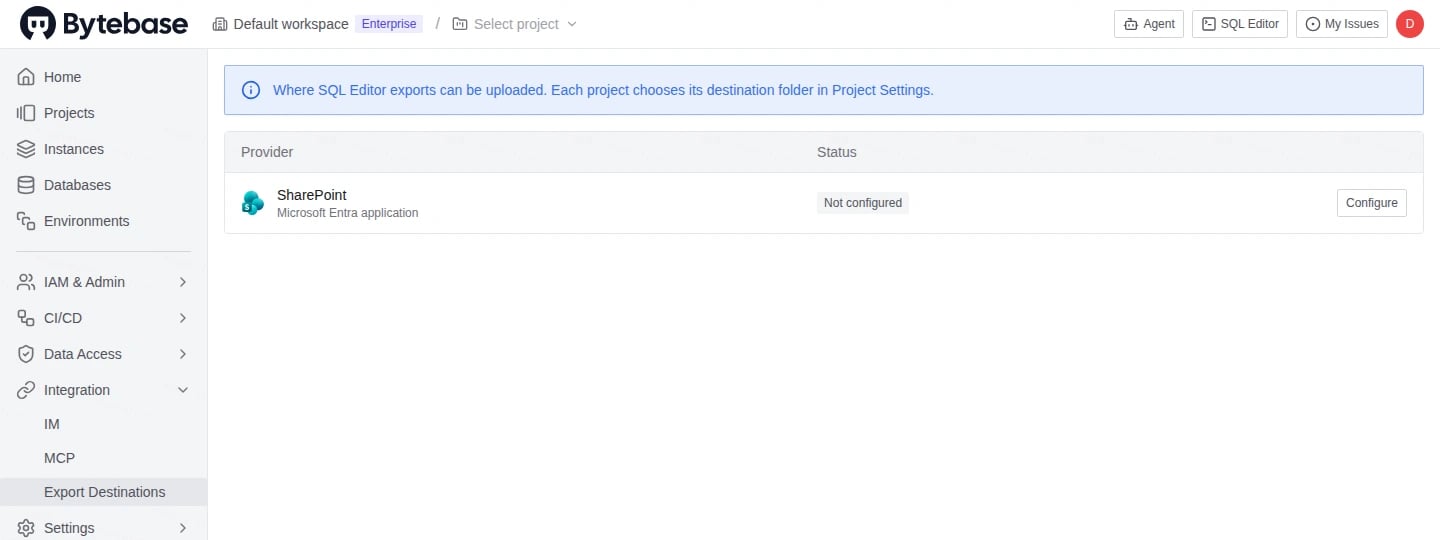
Go to Integration > Export Destinations and click Configure on the SharePoint row.
-
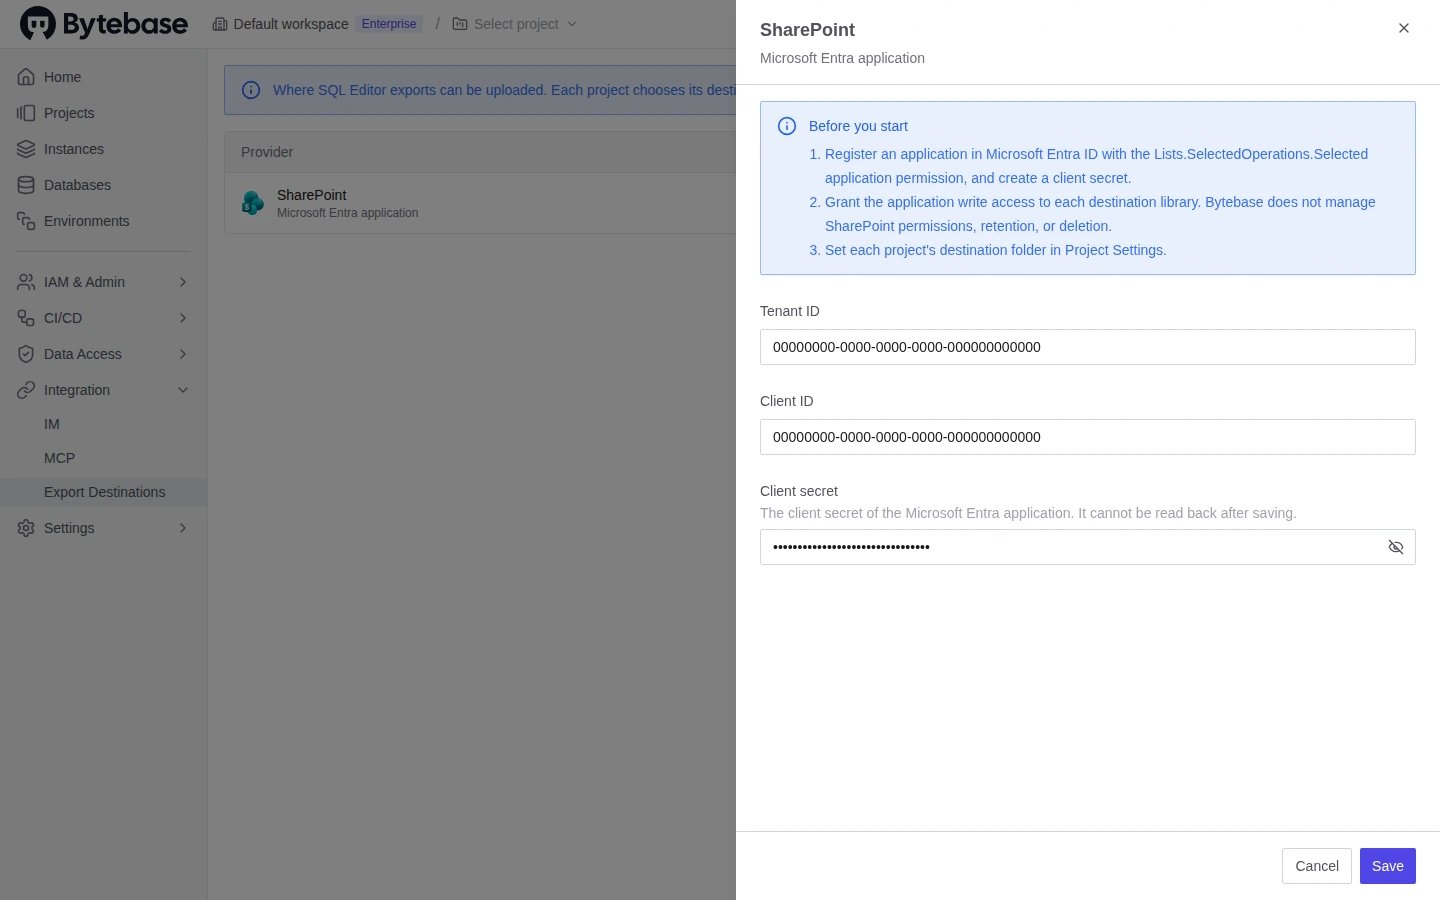
Enter the Tenant ID, Client ID, and Client secret, then click Save.
Set a project’s SharePoint folder
Each project can point to one SharePoint library root or folder.- Open the project and go to Settings.
-
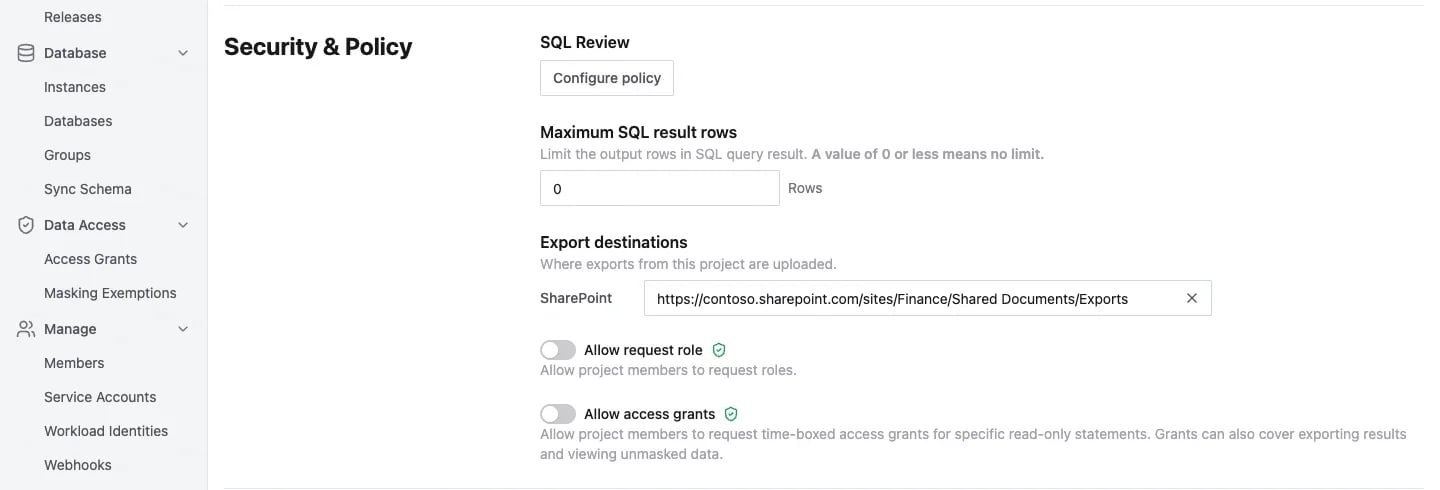
Under Security & Policy > Export destinations, paste the SharePoint URL of the library or folder into the SharePoint field.
- Click Update.
Export query results to SharePoint
- Run a query in SQL Editor and click Export on the result.
-
The Export Data drawer selects SharePoint by default. Switch Destination to Download if you want a local file and your workspace allows it.
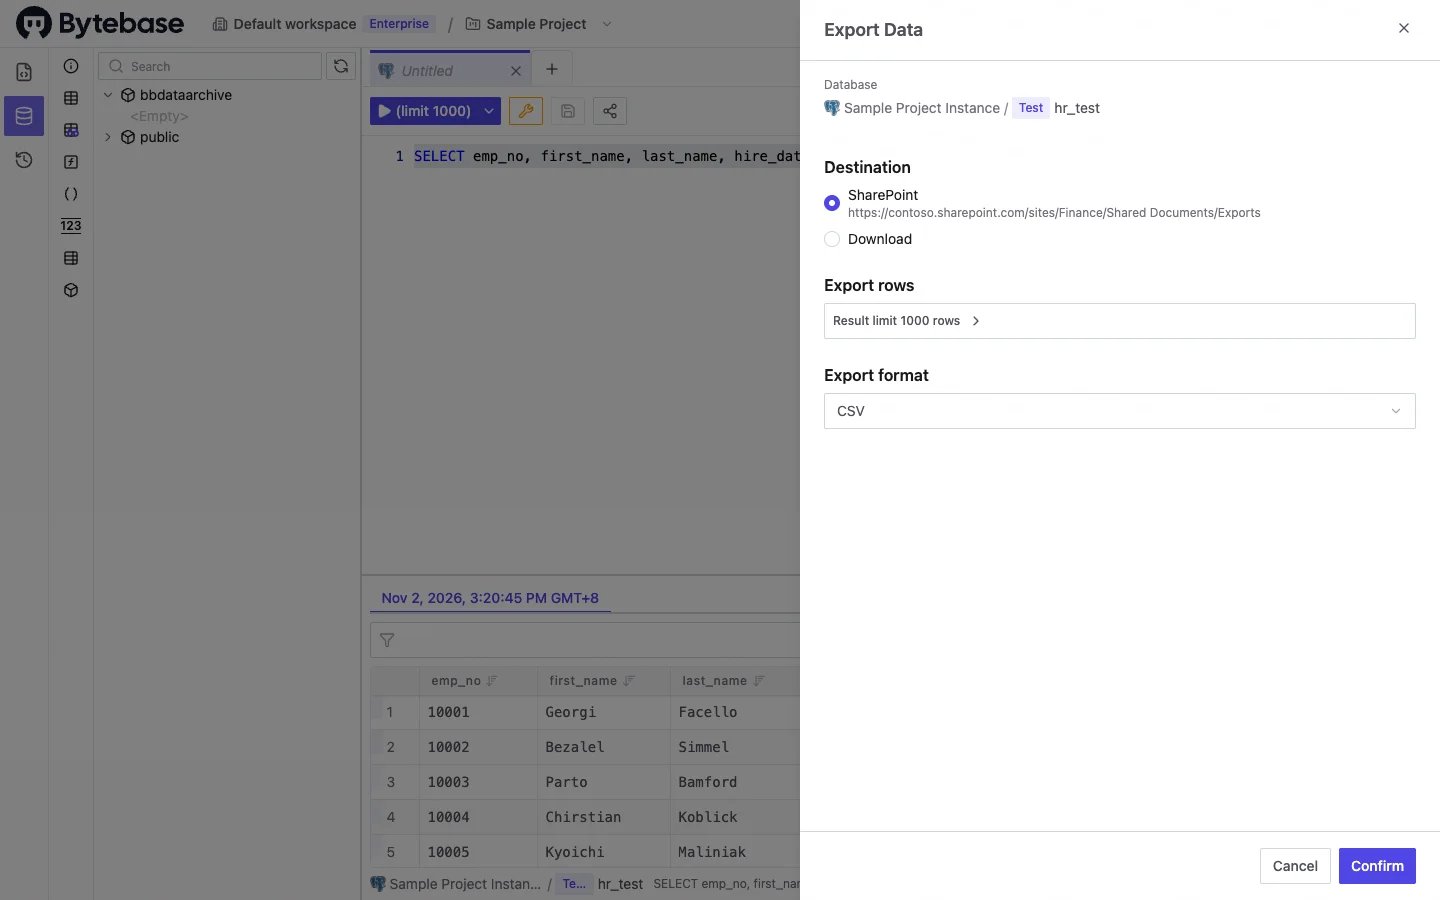
- Choose Export rows and Export format, then click Confirm.