Tutorial: Managing user account provisioning for enterprise apps in Entra
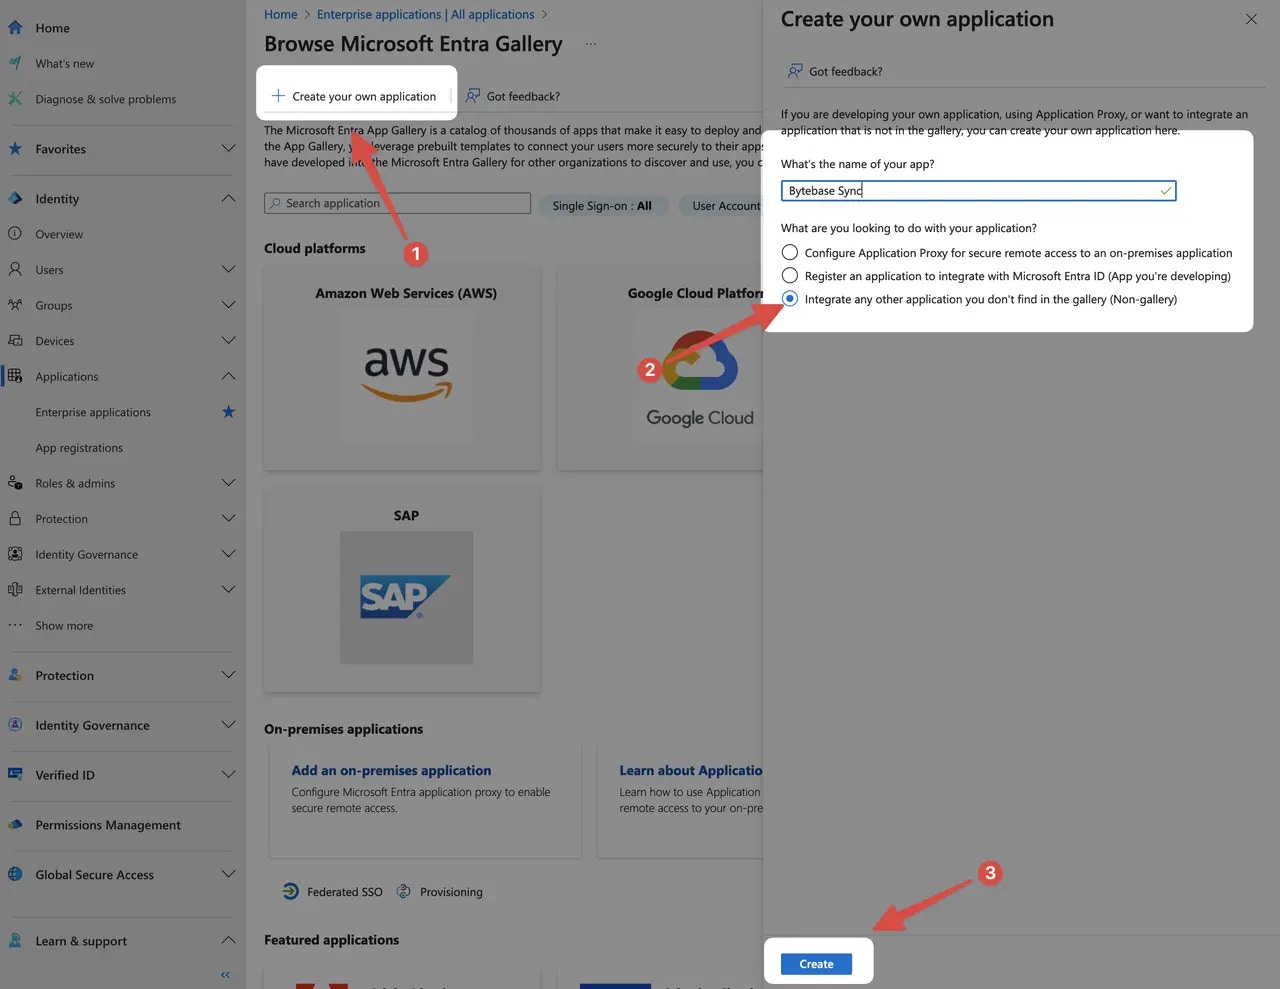
Create enterprise application
Sign in to the Entra ID Admin Center Dashboard. Select Enterprise applications and click New application.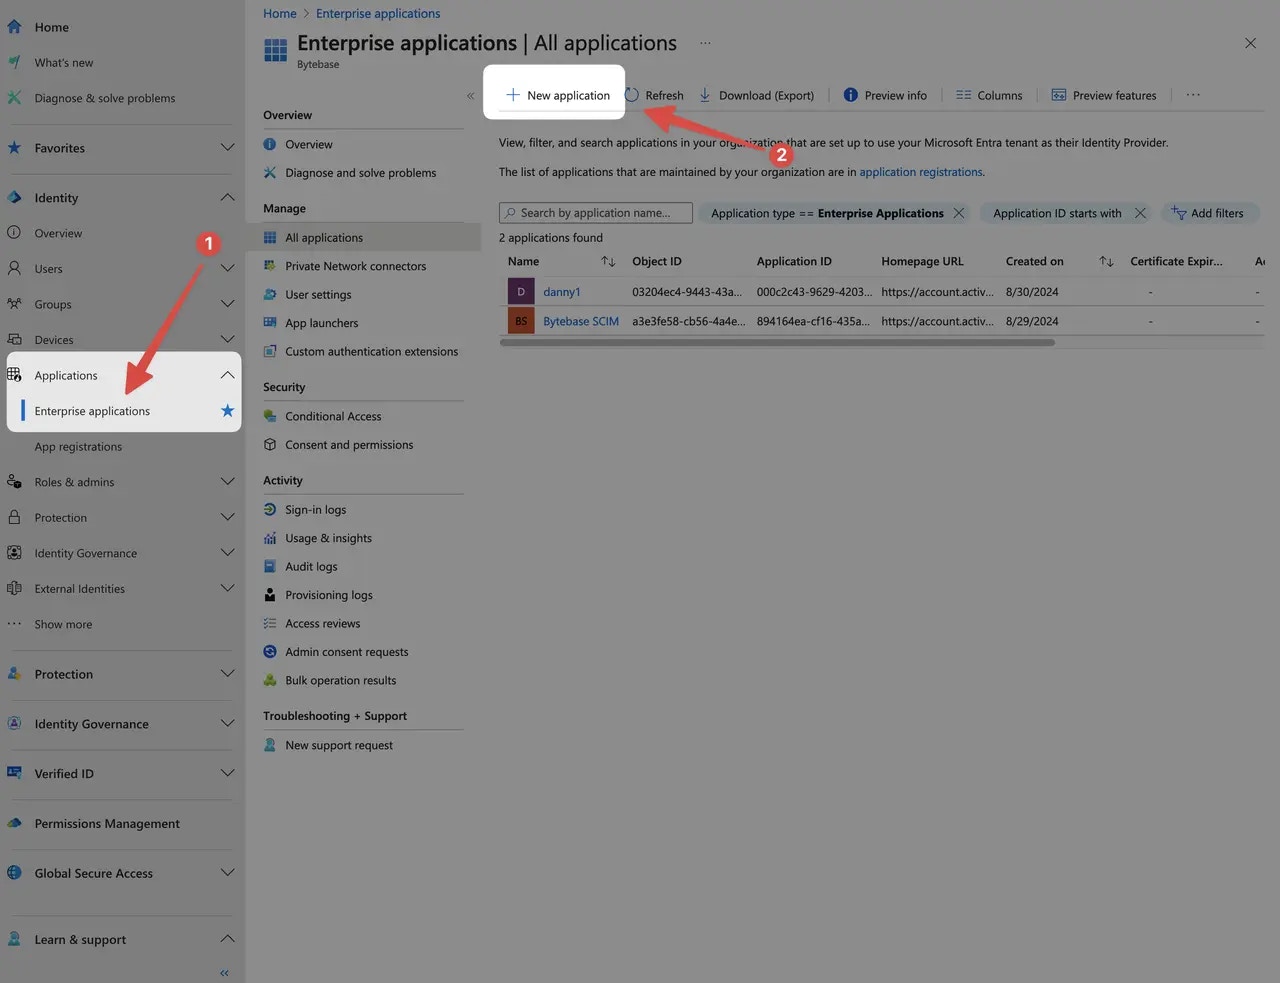
Create provision
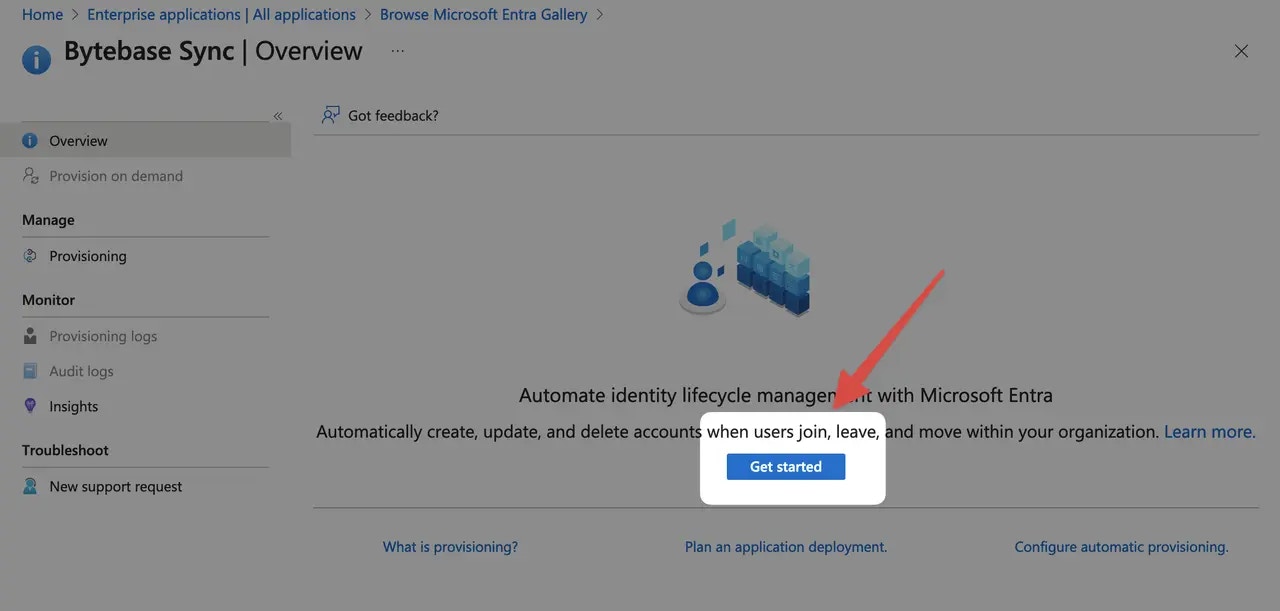
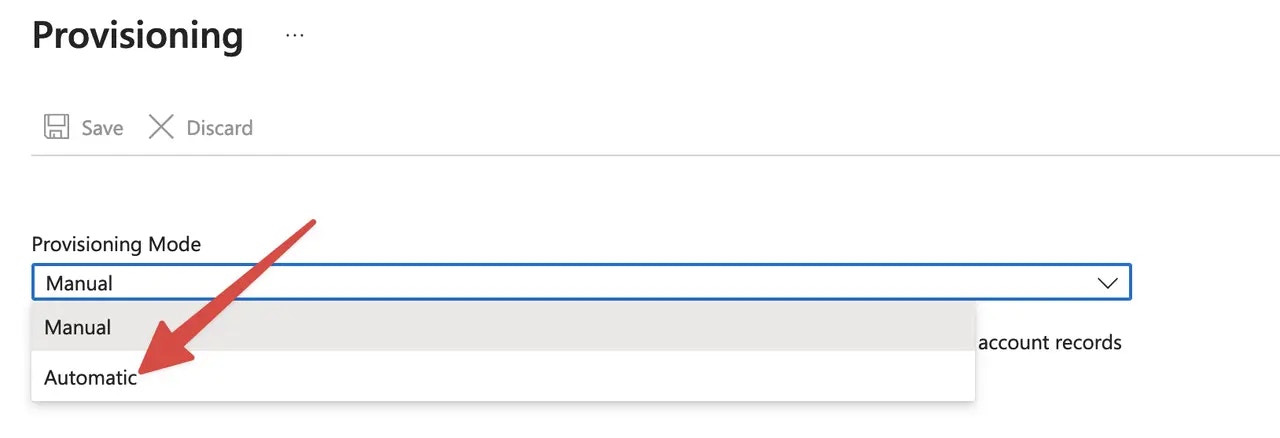
Go to the application detail page. Select Provision User Accounts.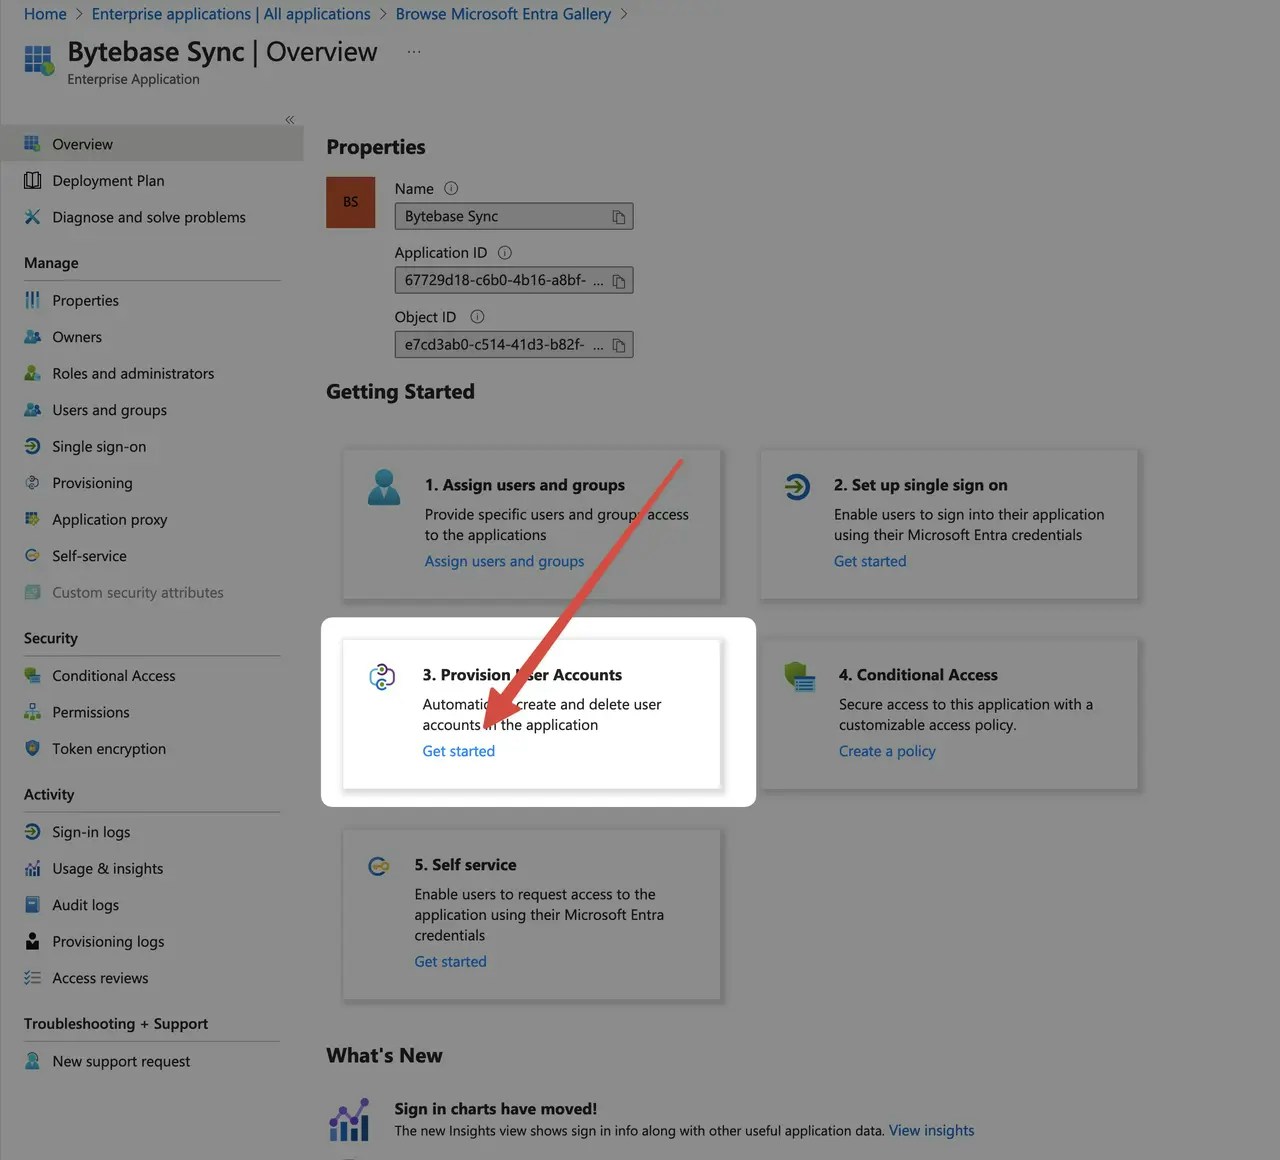

Bytebase endpoint implements SCIM protocol, please make sure you have configured External URL and it’s network accessible from Entra.
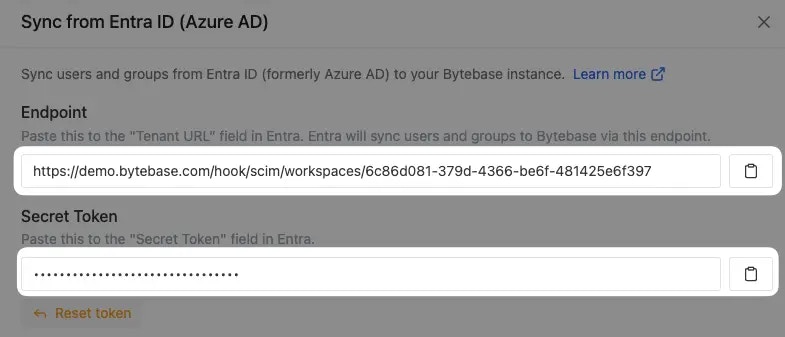
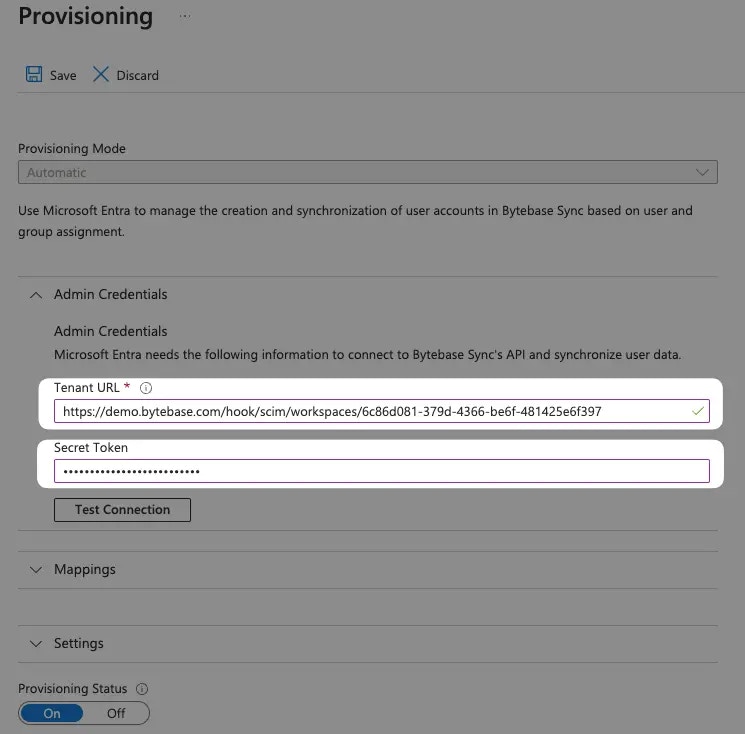
Endpoint and Secret Token above to Tenant URL and Secret Token respectively.
Click Test Connection and save upon success.
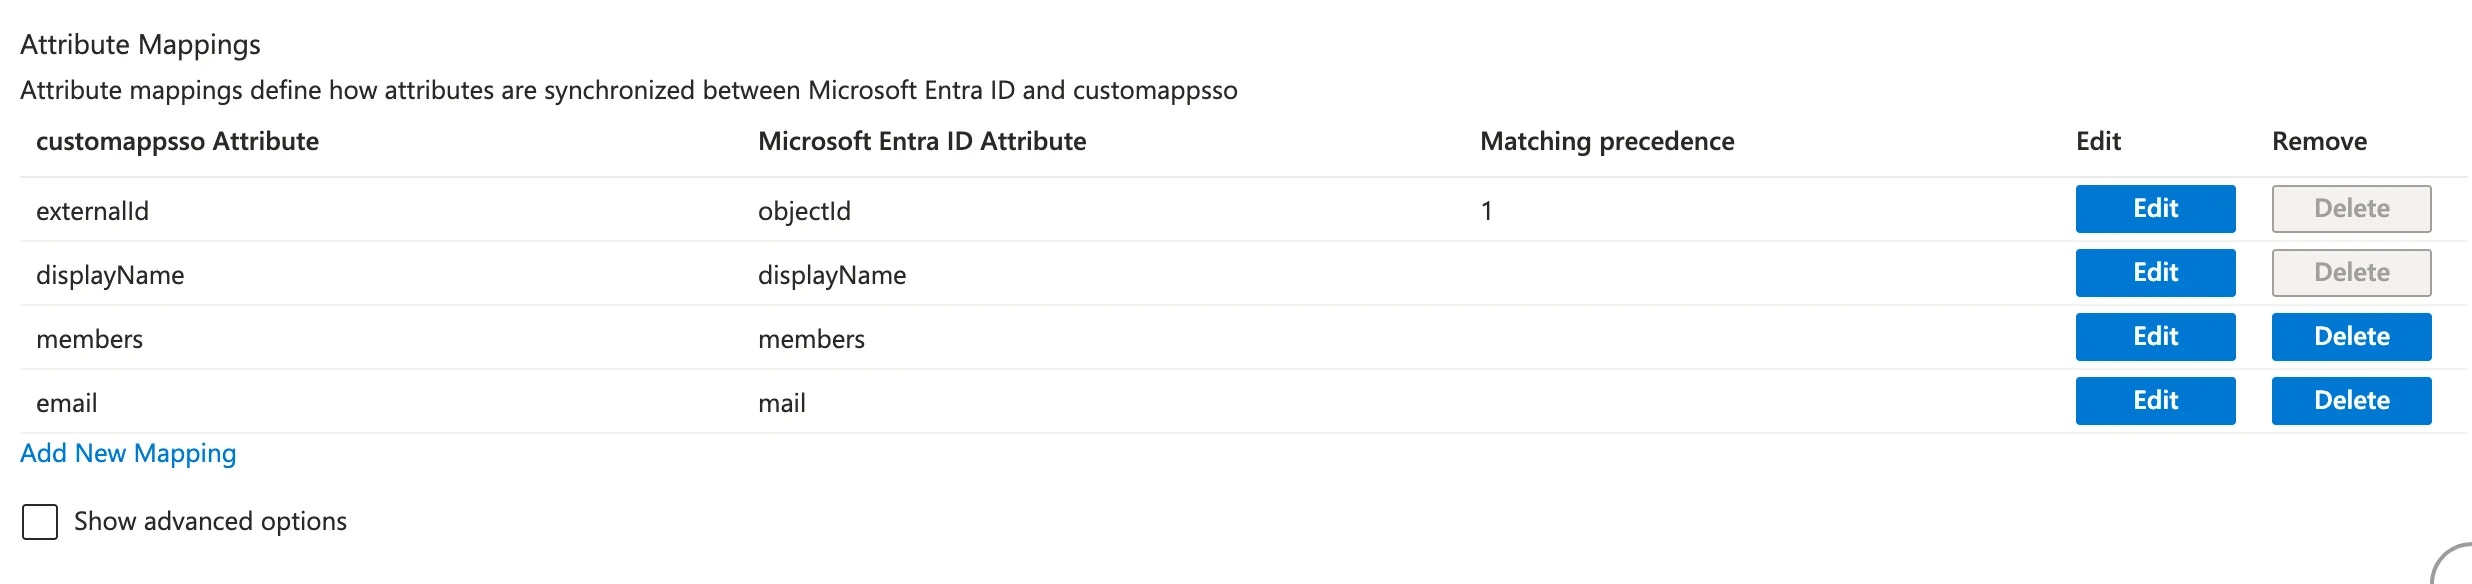
Edit attribute mapping
Continue the provision, click Mappings and click Provision Microsoft Entra ID Groups.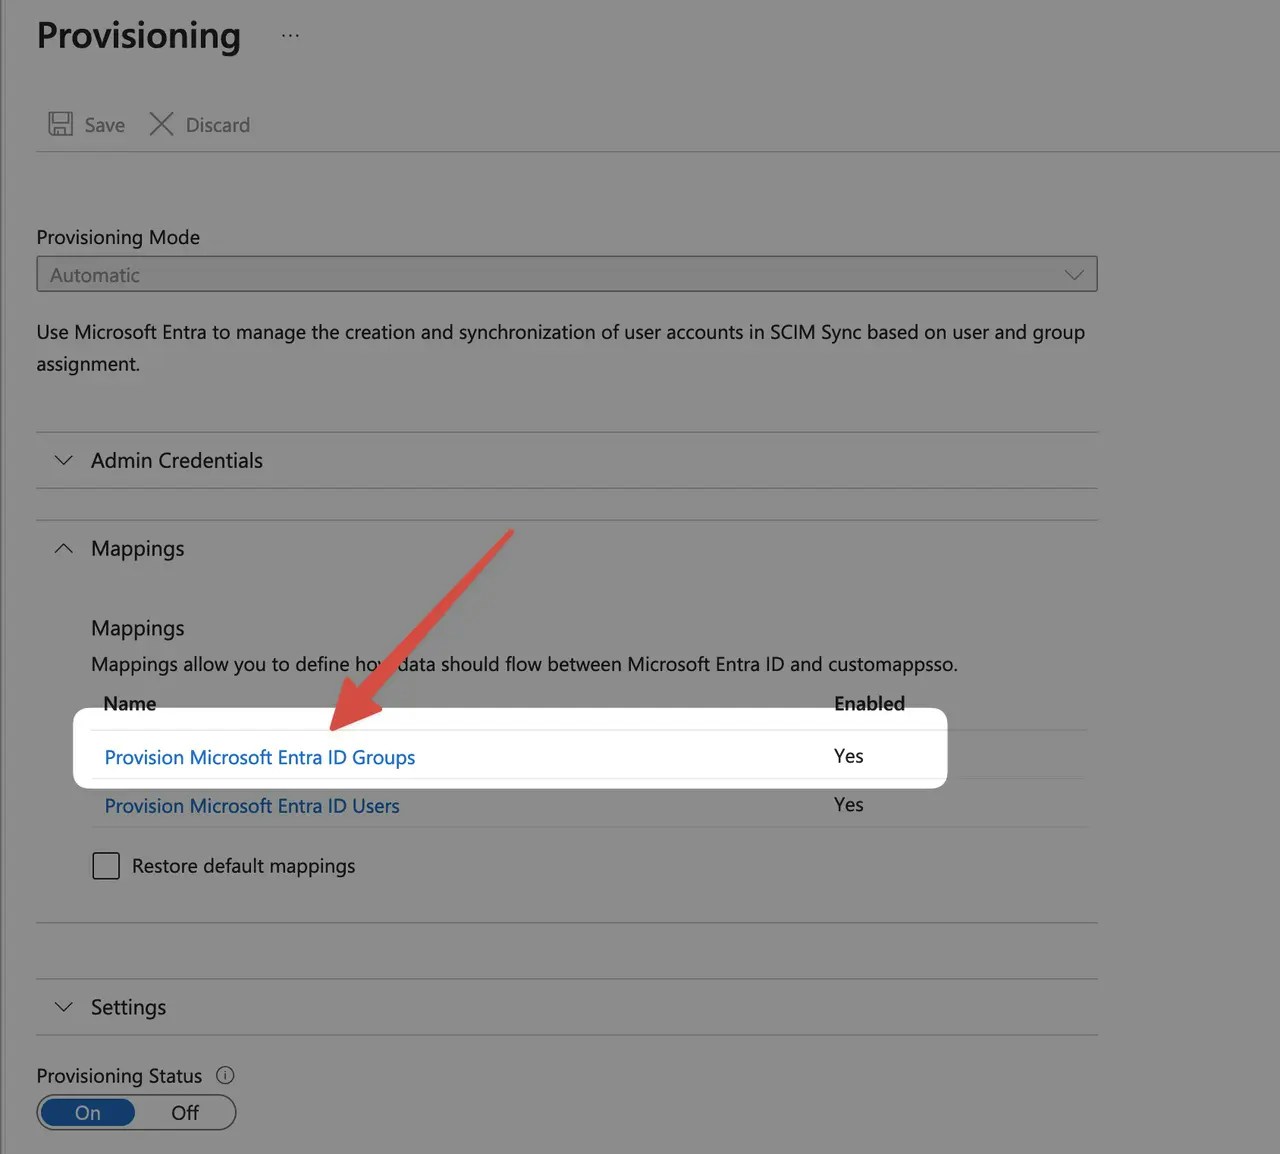
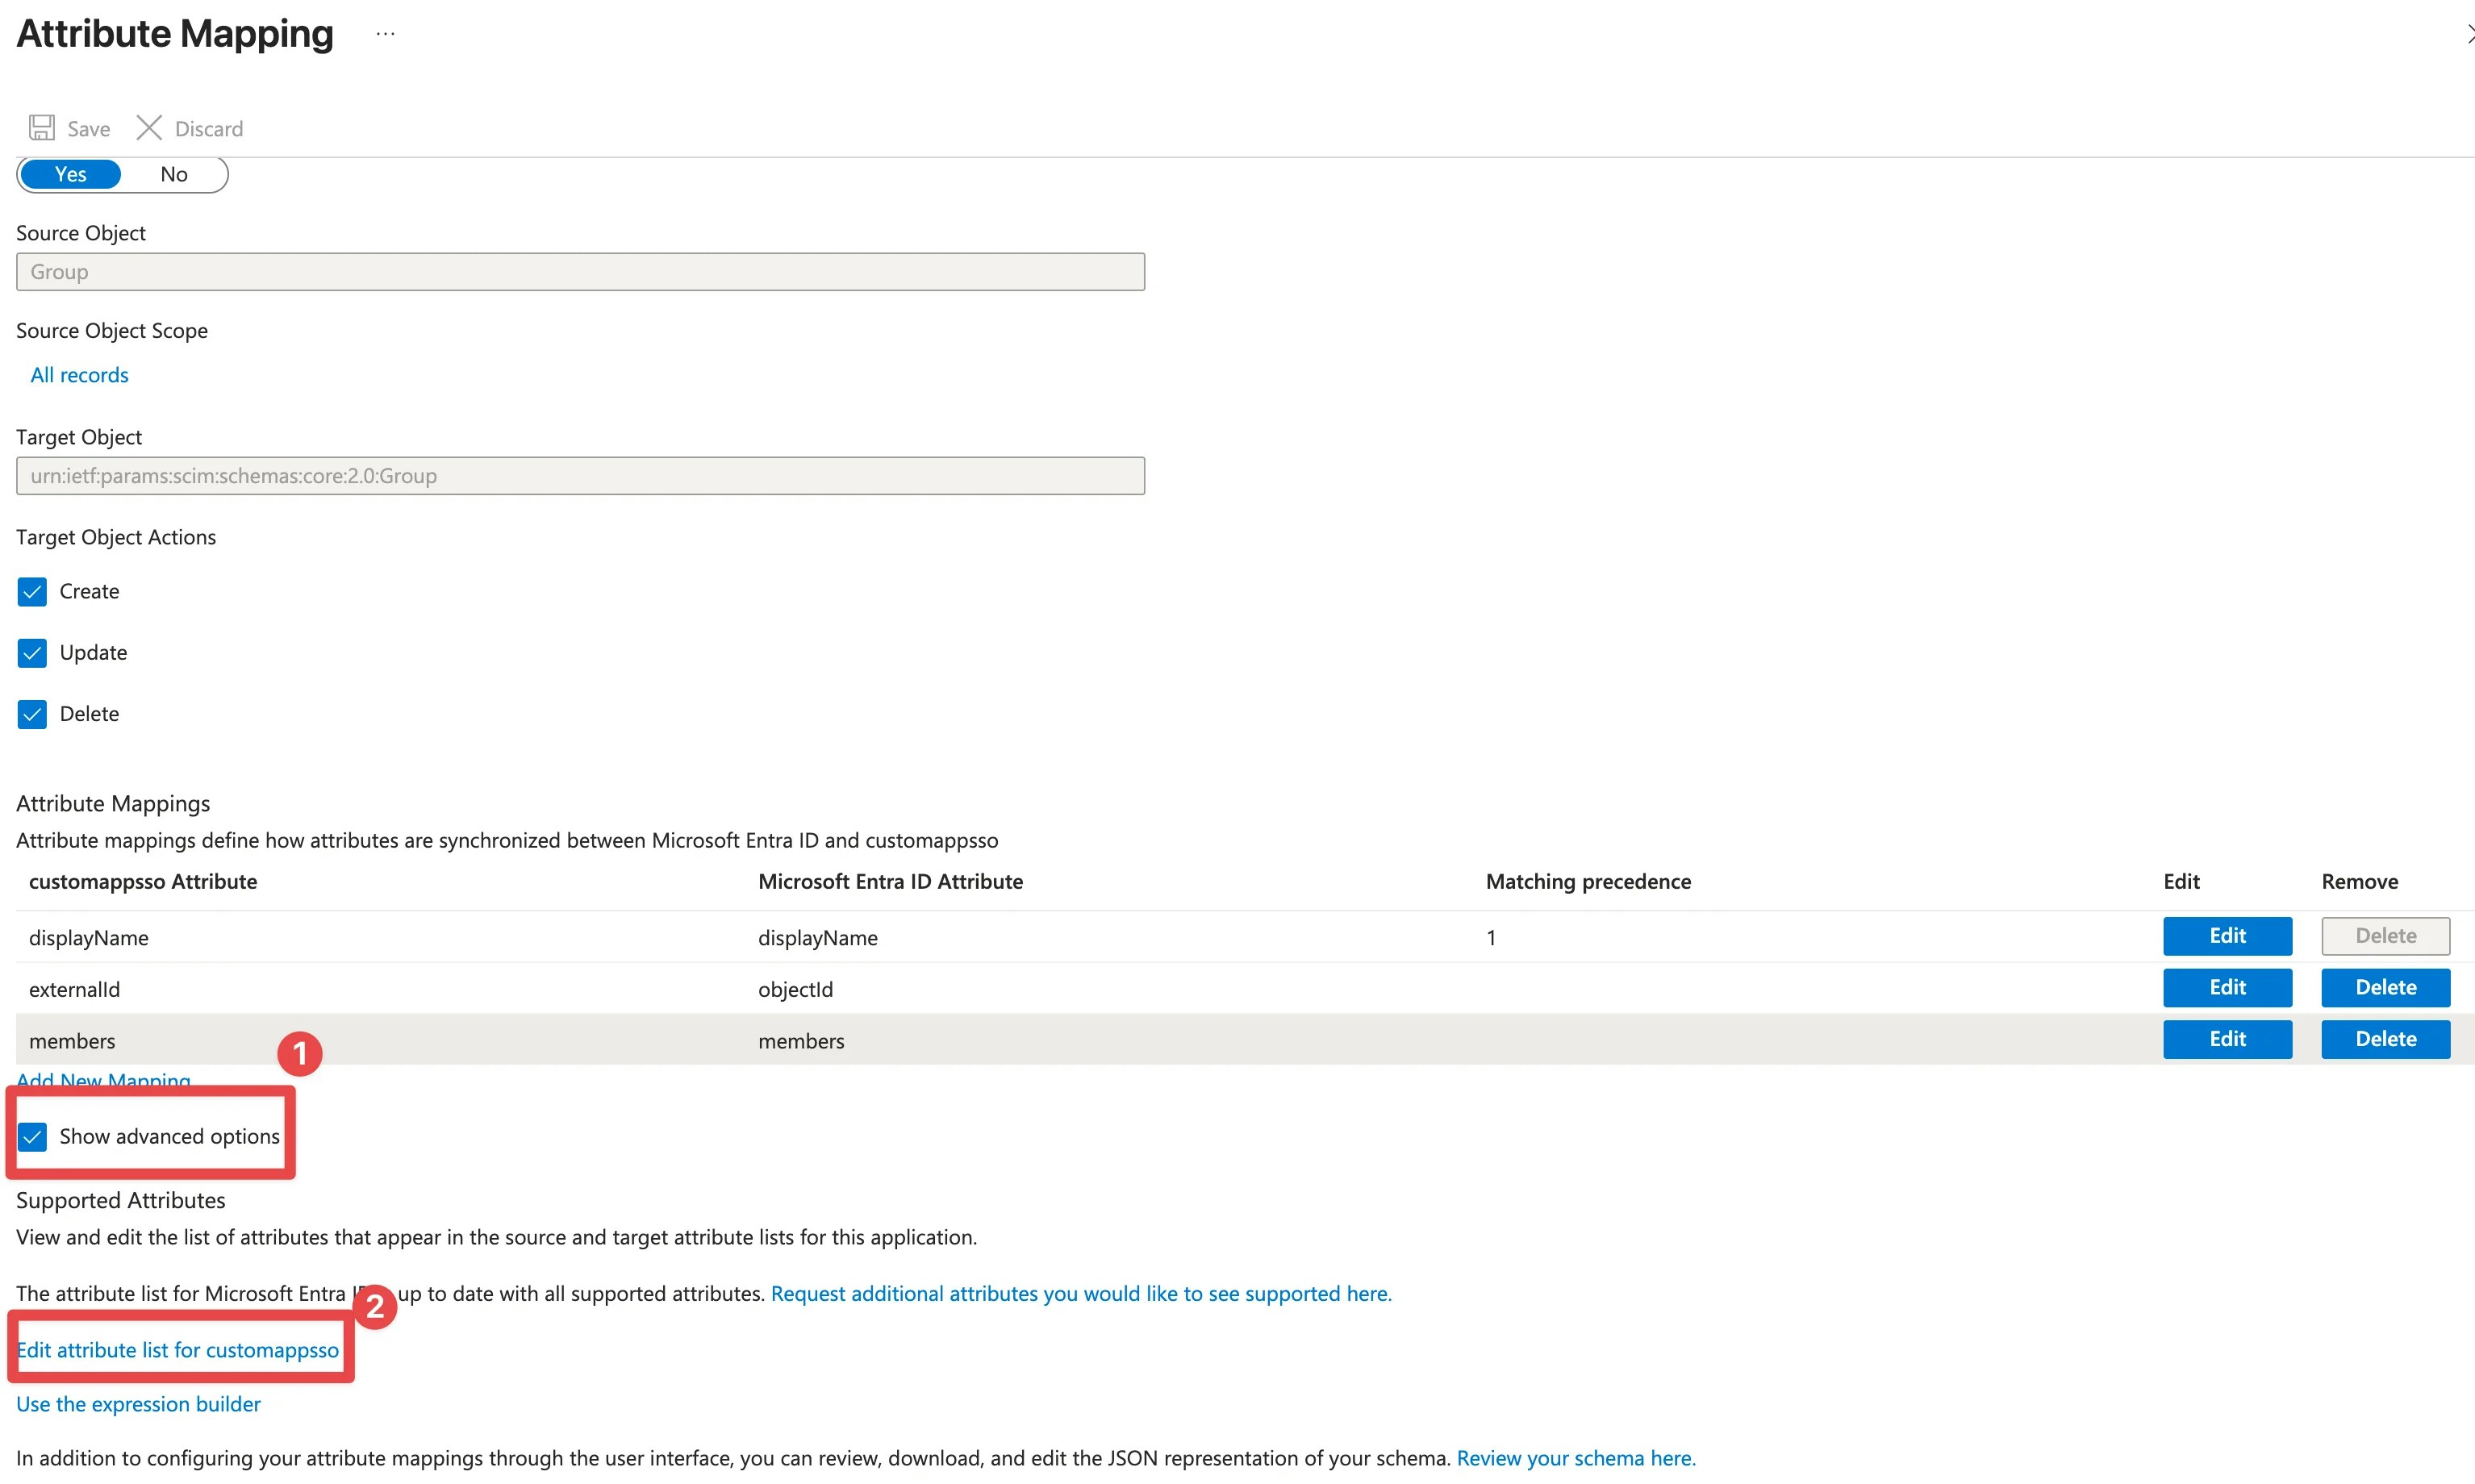
externalId to uniquely identify a group. By default, Entra ID maps objectId to externalId, which is stable and recommended. You can optionally add a custom email attribute to sync the group email to Bytebase.
If you have an existing SCIM configuration that maps
externalId to mail, it will continue to work. However, we recommend switching to the default objectId mapping for stability, since object IDs do not change when a group’s email is updated.Step 1 - Create a new email attribute
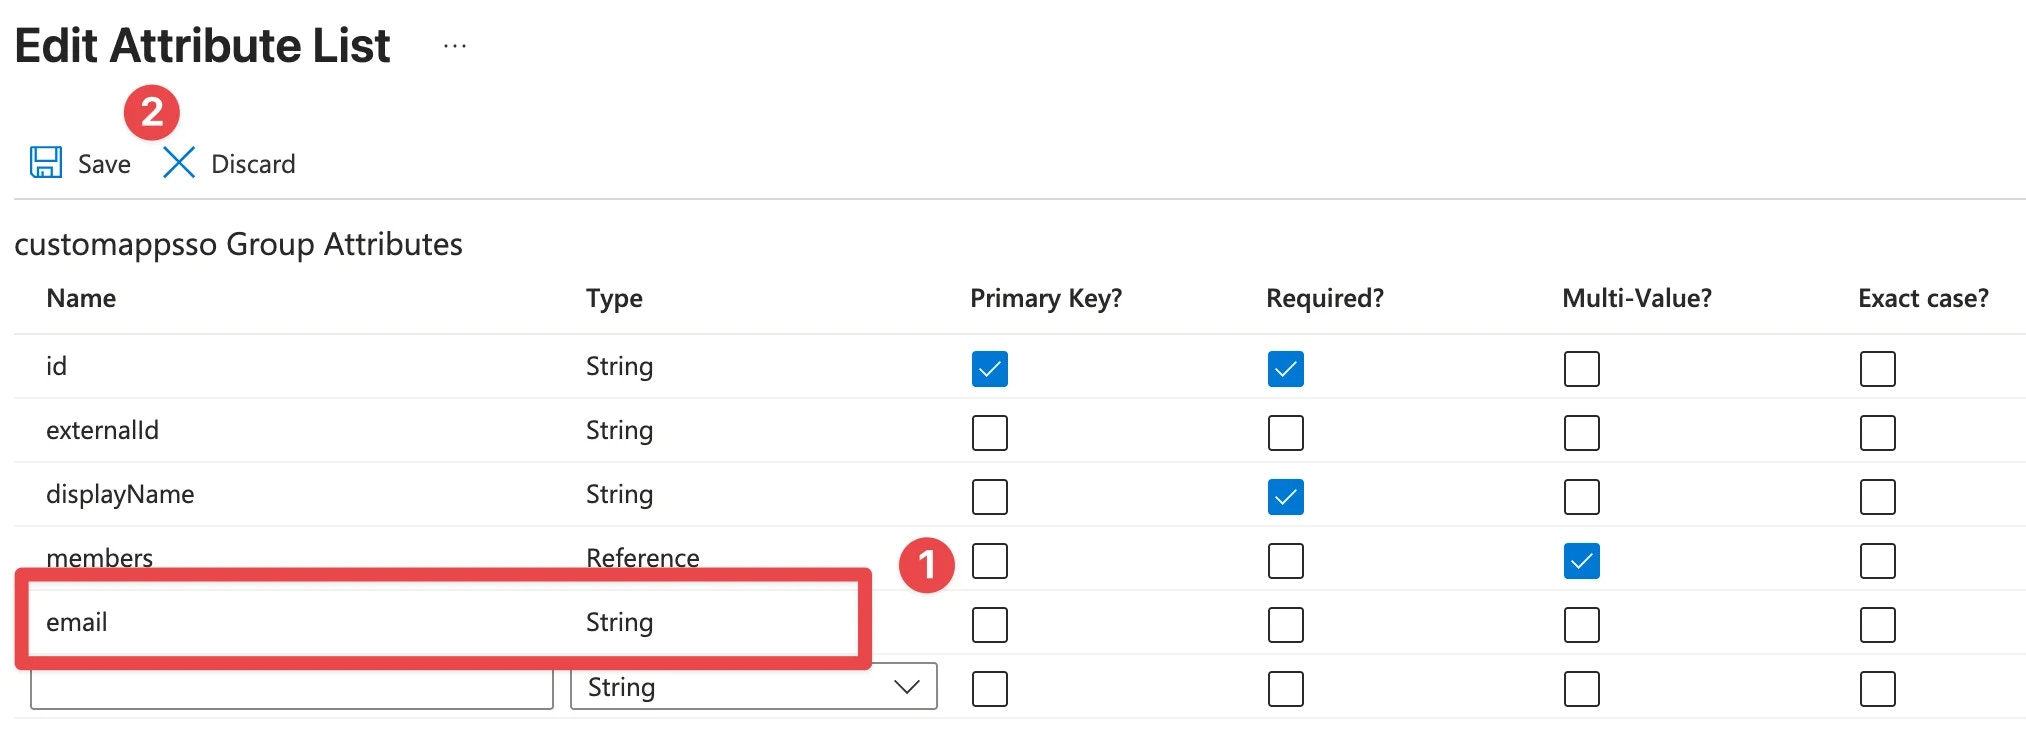
Click Show advanced options, then click Edit attribute list for Bytebase.
email with type String, then click Save.
Step 2 - Edit the mapping
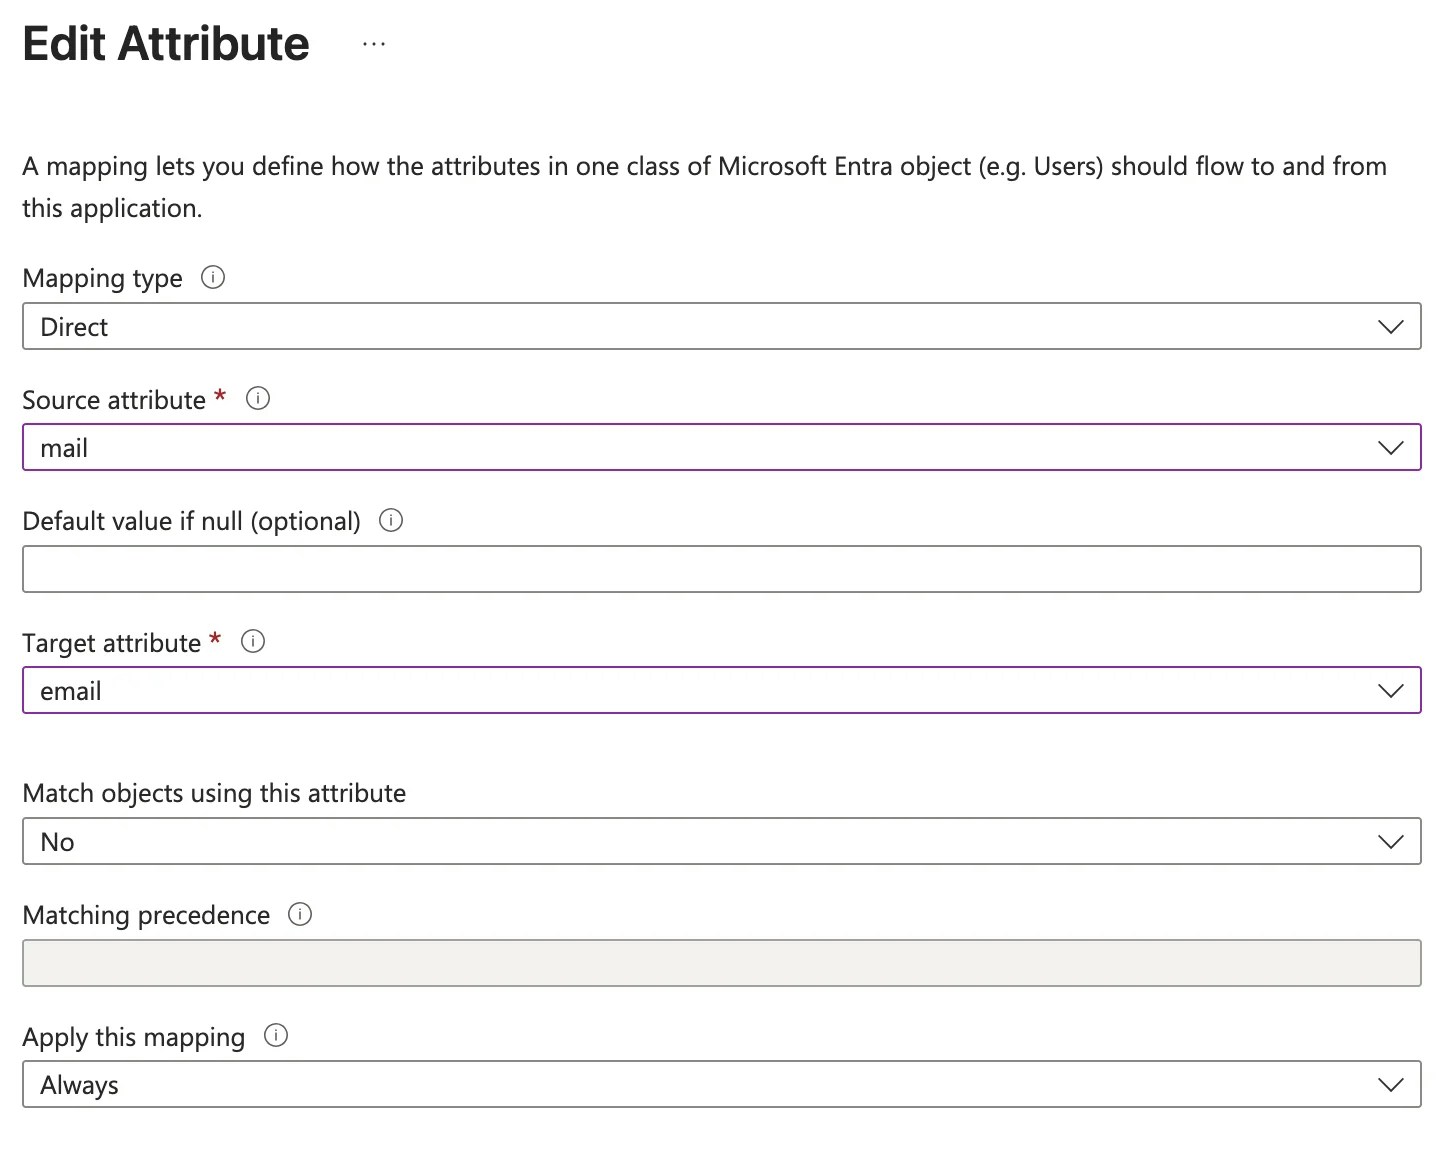
Edit the attribute mapping:- Click Edit for the
displayNamerow. Change Match objects using this attribute toNo. - Click Edit for the
externalIdrow. Change Match objects using this attribute toYesand set Matching precedence to1. - Add a new mapping row: set email to map to mail.
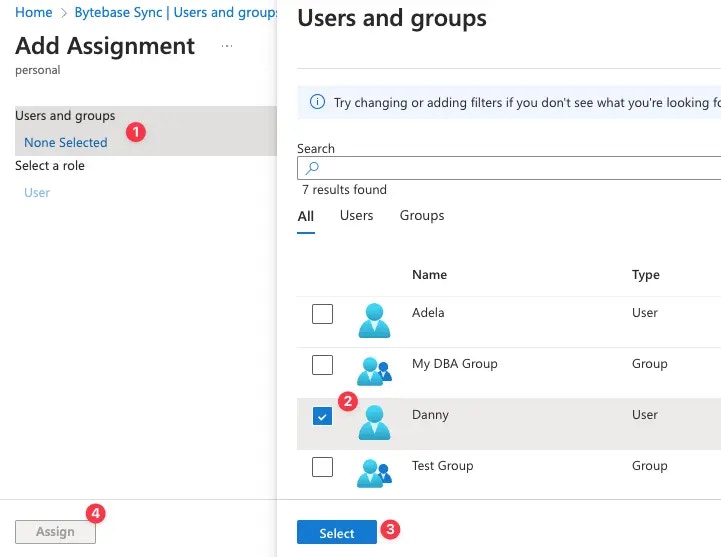
Assign users and groups
In order for your users and groups to be synced to Bytebase, you will need to assign them to your Entra SCIM application. Select Users and groups and click Add user/group.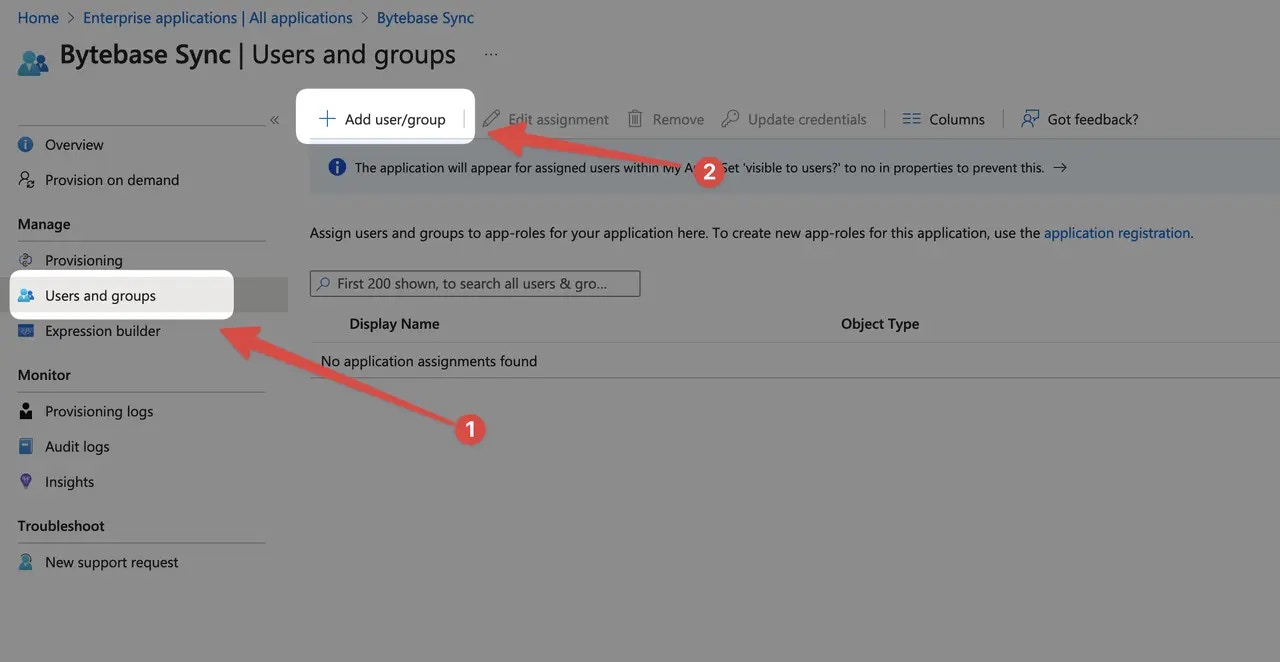
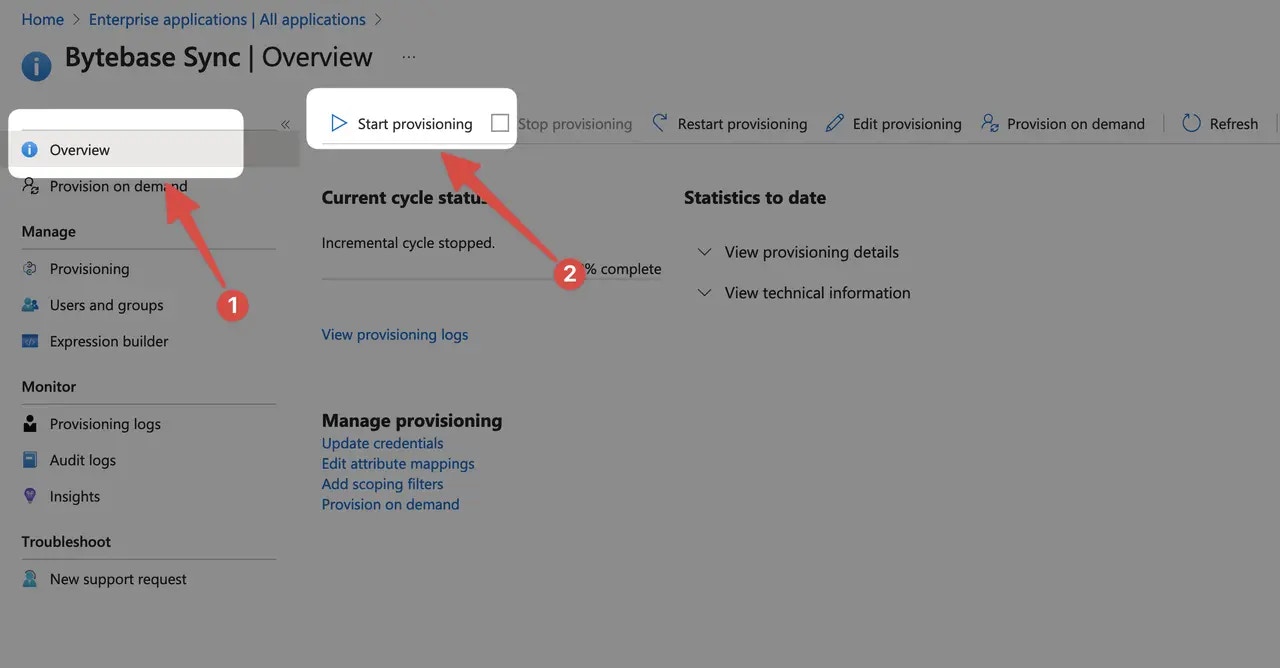
Turn on provisioning
On the application overview page, click Start provisioning. To test syncing, we recommend starting with Provision on demand for a subset of users or groups.