Get SCIM credentials from Bytebase
- Log in to Bytebase as a Workspace Admin.
- Navigate to Settings -> General -> Network.
- Ensure External URL is configured (e.g.,
https://bytebase.example.com). - Navigate to Settings -> Members.
- Click the Directory Sync button (or gear icon).
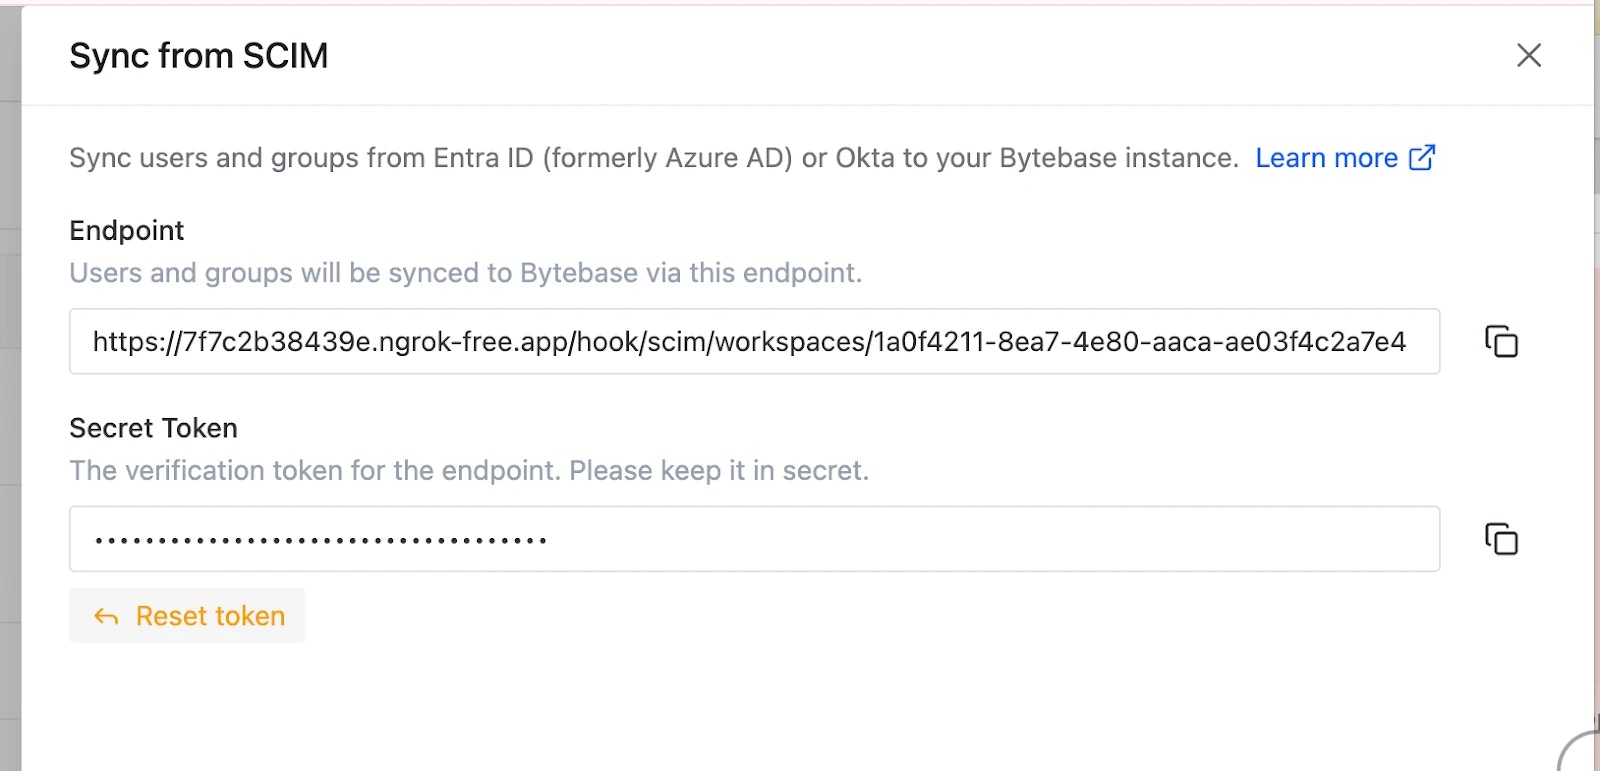
- In the Directory Sync drawer, you’ll find:
- SCIM Endpoint URL:
https://<your-bytebase-url>/hook/scim/workspaces/<workspace-id> - Secret Token: Bearer token for authentication
- SCIM Endpoint URL:
- Copy both values - you’ll need them in the next steps.
Create SCIM application in Okta
- Log in to the Okta Admin Console (
https://your-domain-admin.okta.com). - In the left navigation, go to Applications -> Applications.
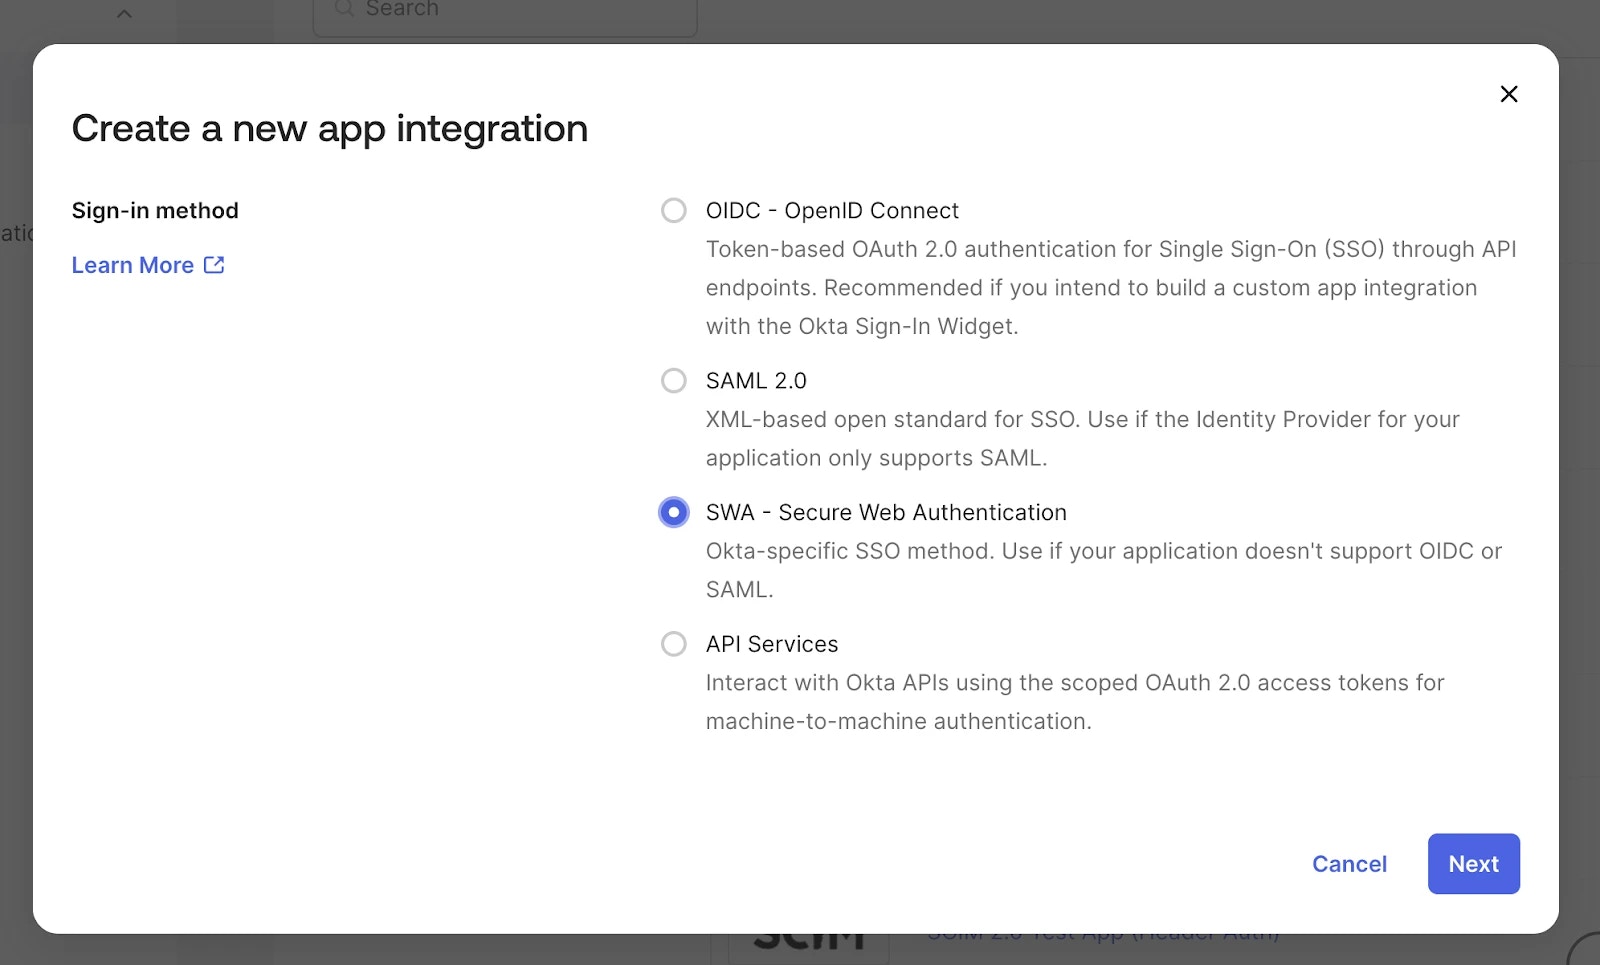
- Click Create App Integration.
- Select SWA - Secure Web Authentication and click Next.
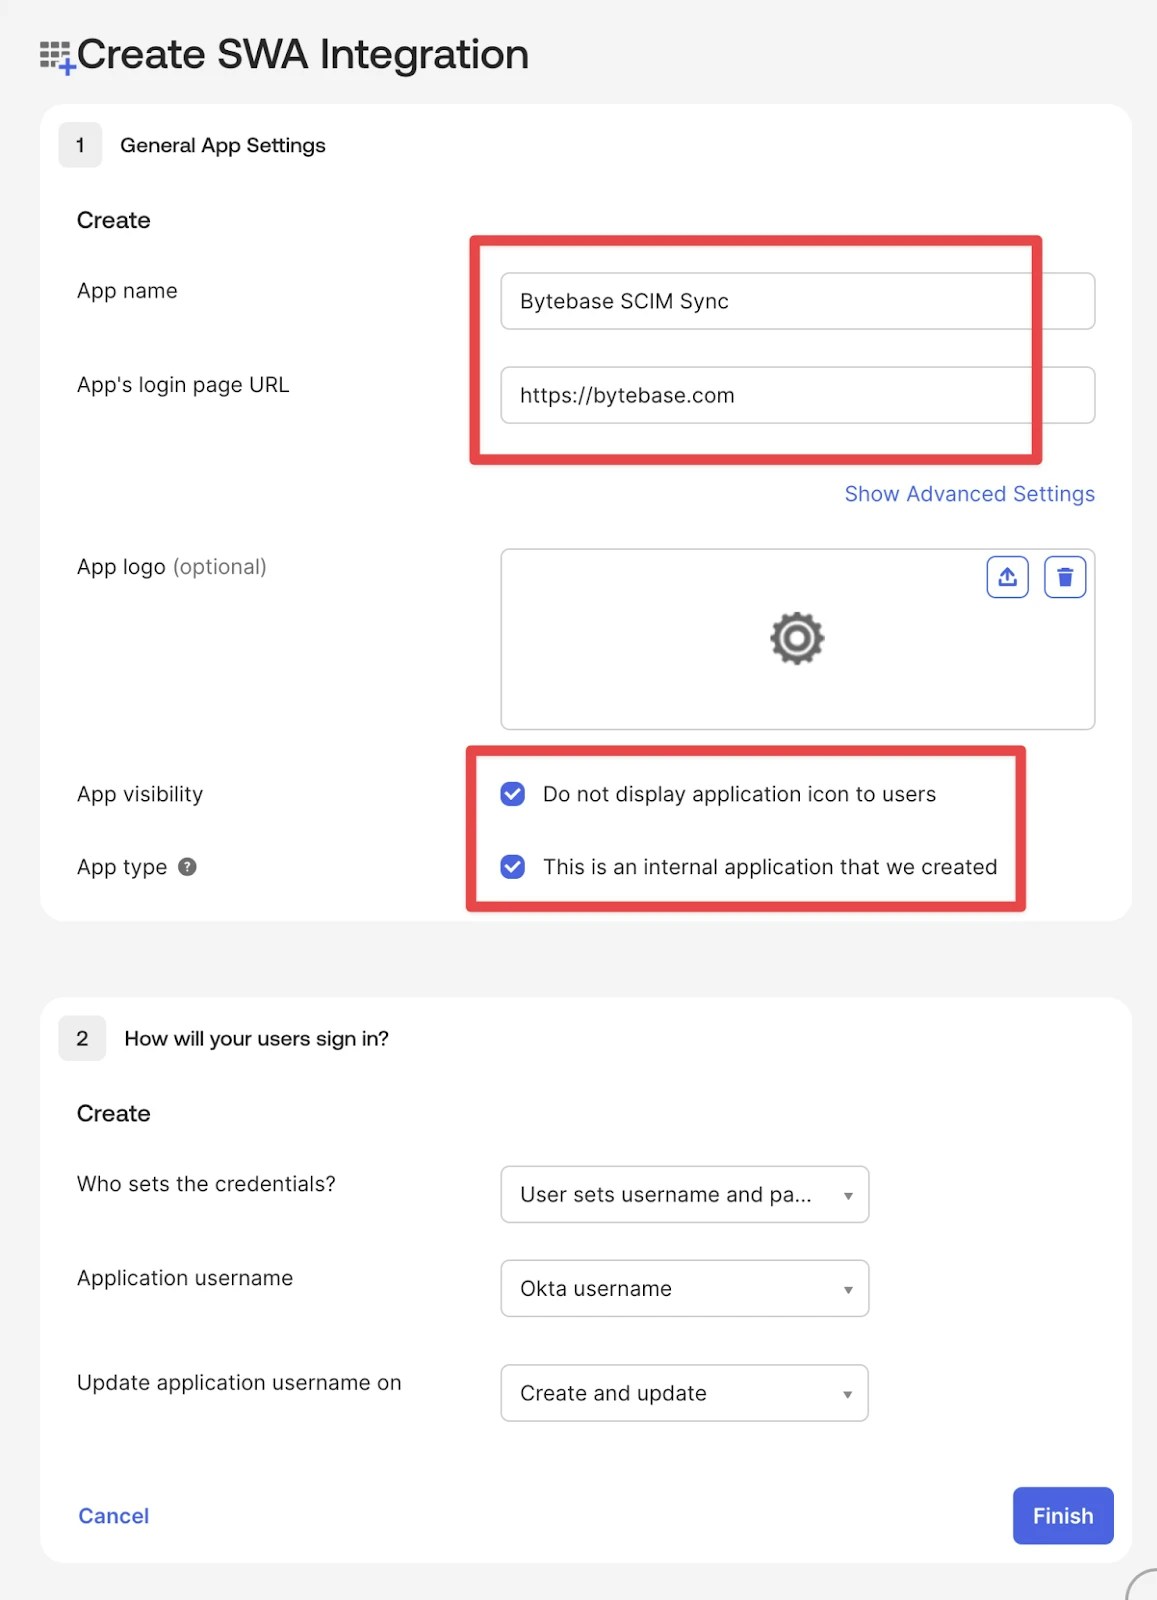
- Configure the application:
- App name:
Bytebase SCIM - App login page URL: Your Bytebase external URL
- You can also check “Do not display application icon to users” and “This is an internal application that we created” since it’s only used for data sync.
- App name:
Configure API integration
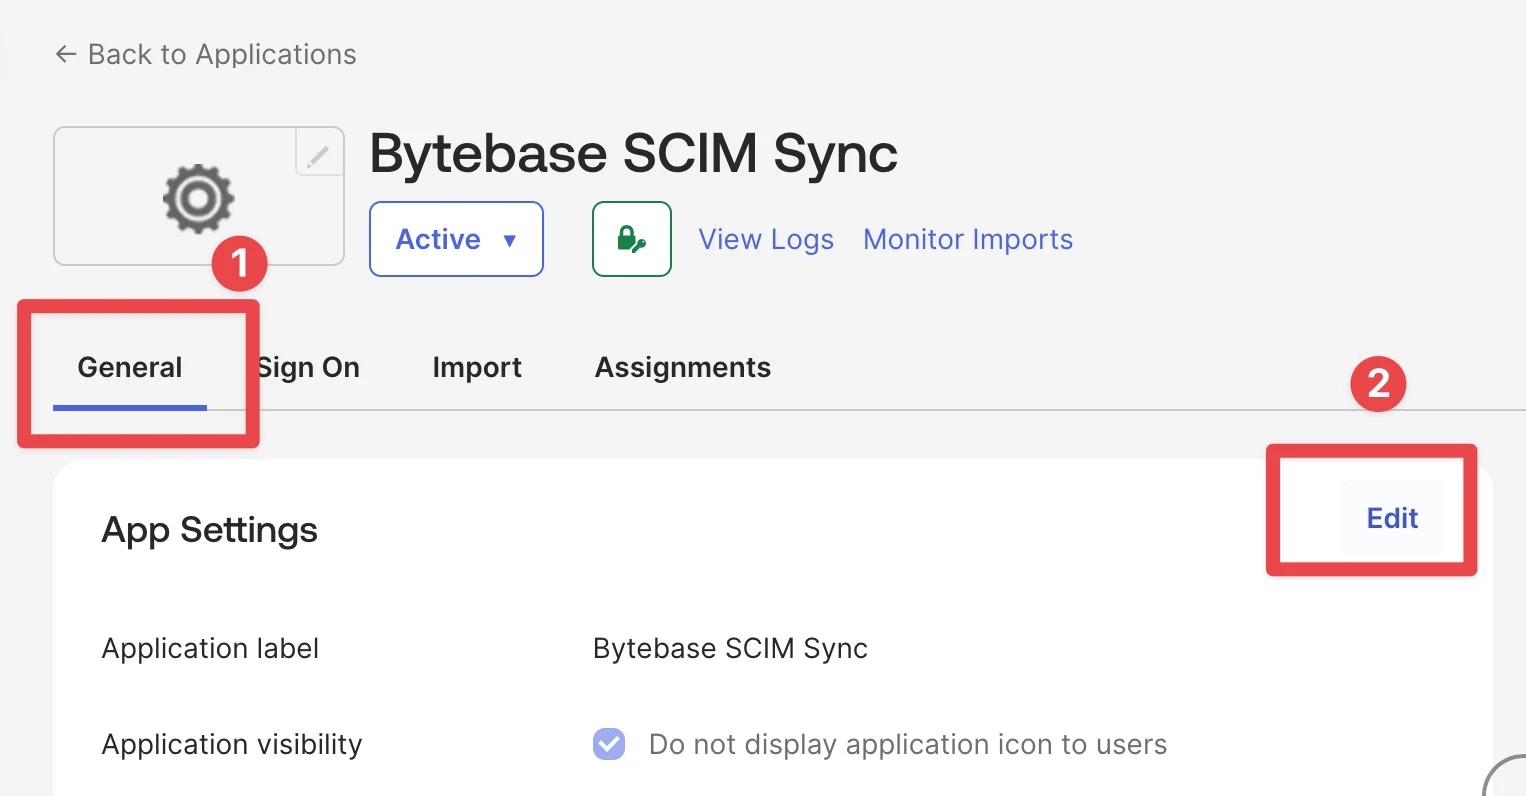
- Go to the General tab, in the App Settings section, click Edit.
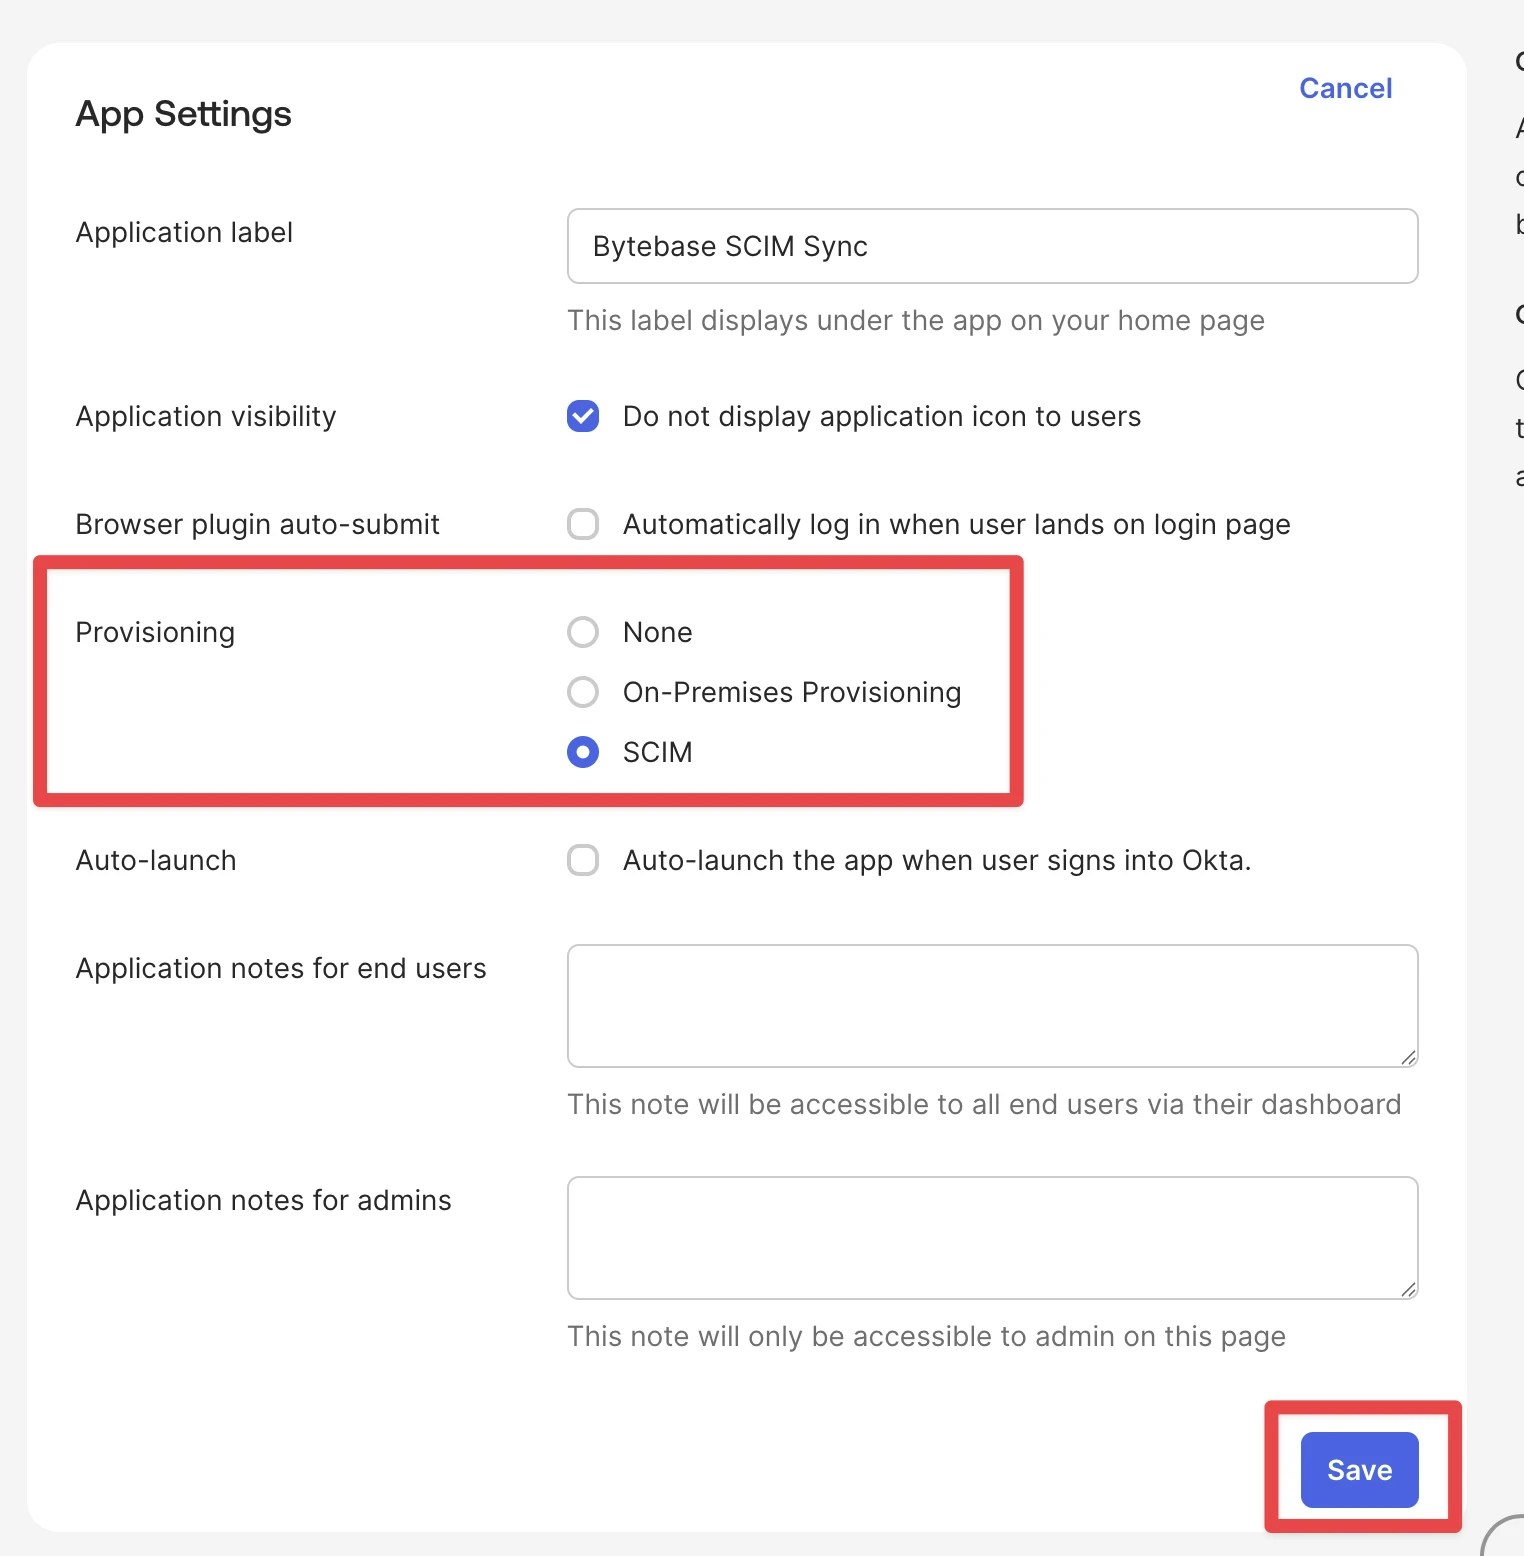
- Find the Provisioning field and select SCIM, then save the setting. After saving, the Provisioning tab will appear in the application.
- Go to the Provisioning tab, edit the integration:
- SCIM connector base URL: The SCIM Endpoint URL from Bytebase (e.g.,
https://bytebase.example.com/hook/scim/workspaces/abc123) - Unique identifier field for users:
userName - Authentication Mode: HTTP Header
- Authorization: The Secret Token from Bytebase
- SCIM connector base URL: The SCIM Endpoint URL from Bytebase (e.g.,
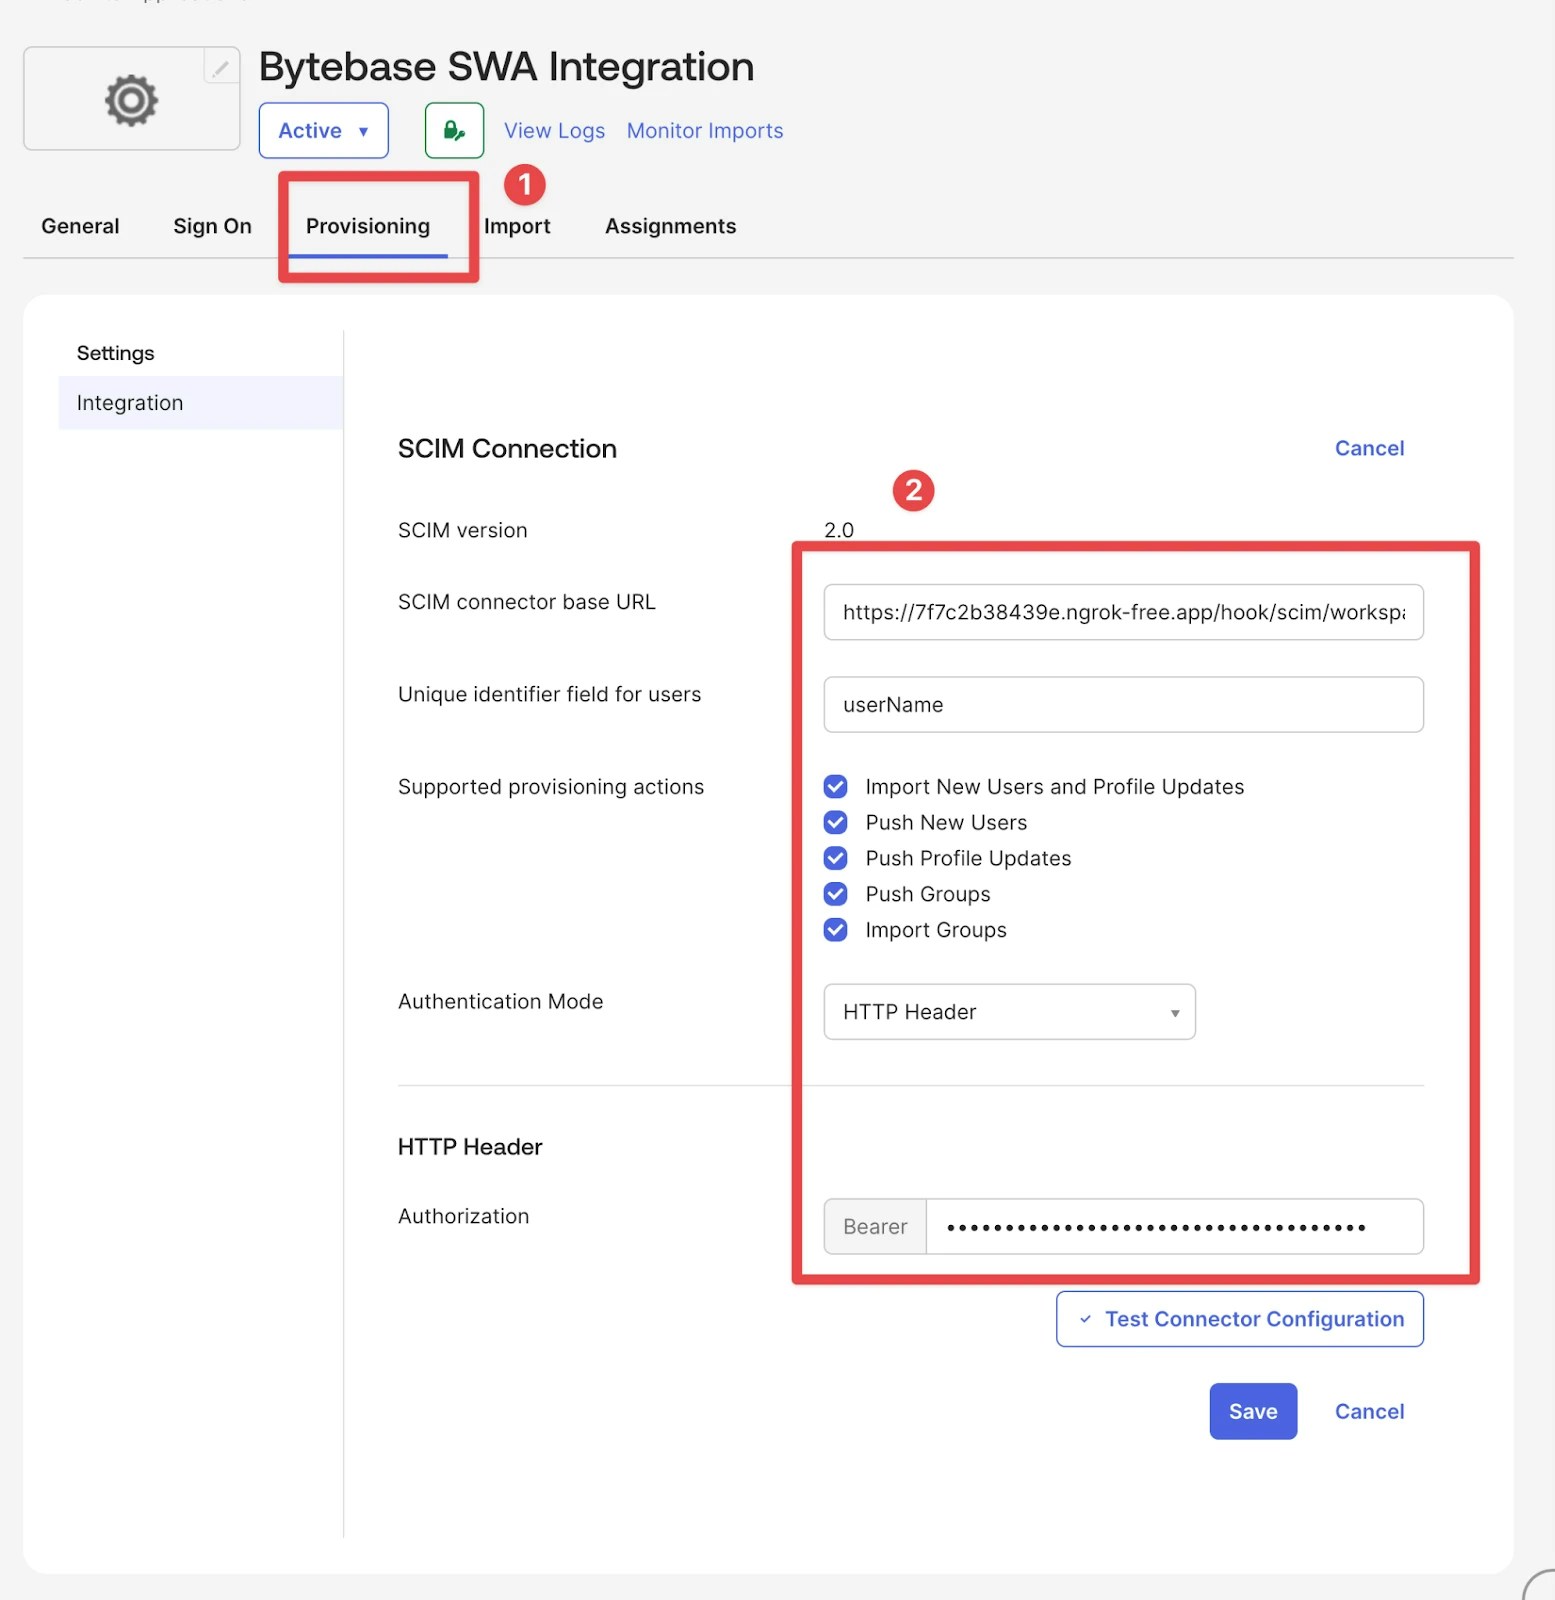
- Click Test Connector Configuration and save upon success.
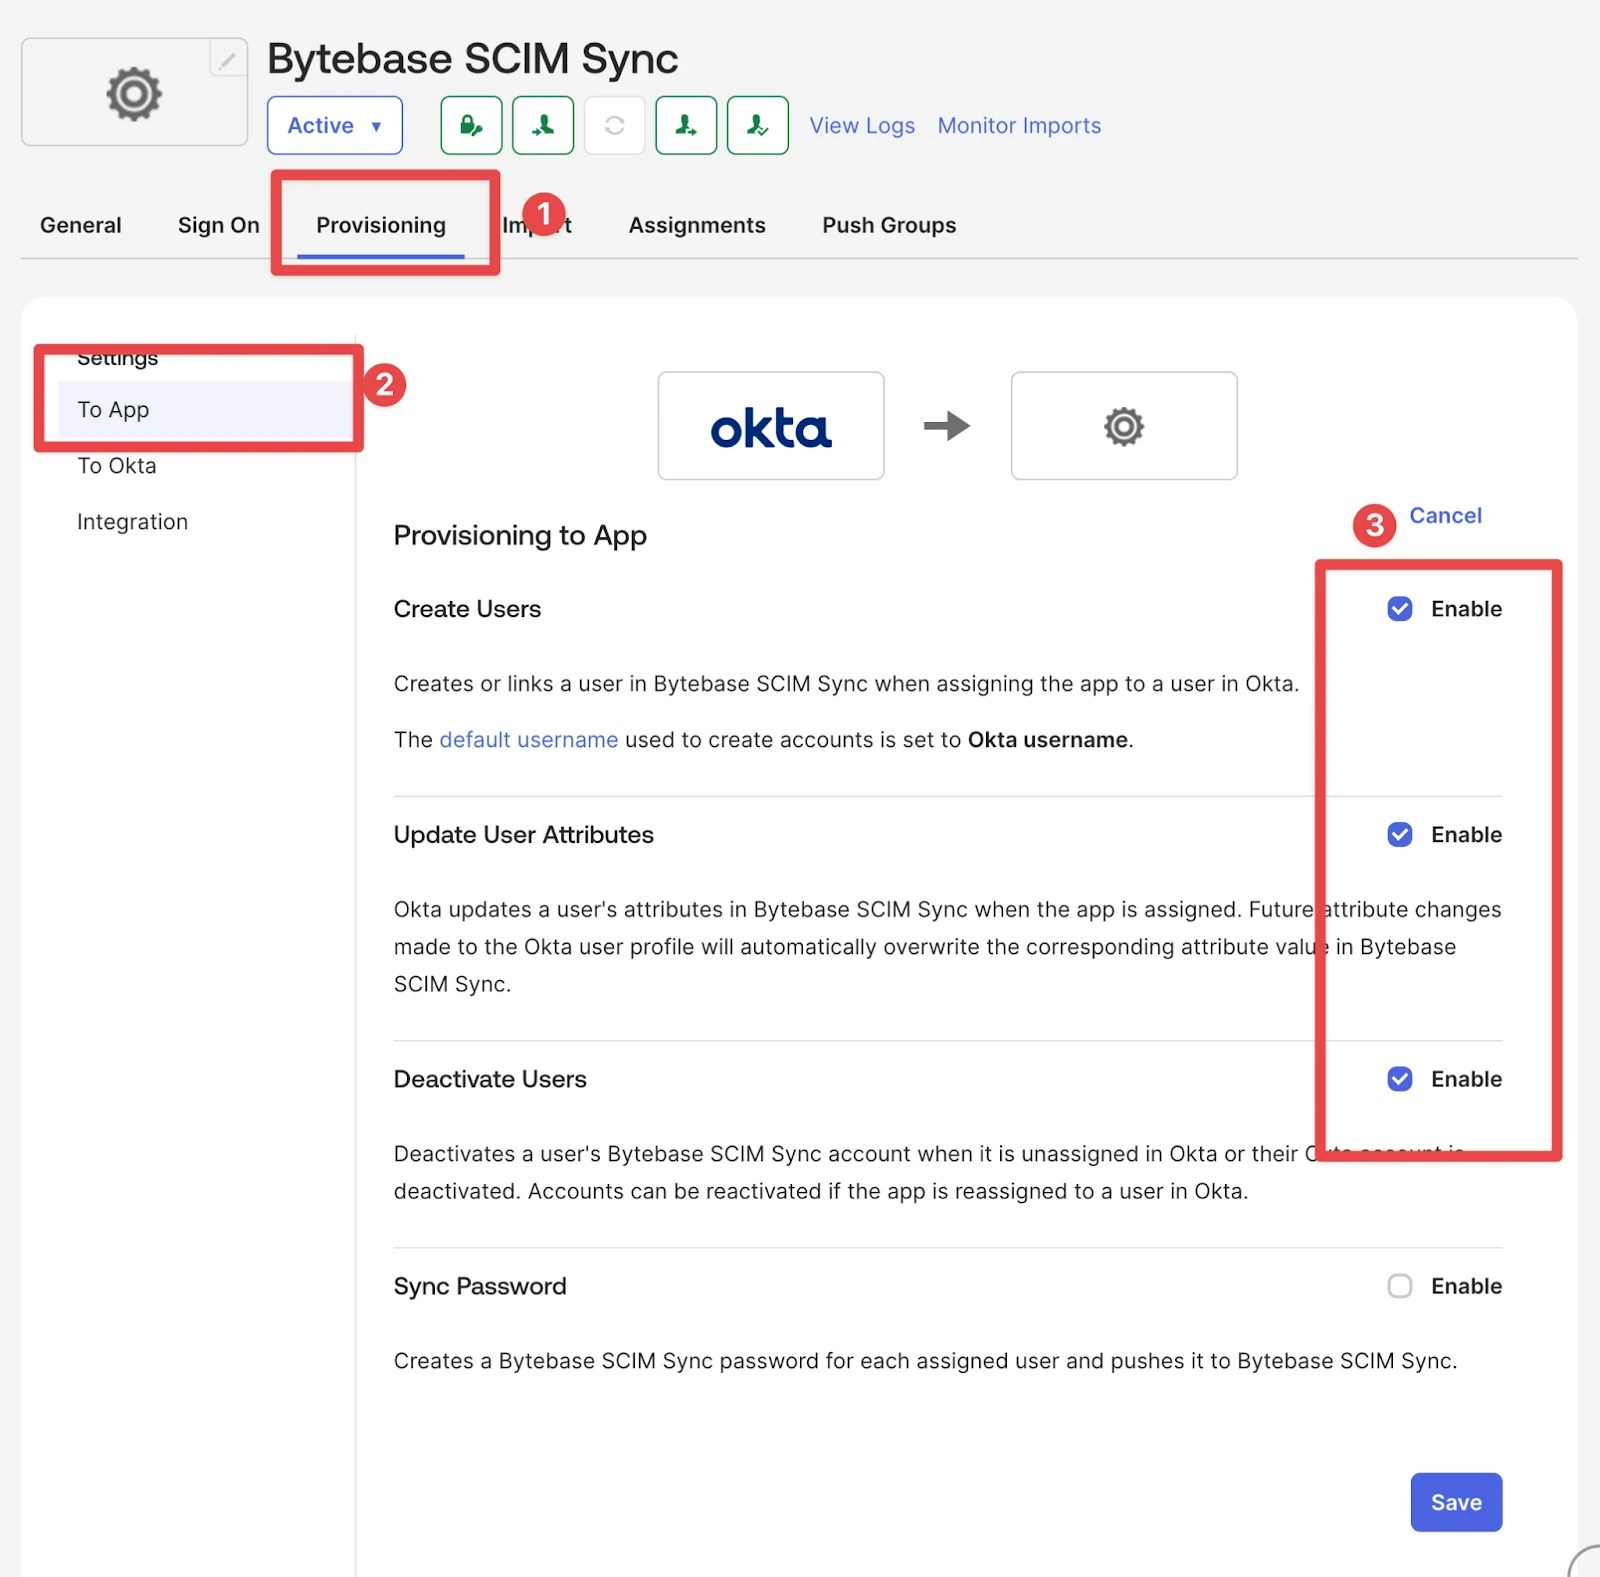
Enable provisioning features
- Still on the Provisioning tab, click To App in the left sidebar.
- Click Edit in the Provisioning to App section.
- Enable the following features:
- Create Users
- Update User Attributes
- Deactivate Users
- Click Save.
Configure user attribute mappings
No changes are needed for the default attribute mapping configuration.Assign users to the application
Assign individual users
- Go to the Assignments tab.
- Click Assign -> Assign to People.
- Find and select the users you want to provision.
- Click Assign next to each user.
- Review the user’s attribute values (you can customize per user if needed).
- Click Save and Go Back.
- Click Done when finished.
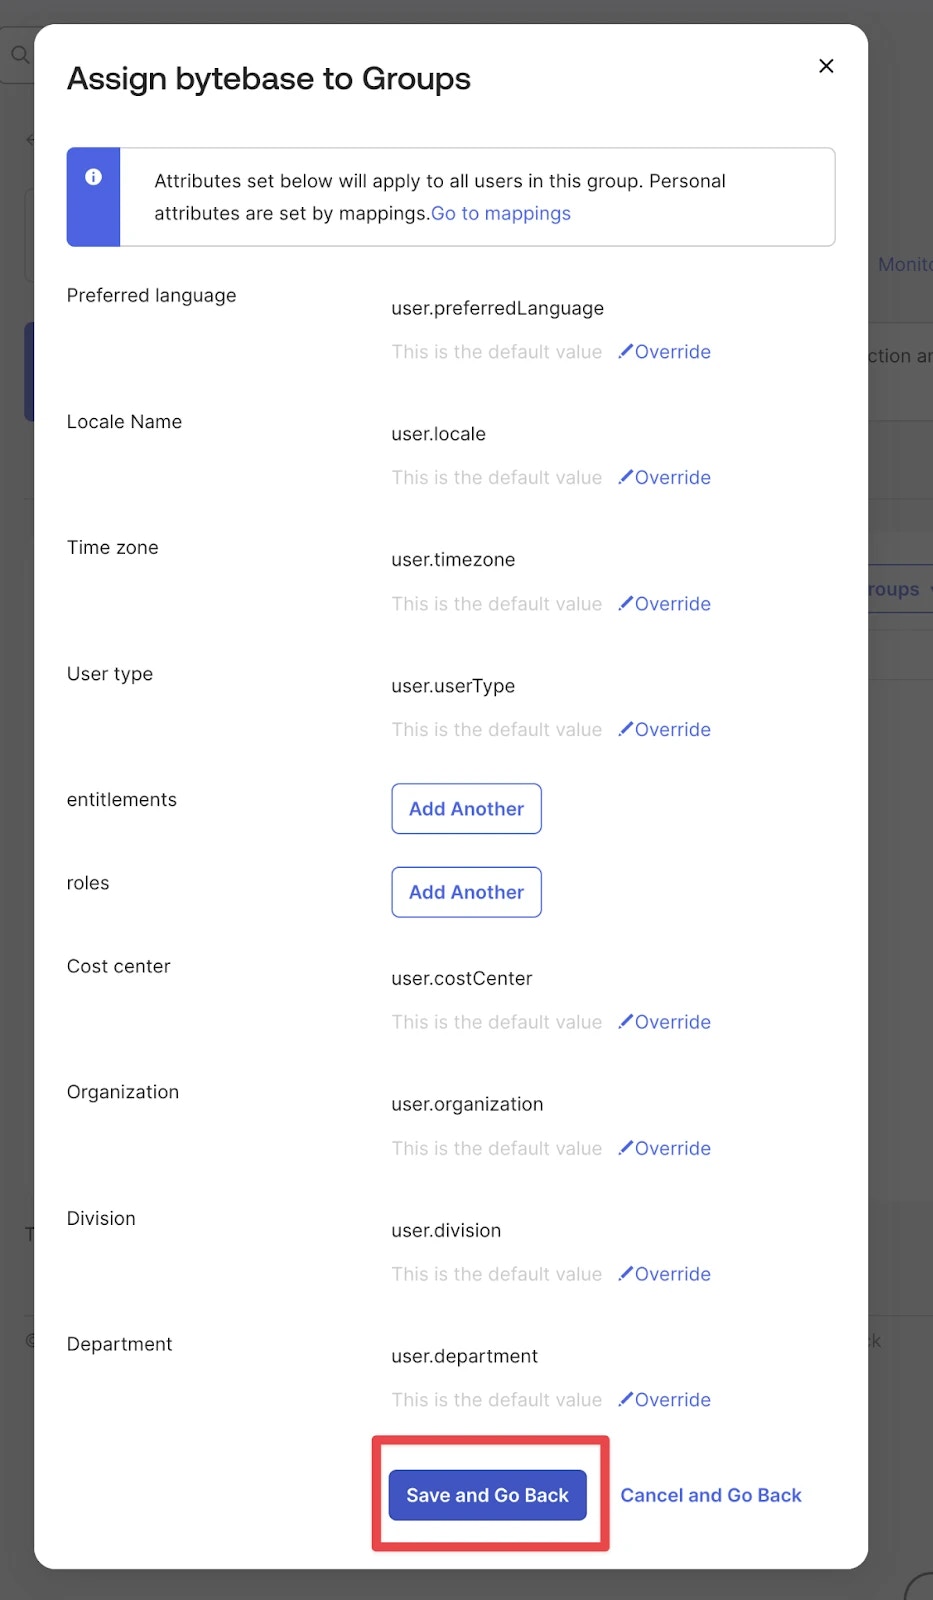
Assign groups (preferred)
- Go to the Assignments tab.
- Click Assign -> Assign to Groups.
- Select the groups whose members should be provisioned.
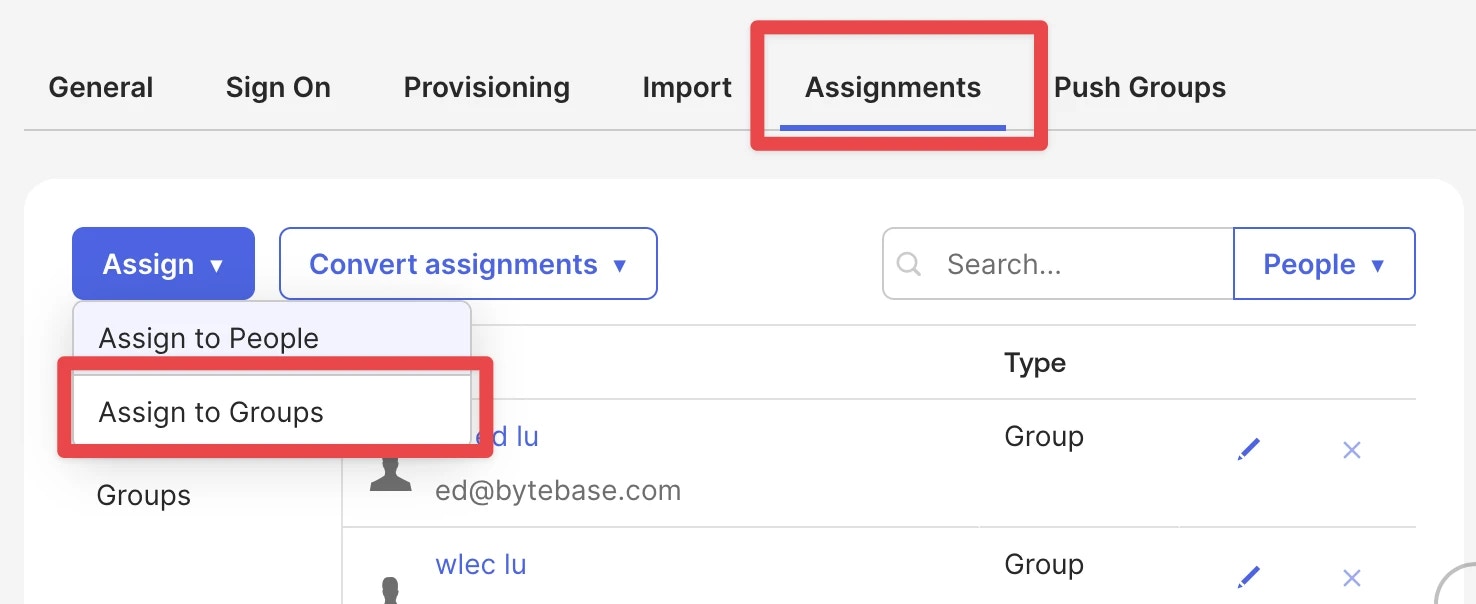
- Click Assign, review the attribute values, and click Save and Go Back.
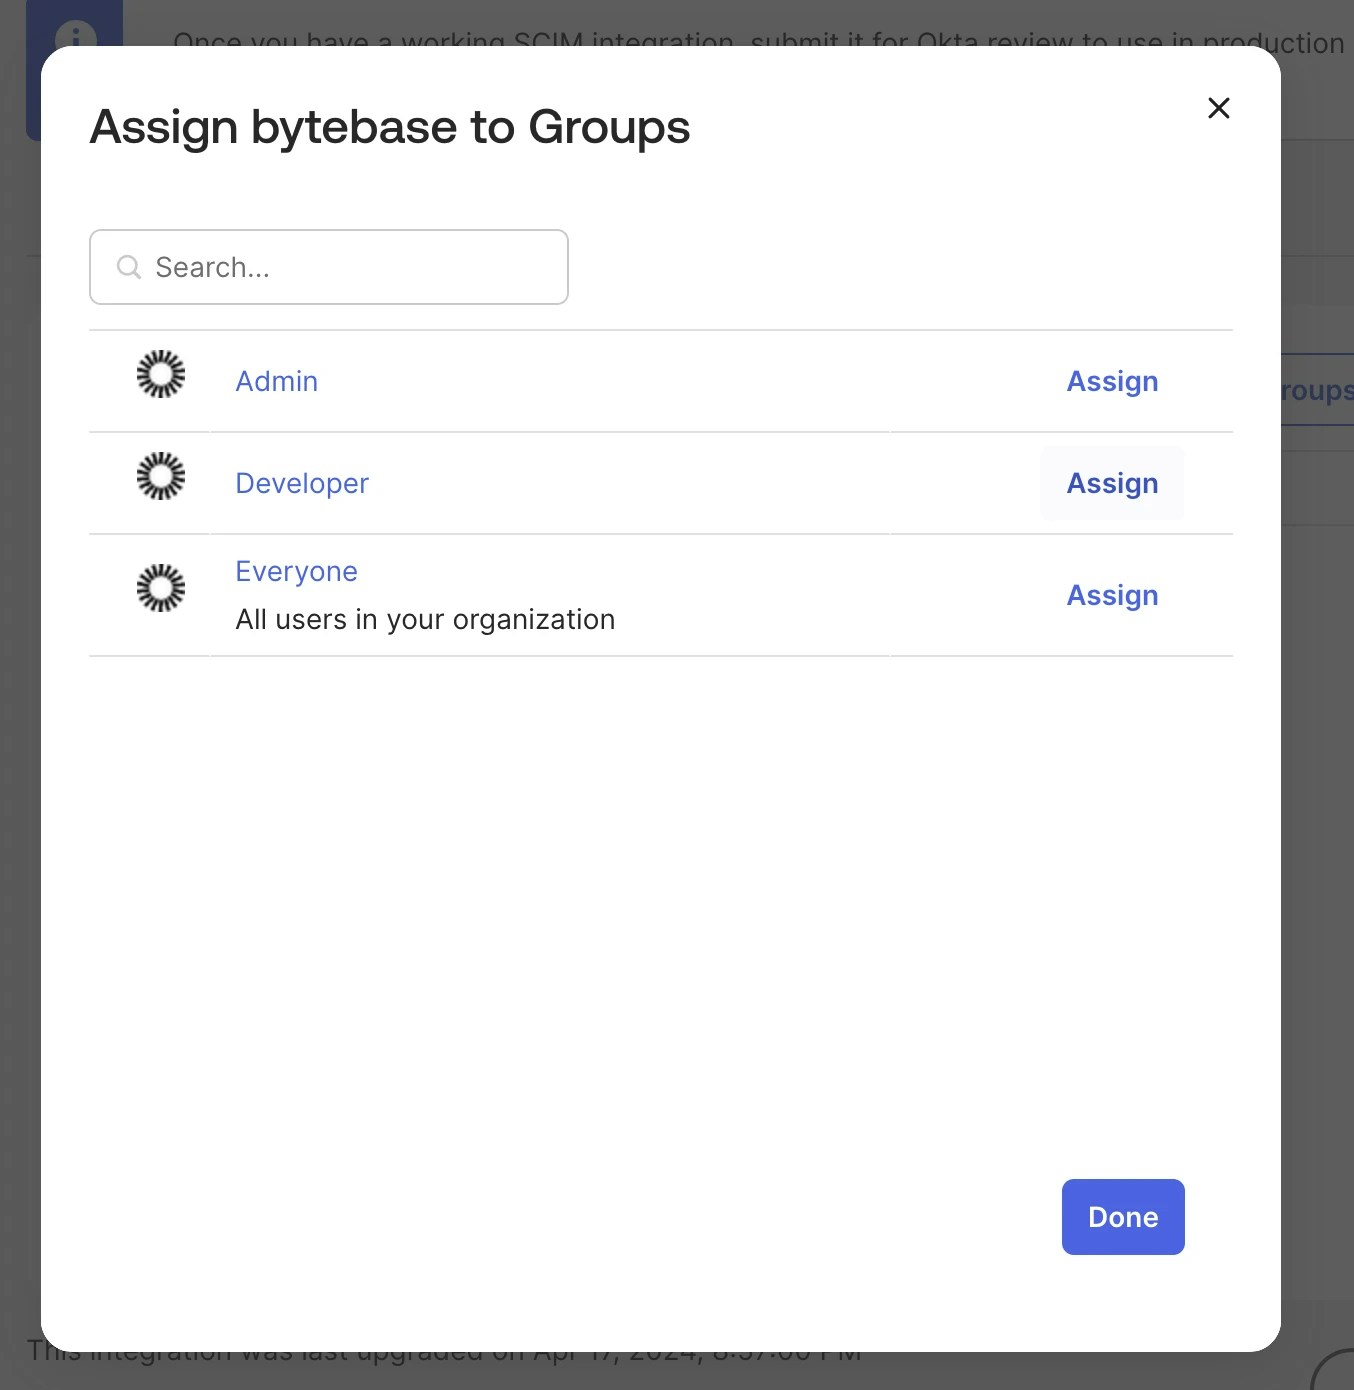
- Click Done when finished.
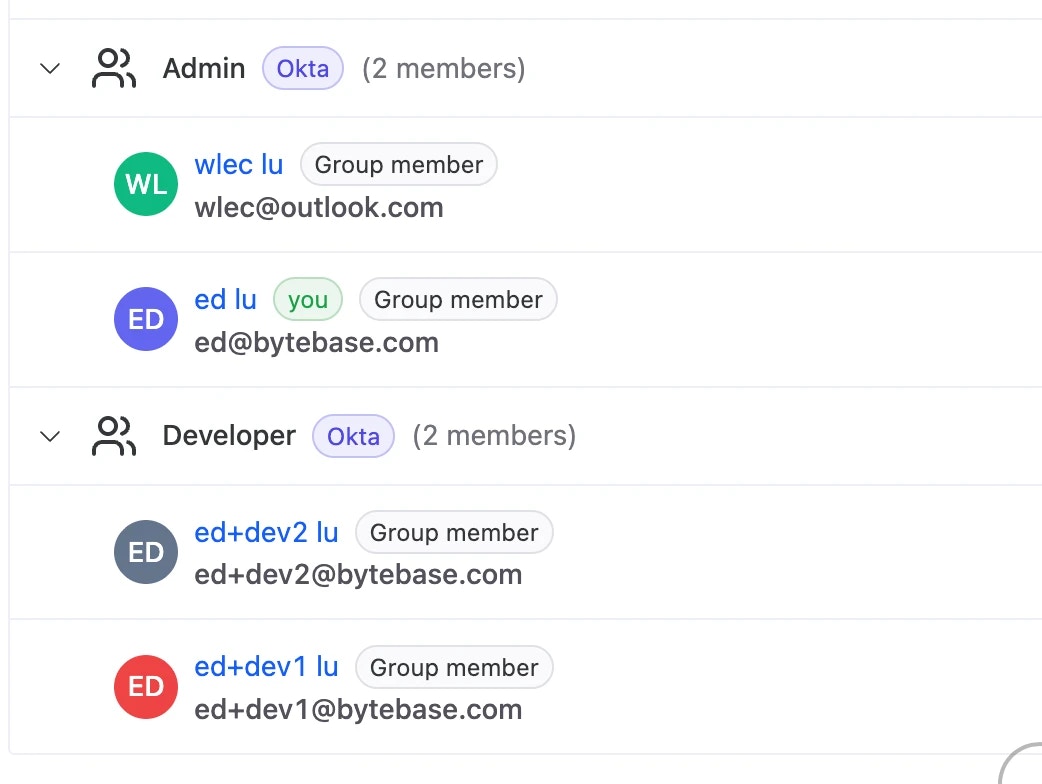
Assigning a group provisions all members as users, but does not create the group in Bytebase. To sync groups, see Configure group push below.
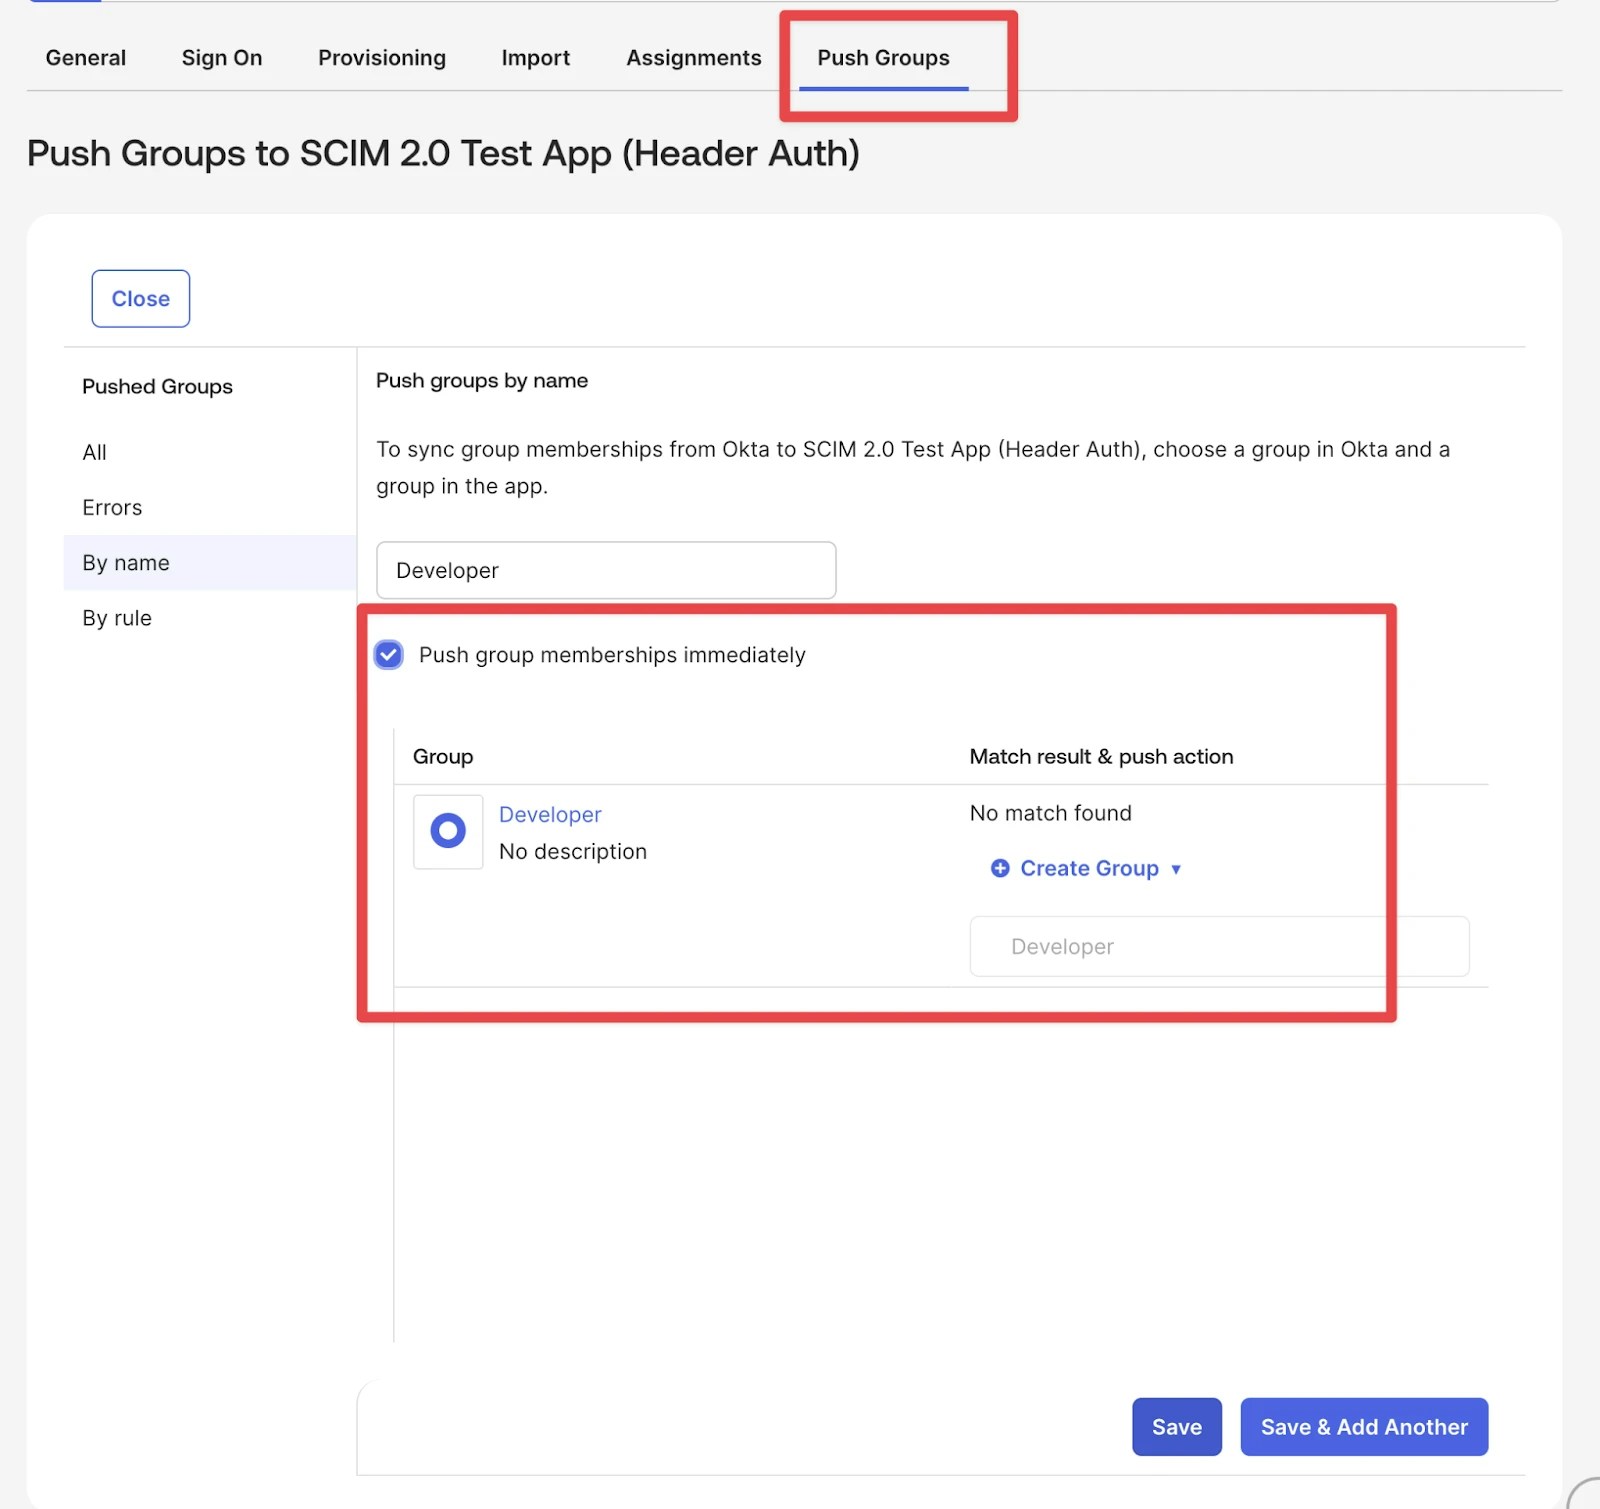
Configure group push
To sync Okta groups to Bytebase (not just group members as users):- Go to the Push Groups tab.
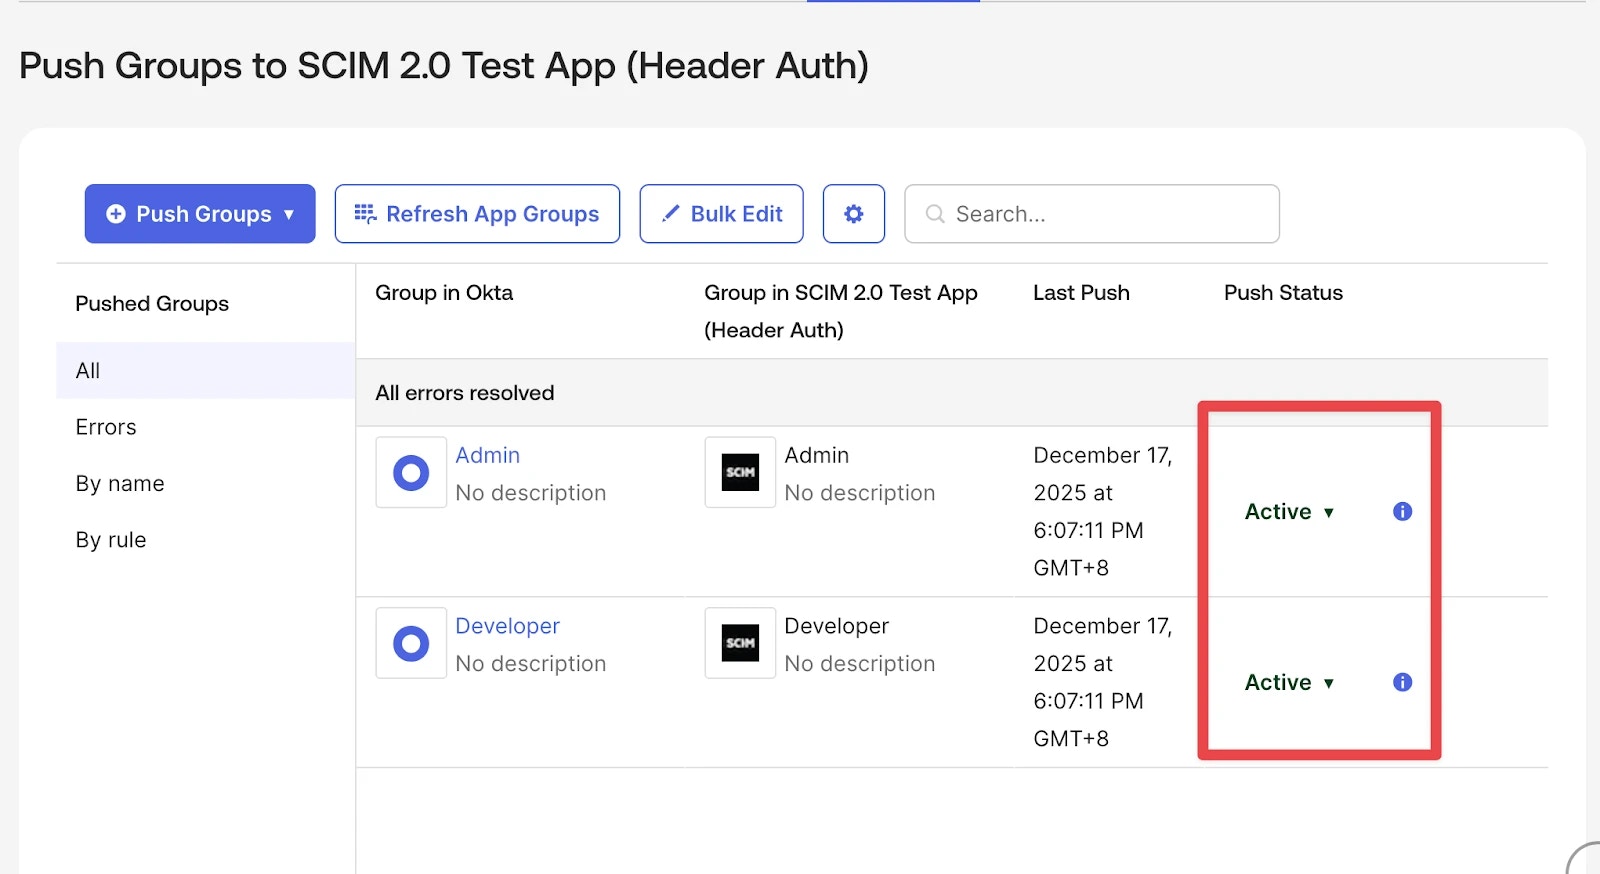
- Click Push Groups, search group by name or rule.
- Click Save, then wait and check the status.