Repository
https://github.com/bytebase/example-api/tree/main/issue-creationPrerequisites
- Docker installed
- Node.js >= v18
Start Bytebase
Make sure your Docker daemon is running. Copy and paste the commands to start Bytebase.localhost:8080. Register the first admin account which will be granted Workspace Admin.
Create Service Account
-
Log in as
Workspace Admin, and go to IAM & Admin > Users & Groups. Click + Add User, fill in withapi-sample, choose theWorkspace DBArole sufficient for this tutorial and click Confirm.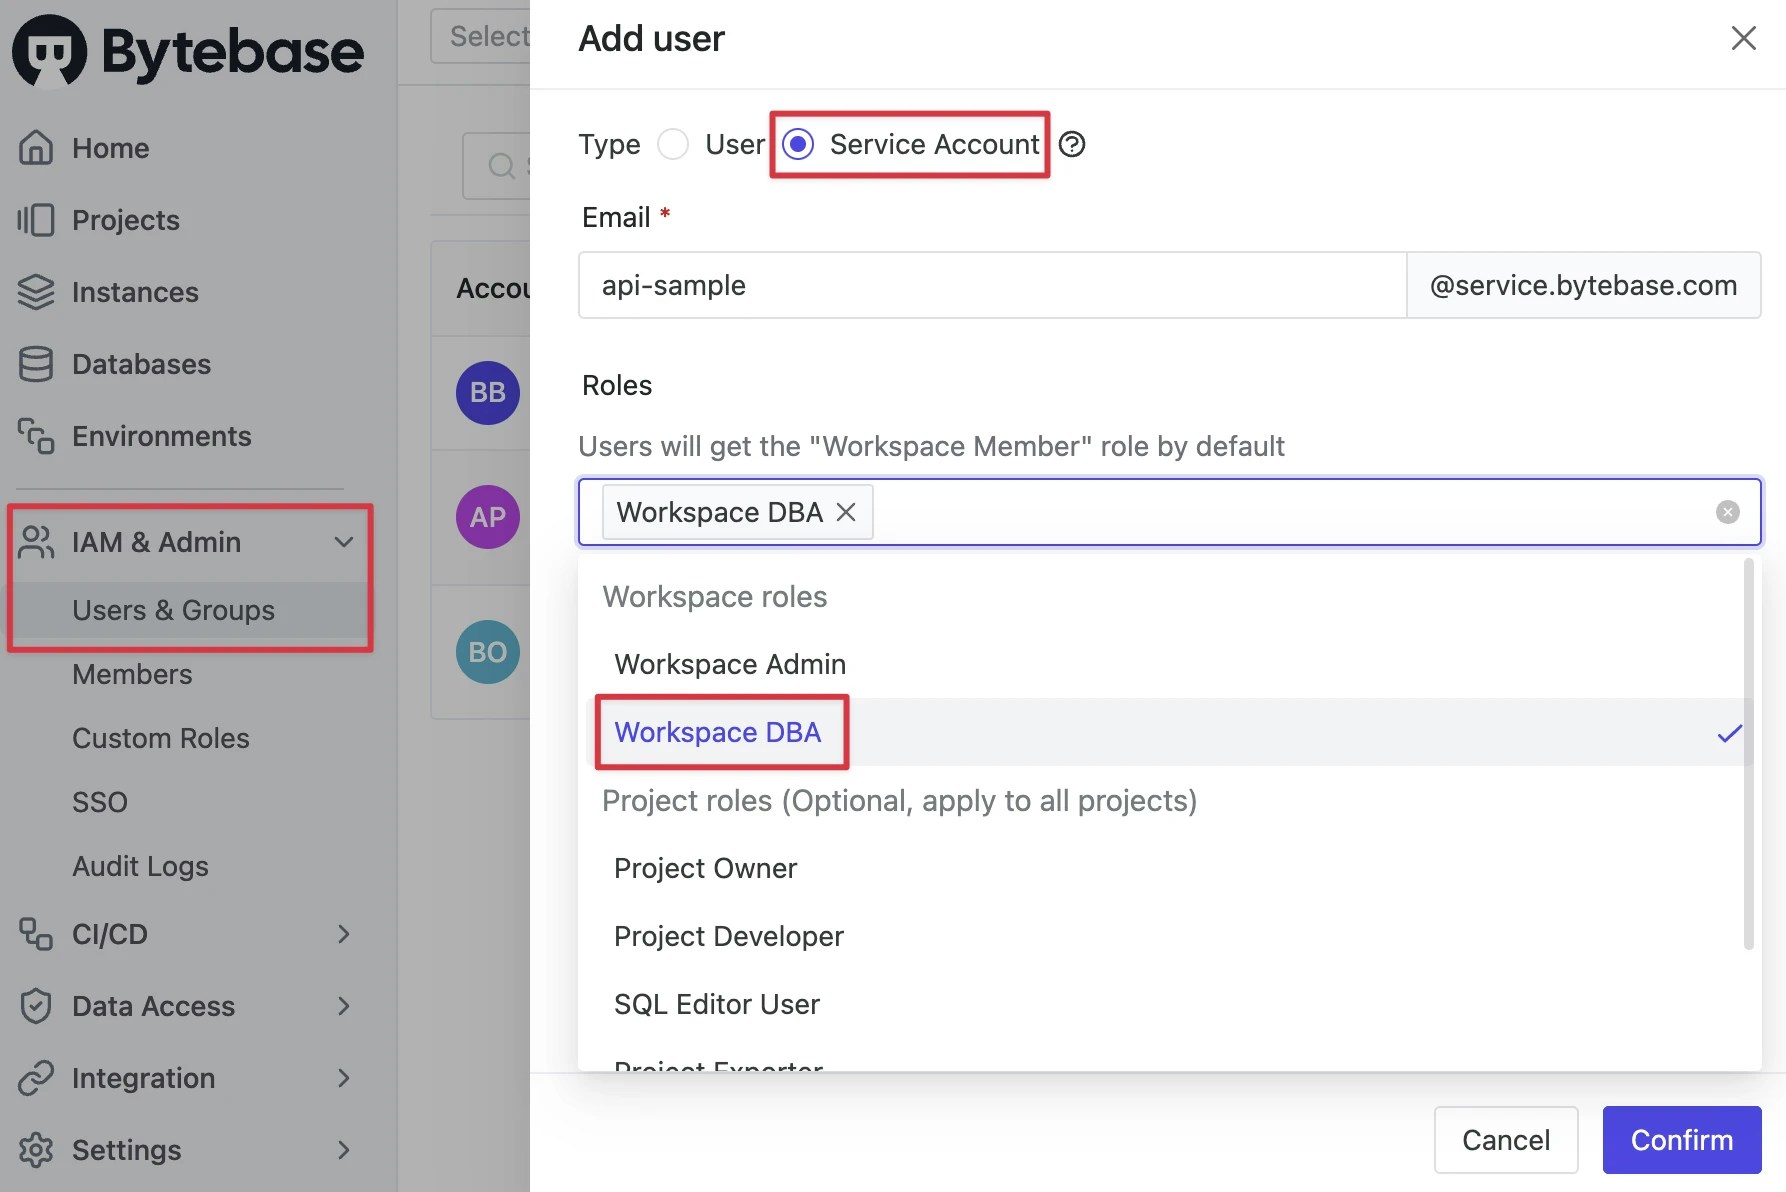
-
Find the newly created service account and Copy Service Key. We will use this token to authenticate the API calls.

Create a schema change in Bytebase Console
Let’s first review how to create a schema change from console directly.-
Stay in Bytebase console, go to
Sample Project. Click the checkbox forhr_prodand click Edit Schema. -
Switch Raw SQL, paste the following SQL statement and click Preview issue.
- Click Create, after the automatic checks are done, it’ll automatically deploy the change. The issue will become Done.
Create a schema change via Bytebase API
Below is an example app demonstrating the following APIs:- List all projects
- List all database under a project
- Create a schema change issue in the project
- Get the created issue status.
-
Clone Bytebase API Example
repo and navigate to the
issue-creationfolder. -
Copy
env-template.localto.env.local.Update the variables.NEXT_PUBLIC_BB_URL:http://localhost:8080NEXT_PUBLIC_BB_SERVICE_ACCOUNT:api-exampleNEXT_PUBLIC_BB_SERVICE_KEY: service key copied in Step 2
-
Run the following commands to start the sample application.
-
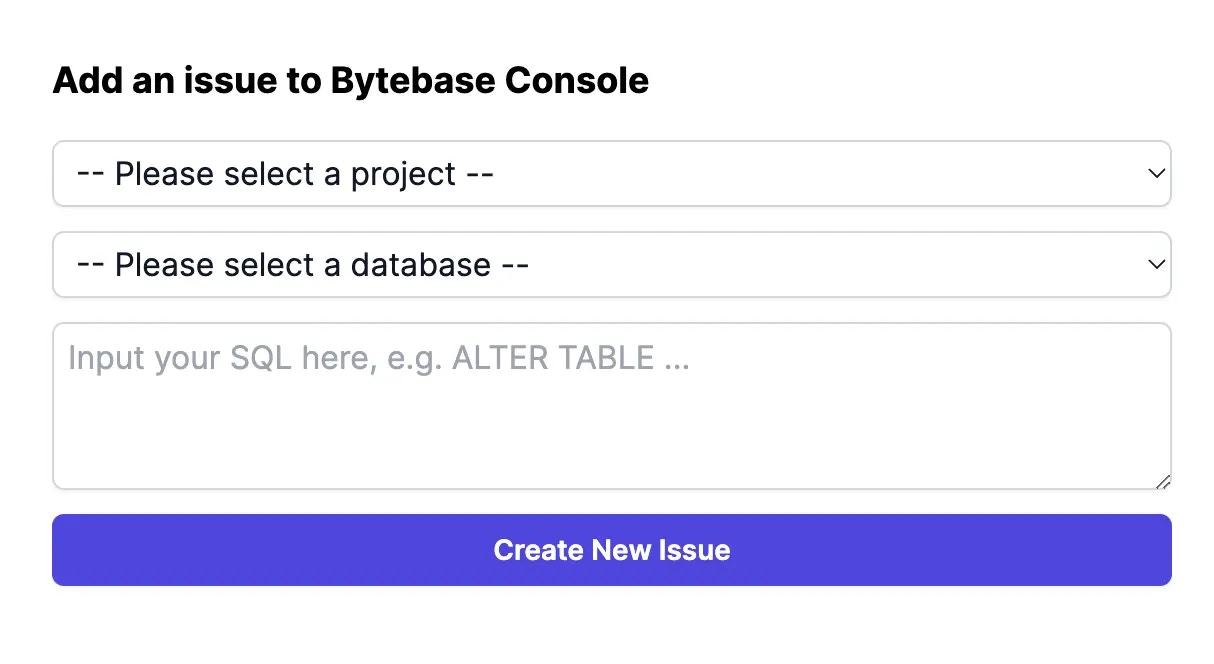
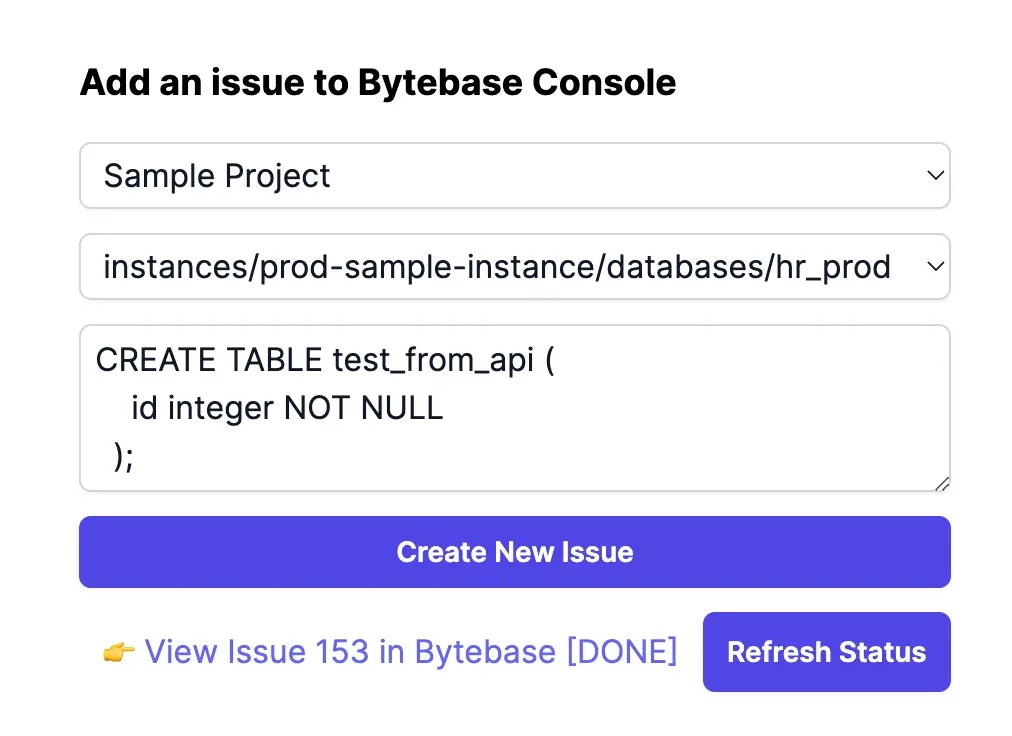
Open the application in your browser, you’ll see the following page.
-
Choose
Sample Project, thenhr_prod, input the following SQL and click Create New Issue. -
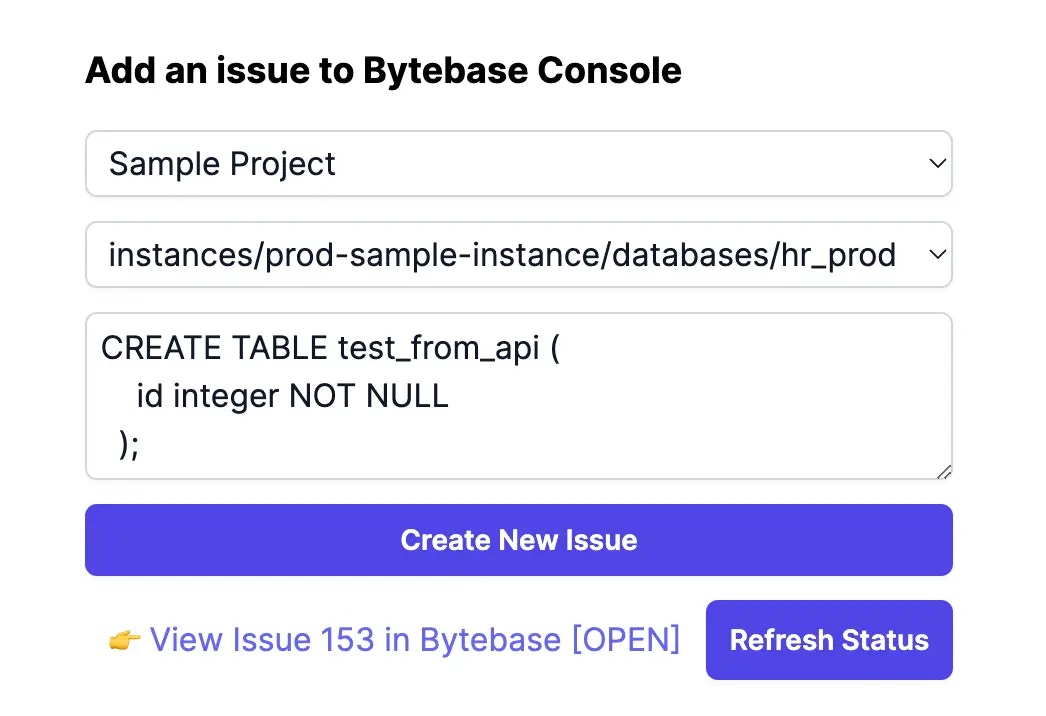
The issue will be created and you’ll see the following page.
-
Click the link
View issue xxx in Bytebase[OPEN]to see the issue in Bytebase Console. You’ll notice the issue rolls out automatically and becomesDone.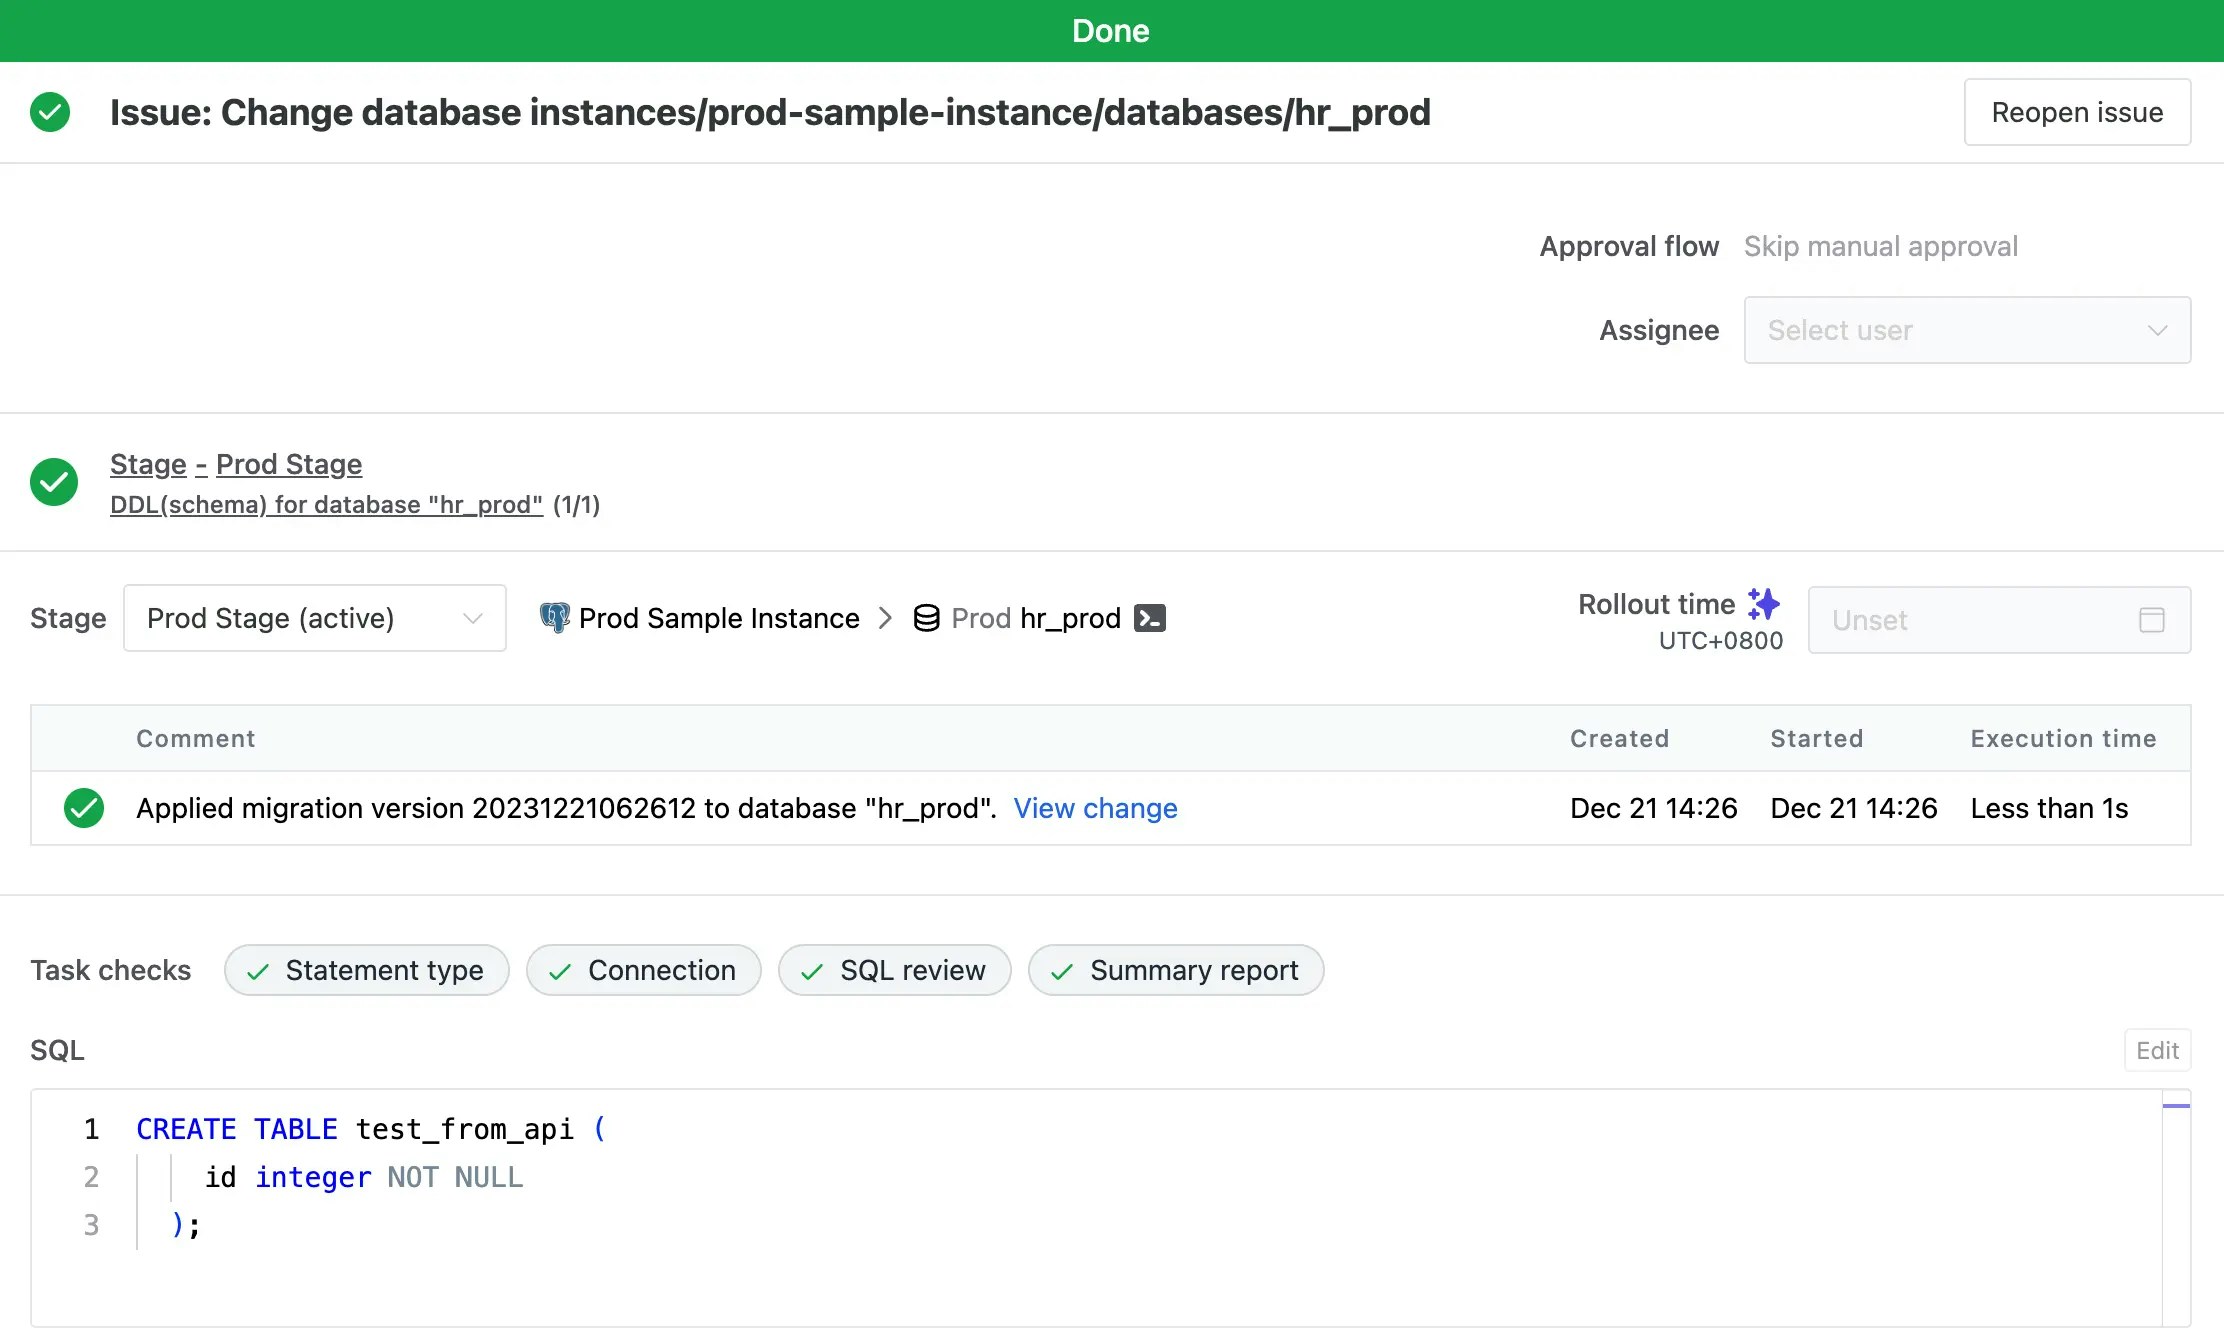
-
Go back to the sample application, and click Refresh status. You’ll see the status has changed from [OPEN] to [DONE].
- For additional information about the example application, refer to the README in its corresponding GitHub repository.