test and prod databases) from the project selector in the upper-left to begin.
Option 1: Streamlined rollout (Recommended)
Deploy changes to multiple environments in a single workflow:- Navigate to CI/CD > Plans and click + New Plan.
- Select Schema Migration as the change type.
- Choose both
testandproddatabases as targets. - Enter your SQL changes in the editor.
- Click Create, then Ready for Review.
- After checks pass, go to the Rollout tab.
- Click Run for each environment in sequence (test first, then prod).
Option 2: Schema synchronization
Use this method when changes already exist in test and need to be replicated to production:-
First, apply changes to the test database:
- Navigate to CI/CD > Plans and click + New Plan.
- Select Schema Migration and choose only the
testdatabase. - Enter your SQL changes and click Create.
- Click Ready for Review, then rollout the changes.
-
Synchronize test schema to production:
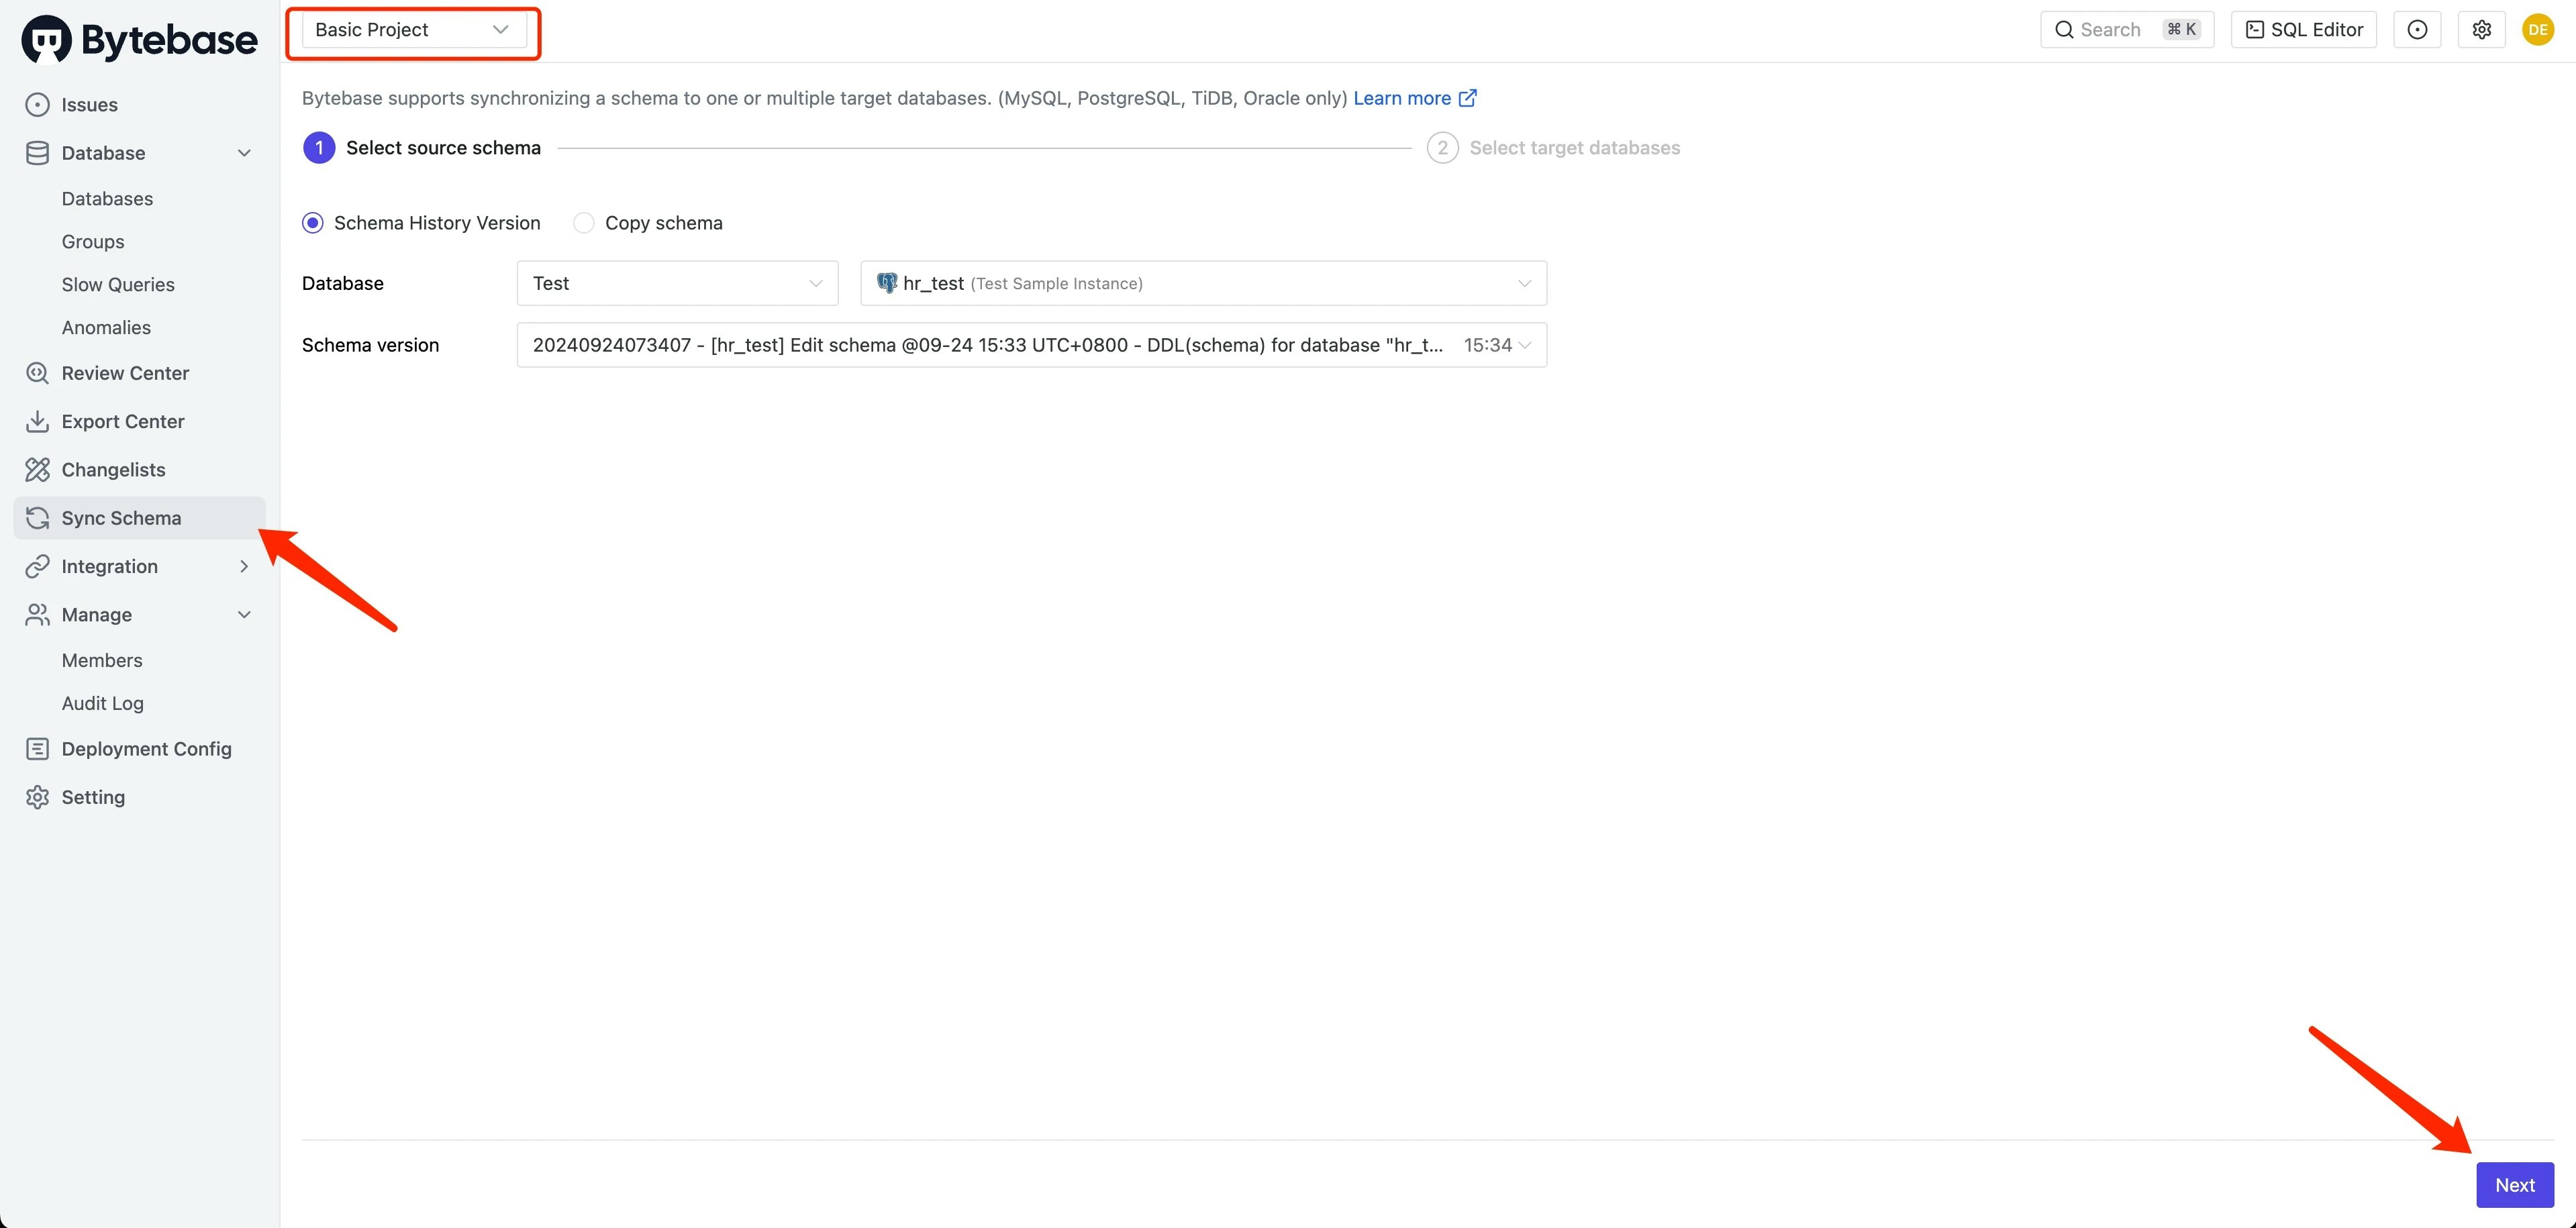
- Navigate to Sync Schema in the left sidebar.
- Select
testas the source database. - Choose the desired schema version and click Next.
-
Select
prodas the target database: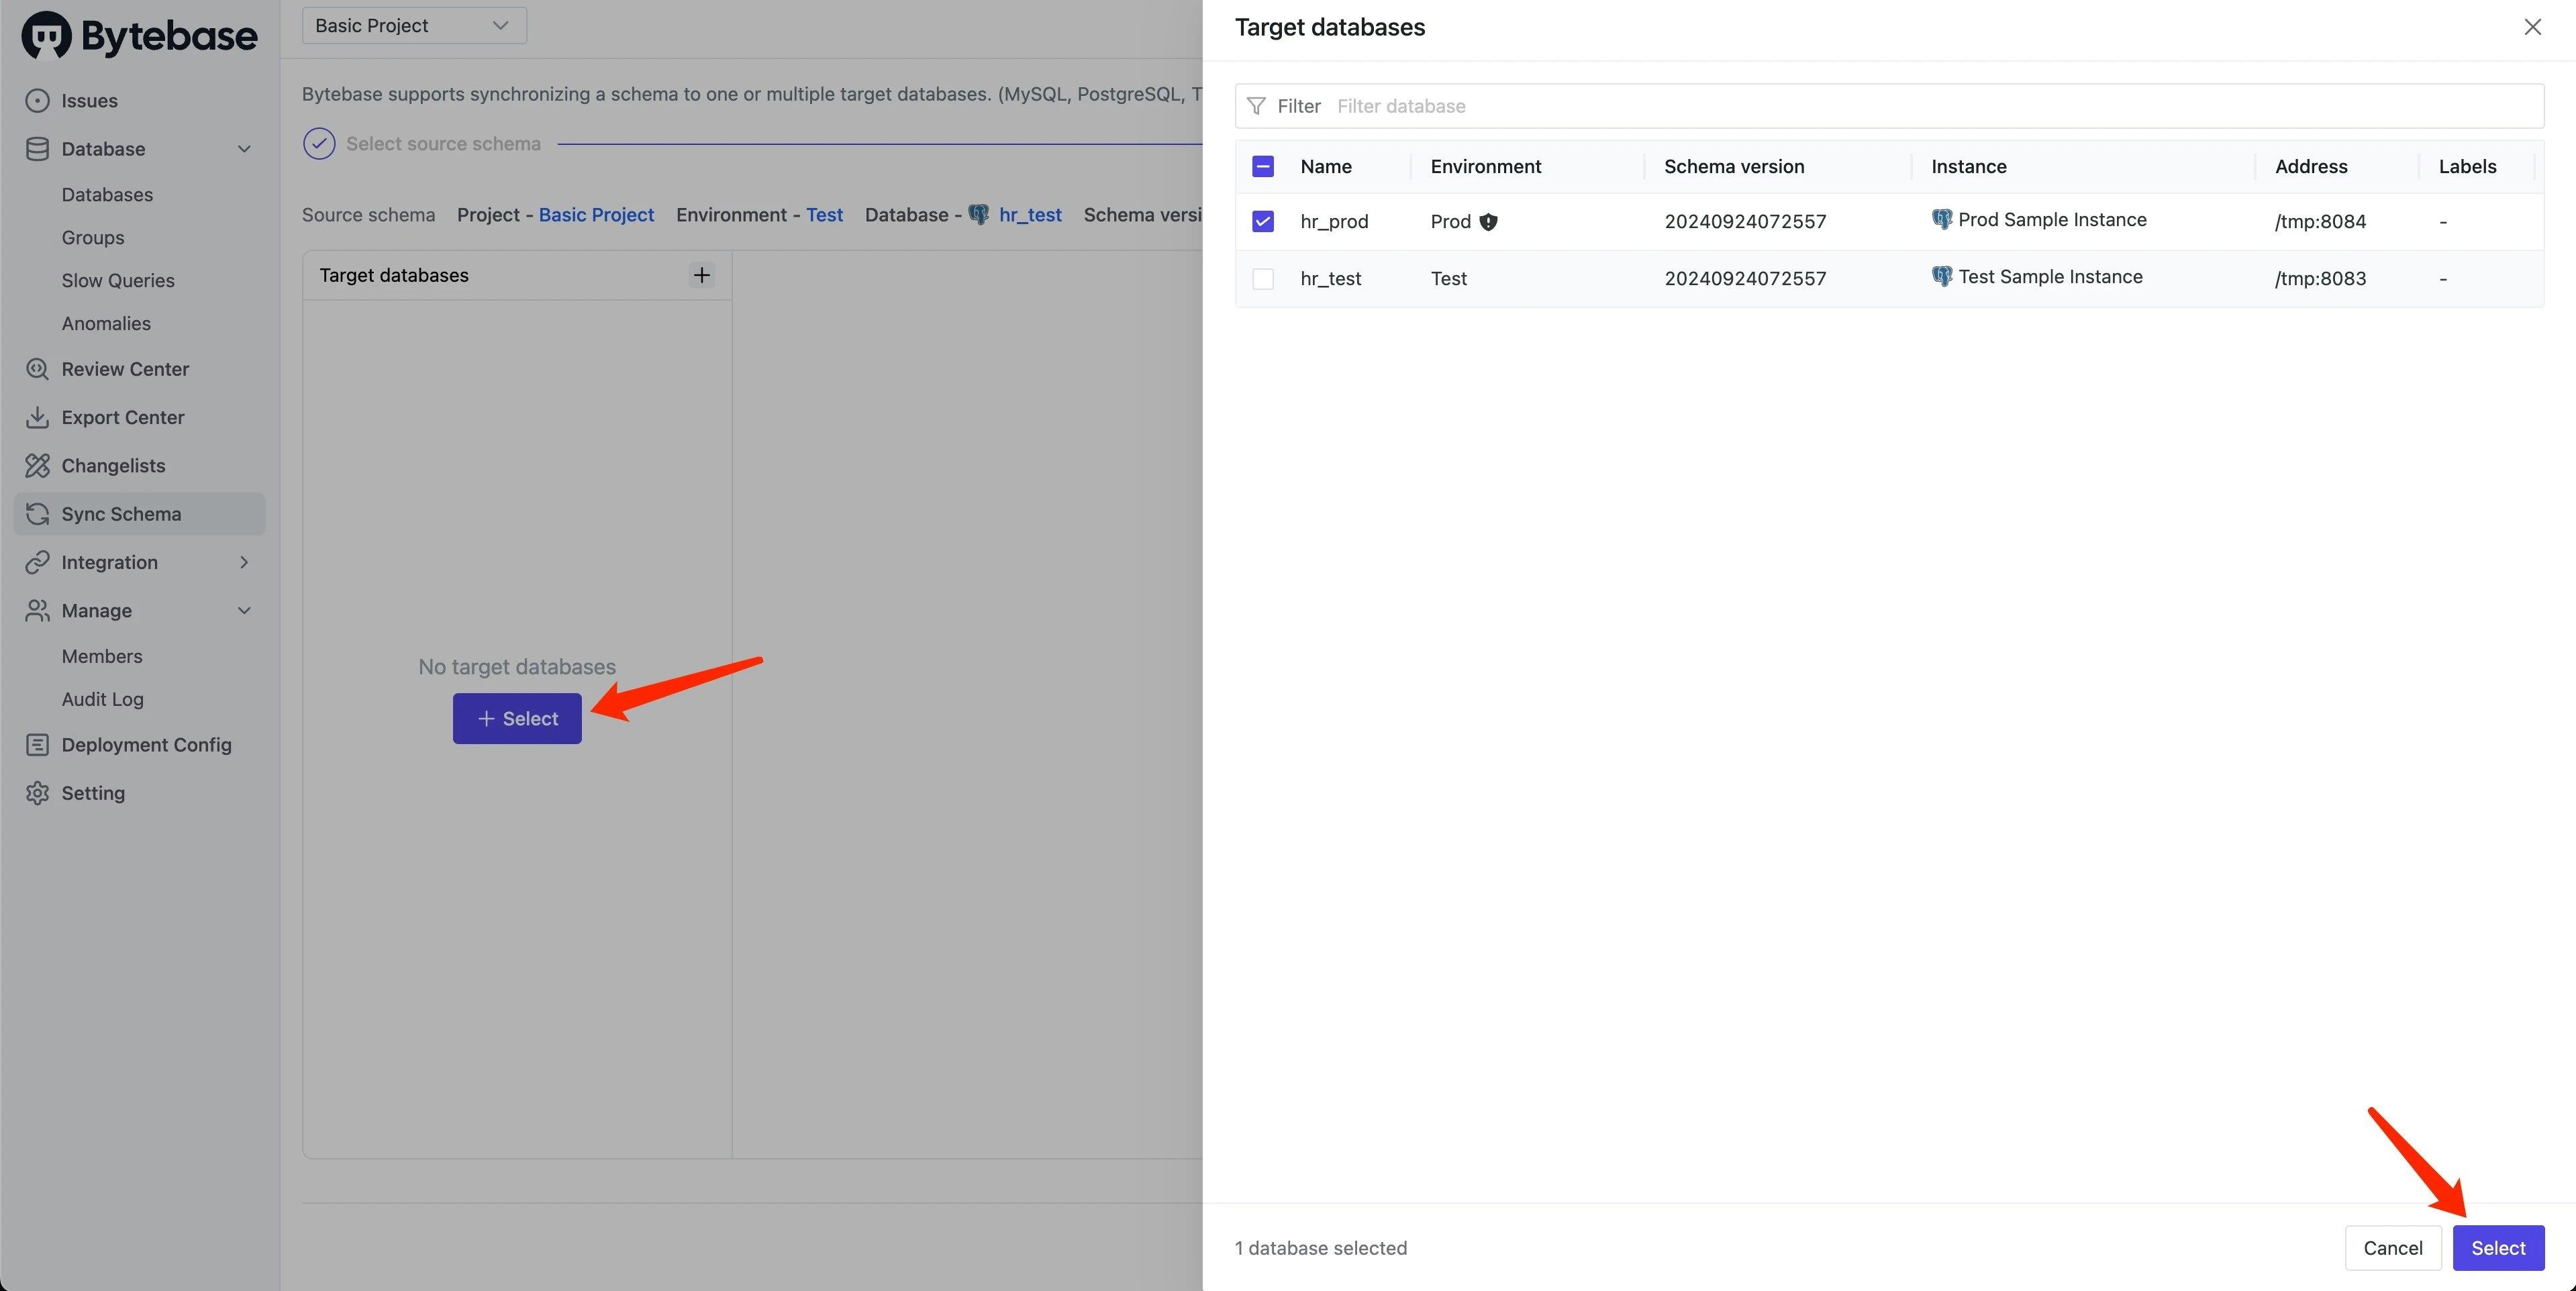
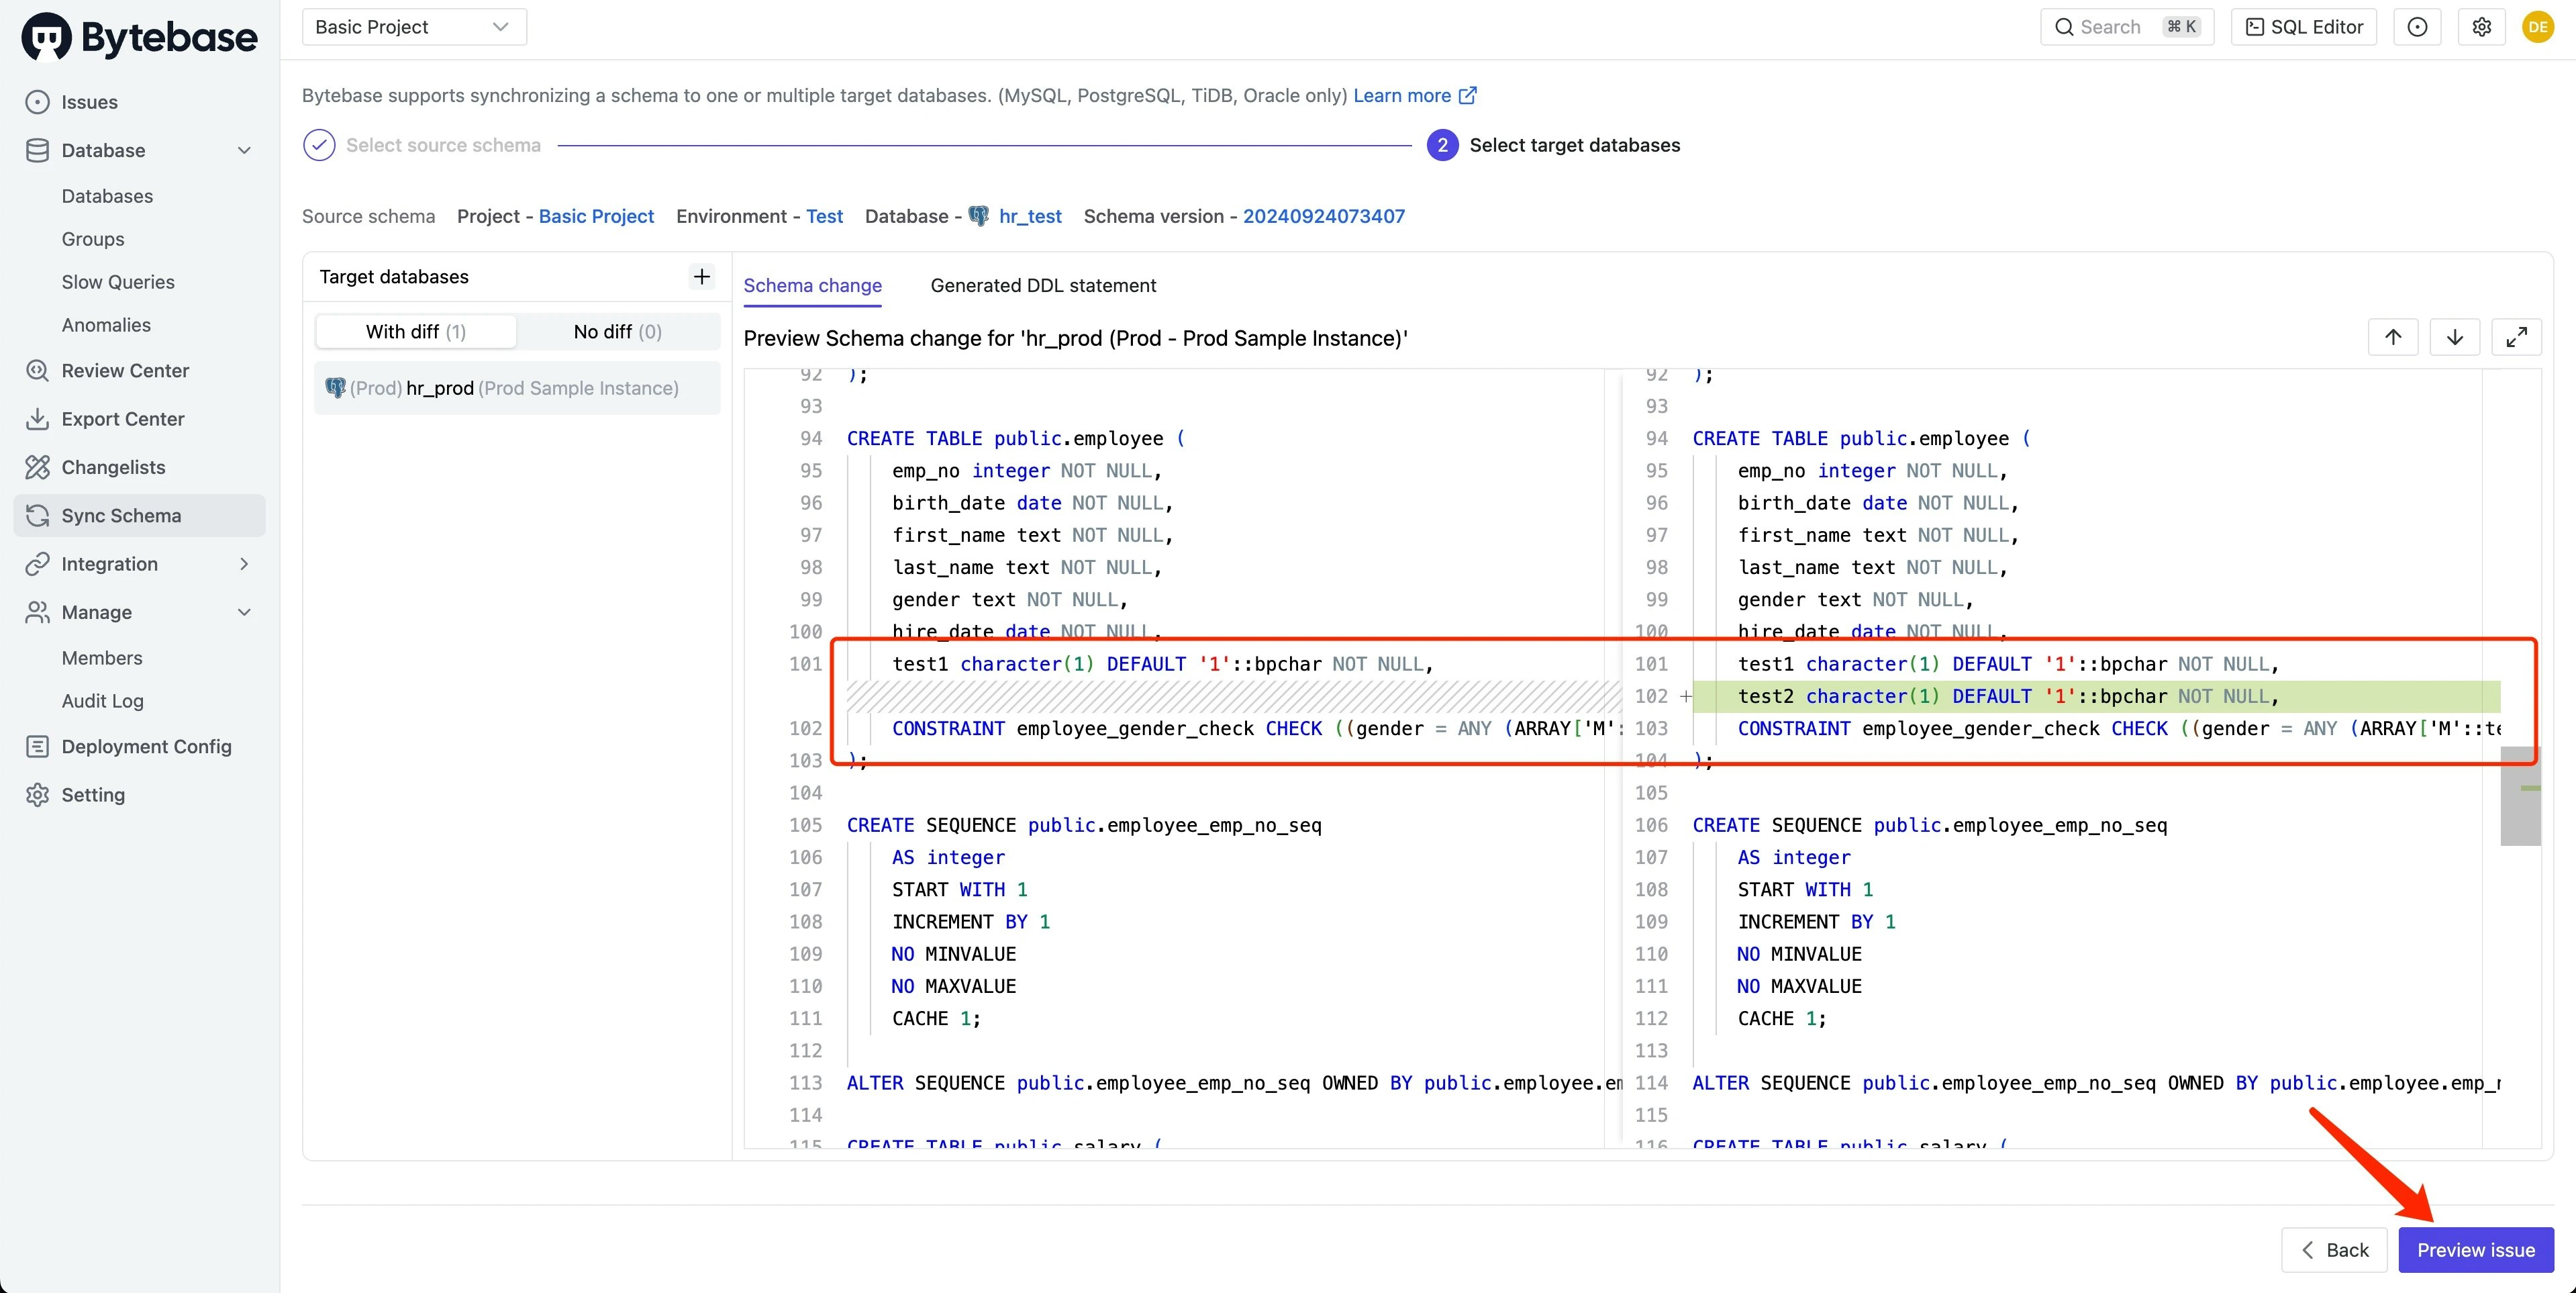
-
Review the schema differences:
- Bytebase displays a detailed diff between test (source) and prod (target).
- Verify the changes match your expectations.
- Click Preview issue to proceed.
-
Deploy the changes:
- Click Create to generate the synchronization issue.
- Click Ready for Review to trigger automated checks.
- Navigate to the Rollout tab and click Run.
Which method to choose?
- Streamlined rollout: Best for new changes that need to be deployed to multiple environments.
- Schema synchronization: Ideal when test already has changes that need to be replicated to production.