Prerequisites
- Docker installed
- Download the api-example repository, you’ll only need
data-classificationfolder for this tutorial
Overview
This demo app simulates the process of fetching data from databases connected to Bytebase and setting classification levels. By integrating global masking configurations, different classification levels will correspond to varying degrees of data masking.Workflow
- Run a Bytebase workspace and add a service account user
- Import the classification
- Configure the data masking based on the classification level
- Configure the environment variables and run the demo app
- In the demo set the classification and see the data masking result
Run a Bytebase workspace and add a service account user
-
Start Bytebase via Docker and register an account which will be granted
Workspace Adminrole.You’ll need an API service account user too: - Go to IAM&Admin > Users&Groups, click +Add User.
-
Choose
Service Accountas the Type, fill in the Email withapi-sample@service.bytebase.com, chooseWorkspace DBAas Roles, and click Confirm. - Copy the Service Key for later use.
Import the classification
- Go to Data Access > Data Classification, click Upload classification.
- Upload the
/public/classification.jsonfile within thedata-classificationrepository, you’ll see the classification is imported.
Configure the data masking based on the classification level
There are two ways to configure the data masking based on the classification level - via UI and API:UI
- Go to Data Access > Data Masking, click Add.
-
Give it a Condition Name, e.g.
Partial masking for Level 1, click Add Condition. -
Here we only care about data on production environment, so we set the Environment ID equals
prod. -
Add another condition with
ANDoperator, and set the Classification Level inLevel 1. -
Choose Masking Level as
Partialand click Confirm. -
The same way, we can add another masking rule for
Level 2with Masking Level asFull.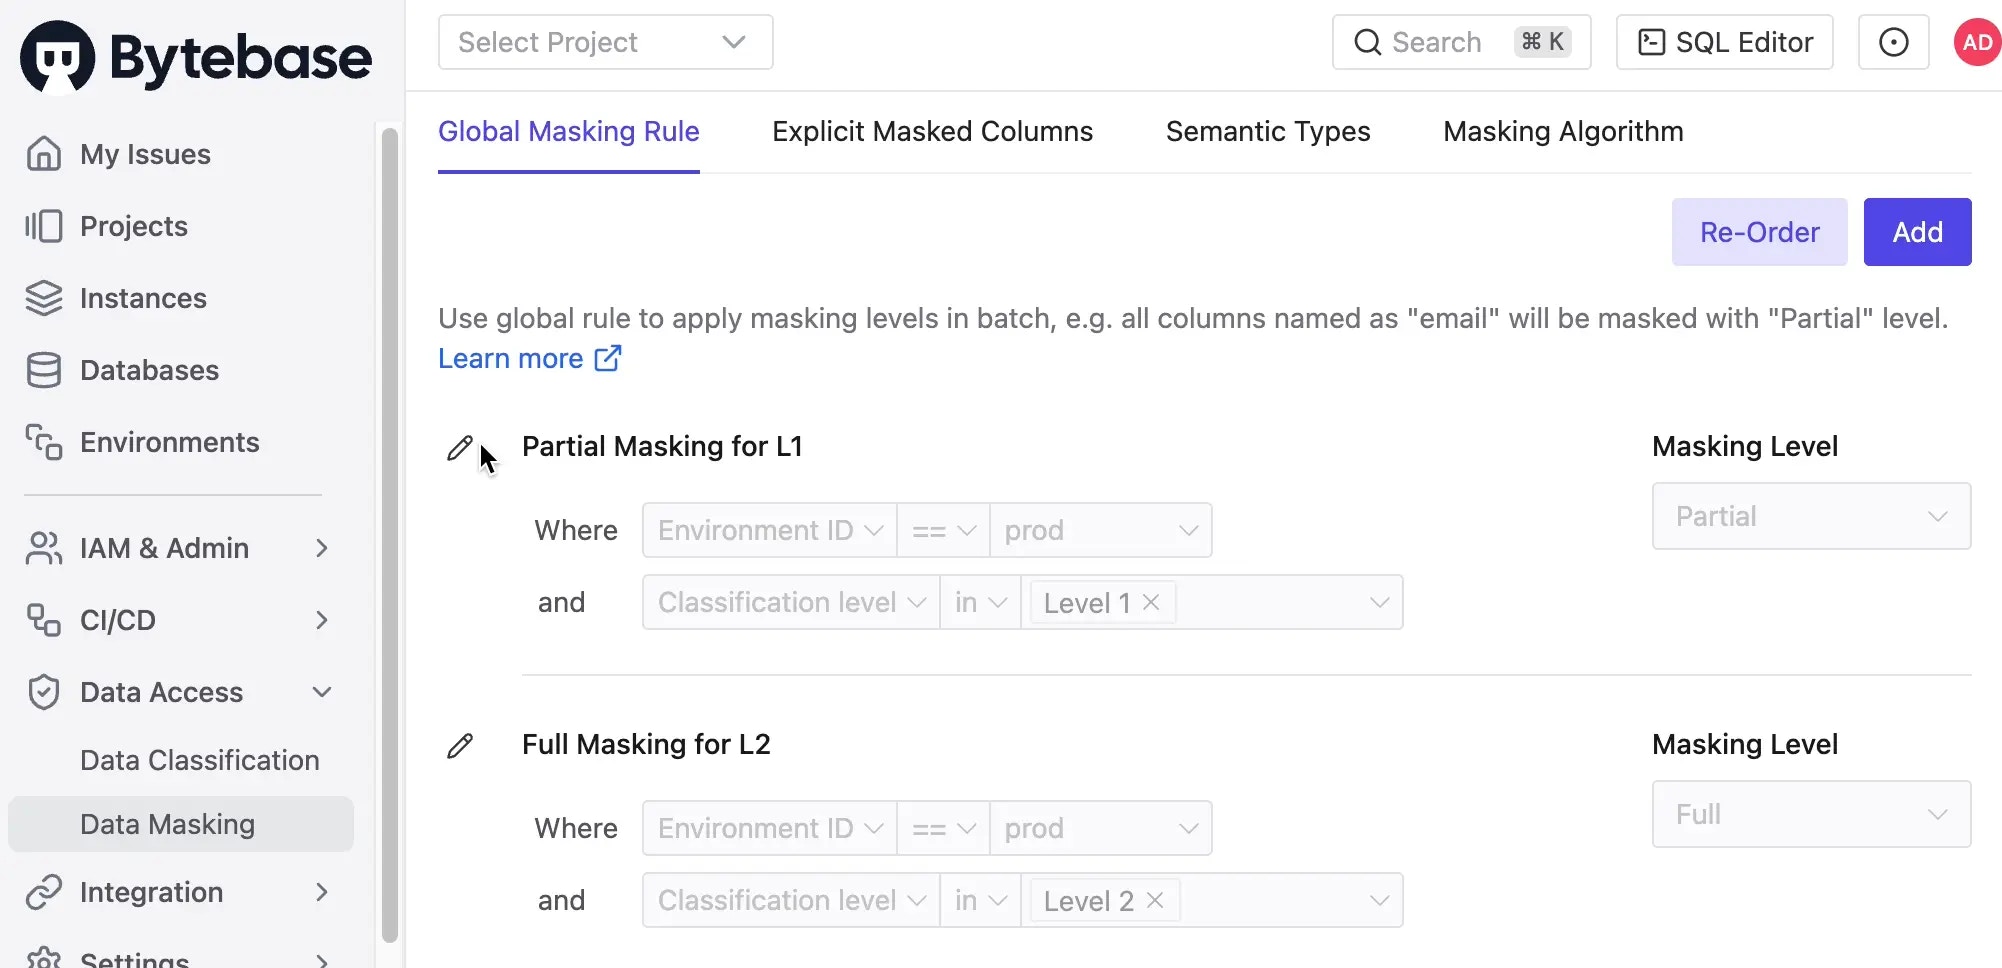
API
-
Find the data masking configuration file within the
data-securityrepository. -
Generate the token for the service account user:
-
Import the data masking configuration:
- Login to Bytebase console and go to Data Access > Data Masking, you’ll see the data masking is configured.
Configure the environment variables and run the data-classification demo app
-
Go to the
data-classificationfolder of theapi-examplerepository, and copyenv-template.localfile as.env.local. Replace the placeholders with yours. -
Run
pnpm iandpnpm run dev, you can run the demo app locally withlocalhost:3000.
Set the classification and see the data masking result
-
In the demo app, select a table, here we select
salary, it’s possible to set the classification level for this table, but here we skip it. -
Choose classification
1-4 Health [Level 2]for theamountcolumn and1-1 Basic [Level 1]for thefrom_datecolumn.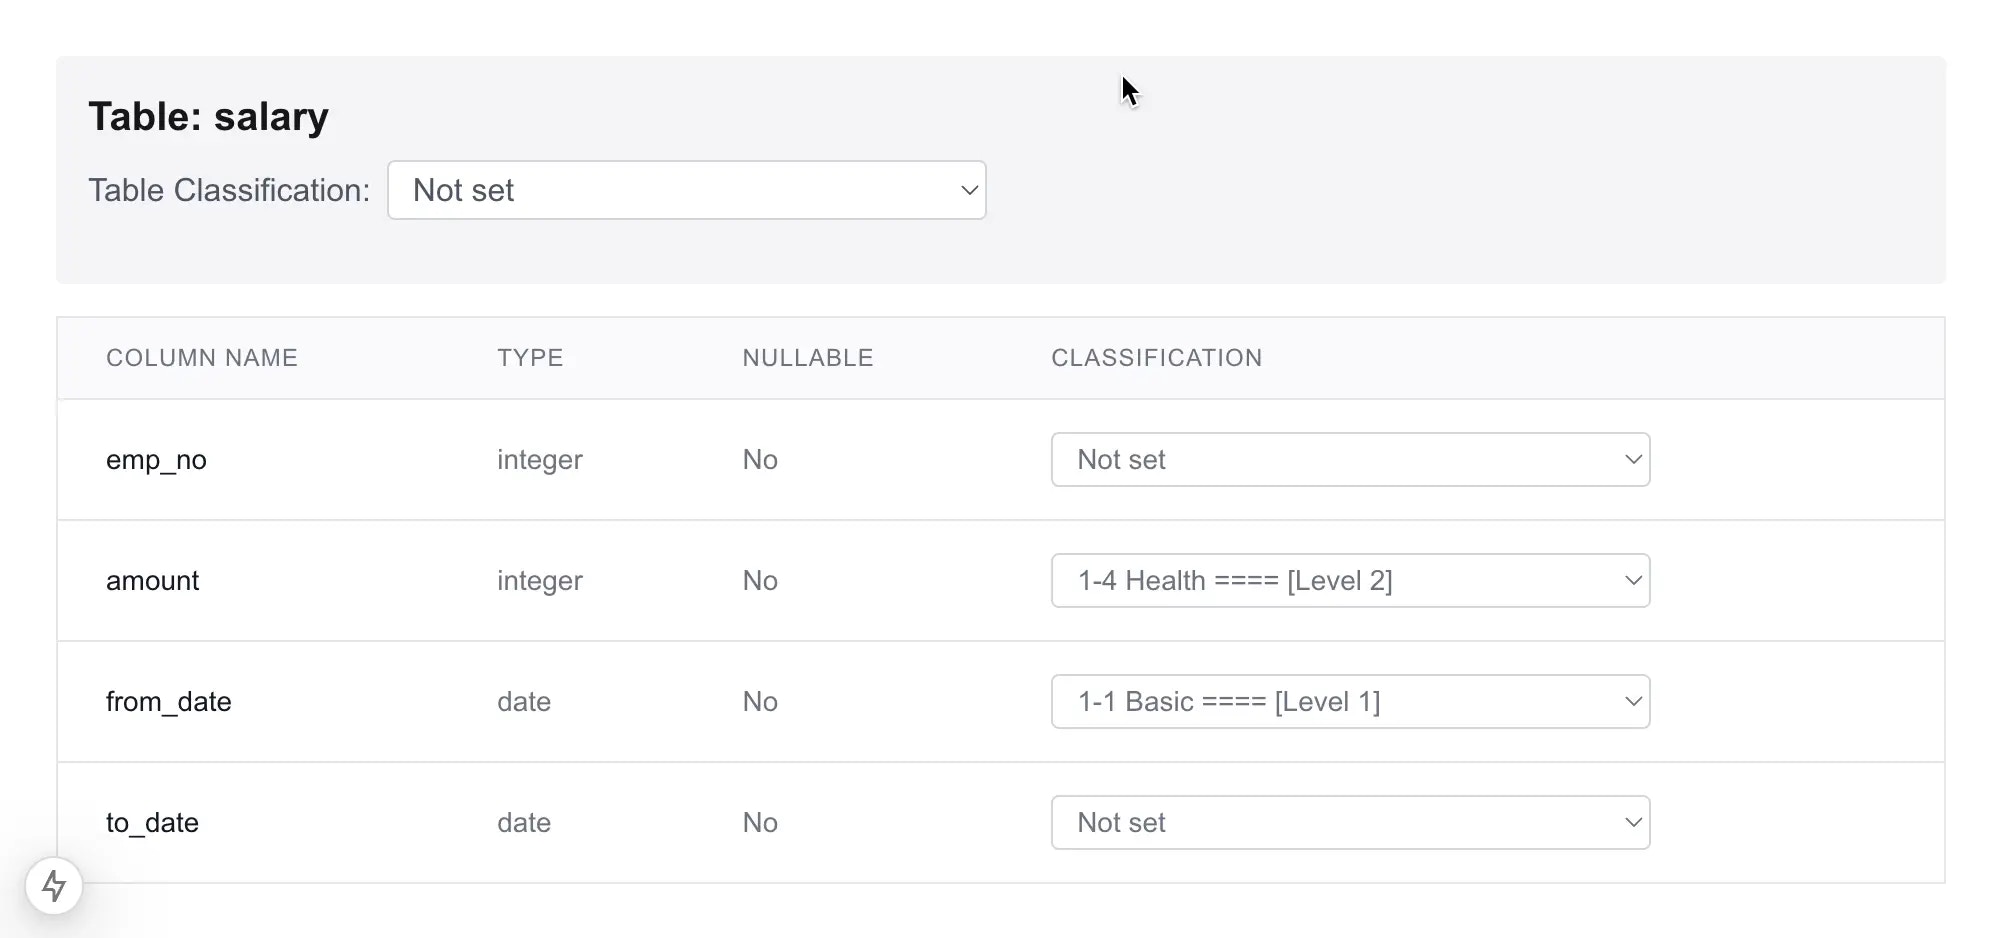
-
Go to Bytebase SQL Editor, double click the
salarytable, you’ll see the data is masked accordingly.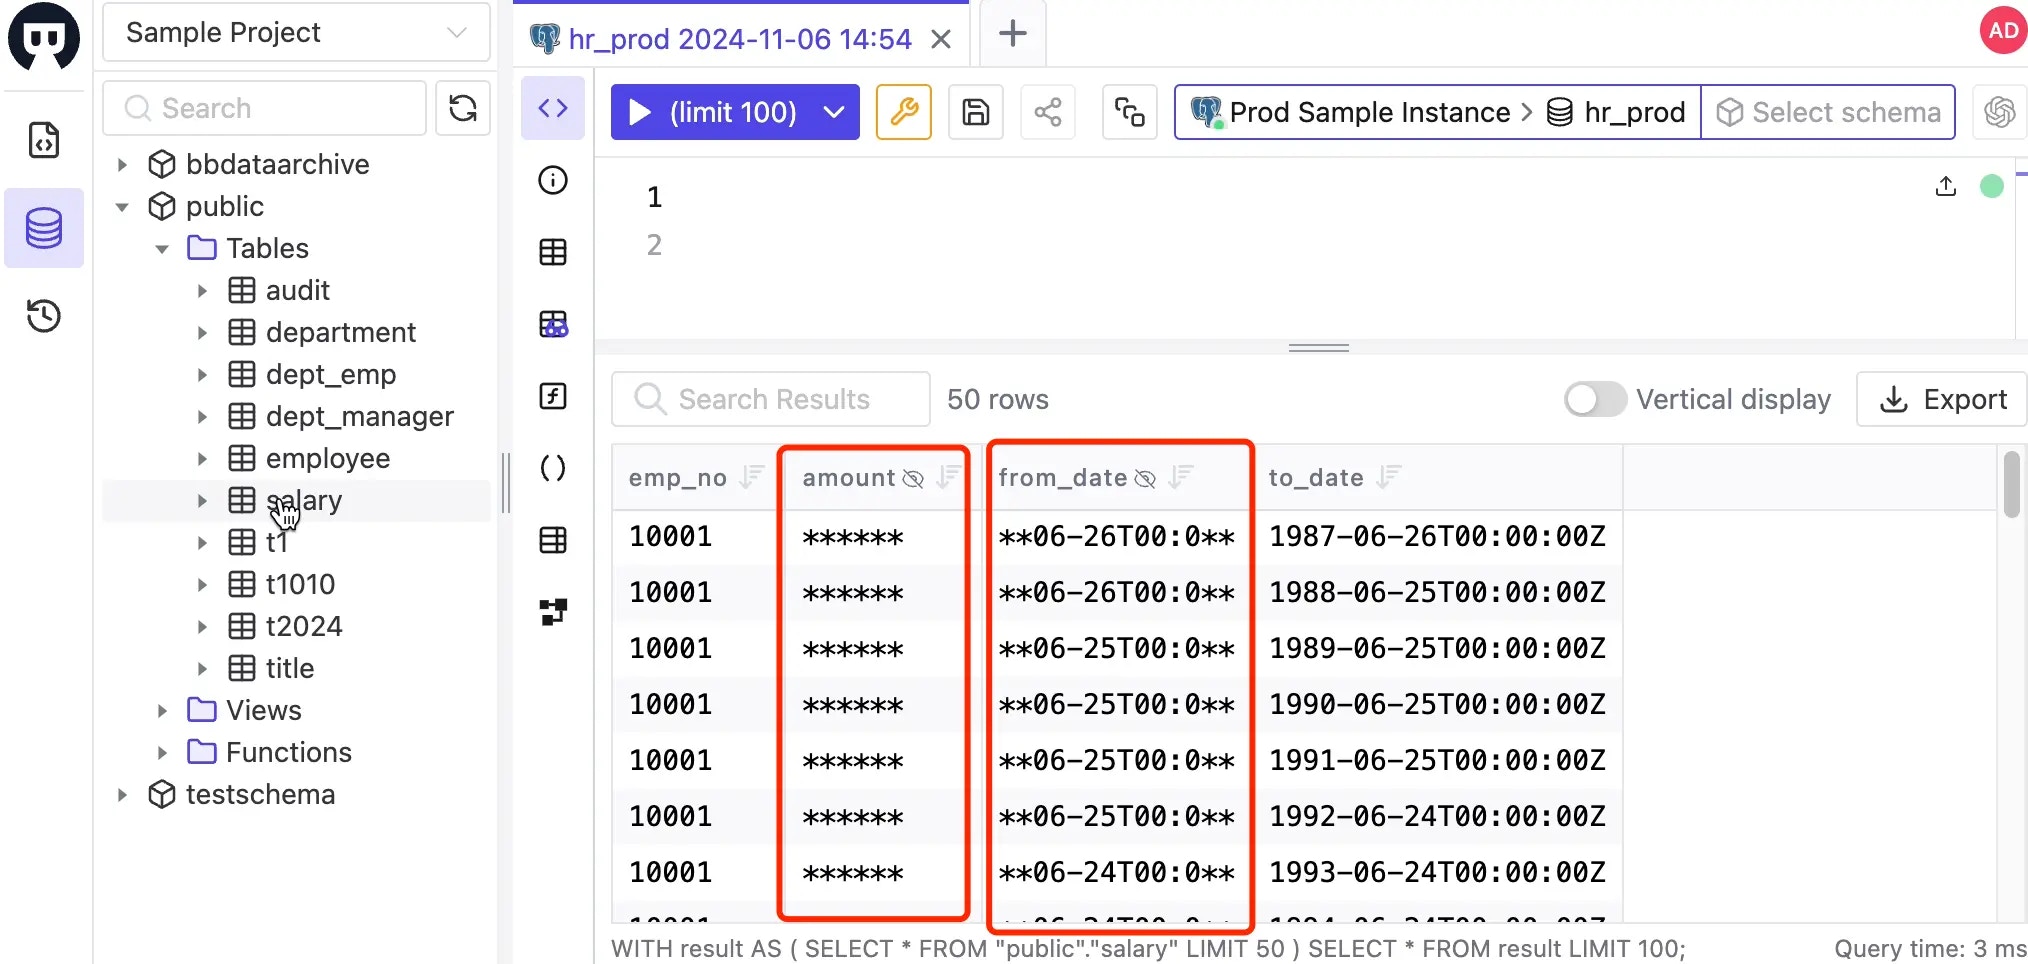
Code explanation
Fetch database schema and classification
- Bytebase provides the possibility to set classification on the table and column level. So the first step is to fetch the database schema.
-
Use the API
/v1/instances/${instance}/databases/${database}/metadatato fetch the database schema information. In this demo, the instance is hardcoded astest-sample-instanceand the database istest-sample-database. -
The metadata response includes the database schema under
schemas:Meanwhile, it also includes the classification information underschemaConfigs:
Update the schema with classification
- To update the schema with classification, we need to use the API
/v1/instances/${instance}/databases/${database}/metadatawithPATCHmethod.
Fetch defined classification
-
Log in Bytebase, go to Data Access > Data Classification. Upload the
classification.jsonfile. It will be parsed and saved as global classification. -
Use the API
/v1/settings/bb.workspace.data-classificationto fetch the defined classification, so it’s always up to date.