This tutorial covers configuration via UI console. You can also codify the masking policies, check
out this sample.
Prerequisites
Preparation
-
Make sure your Docker is running, and start the Bytebase Docker container with command:
-
Having Bytebase successfully running in Docker, visit it via
localhost:8080. Register an admin account and it will be granted theworkspace adminrole automatically. - Acquire the Enterprise license. Enter Instances on the left. Select both instances to Assign License.
No Masking
Enter SQL Editor on top right. Without any worksheet open (no tab page open on top), click Connect to a database or Select a database to start.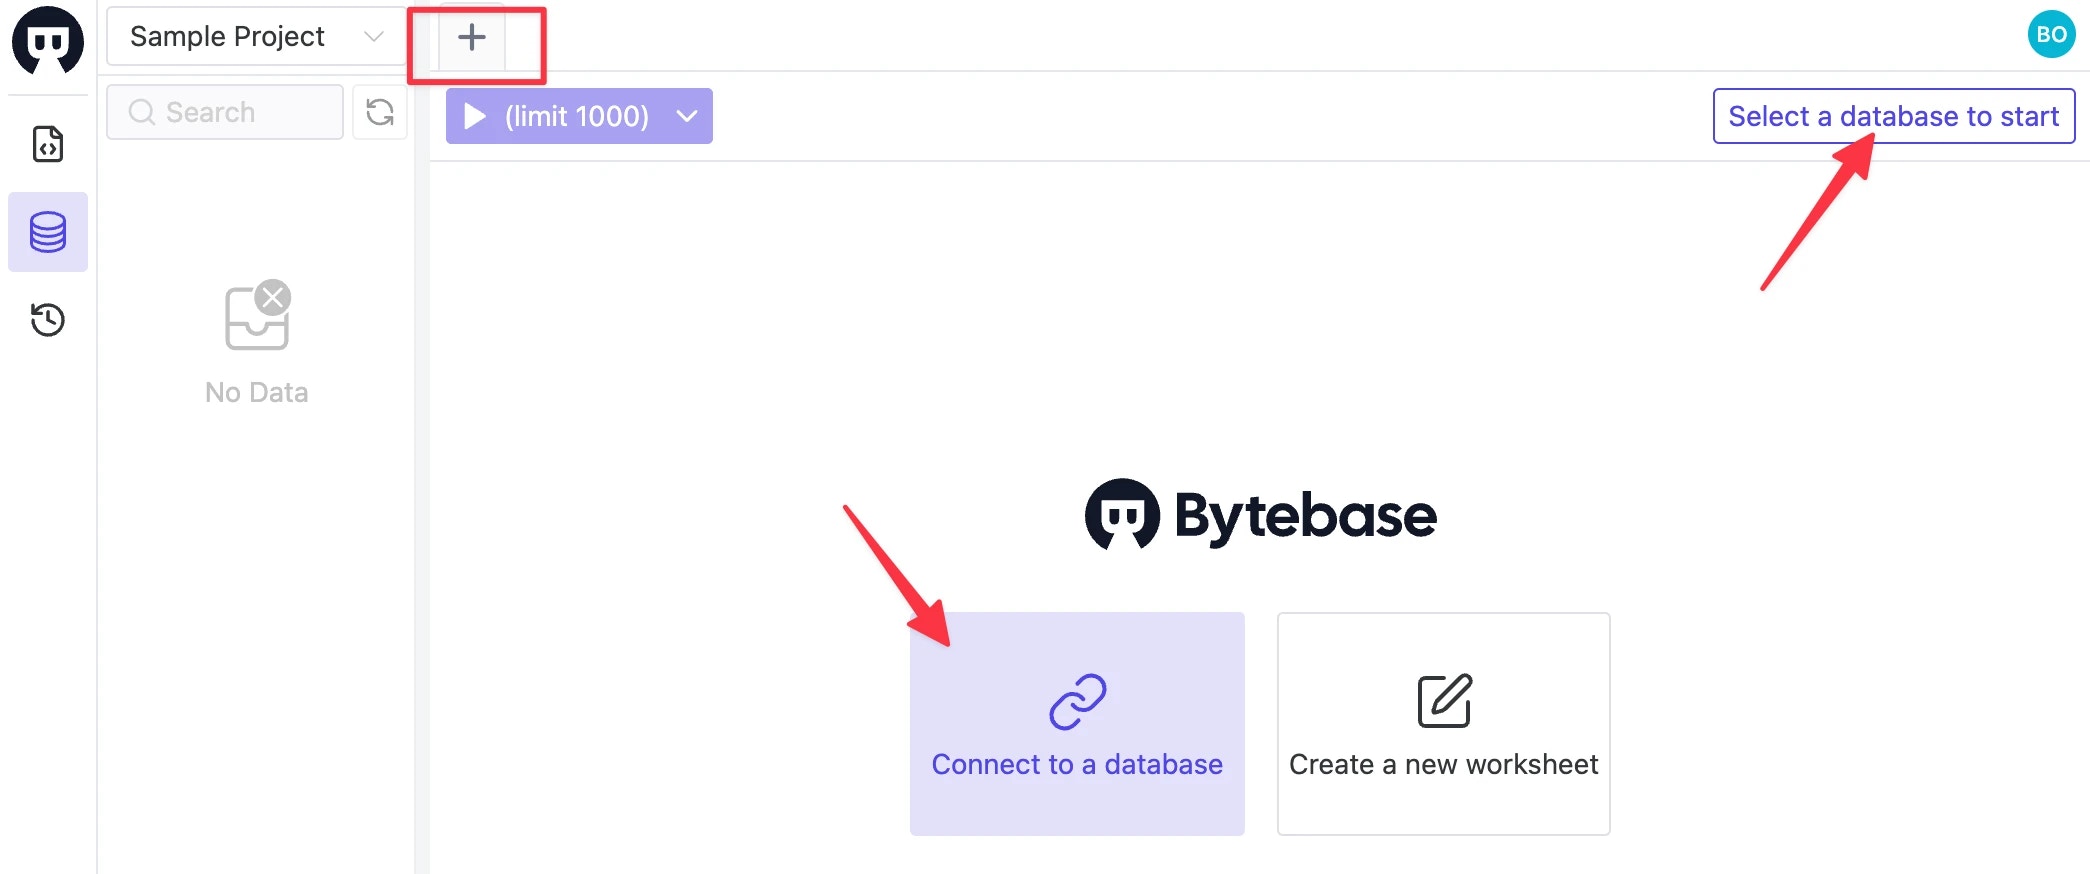
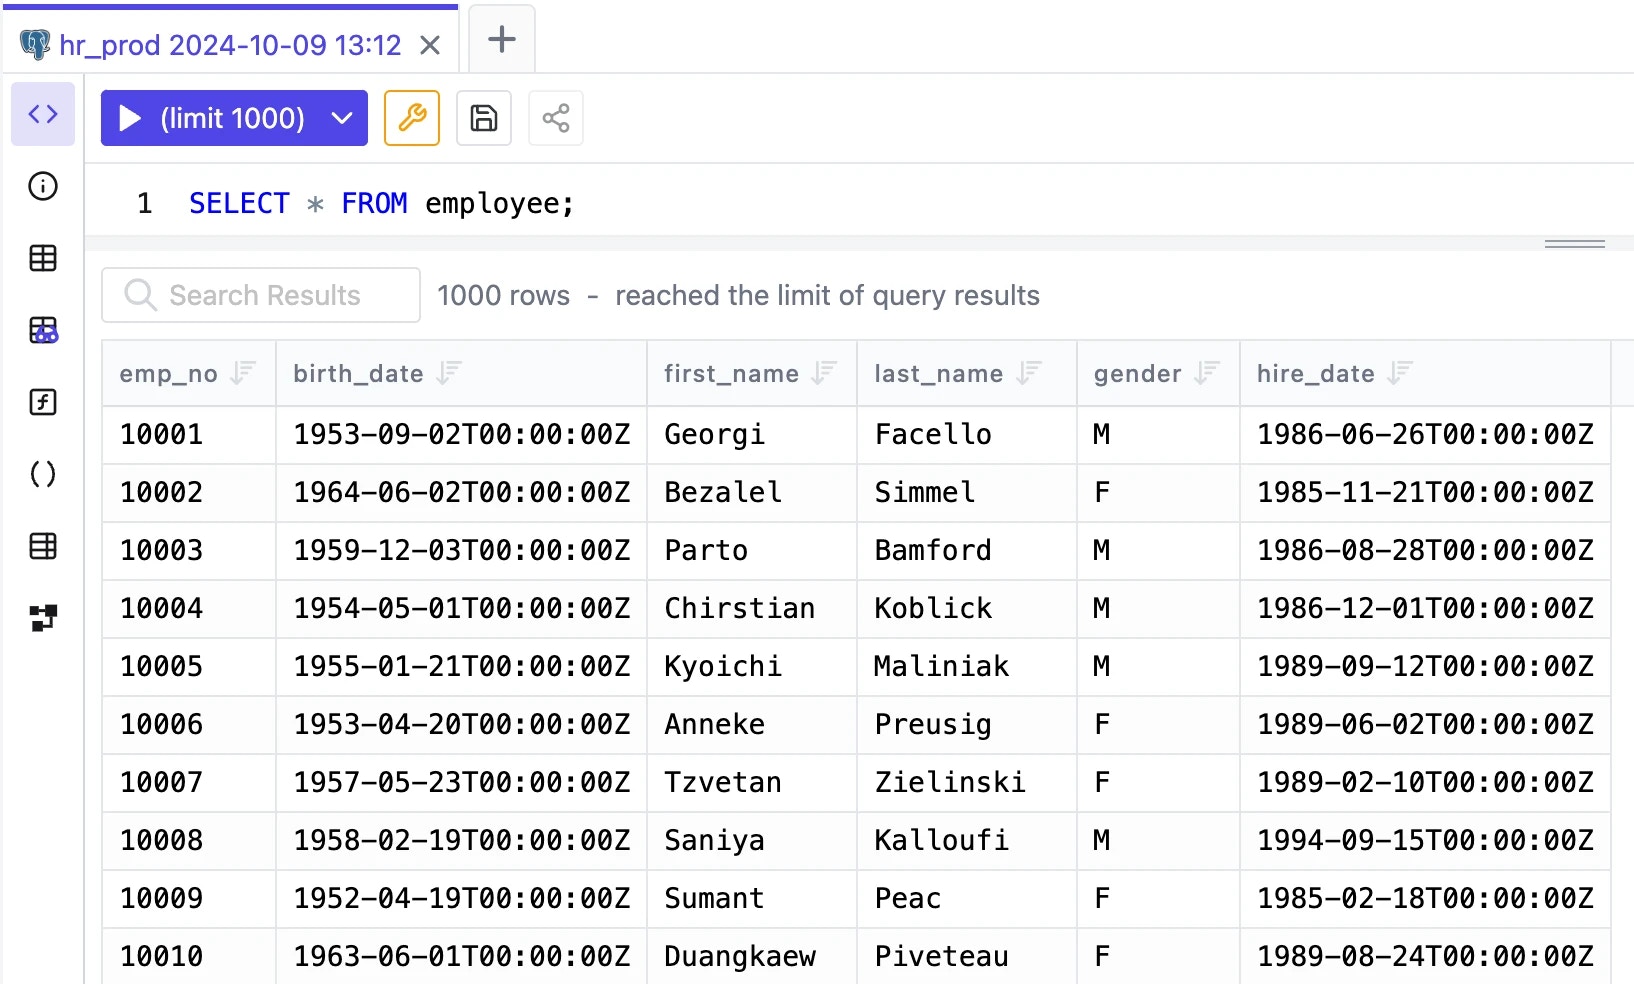
hr_prod under Prod Sample Instance within the Connection detail page. Run SELECT * FROM employee;, you’ll see the following result without any masking.
Semantic Types
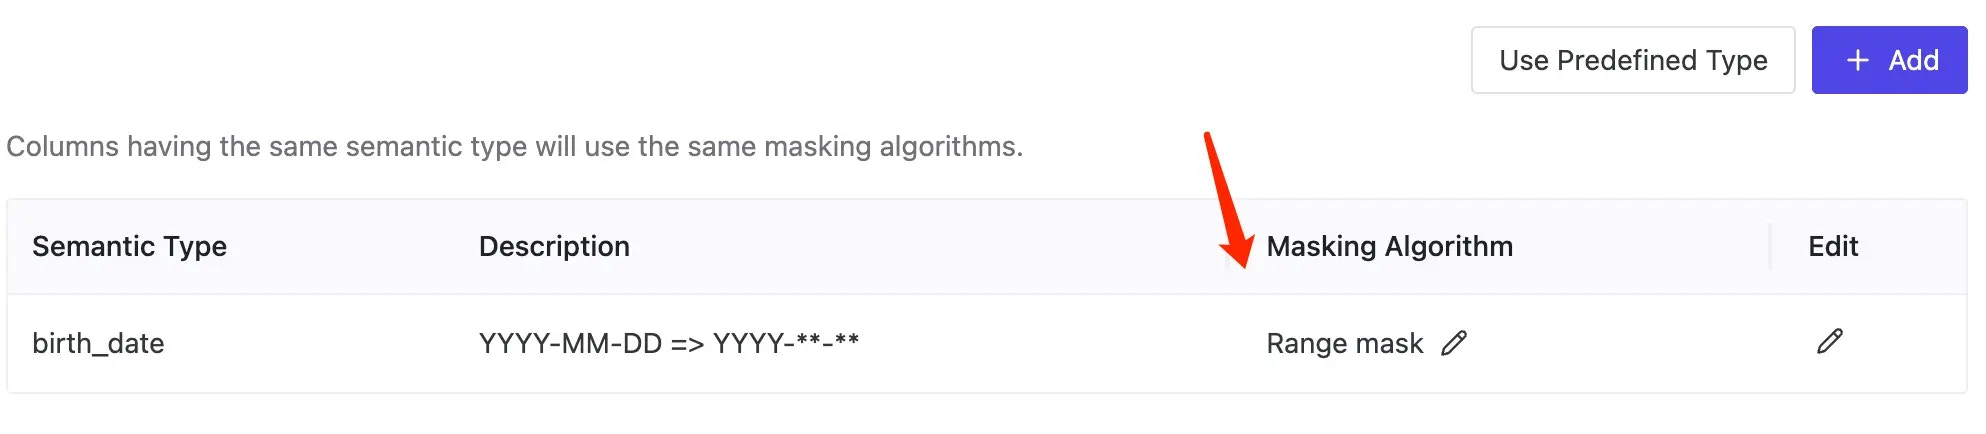
Semantic type is a way to classify data into different categories. You may apply them to columns to apply the same masking rule.- Enter Data Access > Semantic Types, click Add.
- Fill in the name, description and specify the Masking Algorithm. Click the check mark.
- Apply to a column directly.
- Apply according to a global masking rule.
Column Masking Rule
As a project owner, you may want to apply the semantic type to a column, usually it’s a column that you want to mask on production environment.-
Go into the project
Sample Project, and click databasehr_prod. -
Go into the
employeetable, and set thebirth_datecolumn to apply thebirth_datesemantic type.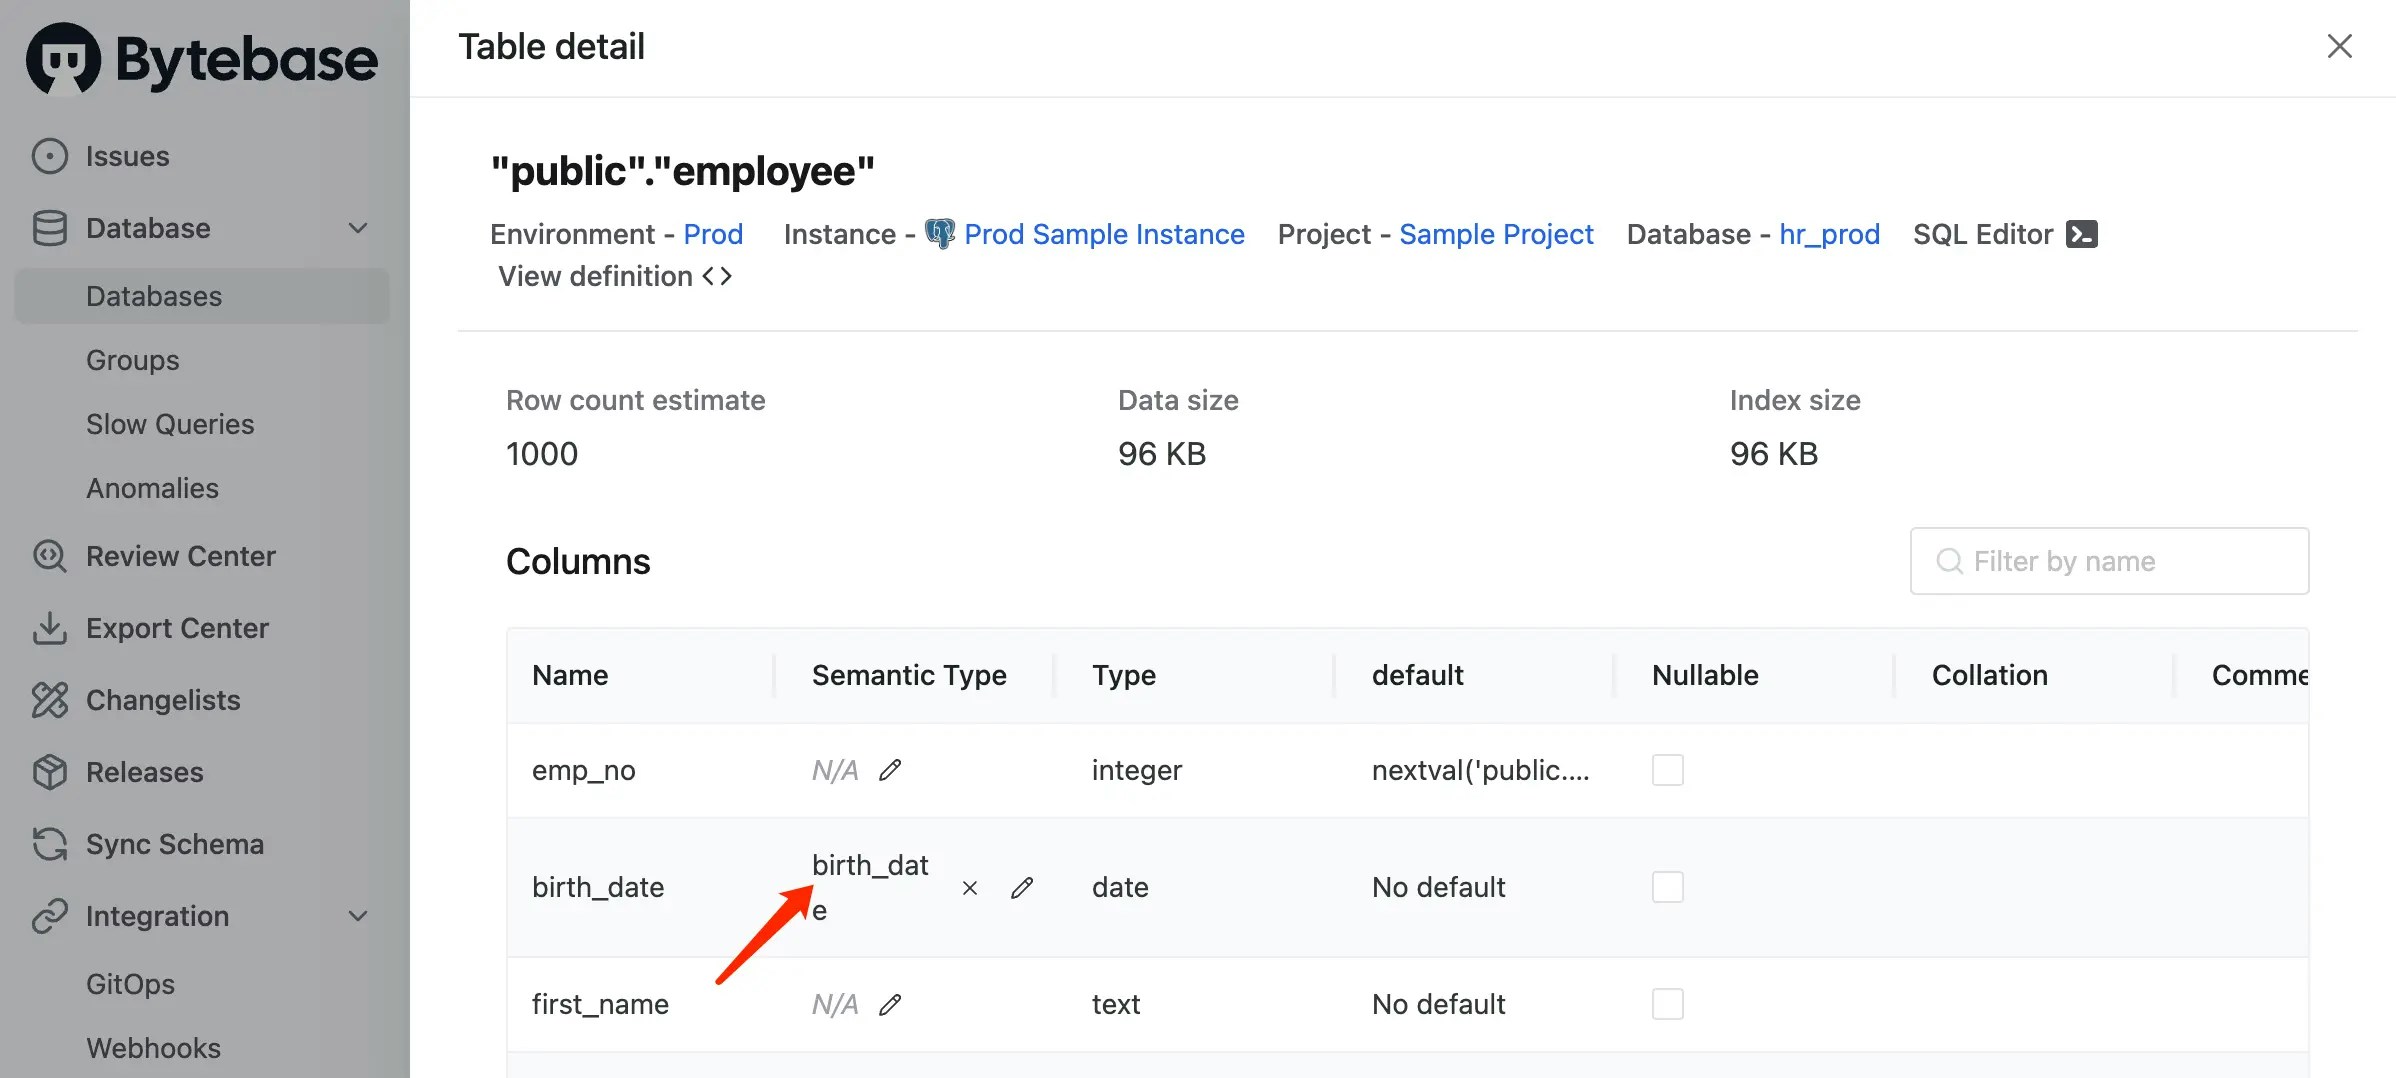
-
Go back to SQL Editor, run
SELECT * FROM employee;withinhr_prod. You’ll see thebirth_dateis masked based on the masking algorithm.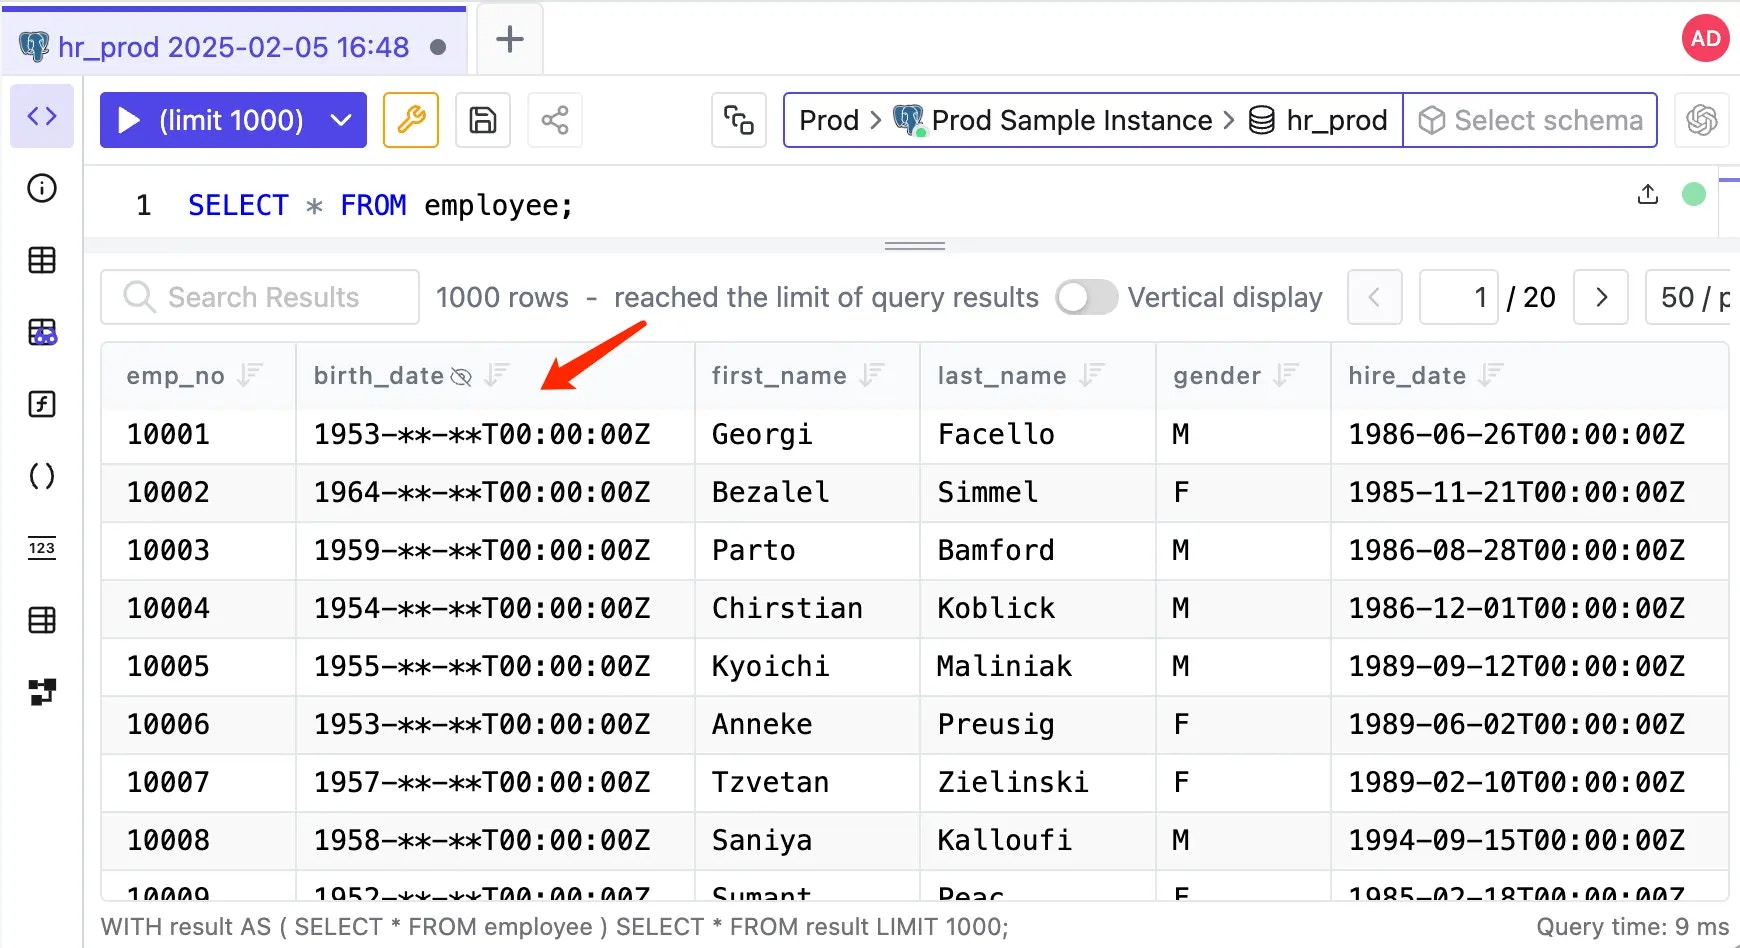
Global Masking Rule
As a DBA, you may want to batch apply masking settings. Use Global Masking Rule to achieve this.- Enter Data Access > Semantic Types, click Use Predefined Type.
-
Add the predefined type
Default. - Enter Data Access > Global Masking Rule, click Add.
-
Here define a global masking rule to mask all the
birth_datecolumns in all tables on production environment with semantic typeDefault, and click Confirm.
-
Go back to SQL Editor, run
SELECT * FROM employee;withinhr_prod. You’ll see thebirth_dateis masked. - You may also notice that the global masking rule take precedence over the column masking rule.
Export data with masked columns
Exported data is masked in the same way as query results.-
Stay on the SQL Editor after querying, and click Export.
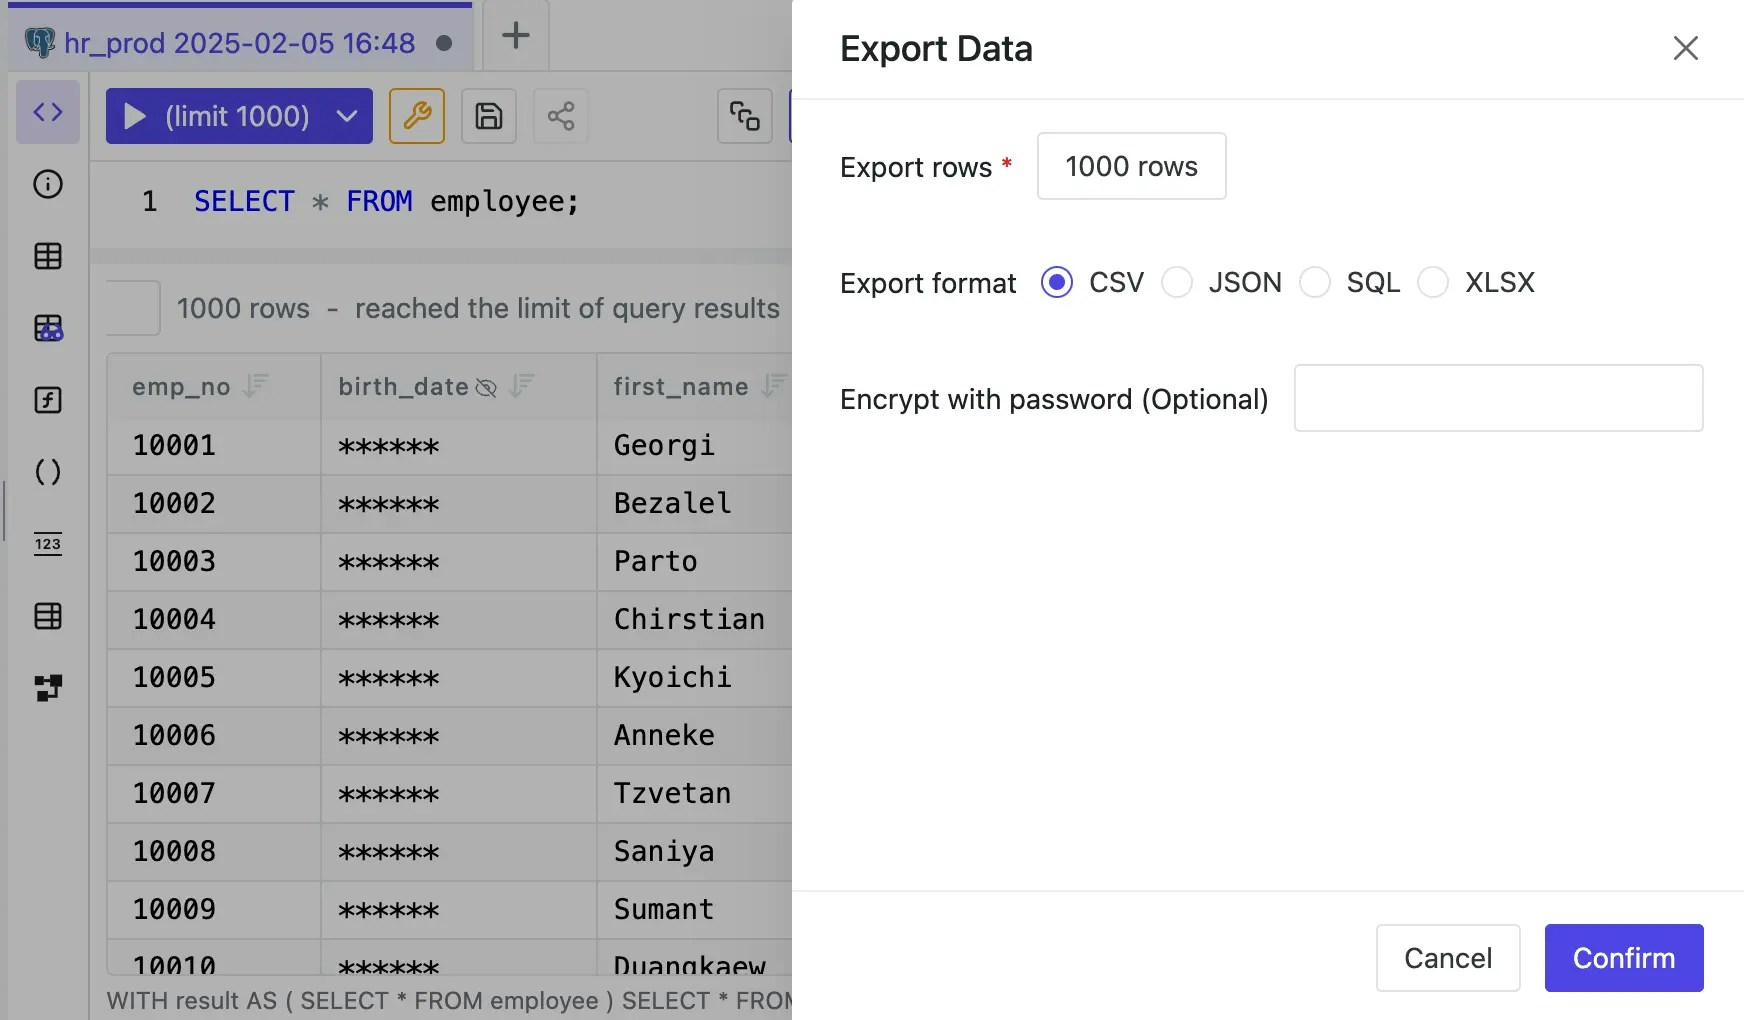
- Fill in the export rows number, choose the format and click Confirm. The file will start downloading.
-
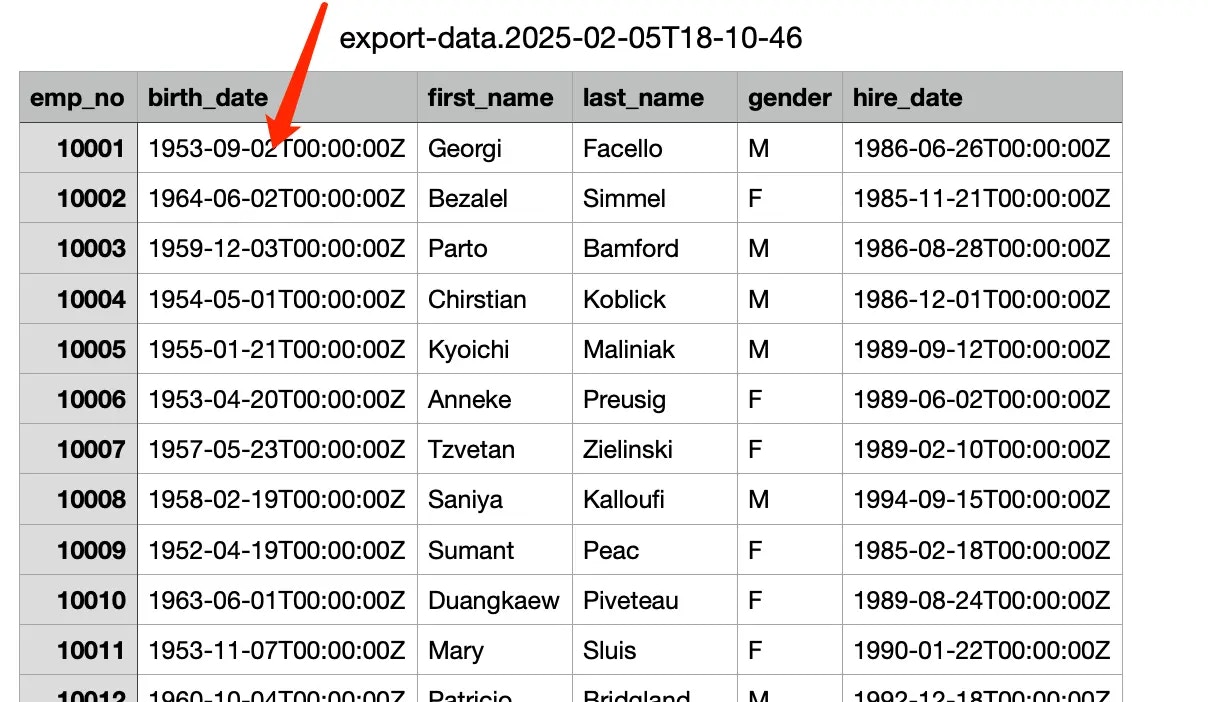
Open the downloaded file, you’ll see the
birth_dateis masked.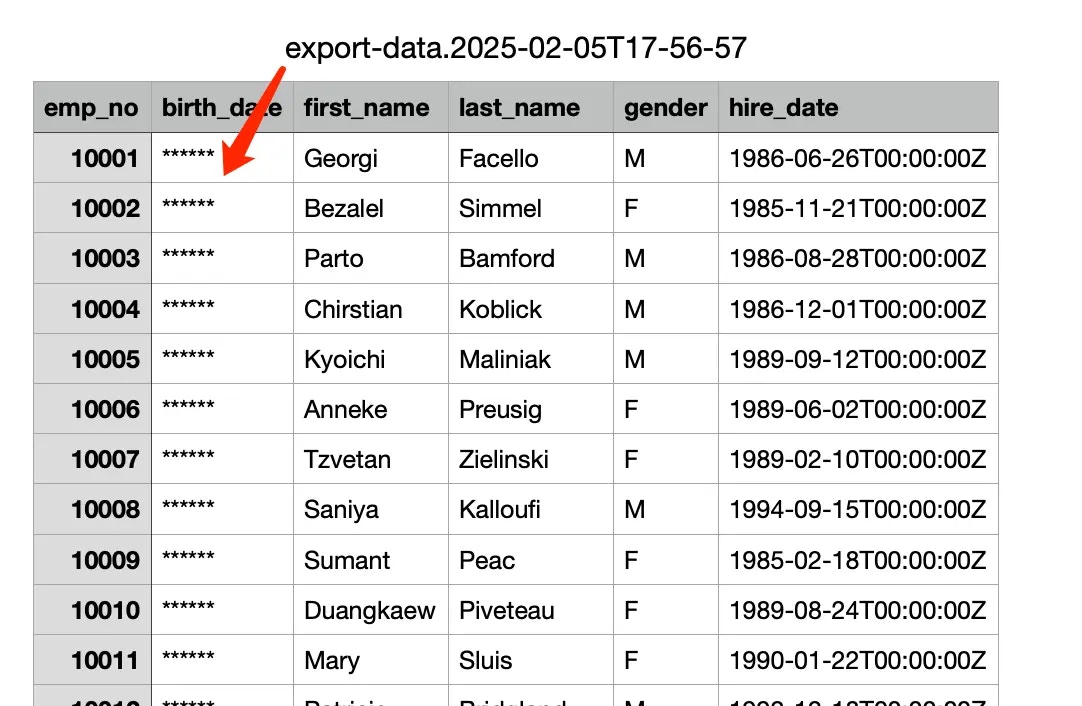
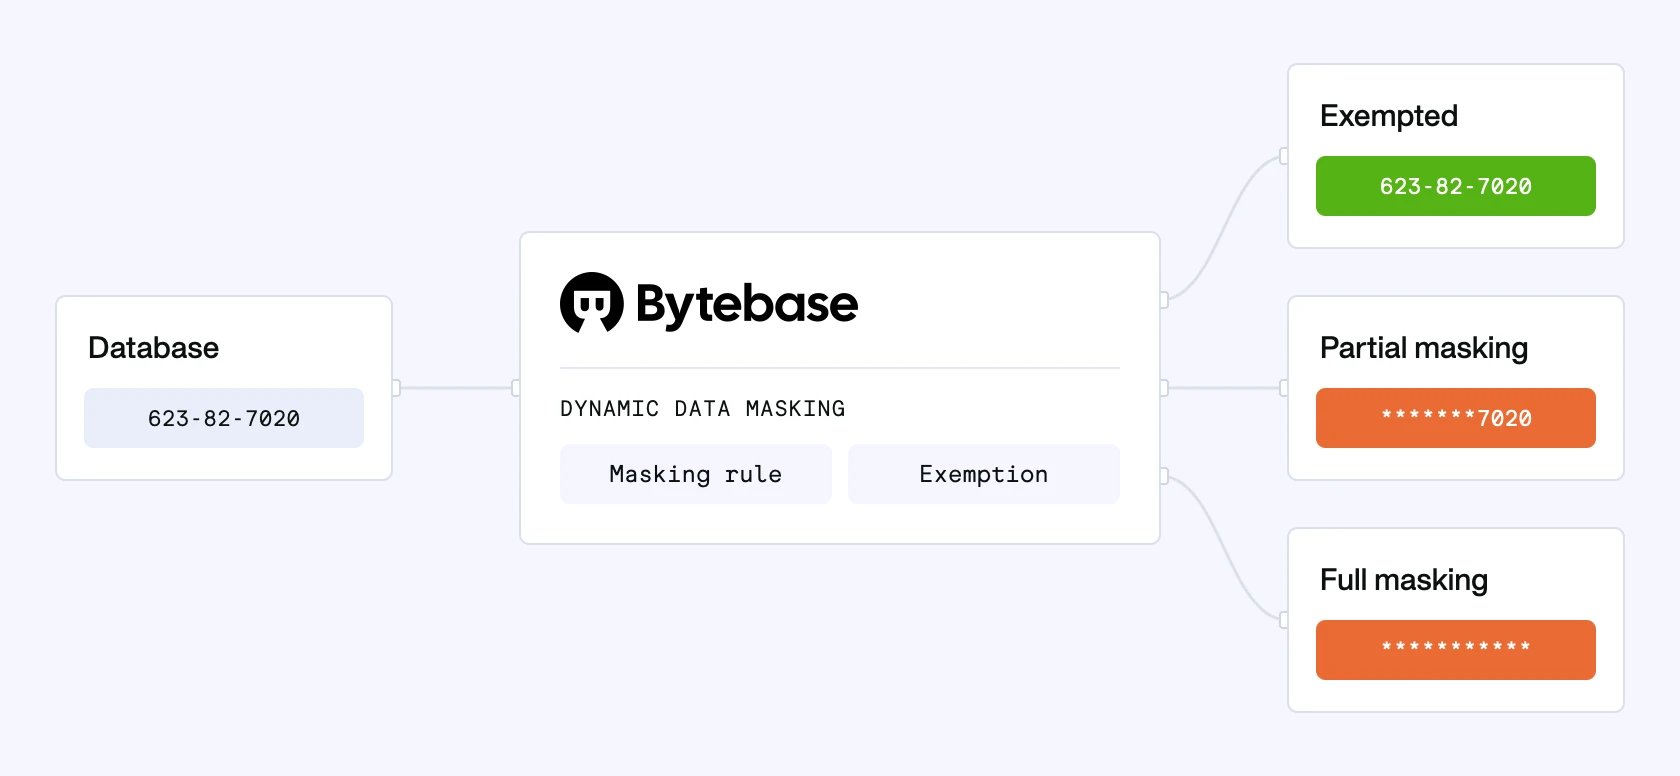
Masking Exemptions
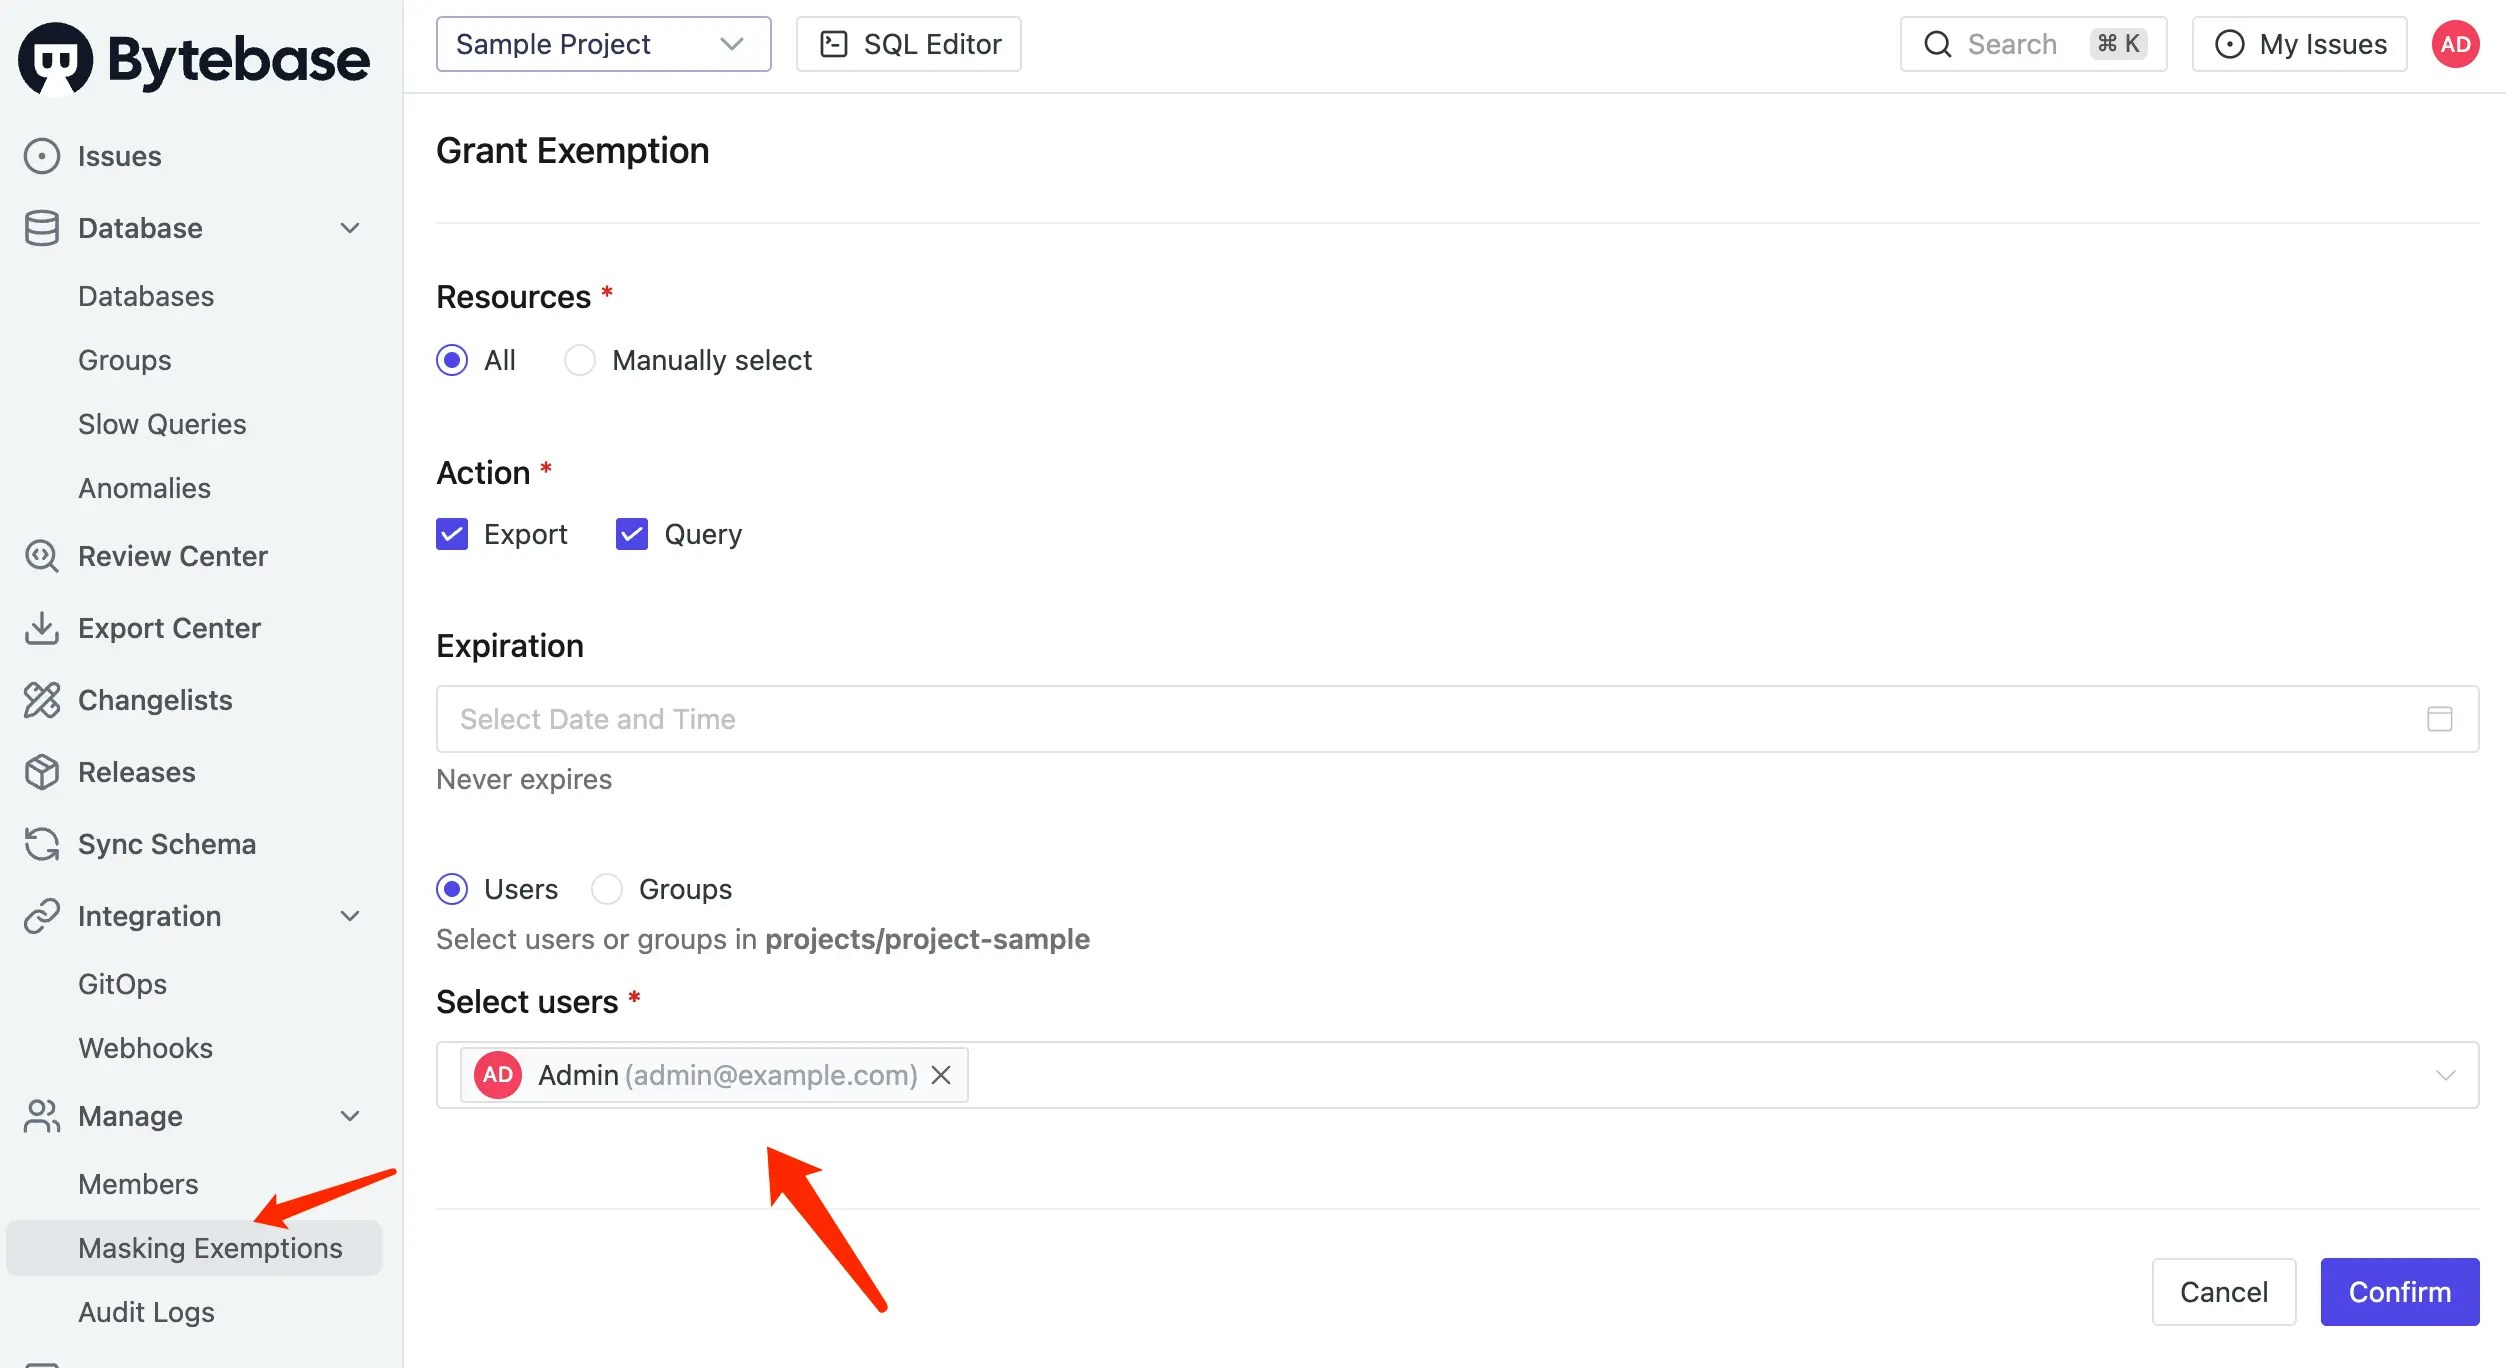
You can reveal masked data to a specific user by granting masking exemption.-
Go into the project
Sample Project, and click Manage > Masking Exemptions. -
Grant exemption to the user and click Confirm.
-
Go back to SQL Editor, run
SELECT * FROM employee;within databasehr_prod. You’ll see thebirth_dateis unmasked.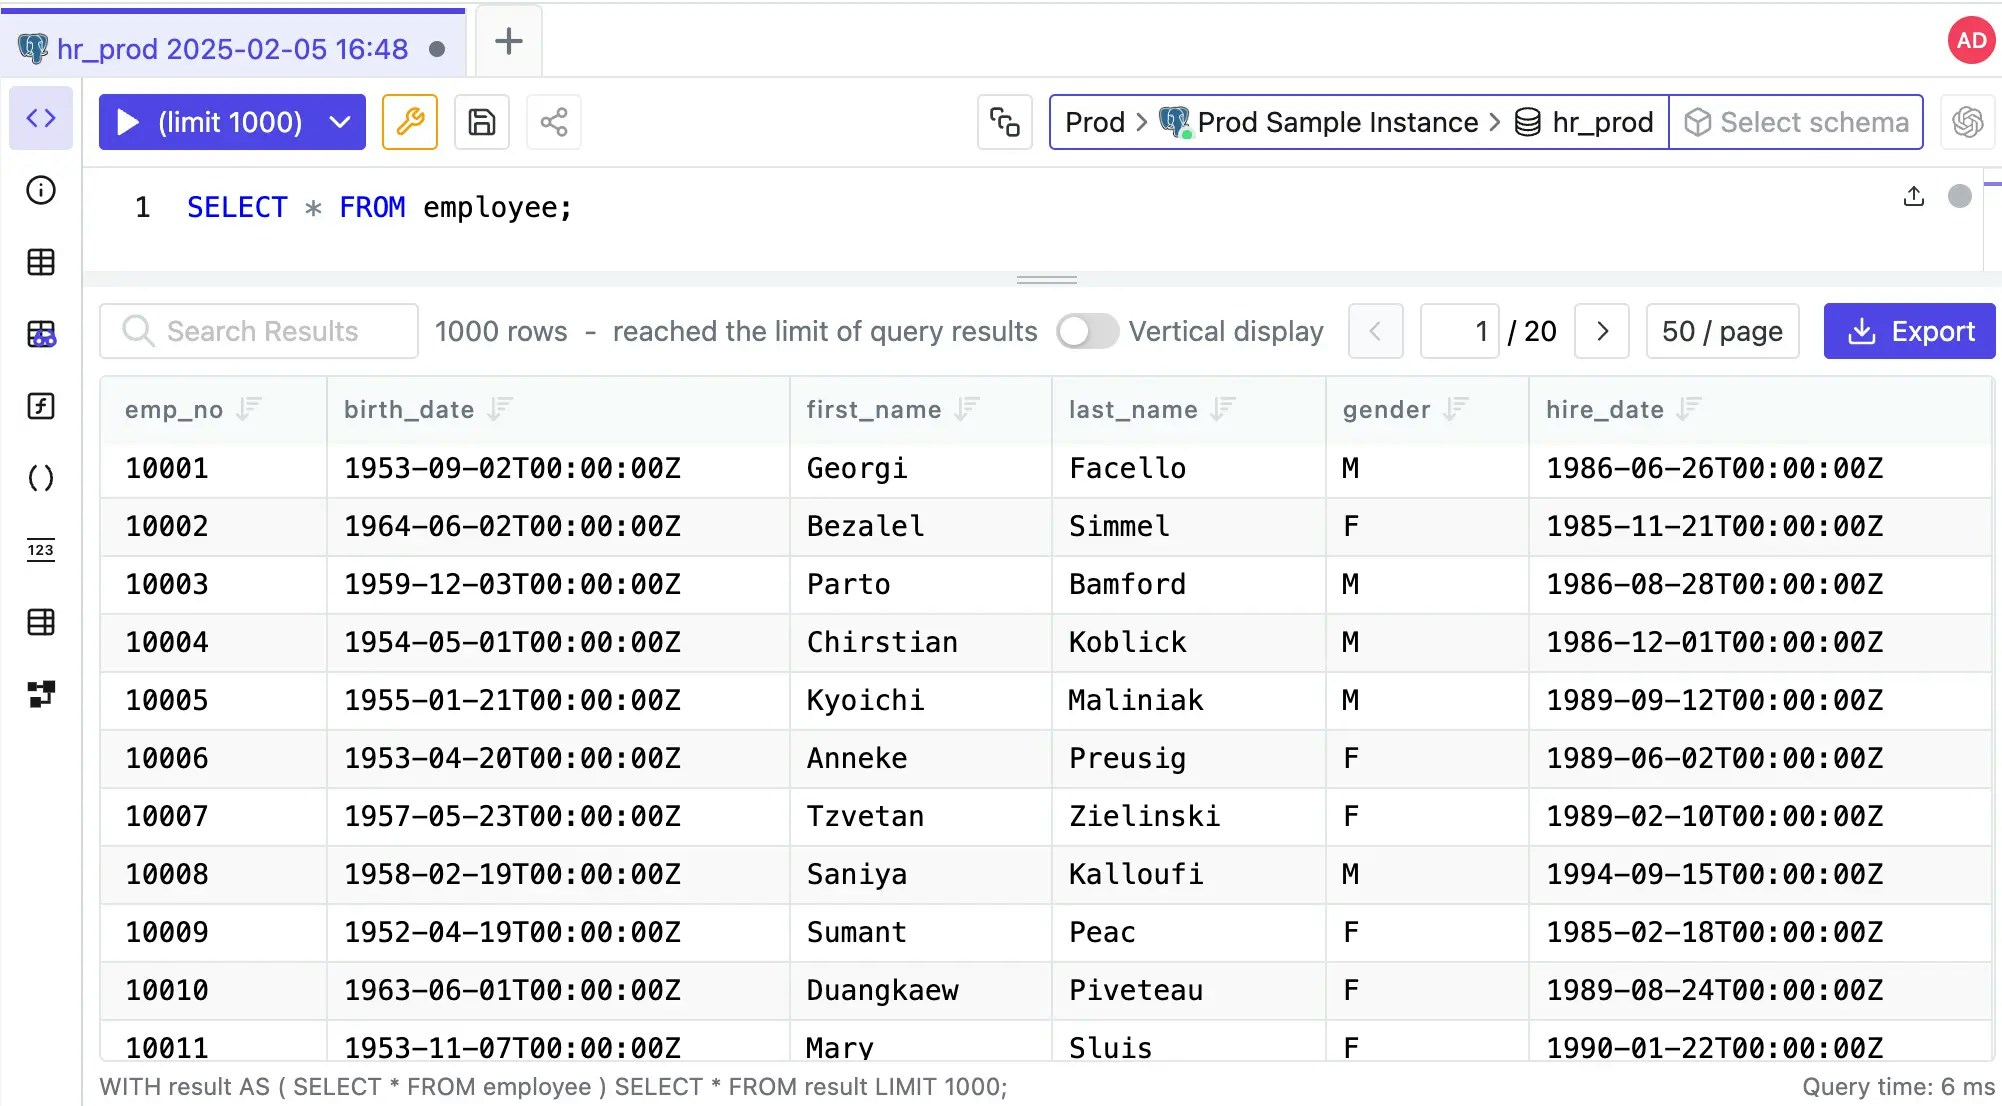
-
If you export the data, the
birth_dateis also unmasked.