- Part 1: Manage Environments with Terraform - Set up environments with policies
- Part 2: Manage Databases with Terraform - Register database instances
- Part 3: Manage Projects with Terraform - Organize databases into projects
- Part 4: Manage Bytebase Settings with Terraform - Configure workspace profile and approval policies
- Part 5: Manage SQL Review Rules with Terraform - Define SQL review policies
- Part 6: Manage Users and Groups with Terraform - Configure users and groups
- Part 7: Manage Database Access Control with Terraform - Grant database permissions
- Part 8: Manage Data Masking with Terraform 👈
This tutorial series uses separate Terraform files for better organization. Files are numbered by tutorial part and sub-step (e.g., 1-1-env-setting.tf, 1-2-env-policy-rollout.tf for Part 1, 2-instances.tf for Part 2, etc.). Terraform automatically handles dependencies between files.
What You’ll Learn
- Define semantic types with various masking algorithms
- Configure data classification levels and categories
- Create global masking policies that apply workspace-wide
- Set up database-specific column masking
- Grant masking exemptions for specific users
Prerequisites
Before starting this tutorial, ensure you have:- Completed Part 7: Manage Database Access Control with Terraform
- Bytebase running with service account configured
- Your Terraform files from the previous tutorials
Setup
From the previous tutorials, you should have:- Database instances and projects configured
- Users and access controls set up
- Production database
hr_prodwith employee data
Understanding Data Masking in Bytebase
Bytebase employs two concepts for data masking:- Semantic Types: Define masking algorithms (e.g., full mask, partial mask)
- Classifications: Group data by sensitivity levels (e.g., Level 1, Level 2)
- Classifications define sensitivity levels (Level 1, Level 2, etc.) but cannot mask data by themselves
- Semantic types define the actual masking algorithms (full-mask, range-mask, etc.)
-
Global masking rules: Define workspace-wide rules that map to semantic types
- Match by column names or patterns → semantic type
- Match by classification levels → semantic type
-
Column-level masking: Apply directly to specific columns
- Assign semantic types directly to columns
- Assign classifications to columns (which then use semantic types via global rules)
Configure Data Masking
Step 1: Define Semantic Types
| Terraform resource | bytebase_setting |
| Sample file | 8-1-semantic-types.tf |
8-1-semantic-types.tf to define masking algorithms:
8-1-semantic-types.tf
Step 2: Define Data Classification
| Terraform resource | bytebase_setting |
| Sample file | 8-2-classification.tf |
8-2-classification.tf to organize data by sensitivity levels:
8-2-classification.tf
Step 3: Apply Basic Configuration
Apply the semantic types and classification configuration:-
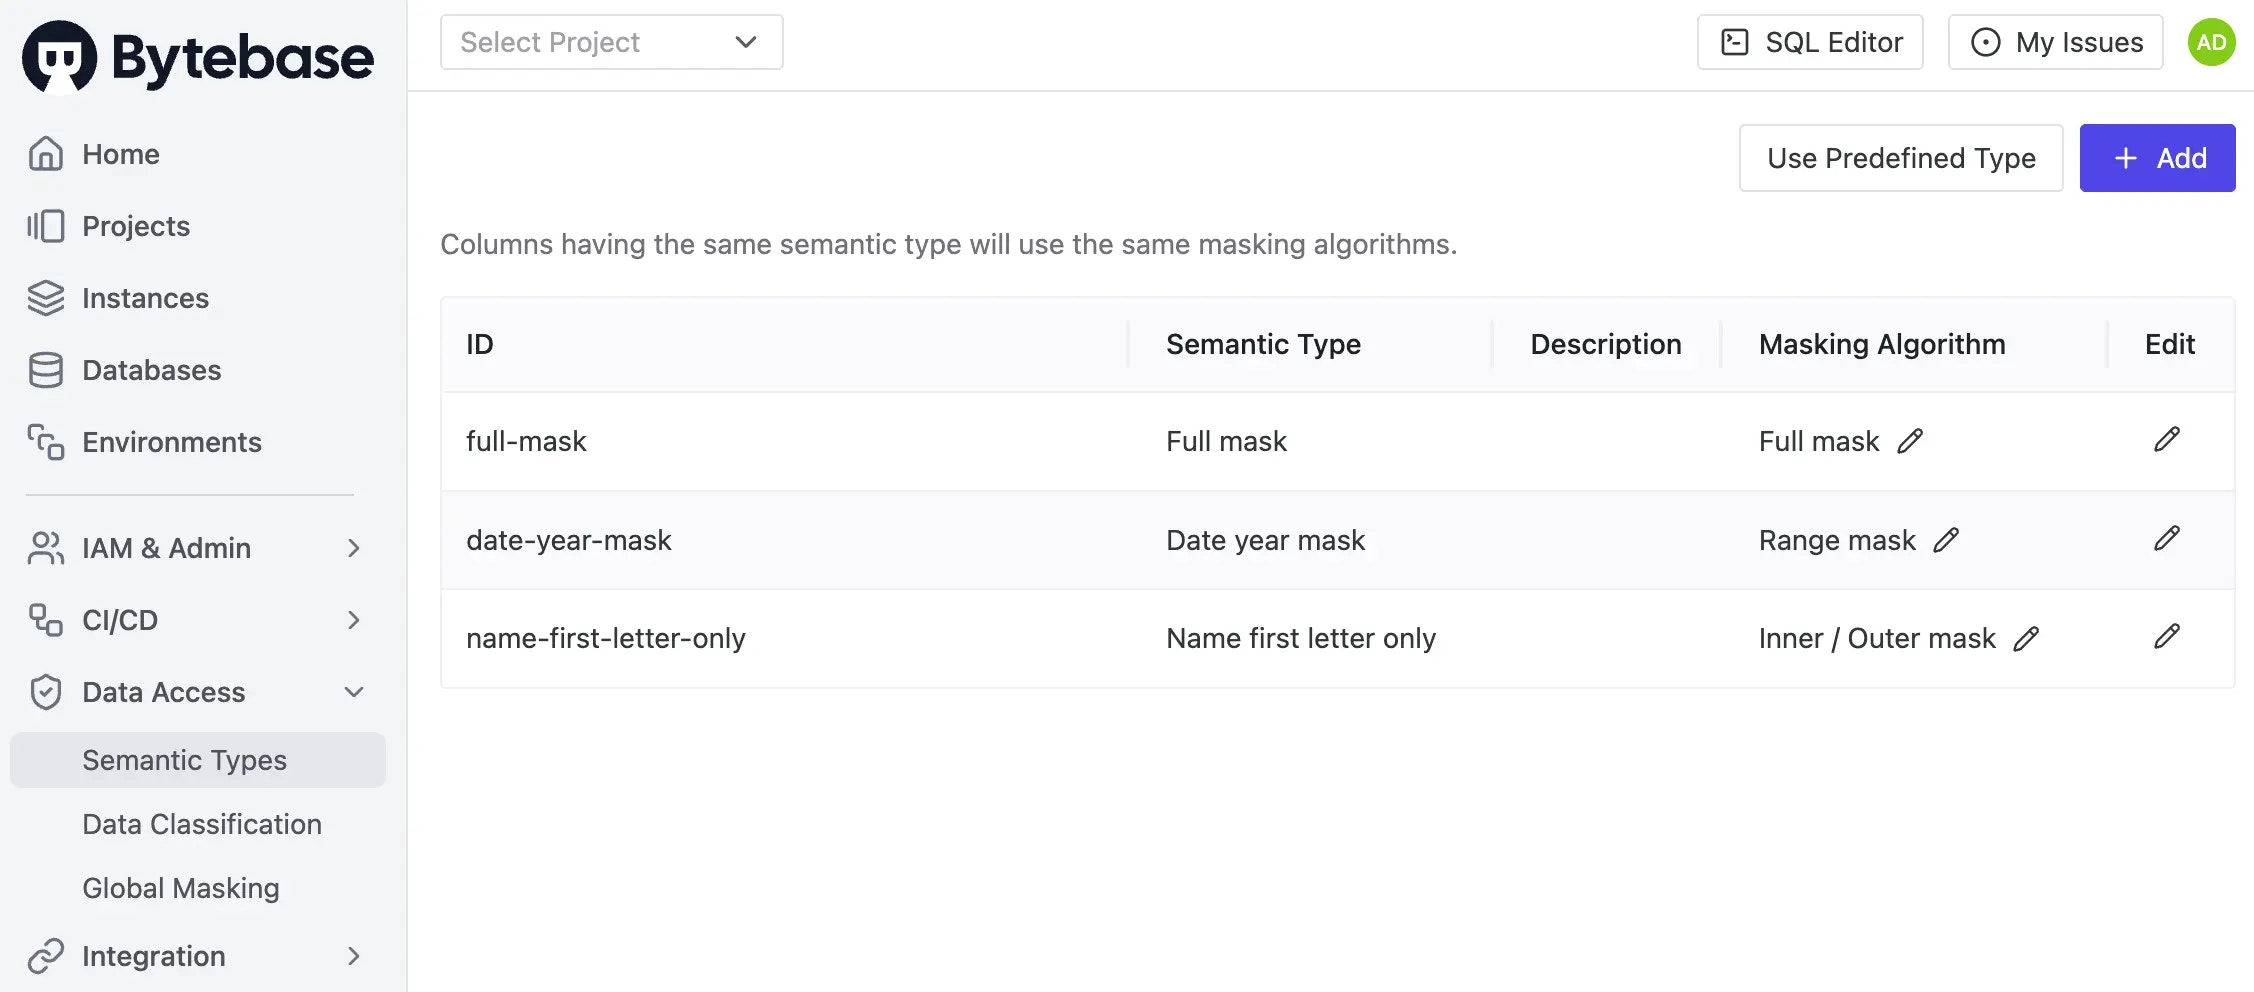
Click Data Access > Semantic Types on the left sidebar. You should see three masking types configured.
-
Click Data Access > Data Classification on the left sidebar. You should see the classification hierarchy with two levels. Note that Level 2 is marked as more sensitive.

Step 4: Apply Global Masking Policy
Now that you’ve defined your masking methods, apply them workspace-wide using a global policy.Classification levels must be mapped to semantic types to perform actual masking. Classification
defines the sensitivity level, while semantic types define the masking algorithm.
| Terraform resource | bytebase_policy |
| Sample file | 8-3-global-data-masking.tf |
8-3-global-data-masking.tf to apply workspace-wide masking rules:
8-3-global-data-masking.tf
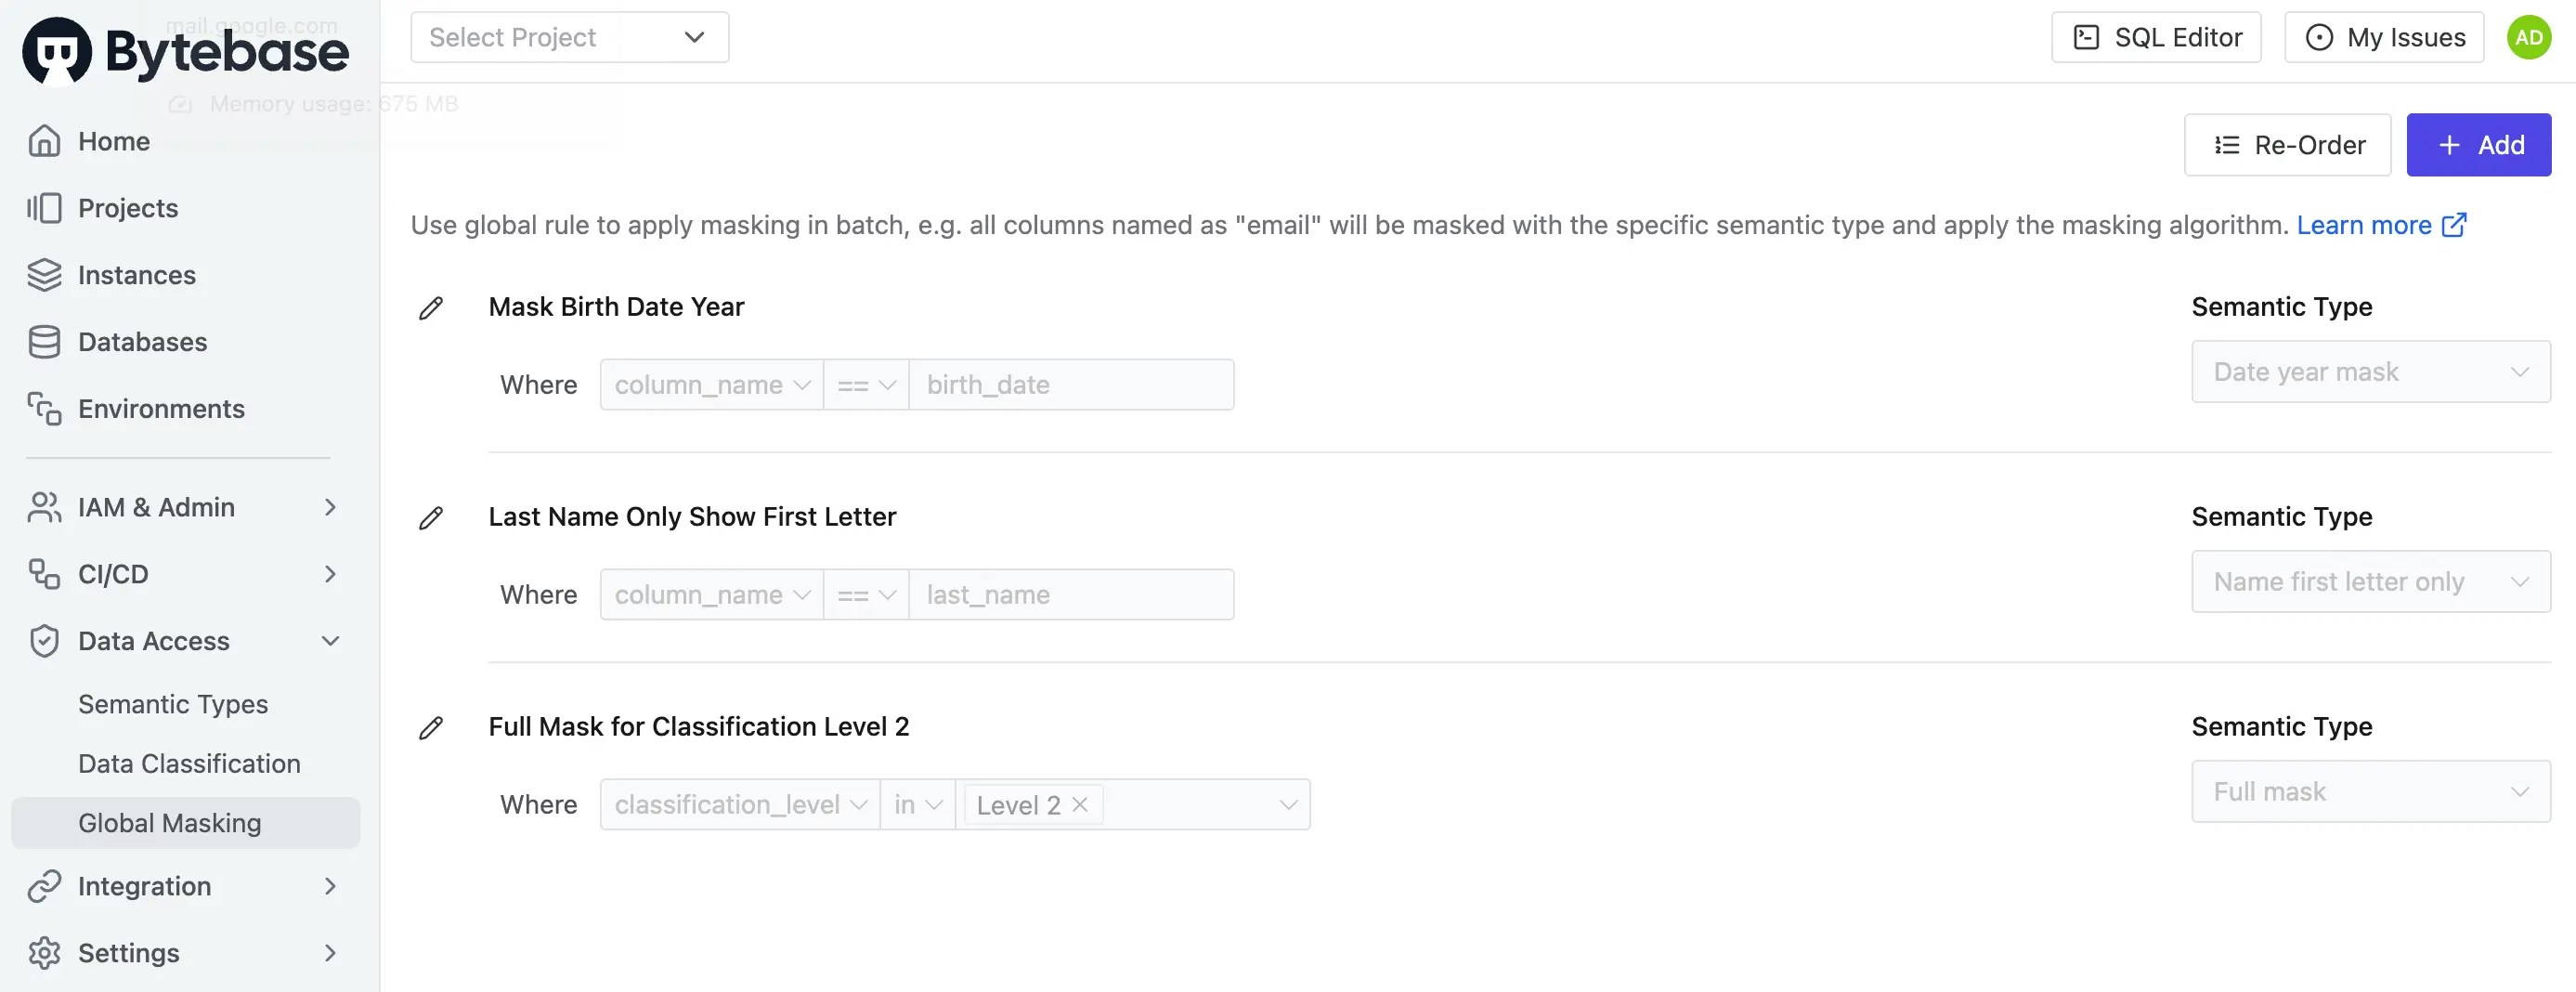
-
Click Data Access > Global Masking. You should see the global policy with three conditions with corresponding semantic types.
-
Log in as Developer 1 (
dev1@example.com), then go to SQL Editor to accesshr_prod. Double-clickemployeetable on the left.birth_datehasMask Birth Date Yearsemantic type, andlast_namehasLast Name Only Show First Letter. Hovering the eye icon will show the masking reason.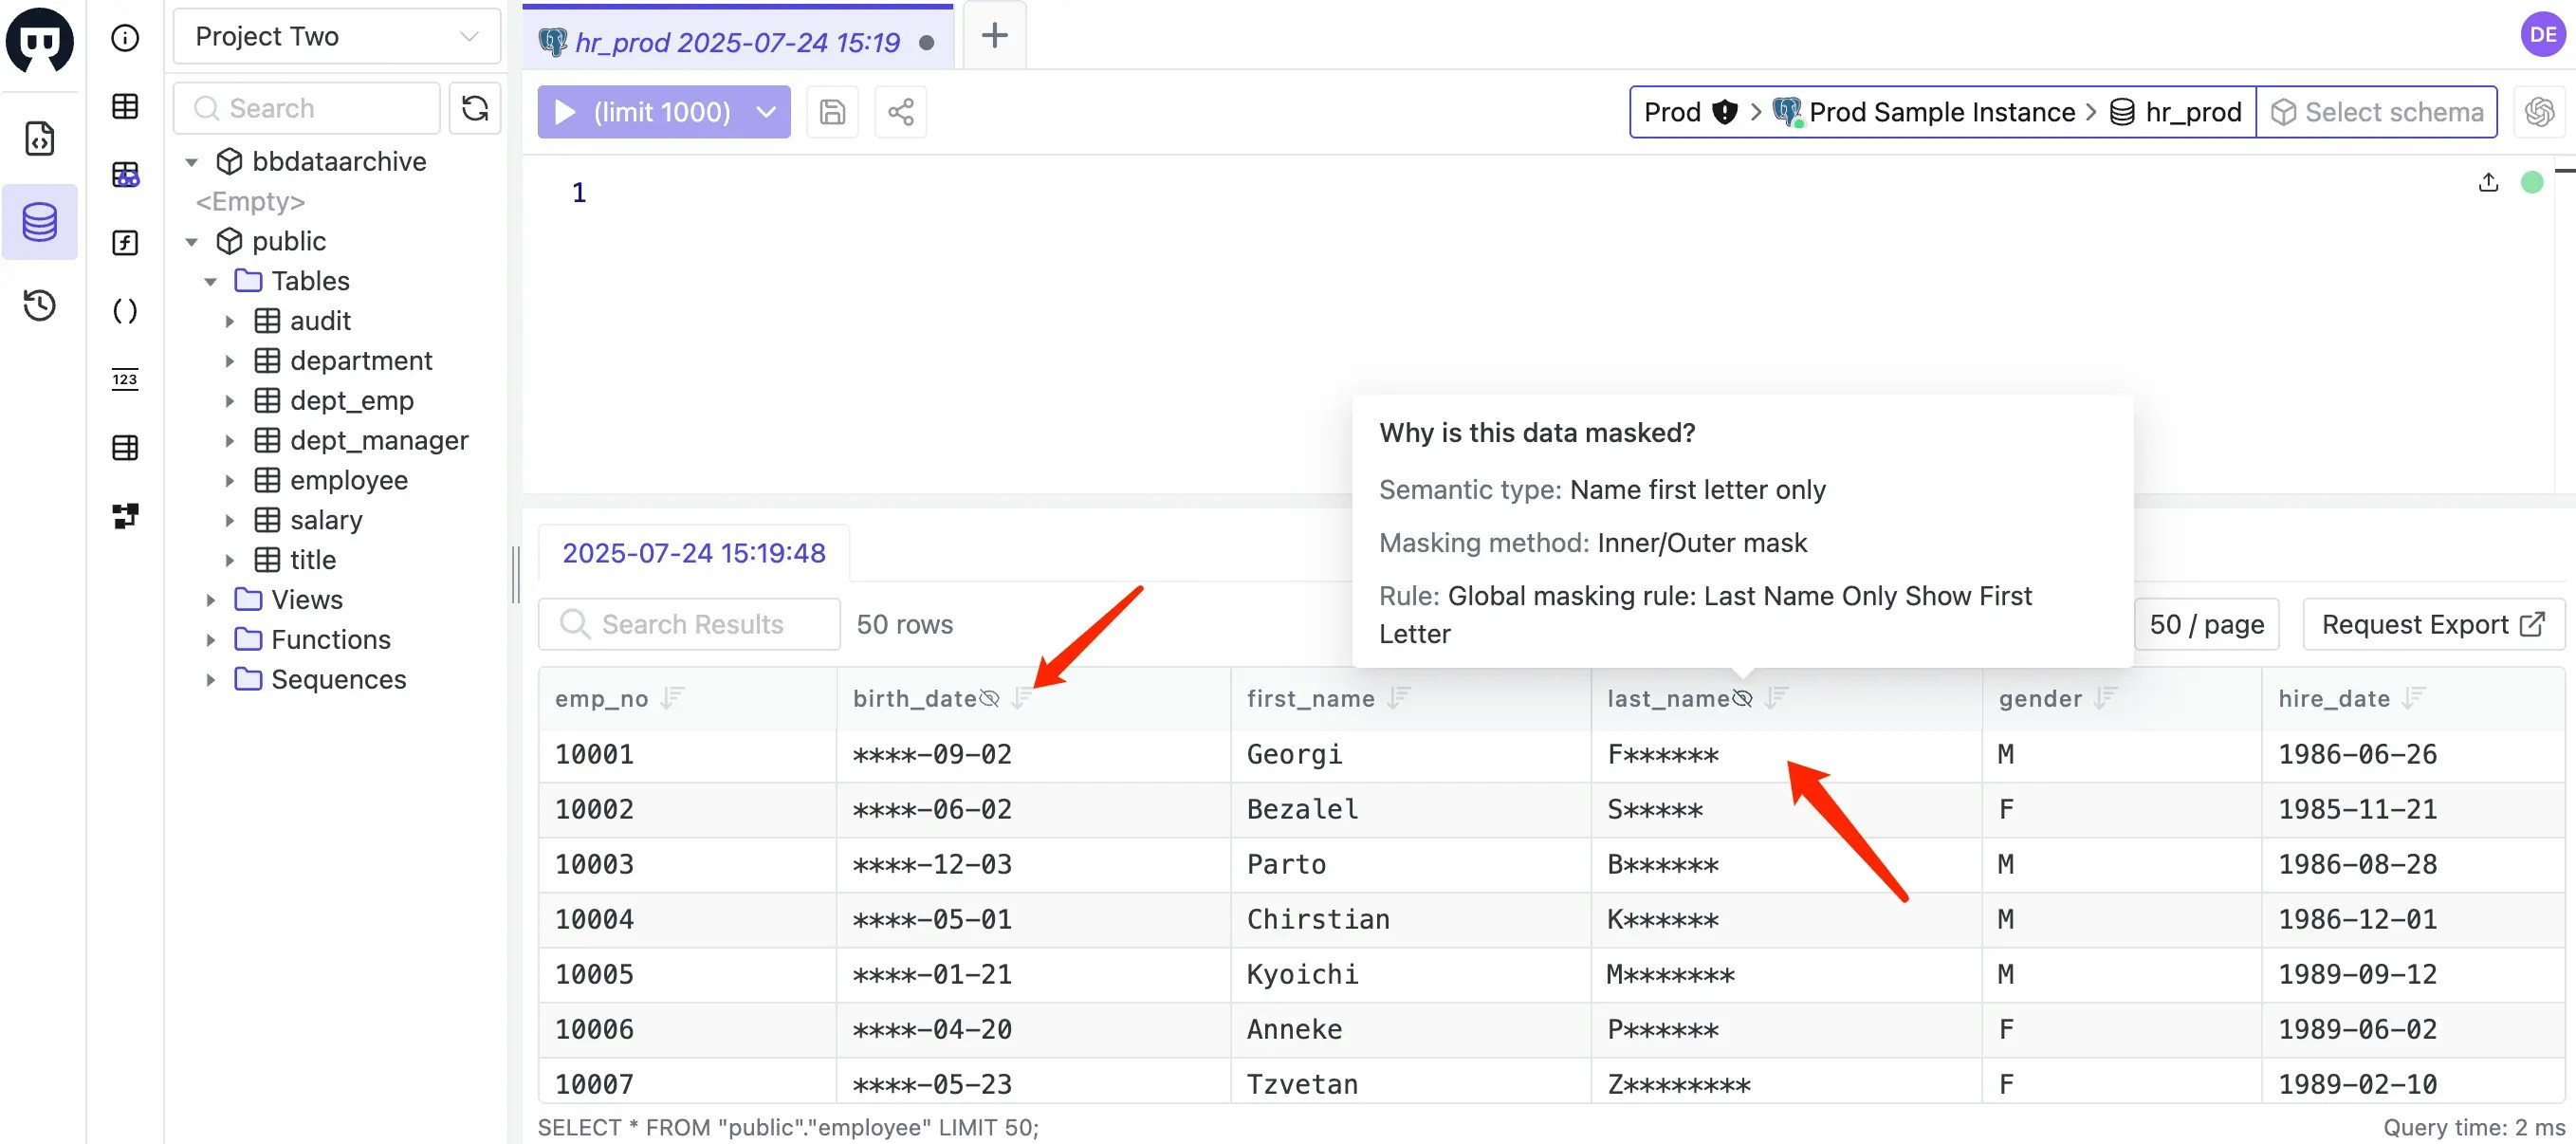
Step 5: Apply Column-Specific Masking
| Terraform resource | bytebase_database |
| Sample file | 8-4-database-masking.tf |
8-4-database-masking.tf to apply masking to specific columns:
- Column
from_dateis assigned the semantic typedate-year-mask - Column
amountis assigned the classification2-1(Employment info)
8-4-database-masking.tf
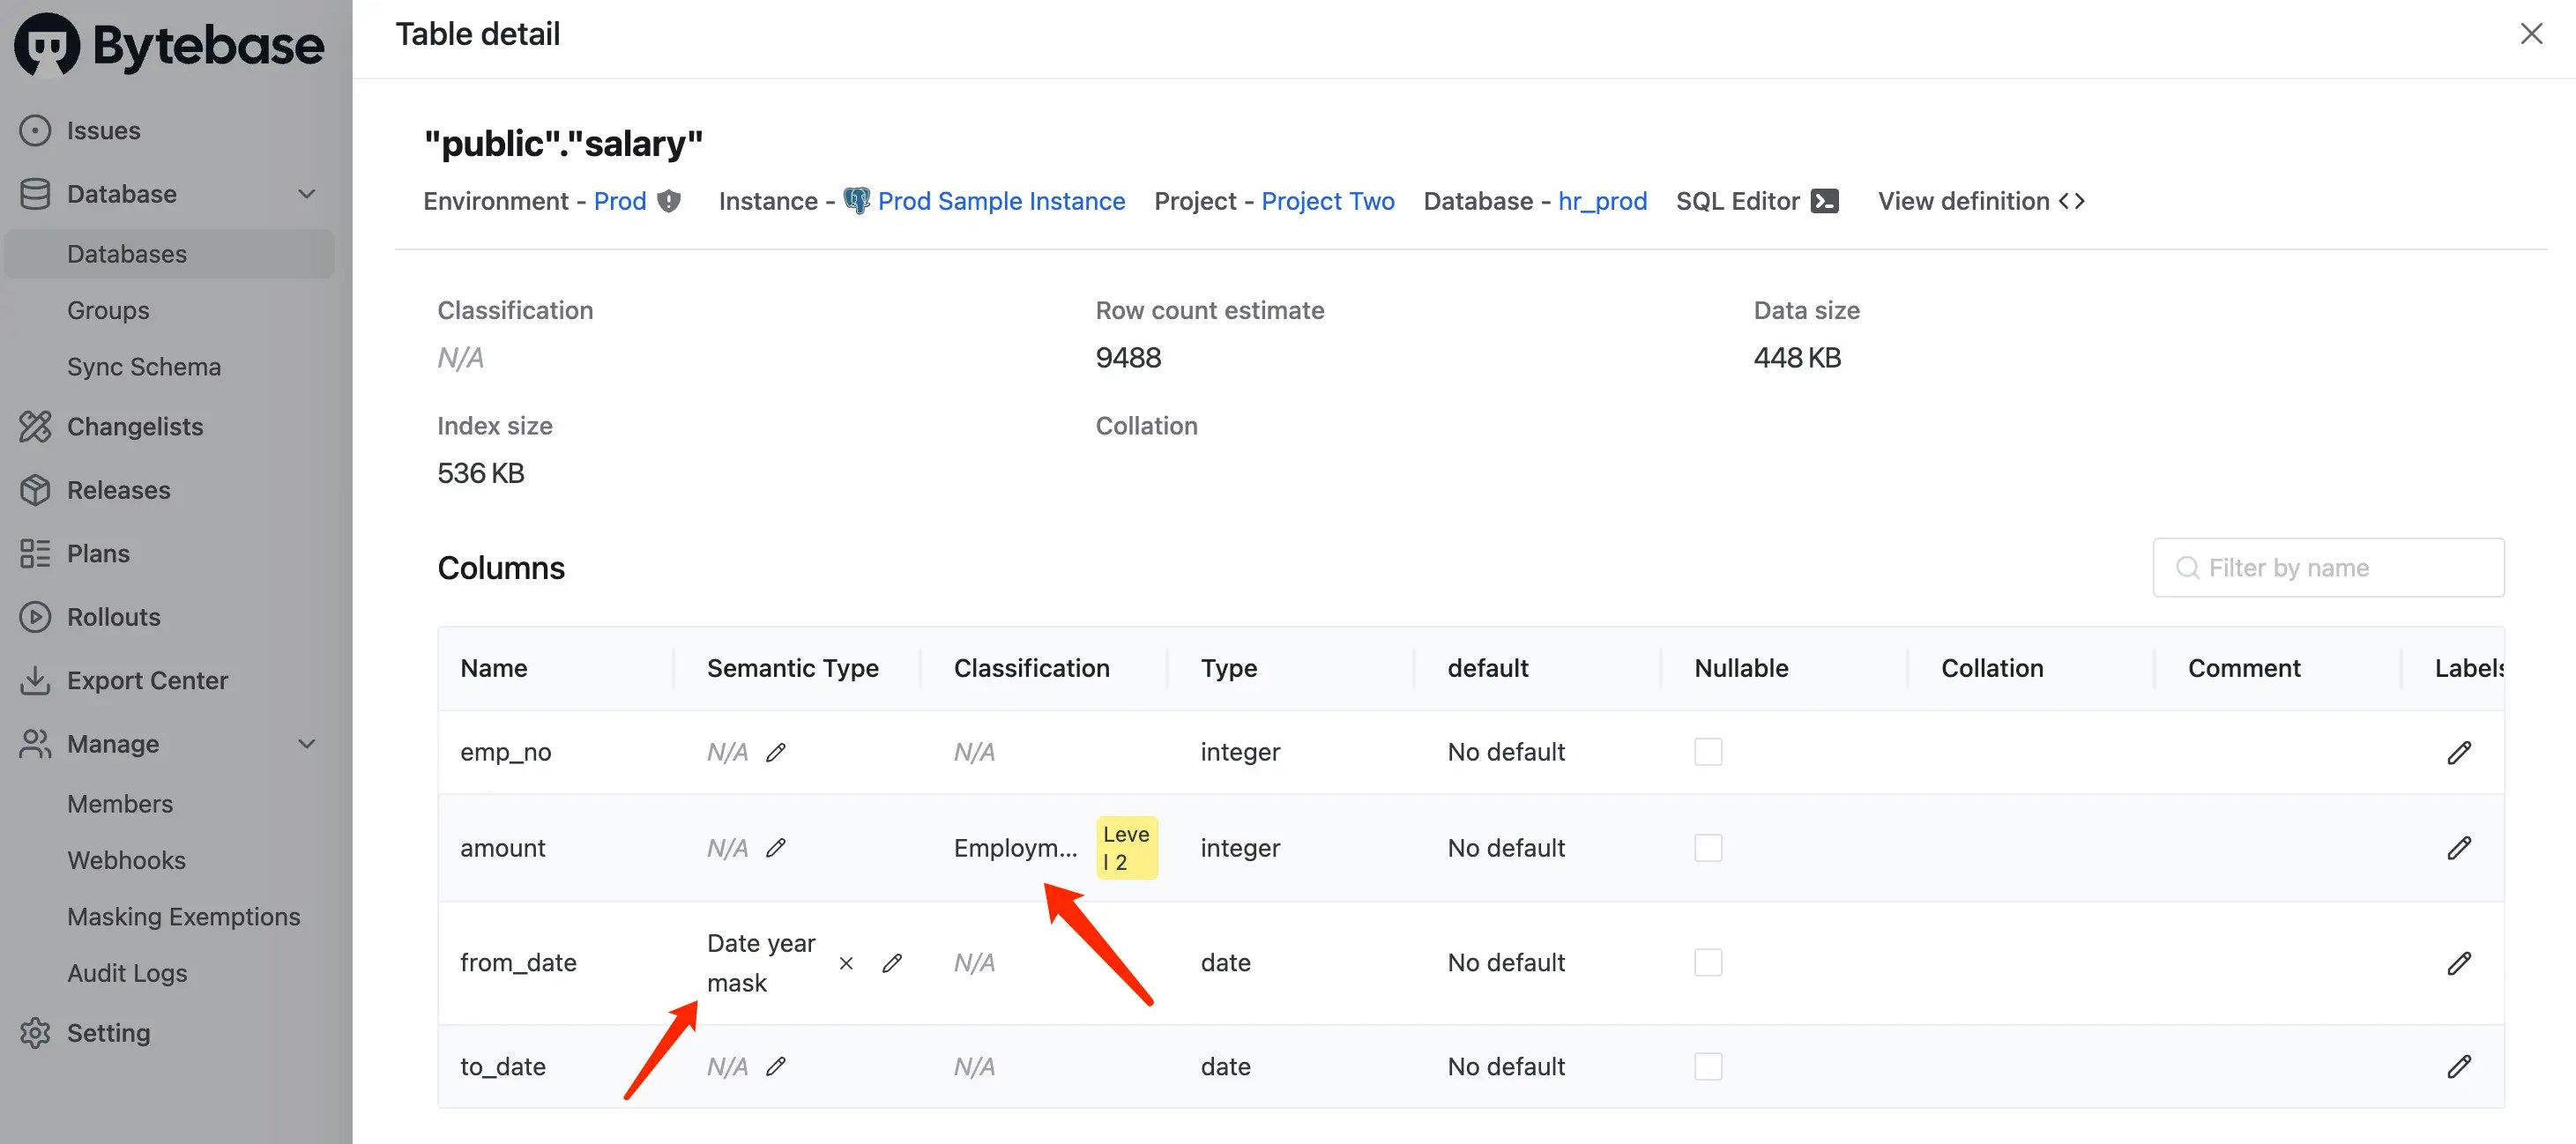
- Go into Project Two, then click Database > Databases and click hr_prod.
-
Scroll down to find
salarytable, click it. You should see:amountis assigned asEmployment info(Level 2) classificationfrom_dateis assigned asdate-year-masksemantic type
-
Log in as Developer 1 (
dev1@example.com), then go to SQL Editor to accesshr_prod. Double-clicksalarytable on the left.from_datehasDate year masksemantic type, andamounthasL2classification which leads toFull maskingsemantic type.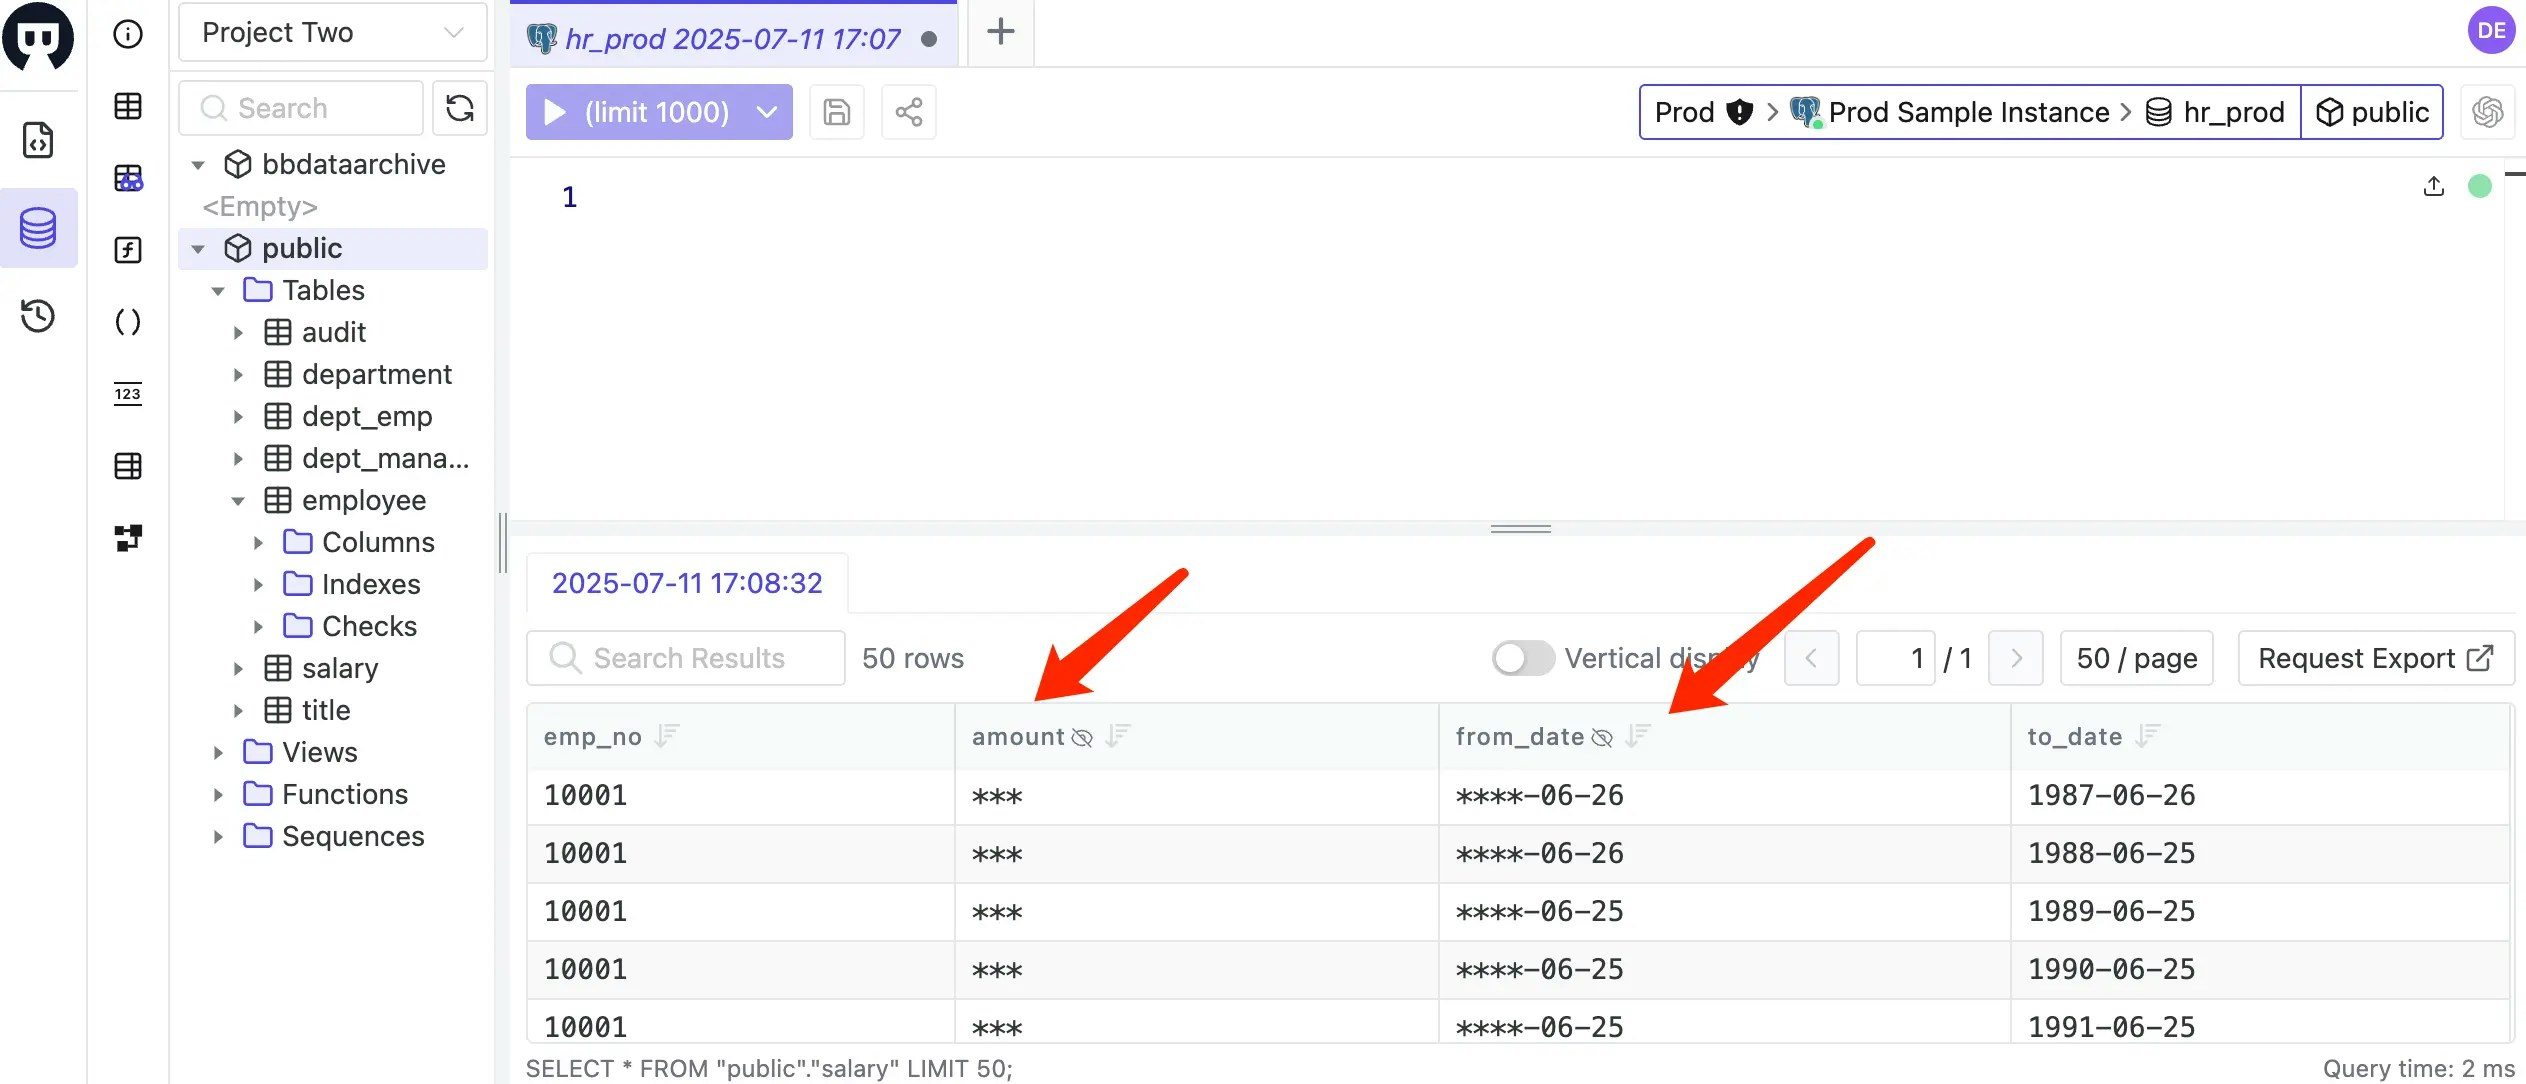
Step 6: Grant Masking Exemptions
| Terraform resource | bytebase_policy |
| Sample file | 8-5-masking-exemption.tf |
8-5-masking-exemption.tf to grant bypass permissions:
- Workspace Admin (
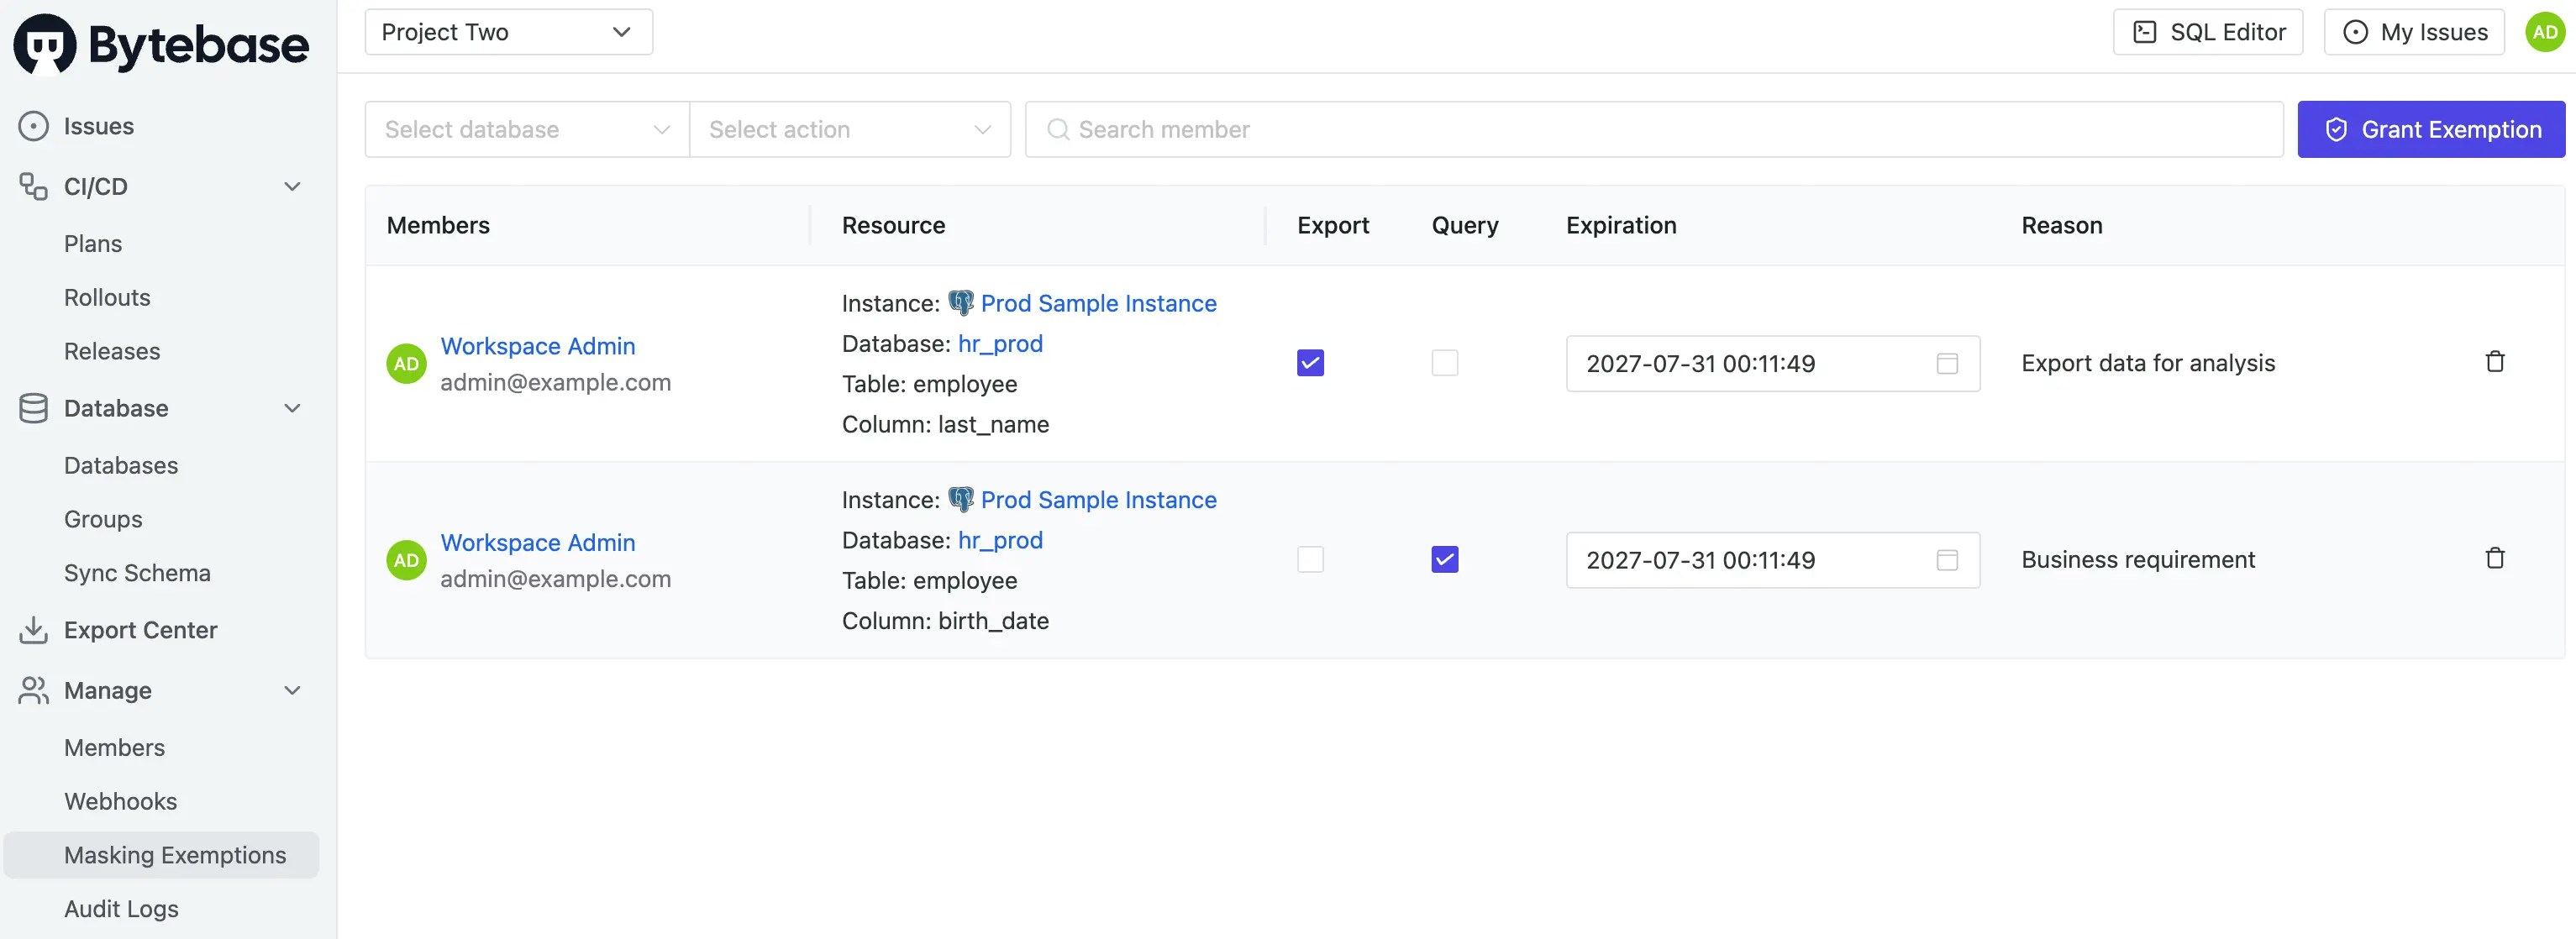
admin@example.com) and QA Tester (qa1@example.com) have masking exemptions forbirth_dateandlast_namein theemployeetable (expires 2027-07-30). - Developer 1 (
dev1@example.com) has exemptions for specific columns via CELraw_expression(no expiry).
8-5-masking-exemption.tf
If there is no
expire_timestamp specified, the exemption will never expire.2027-07-30T16:11:49Z is an ISO 8601 UTC timestamp.
Our system uses PostgreSQL to store metadata, where this value is stored as a timestamptz.If you want to apply the exemption to all databases, you can skip the
database, table, and column fields.If you specify
raw_expression, it defines the exemption condition directly as a CEL expression. When raw_expression is used, the other fields (database, schema, table, columns, expire_timestamp) are ignored.Step 7: Apply Final Configuration and Test
Apply the masking exemptions and test everything:-
Log in as Workspace Admin (
admin@example.com), then go to SQL Editor to accesshr_prodand double-click theemployeetable. Bothbirth_dateandlast_nameare now unmasked for both query and export.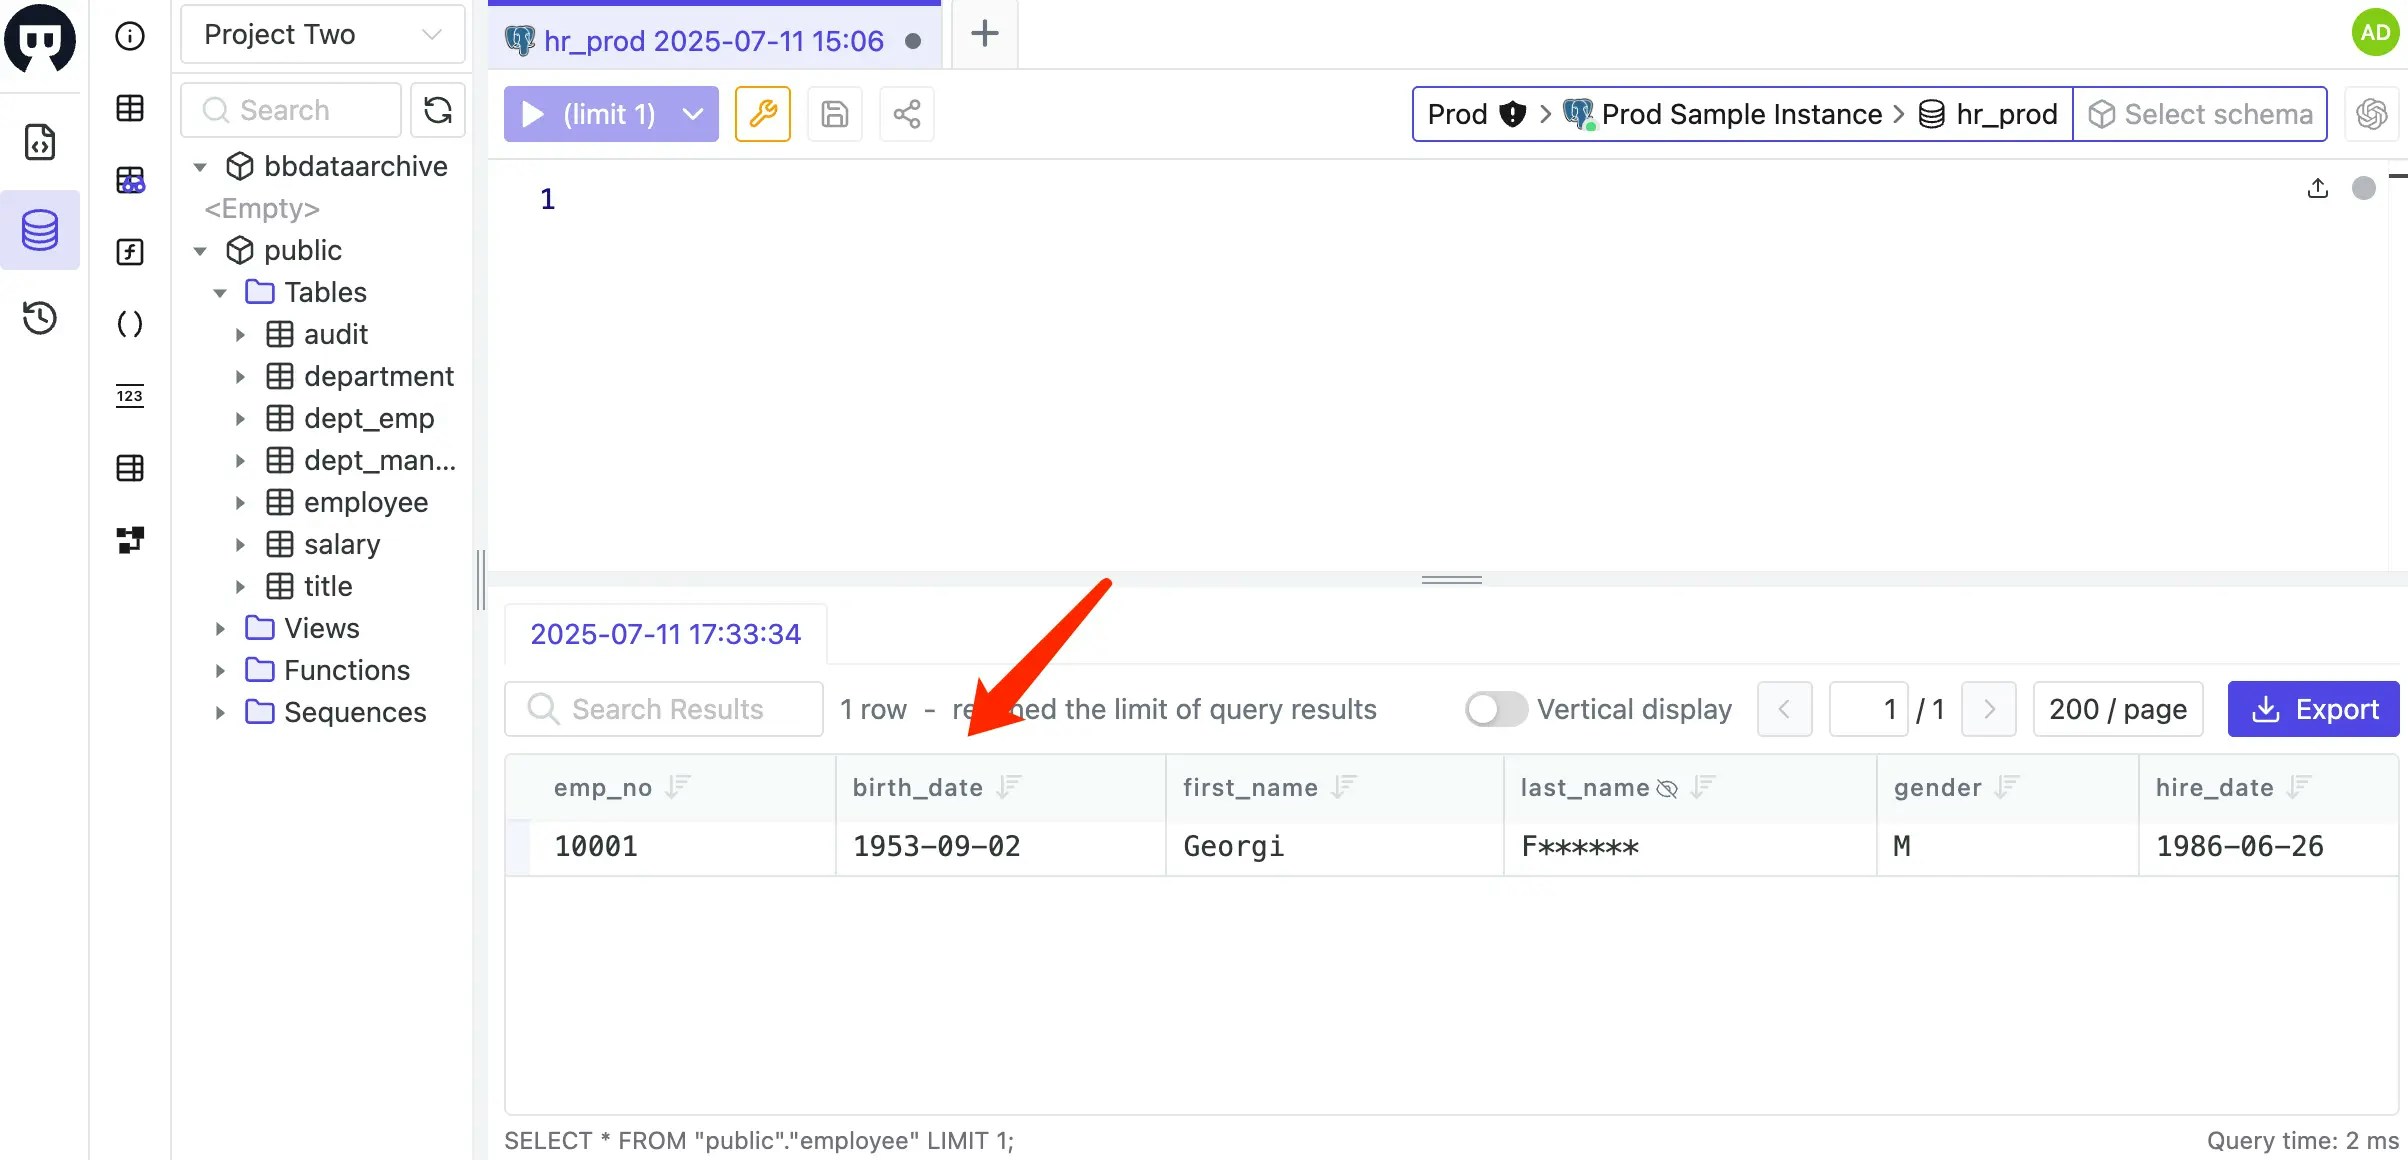
-
You may go to Manage > Masking Exemptions to view current exemptions. They will expire automatically after the expiration time.
Summary
This tutorial demonstrated how to implement data masking in Bytebase using Terraform. Here are the key concepts: Define Phase:- Semantic Types: Define reusable masking algorithms
- Classification: Organize data by sensitivity levels (requires mapping to semantic types)
- Global Policies: Apply masking rules workspace-wide based on conditions
- Column-Level Masking: Apply semantic types or classifications to specific columns
- Masking Exemption: Grant bypass permissions for specific users to query/export unmasked data
Next Steps
Congratulations! You’ve completed the Bytebase Terraform tutorial series. You now have a fully configured Bytebase workspace with:- Database instances and environments
- Organized projects
- Risk policies and approval workflows
- SQL review rules for schema standards
- Database access control
- Data masking for sensitive information