Prerequisites
- Environment: Available in all plans
- Database Groups: Requires Pro Plan or higher (request trial)
Procedure
Step 1 - Start Bytebase with sample data
-
Ensure Docker is running, then start the Bytebase container:

-
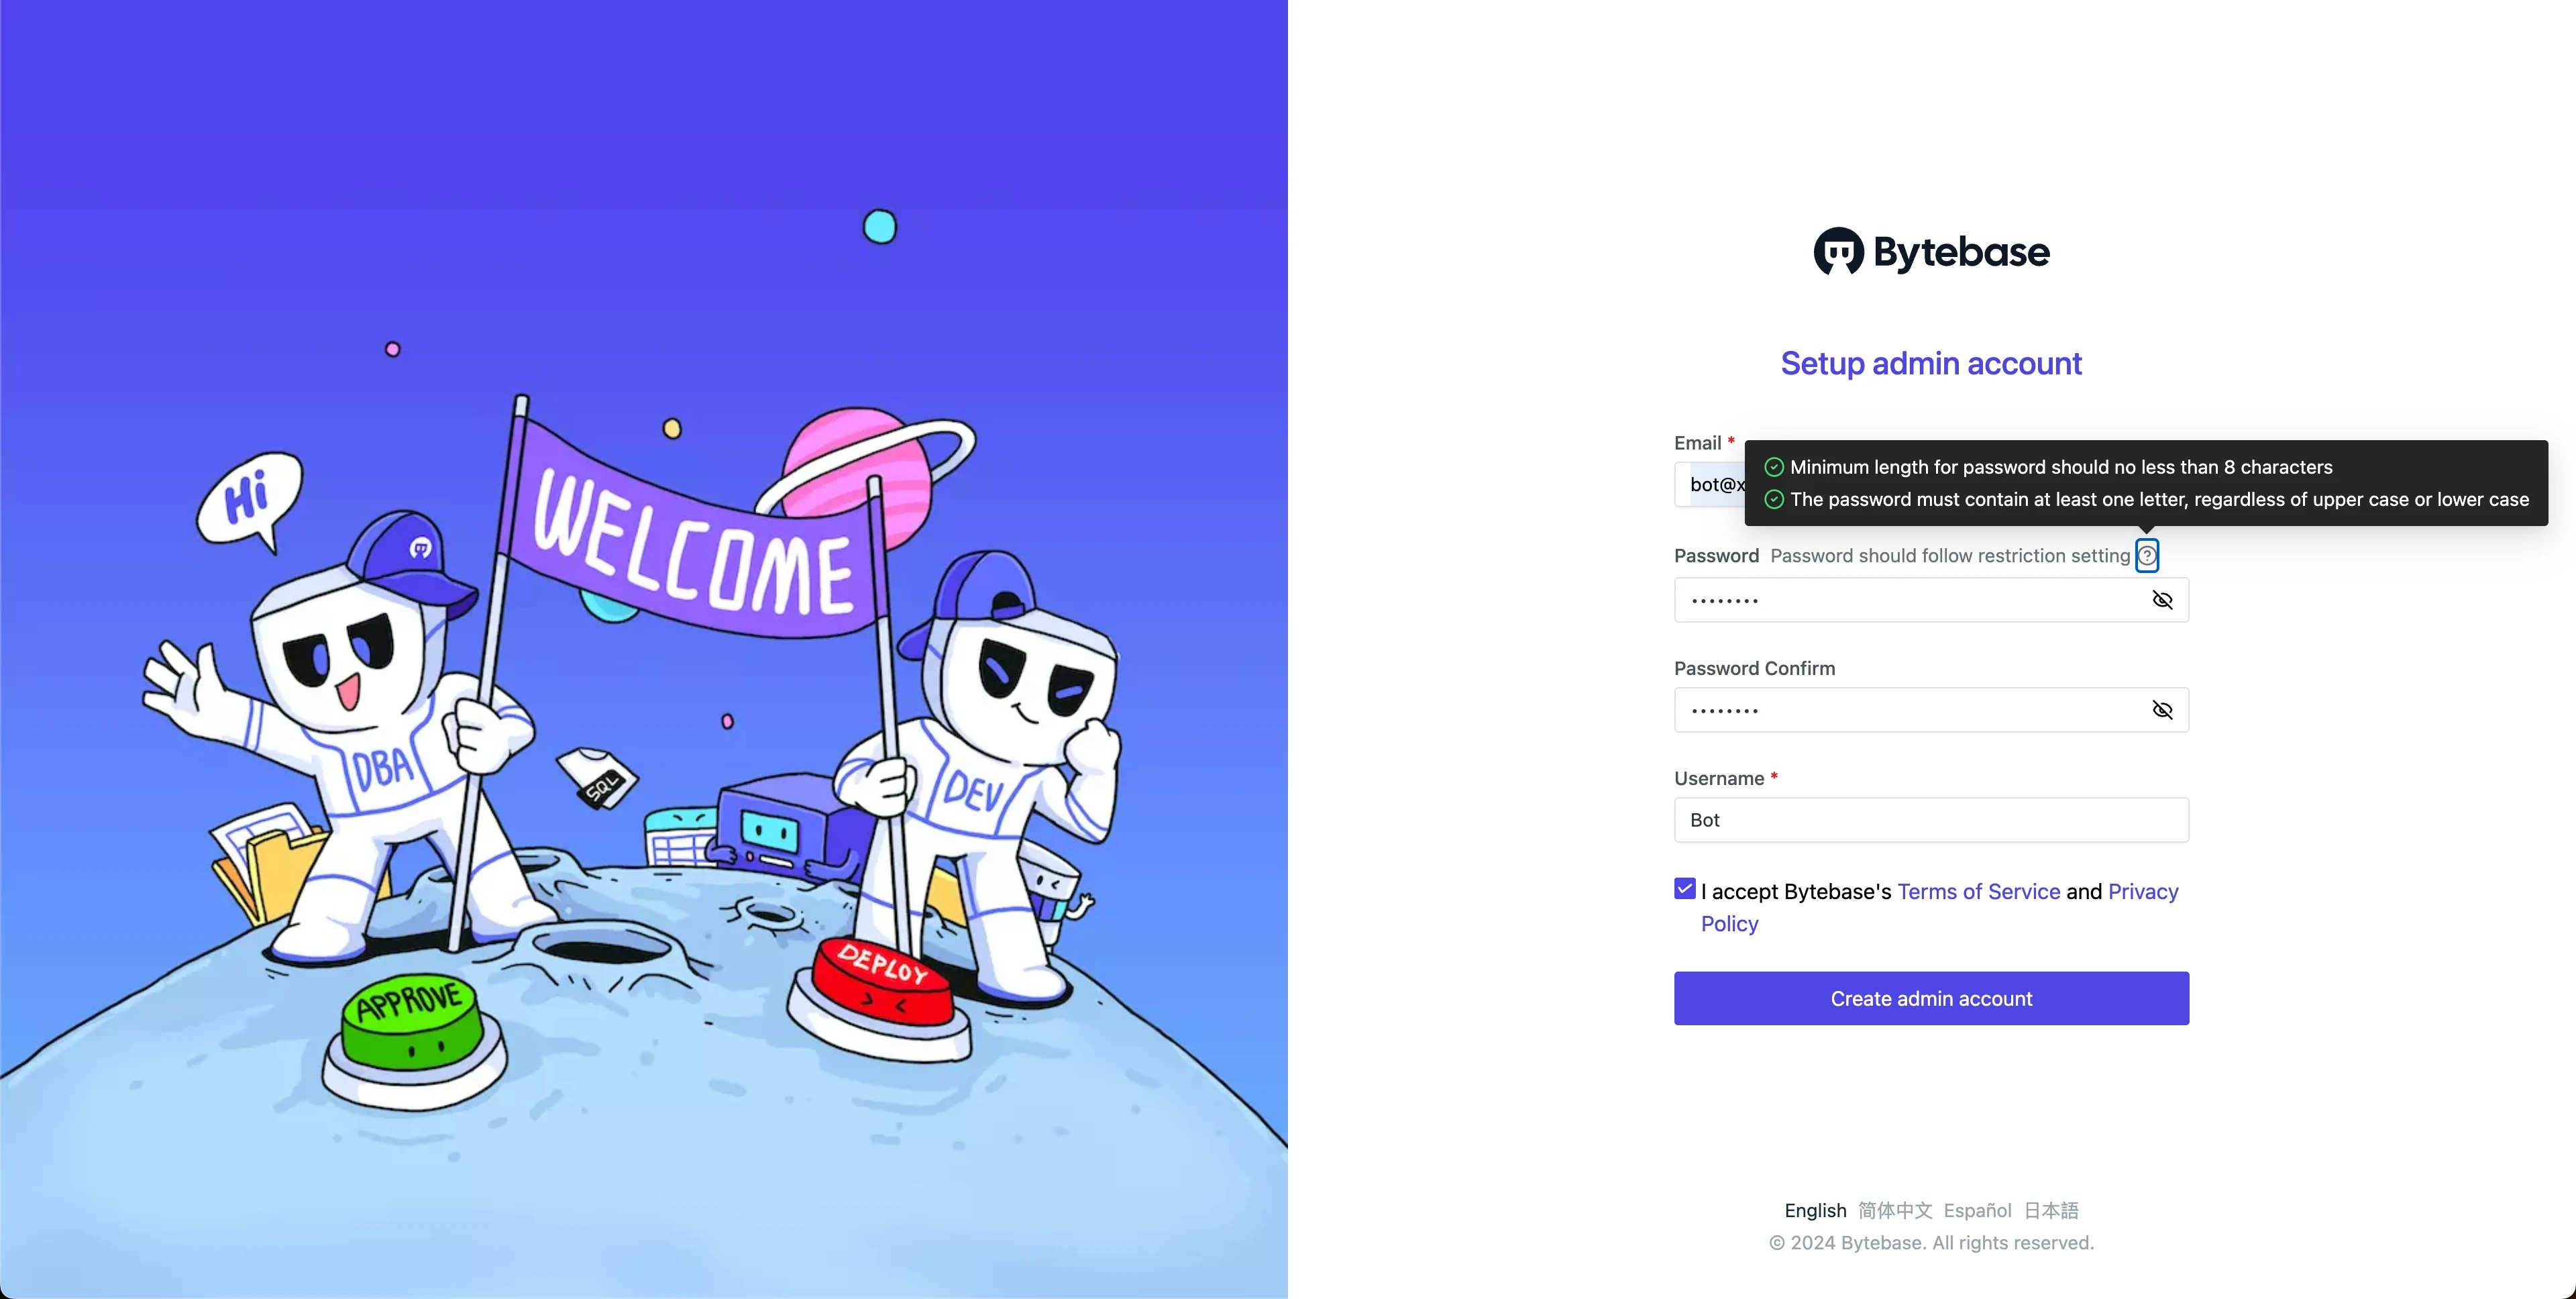
Open Bytebase in localhost:8080, fill in the fields and click Create admin account. You’ll be redirected to Workspace.
-
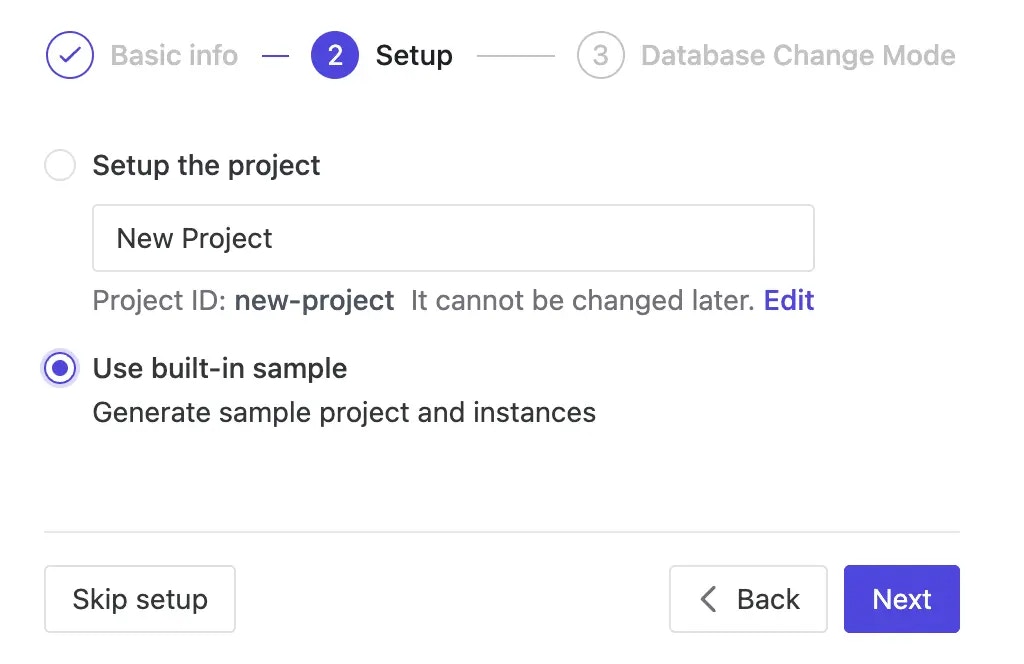
During workspace setup, choose the built-in sample data.
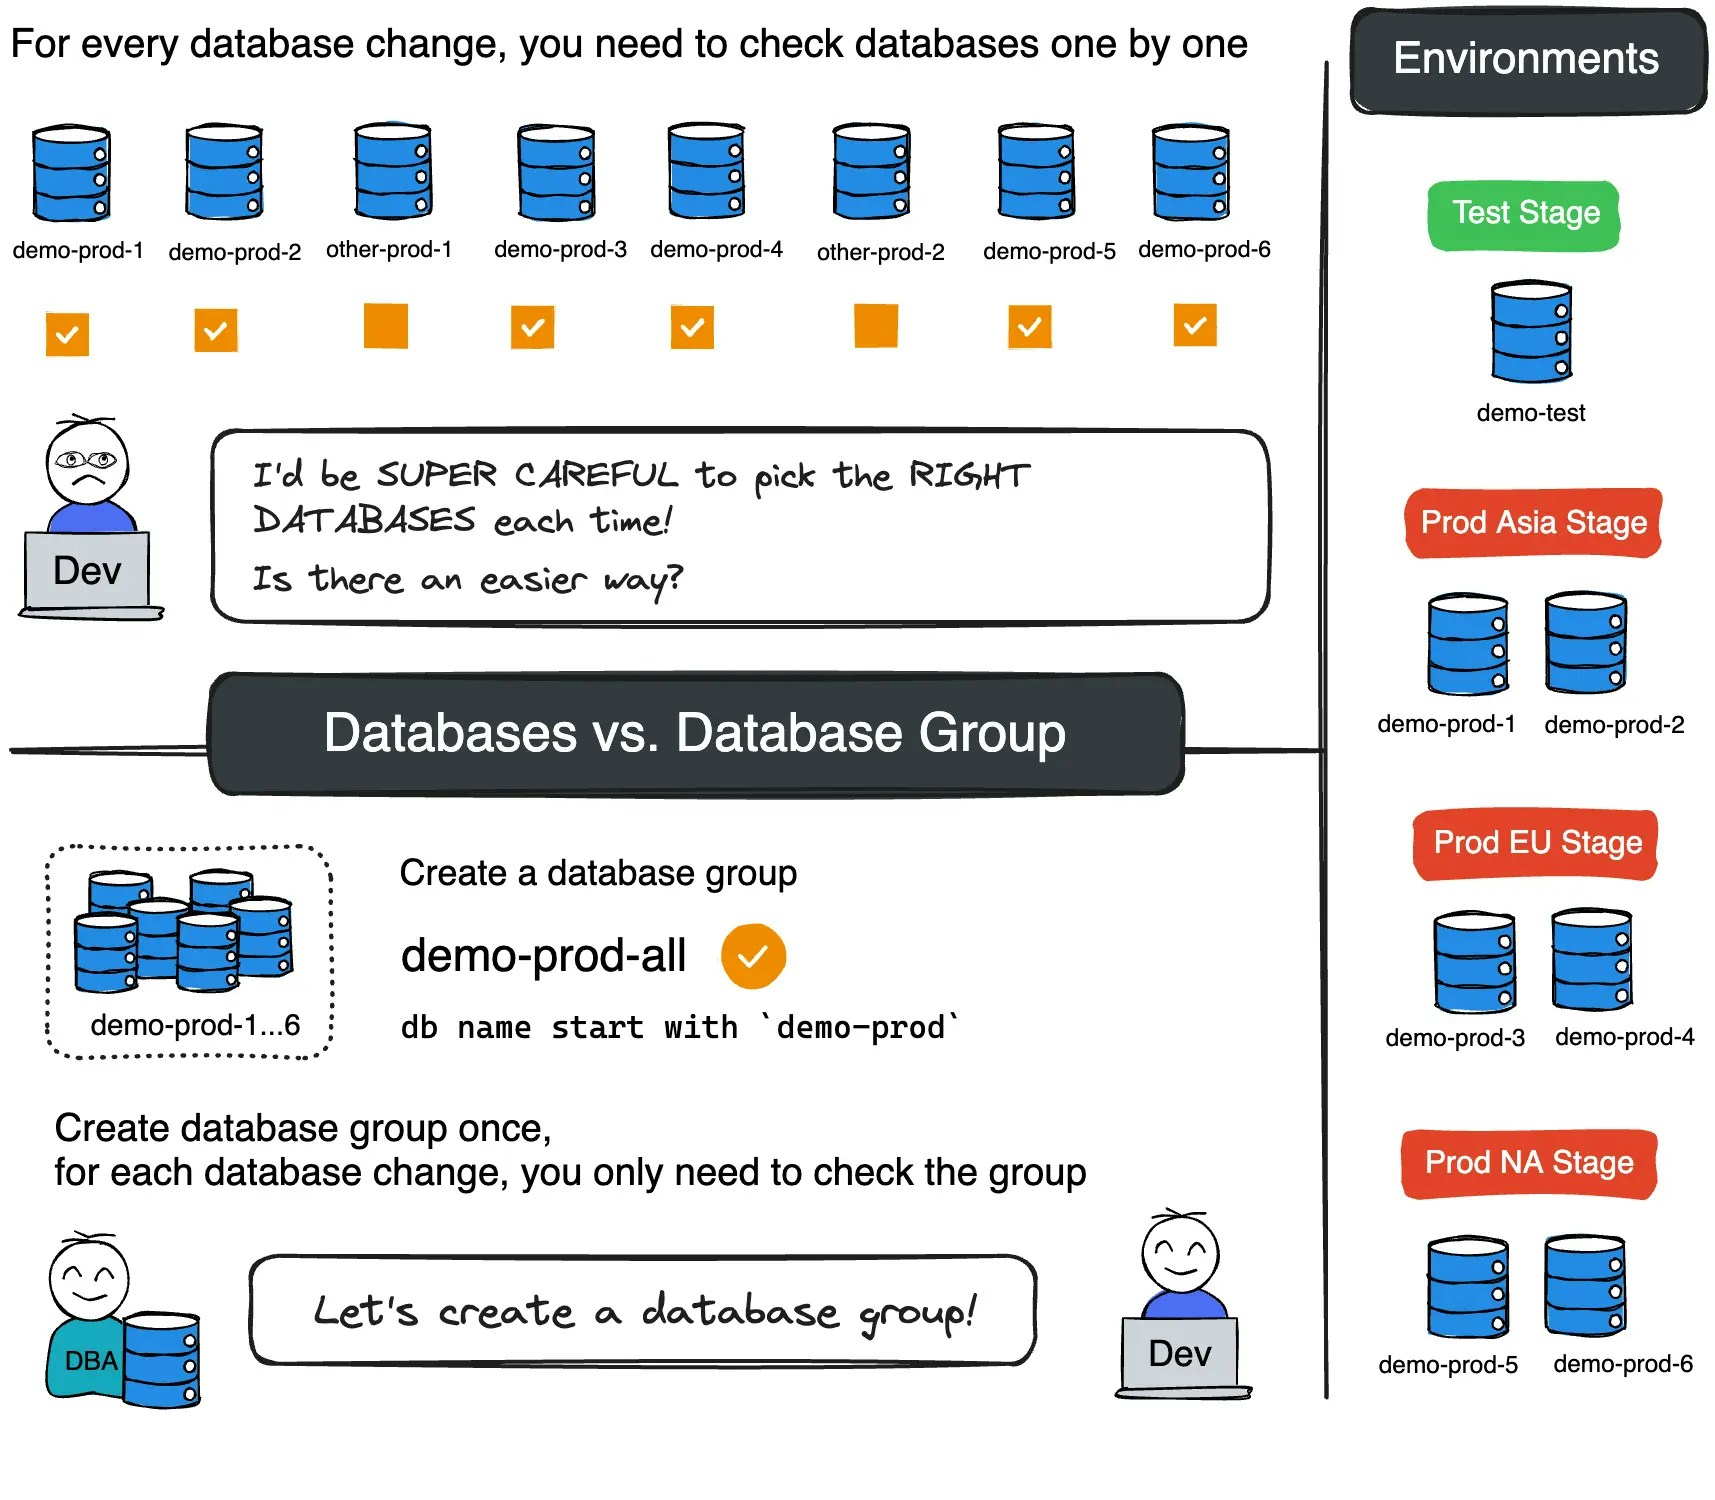
Step 2 - Set up environments and databases
-
Navigate to Environments. Rename
ProdtoProdAsia, then create two new environments:ProdEUandProdNA.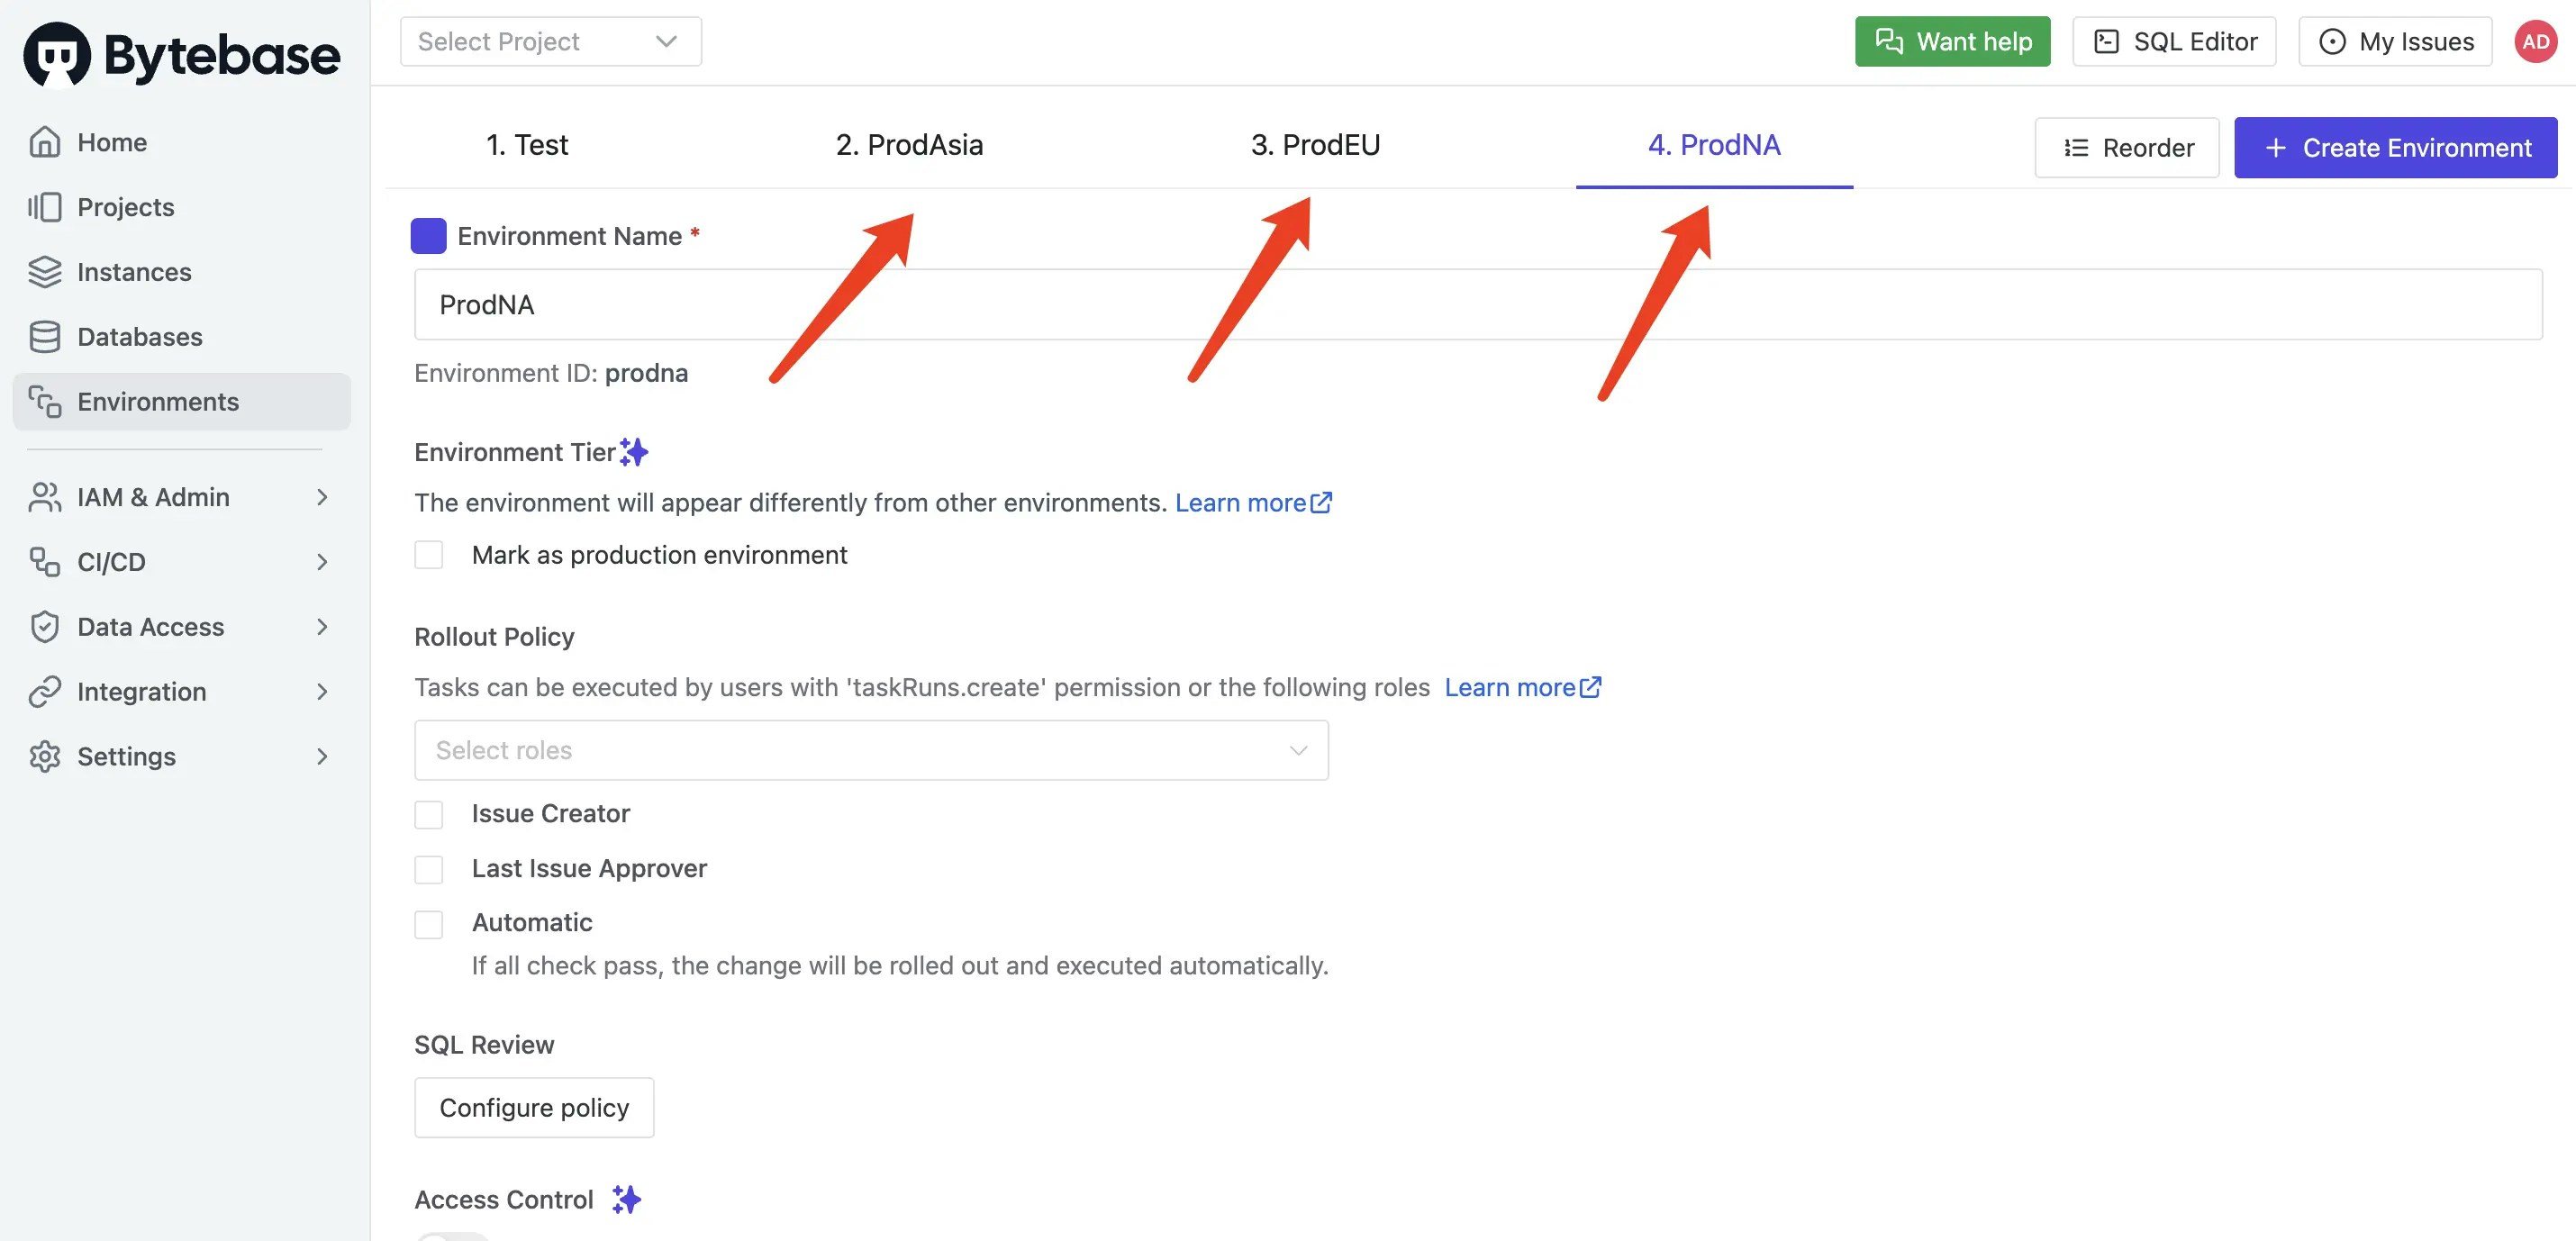
-
Click Select Project in the top bar, then New Project. Name it
Batch Change Projectand click Create. -
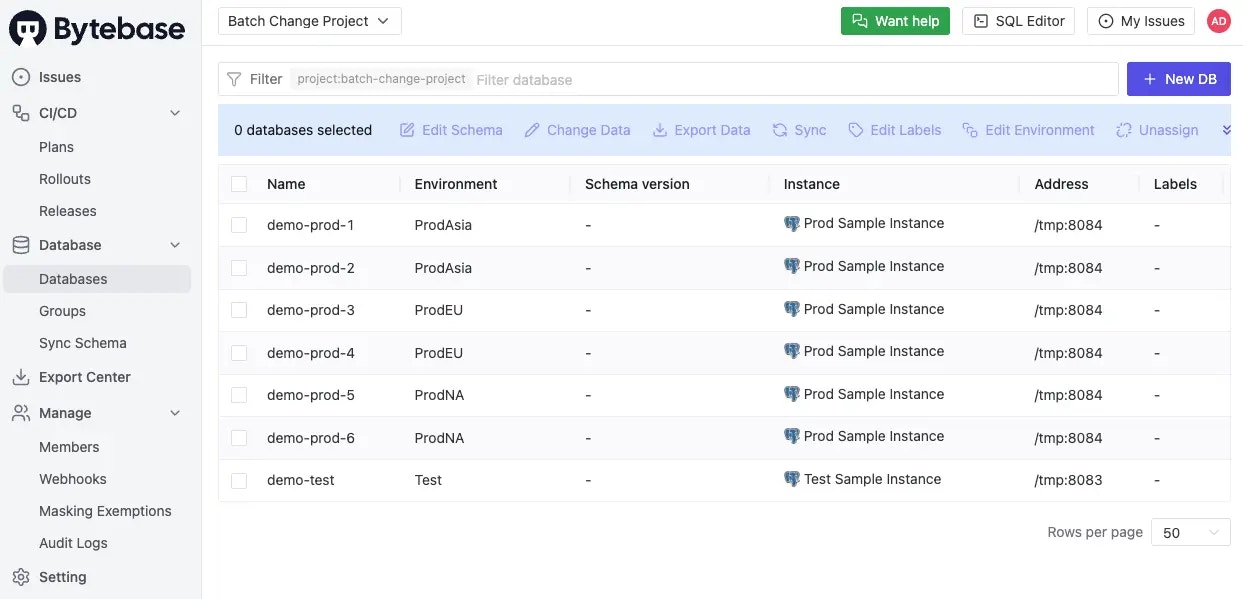
In the new project, navigate to Database > Databases and click + New DB. Create
demo-teston the Test instance. Click Rollout when the issue appears. -
Similarly, create the following databases:
demo-prod-1anddemo-prod-2onProdAsiademo-prod-3anddemo-prod-4onProdEUdemo-prod-5anddemo-prod-6onProdNA
Step 3 - Execute batch changes by environment (All plans)
- Navigate to CI/CD > Plans, click + New Plan, and select Schema Change.
- Select all databases and click Confirm.
-
Enter the following SQL, then click Create and Ready for review:
-
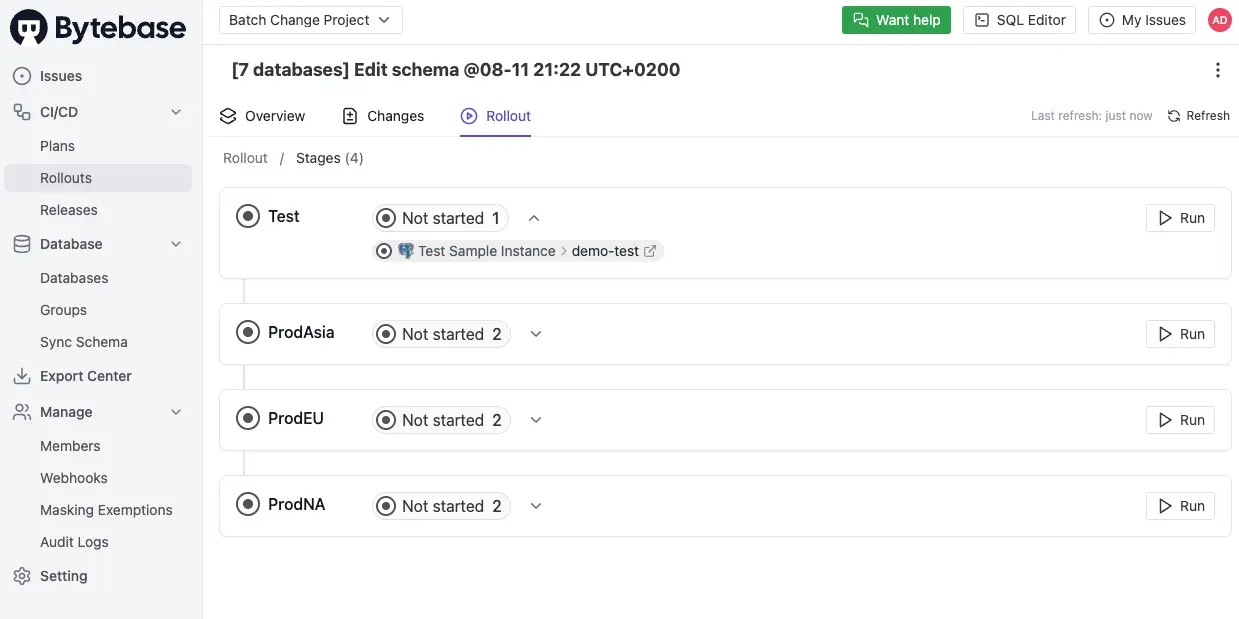
The Overview and Rollout tabs display four stages: Test, ProdAsia, ProdEU, and ProdNA. You can deploy changes to individual databases or entire stages.

-
Go to the Rollout tab and click Run in the Test stage to execute.

Step 4 - Use database groups (Pro/Enterprise)
We need first to upgrade to Pro/Enterprise Plan to use Database Group.- Click the Setting icon on the top right, and then click Workspace > Subscription to upload the license.
-
Click the pen icon, select the instances you want to enable Enterprise features , and click Confirm.

-
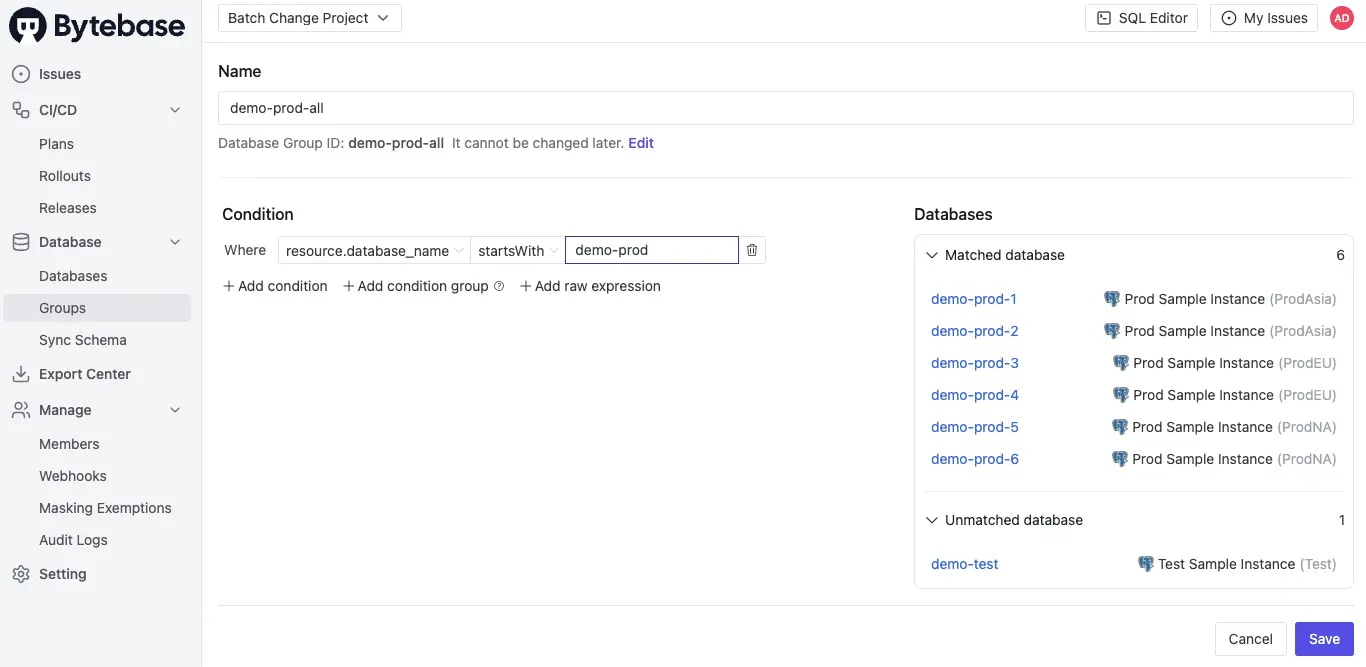
Navigate to Database > Groups in your project. Click + New database group and configure:
- Name:
demo-prod-all - Condition:
resource.database_name startsWith demo-prod
- Name:
-
Go to CI/CD > Plans, click + New Plan, select Schema Migration. Switch to the Database Group tab, select
demo-prod-all, and click Confirm. -
Enter the following SQL, then click Create and Ready for review:
-
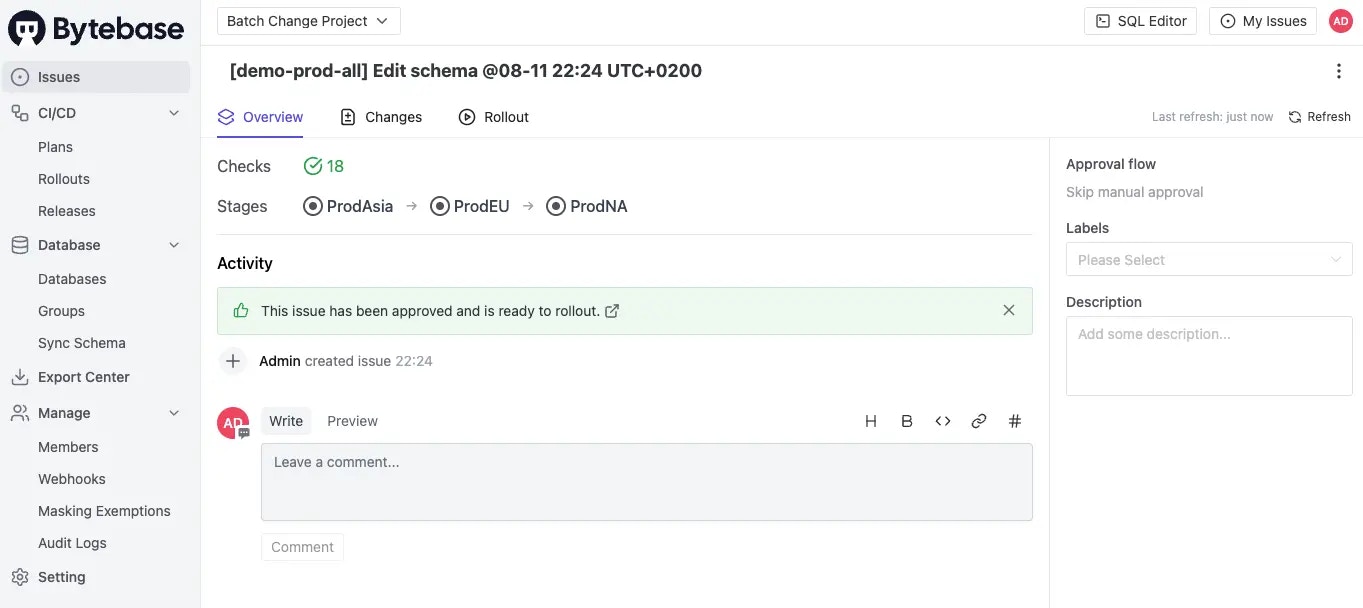
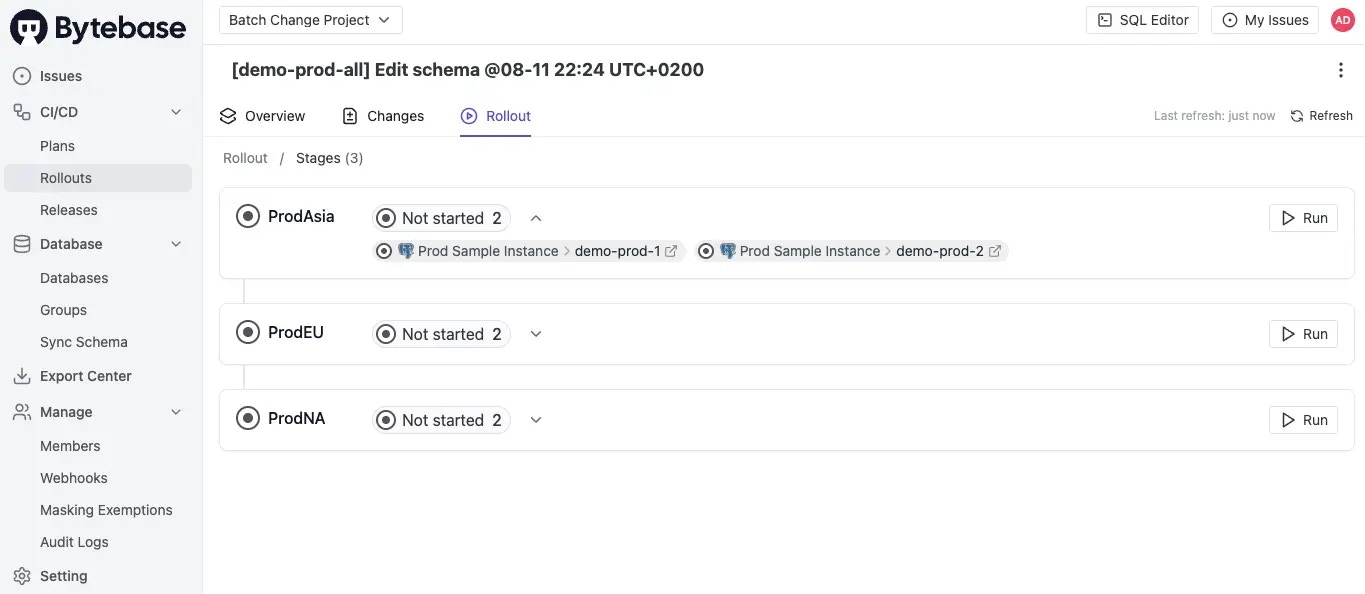
The Overview and Rollout tabs now show 3 production stages. Click Run in the ProdAsia stage to execute.
Summary
You’ve learned how to:- Group databases by environment for staged rollouts
- Use Database Groups to target databases matching specific criteria
- Execute batch changes across multiple databases efficiently