- Part 1: Manage Environments with Terraform - Set up environments with policies
- Part 2: Manage Databases with Terraform - Register database instances
- Part 3: Manage Projects with Terraform - Organize databases into projects
- Part 4: Manage Bytebase Settings with Terraform - Configure workspace profile and approval policies
- Part 5: Manage SQL Review Rules with Terraform - Define SQL review policies
- Part 6: Manage Users and Groups with Terraform - Configure users and groups
- Part 7: Manage Database Access Control with Terraform 👈
- Part 8: Manage Data Masking with Terraform - Protect sensitive data
This tutorial series uses separate Terraform files for better organization. Files are numbered by tutorial part and sub-step (e.g., 1-1-env-setting.tf, 1-2-env-policy-rollout.tf for Part 1, 2-instances.tf for Part 2, etc.). Terraform automatically handles dependencies between files.
What You’ll Learn
- Configure workspace-level IAM policies for role assignments
- Set up project-level permissions with granular database access
- Implement conditional access control for specific tables
- Test access restrictions with different user roles
Prerequisites
Before starting this tutorial, ensure you have:- Completed Part 6: Manage Users and Groups with Terraform
- Bytebase running with service account configured
- Your Terraform files from the previous tutorials
Setup
From the previous tutorials, you should have:- Bytebase workspaces and projects configured
- Workspace settings and approval flows set up
- Users and groups created from Part 6
- Service account with
Workspace Adminrole
Understanding IAM in Bytebase
Bytebase has a hierarchical IAM system:- Workspace Level: Permissions apply to the entire workspace
- Project Level: Permissions apply to specific projects only
- Conditional Access: Fine-grained permissions for specific databases, schemas, and tables
Configure Access Control
Step 1 - Configure Workspace IAM Policy
Create
7-1-workspace-iam.tf with workspace-level permissions:
7-1-workspace-iam.tf
Service accounts use the
serviceAccount: member prefix, workload identities use workloadIdentity:, users use user:, and groups use group:.allUsers is a special member representing everyone in the workspace. Without it, users may be
unable to access the workspace.Step 2 - Apply Workspace IAM Configuration
- Go to IAM & Admin > Members
-
Check user roles:
admin@example.com: Workspace Admintf@service.bytebase.com(service account): Workspace Admindba@example.com,dba2@example.com: Workspace DBAallUsers: Workspace Member
-
Note that
QA Teamgroup hasProject Viewerrole for ALL projects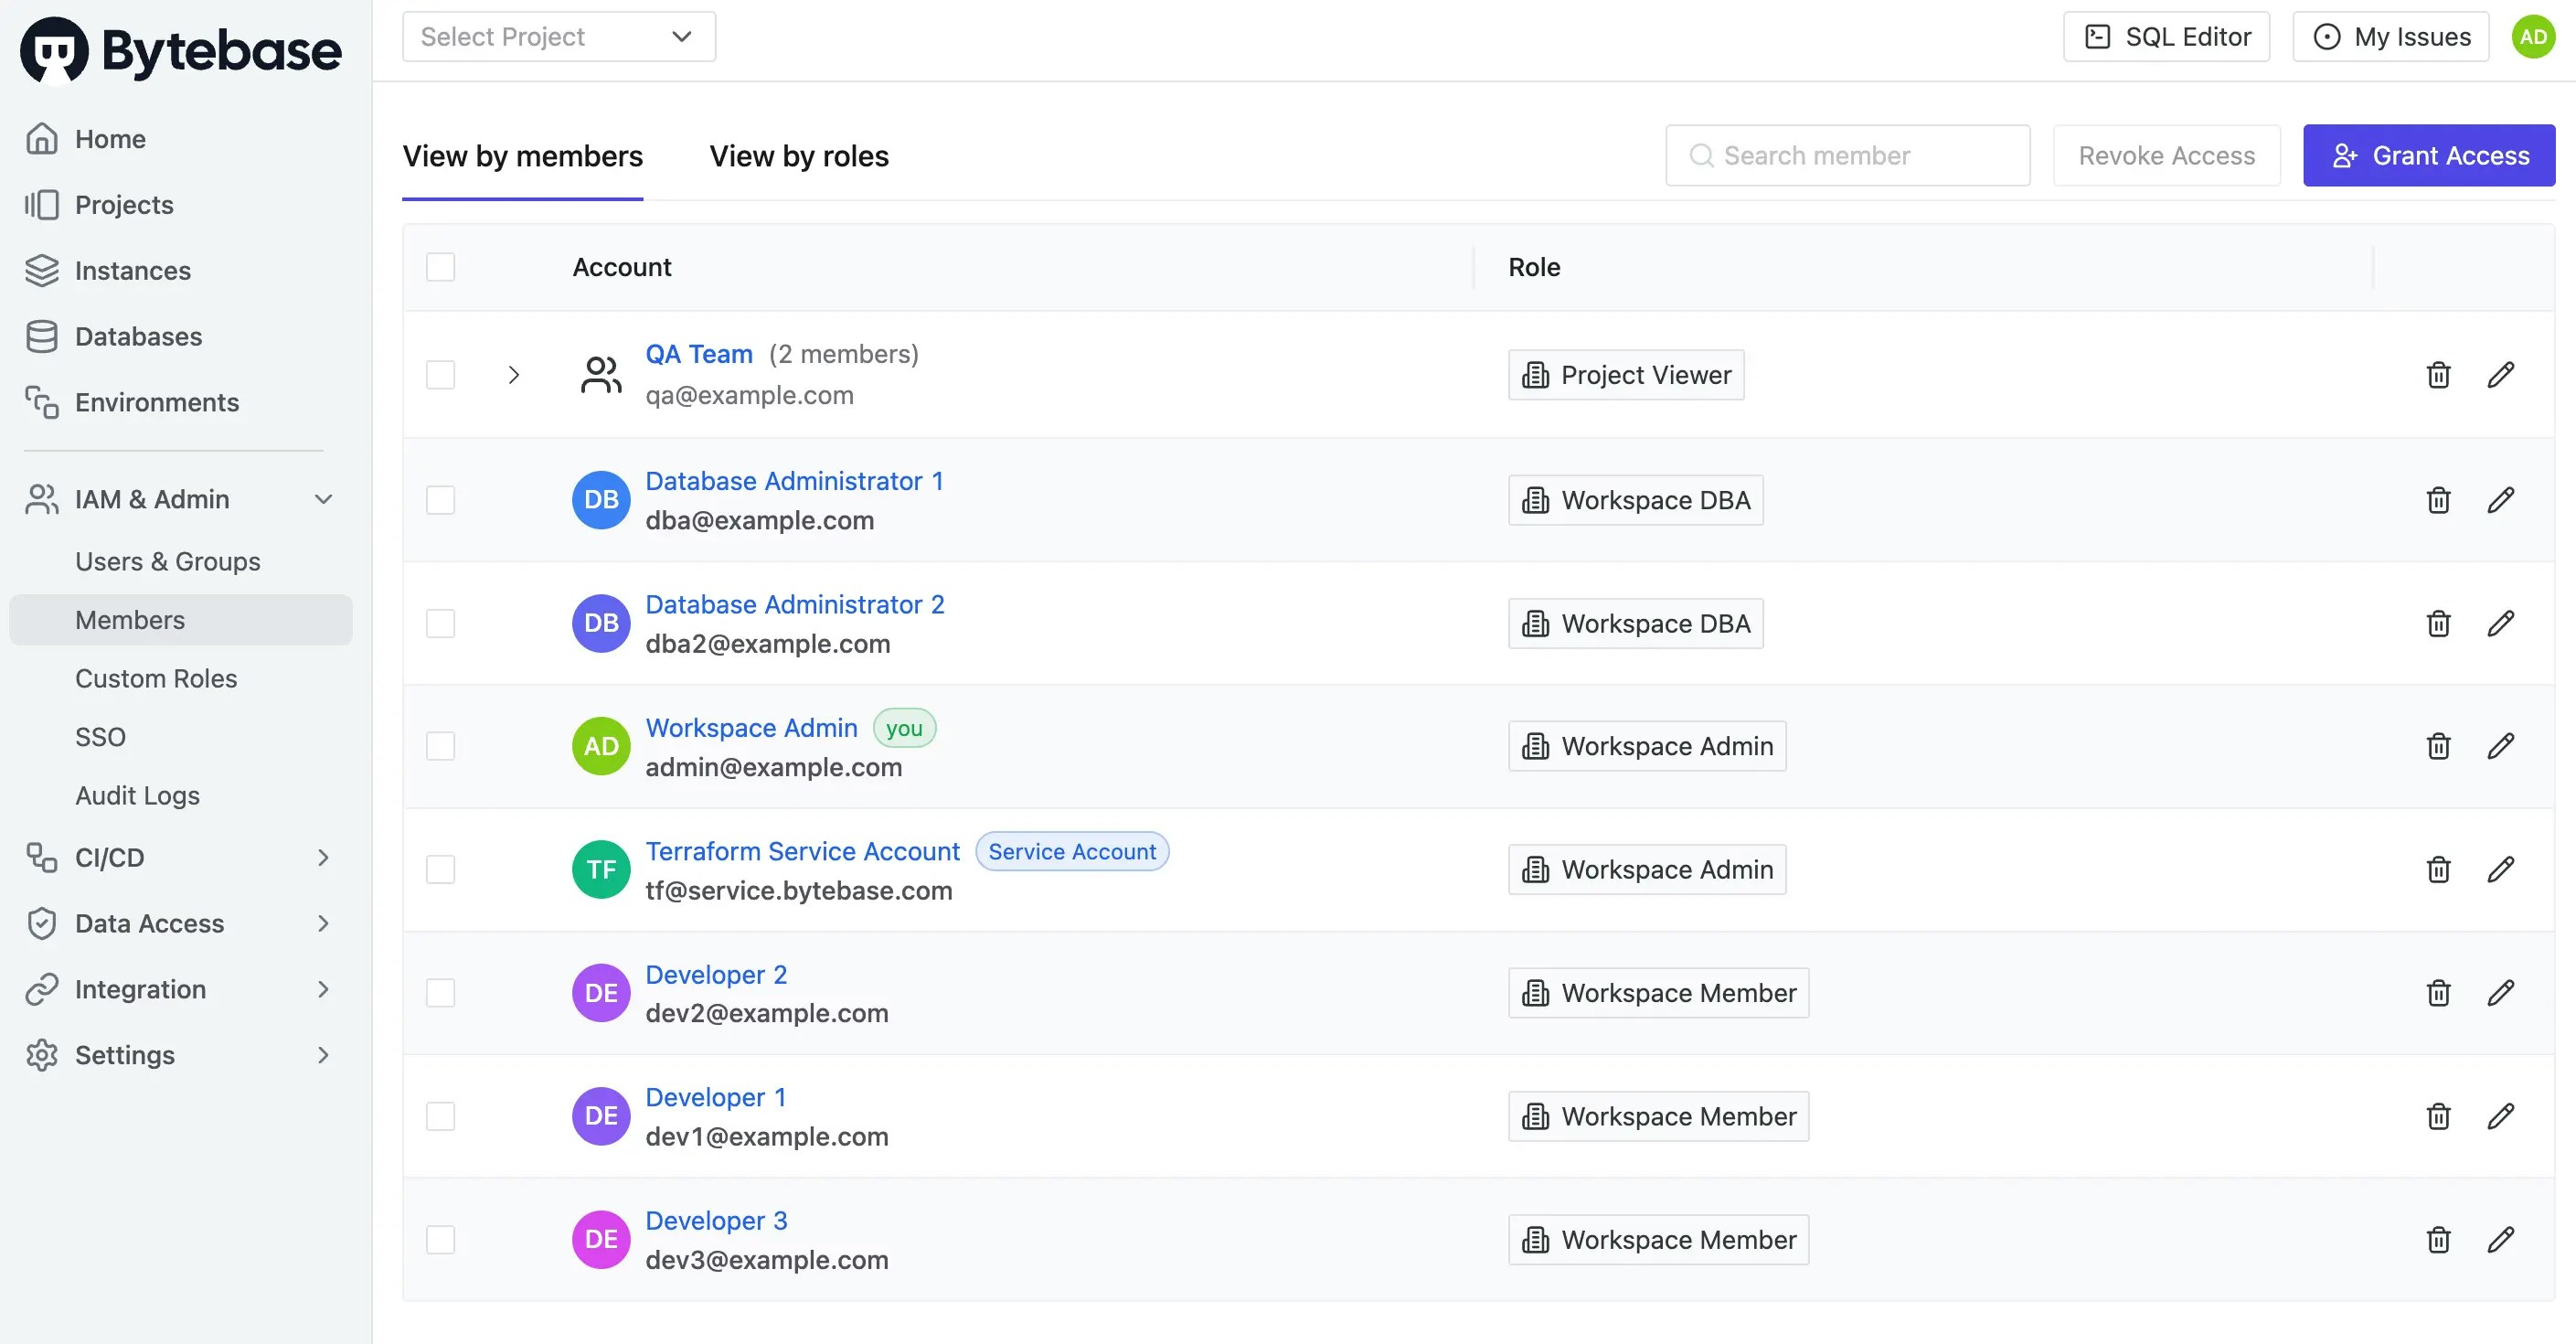
Step 3 - Configure Project IAM Policy
Create
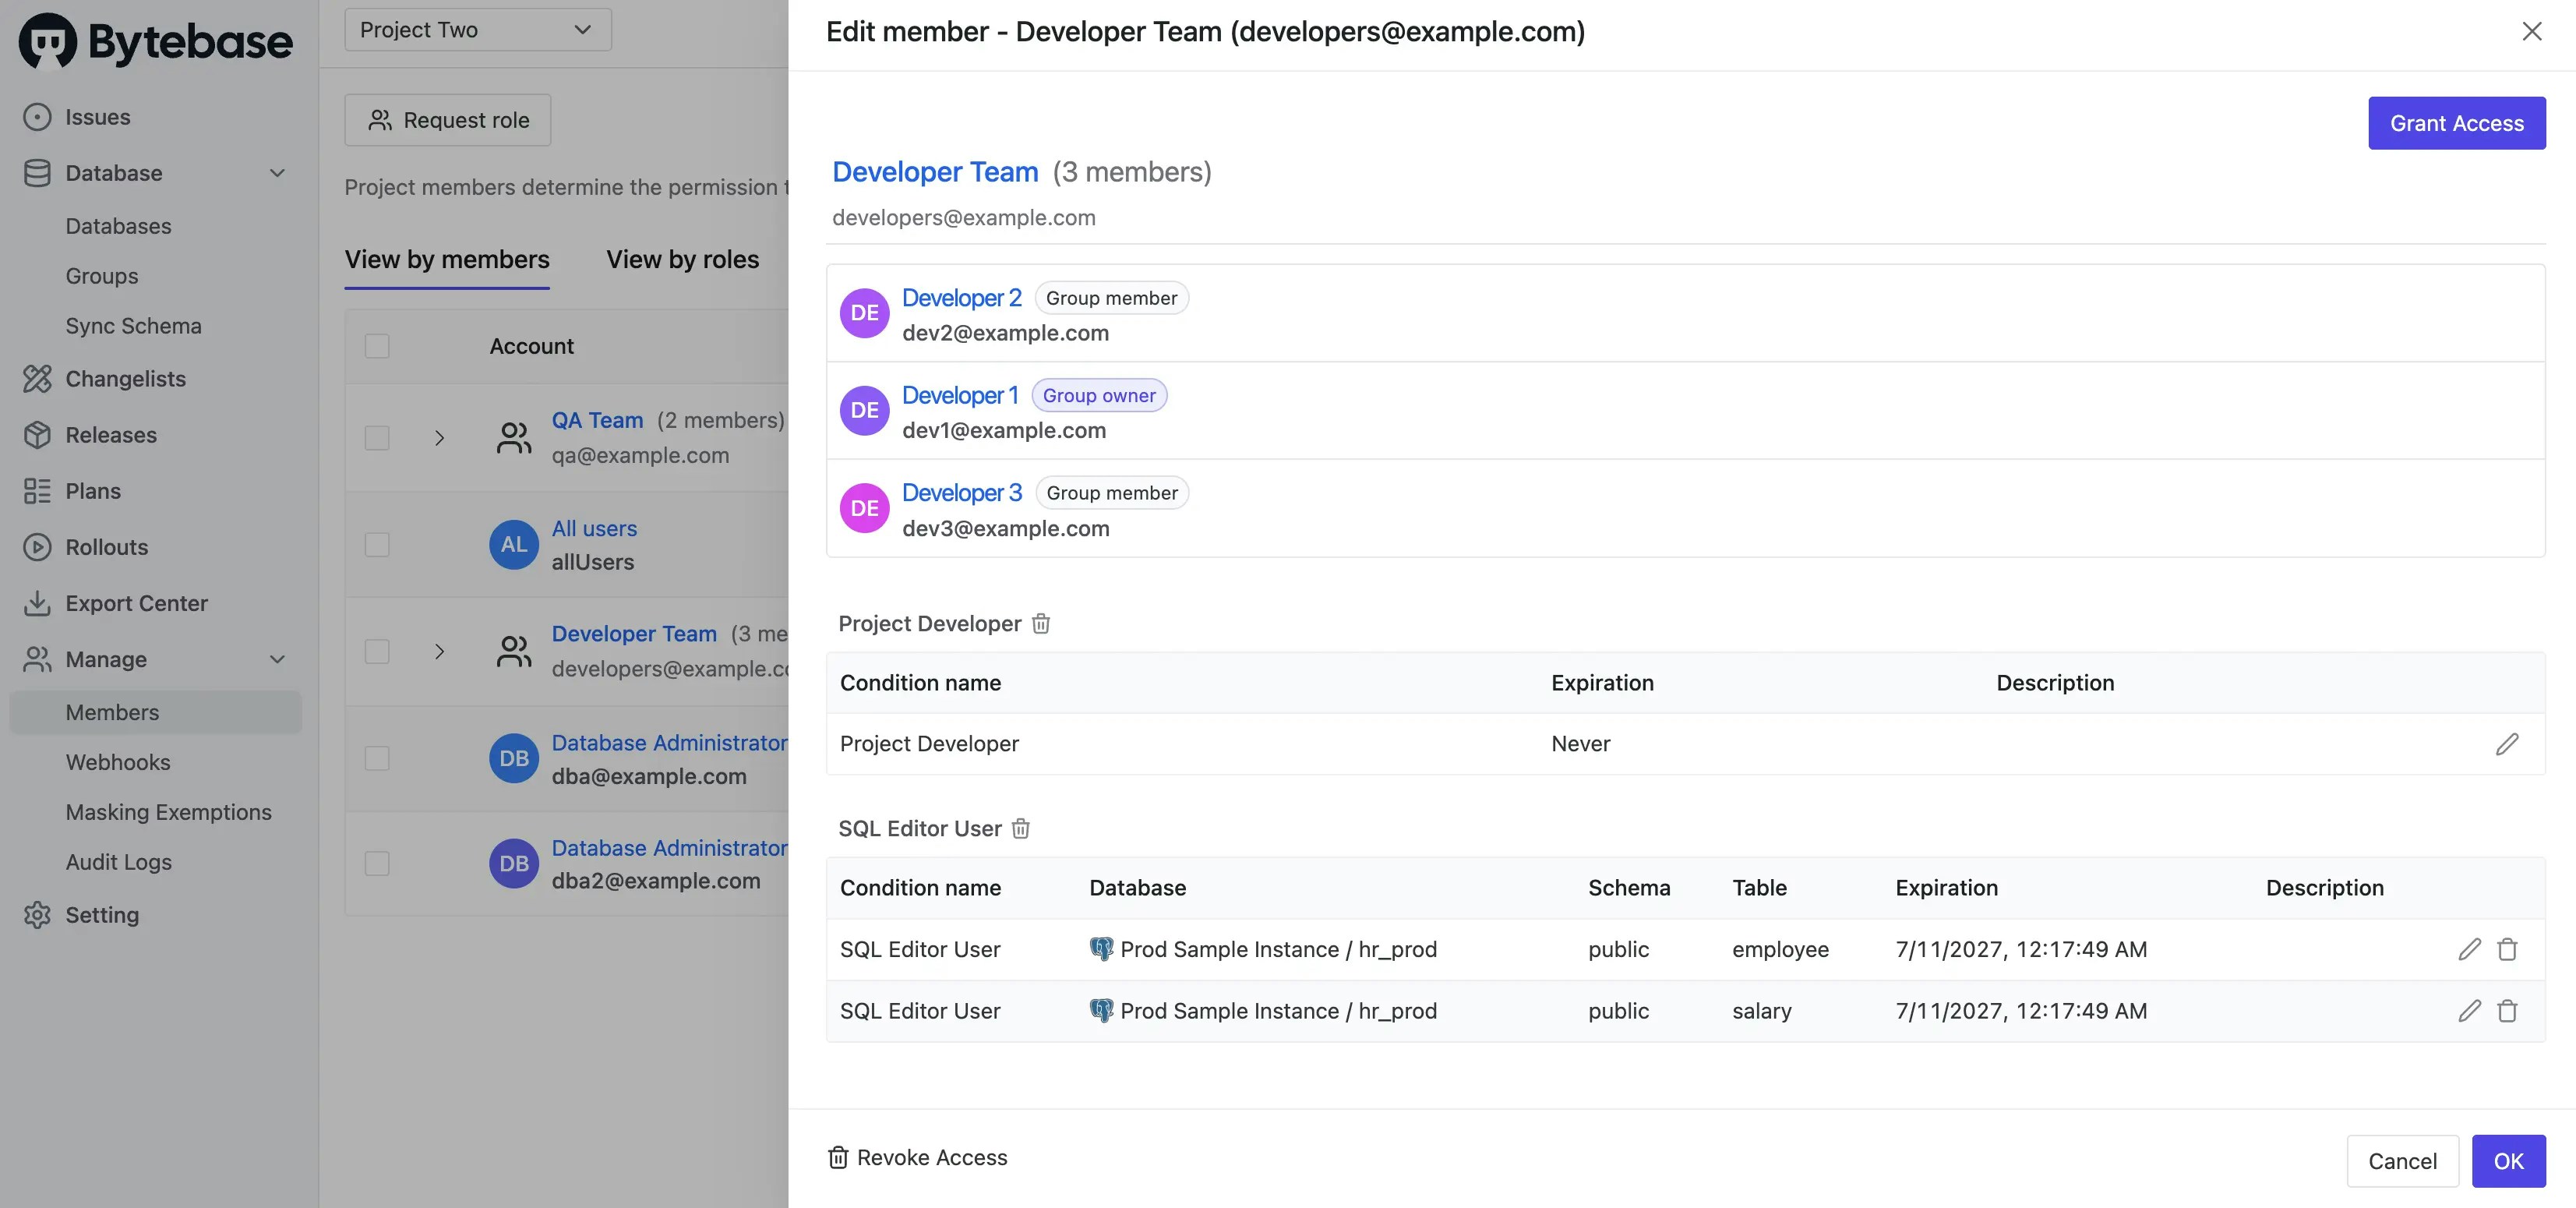
7-2-project-iam.tf for project-specific permissions:
7-2-project-iam.tf
2027-07-10T16:17:49Z is an ISO 8601 UTC timestamp. Our system uses PostgreSQL to store metadata,
where this value is stored as a timestamptz.Step 4 - Apply Complete IAM Configuration
Step 5 - Verify Project Permissions
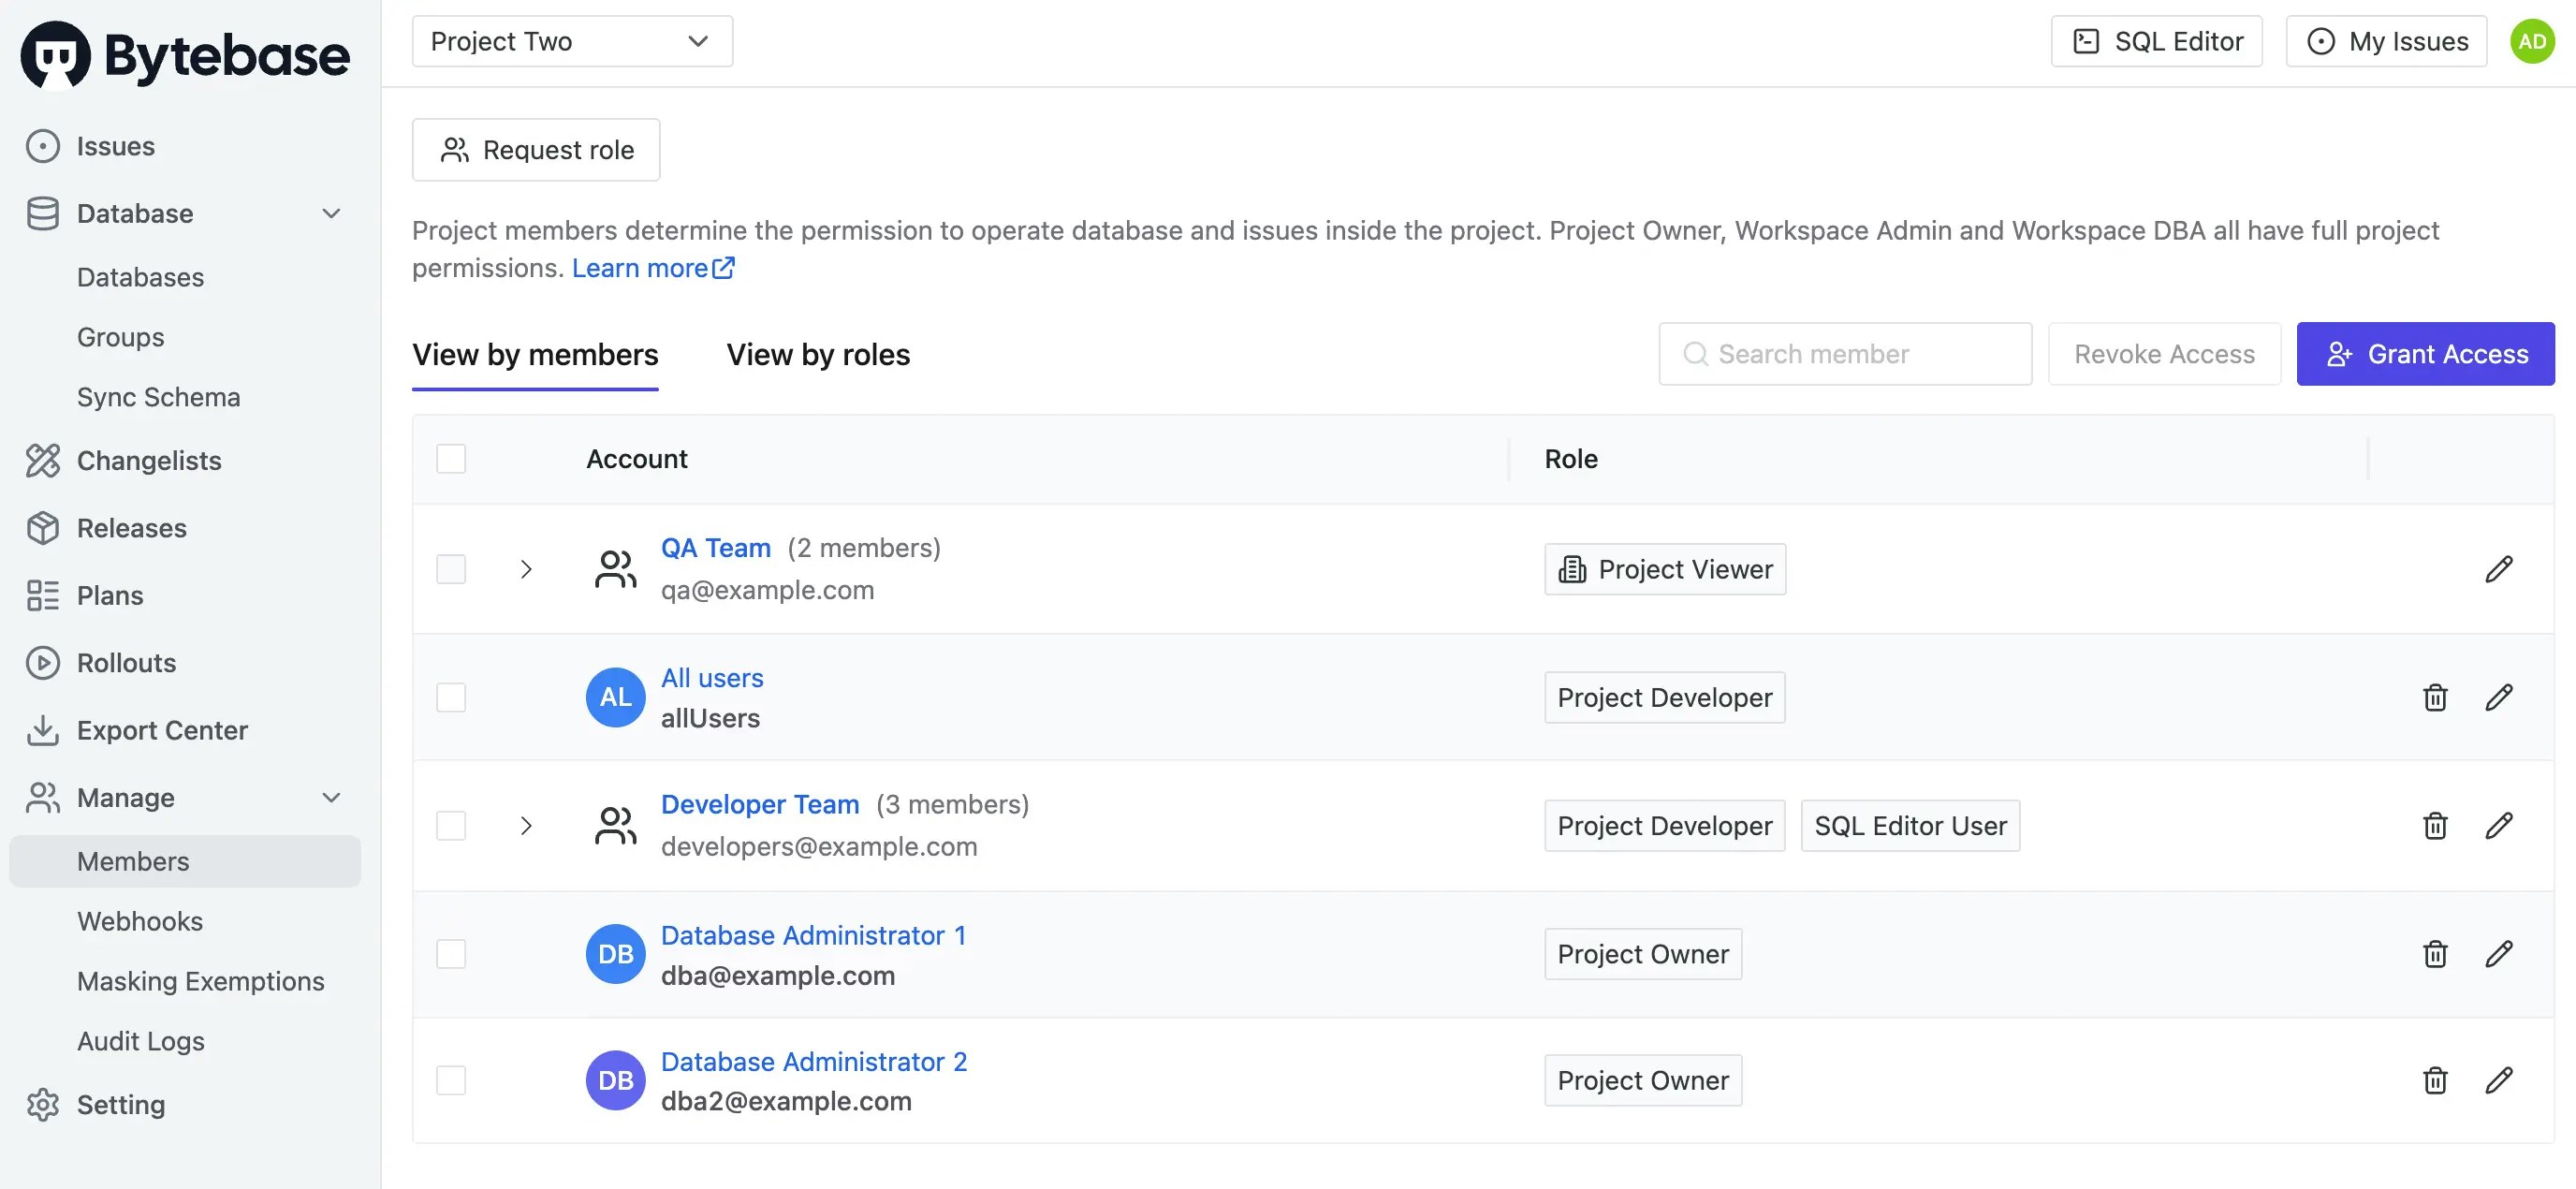
- Project One Members
- Project Two Members
Go to Project One > Manage > Members:
-
QA Team:Project Viewer(inherited from workspace) -
Terraform Service Account:Project Owner(as creator)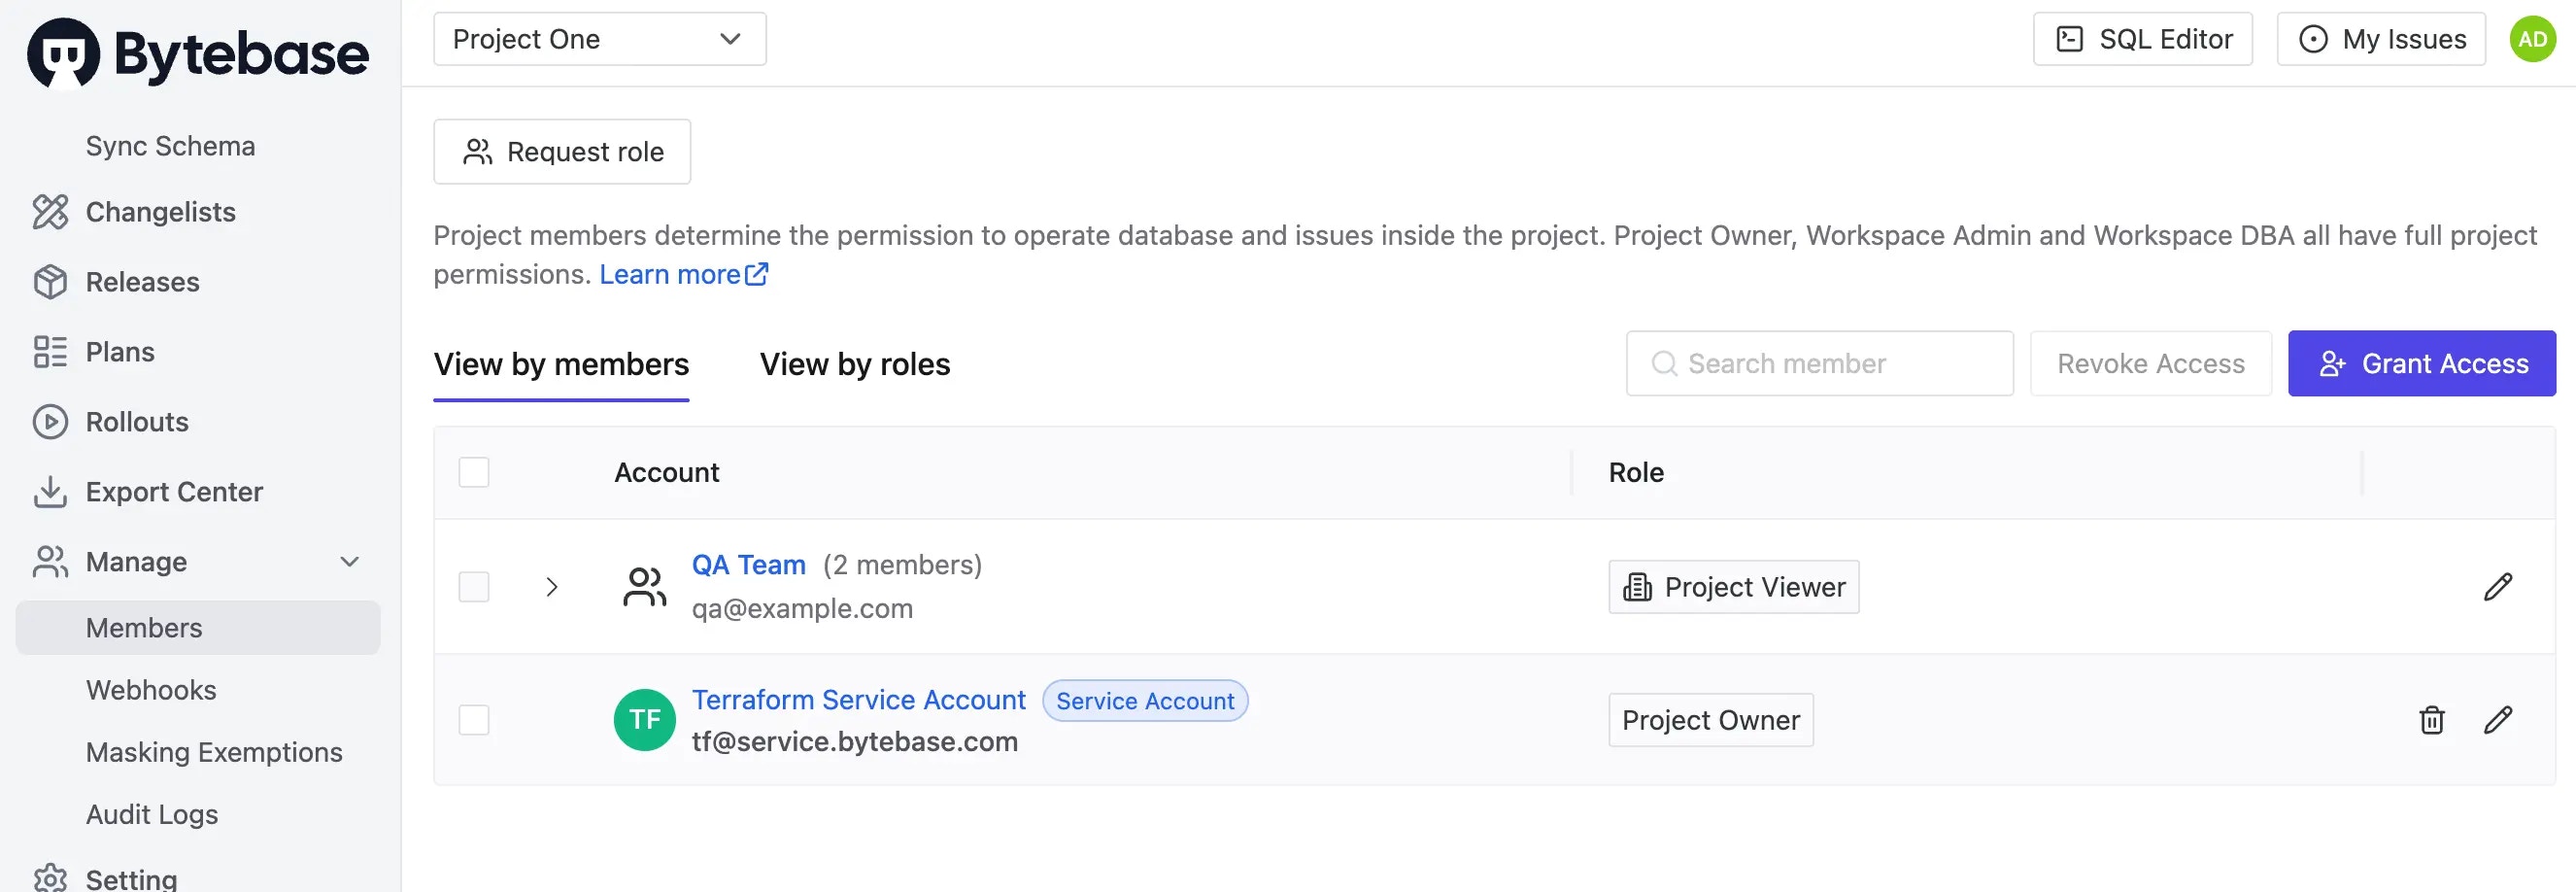
Step 6 - Test Access Control
Test the access control configuration by logging in as different users:Set Up Test User
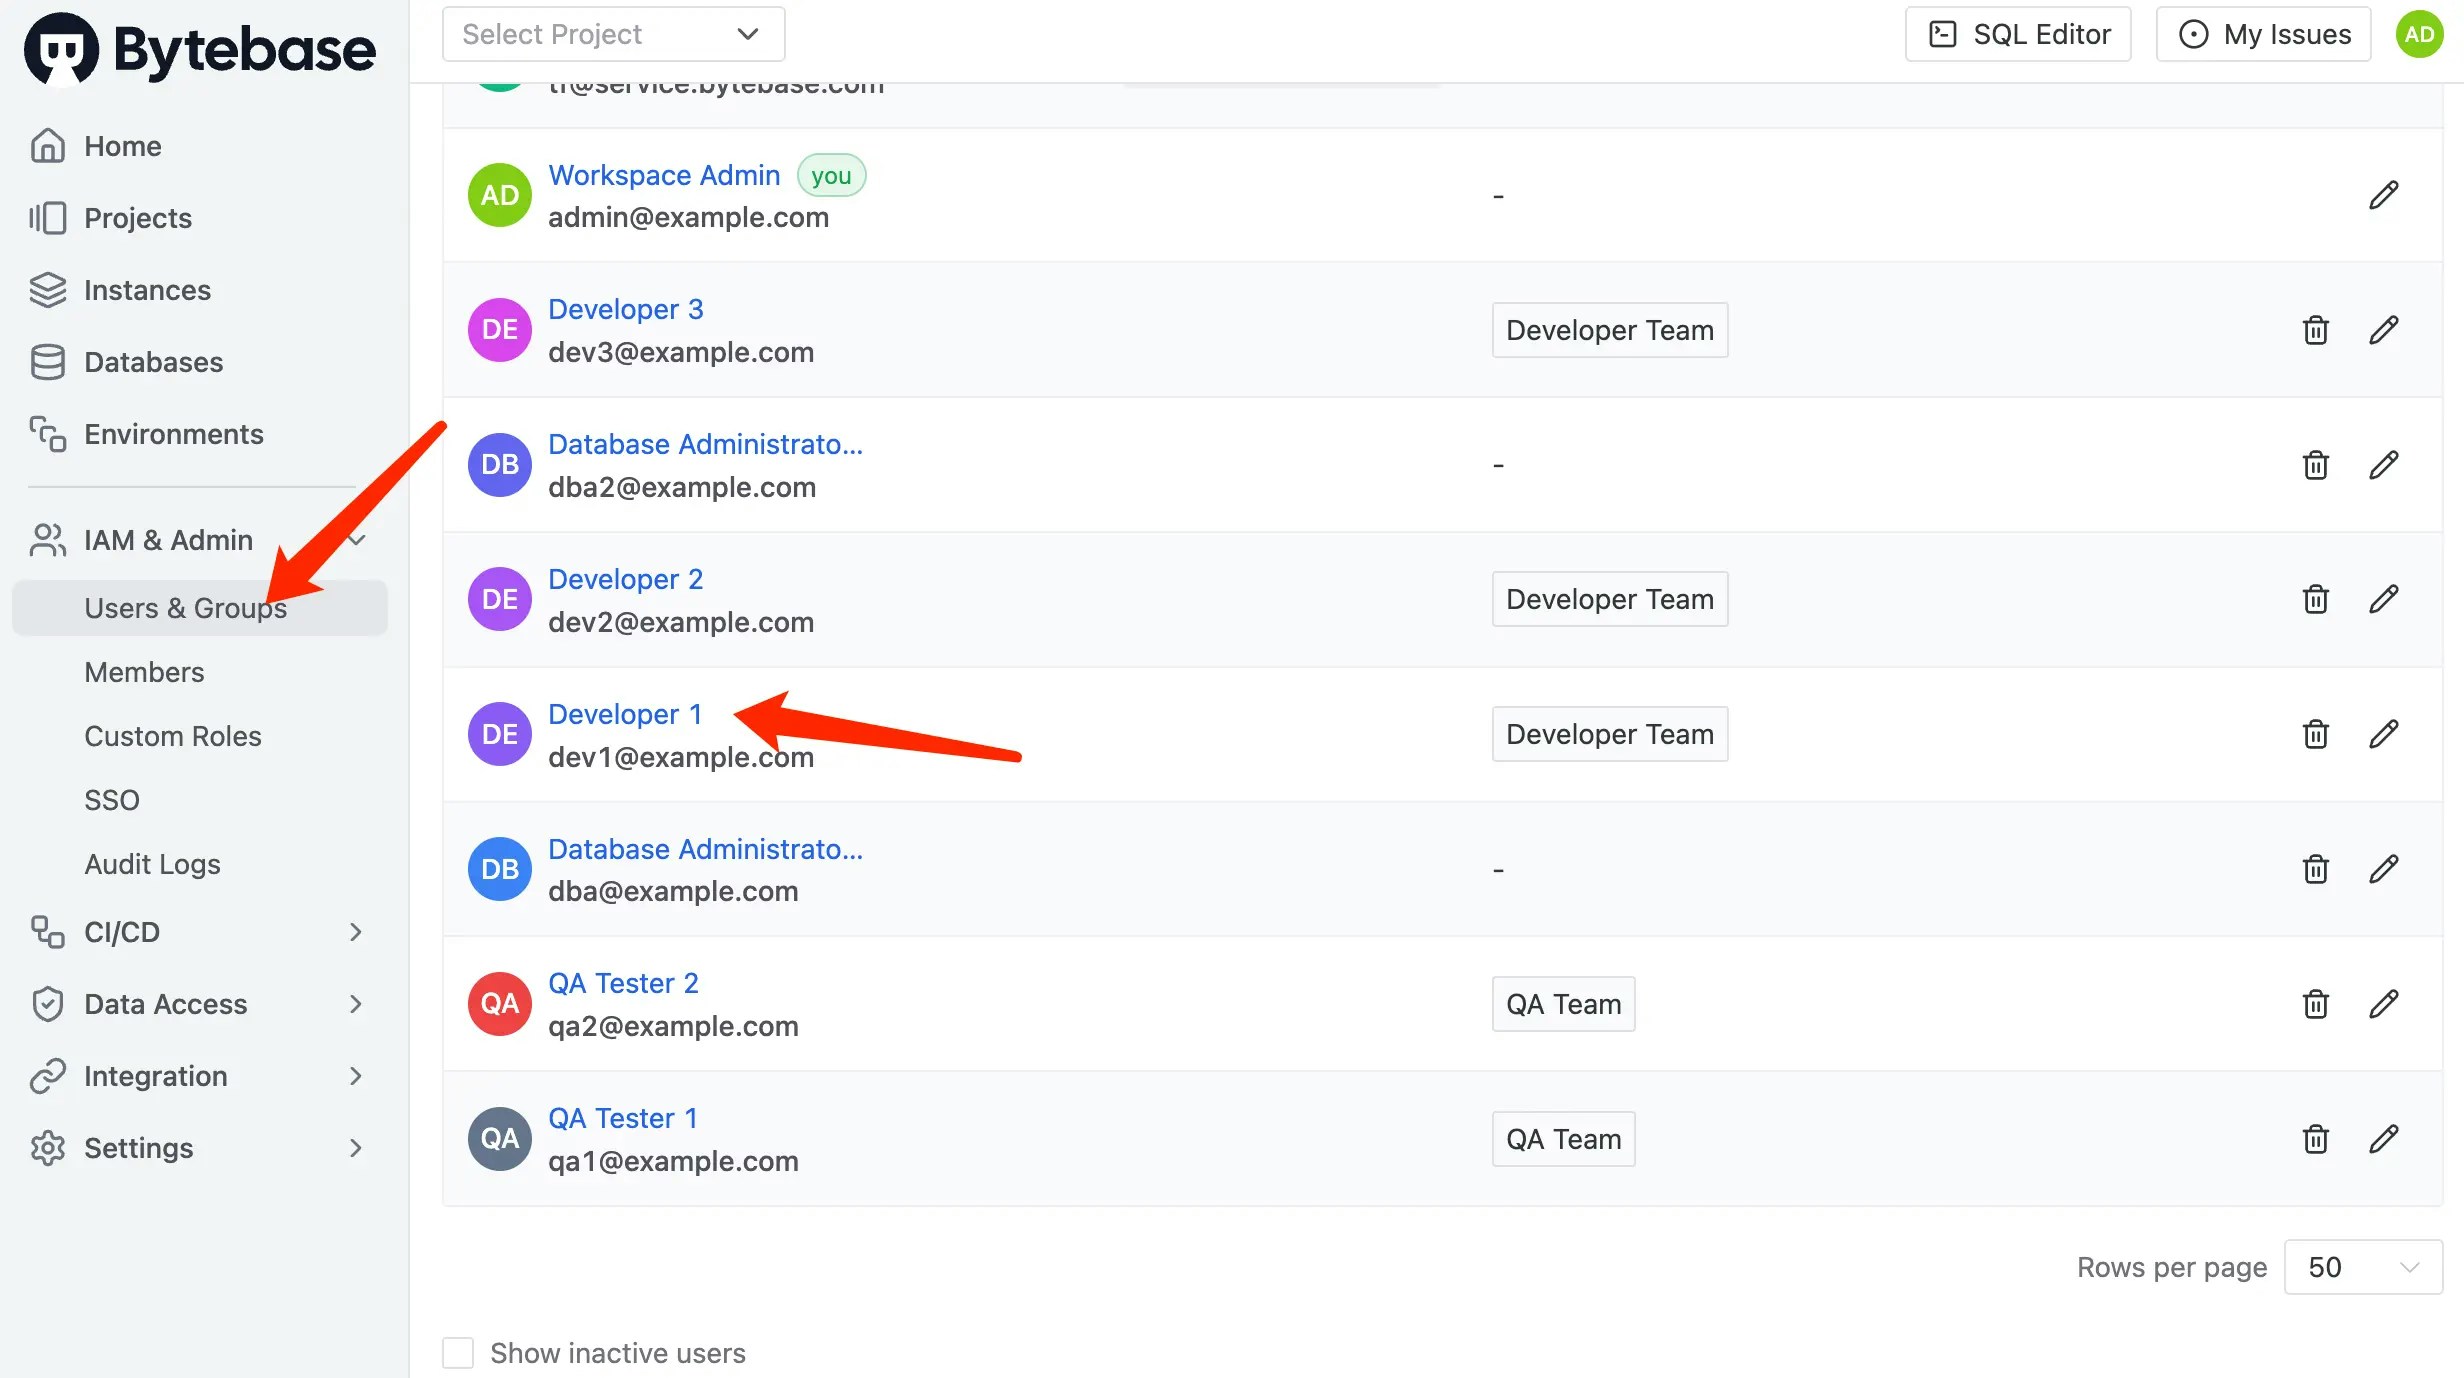
- Go to IAM & Admin > Users & Groups.
-
Find and click on
Developer 1. -
Click Edit and set a password.
Test Developer Access
- Log in as
dev1@example.comin a new browser/incognito window. - Verify project visibility:
- ✅ Can see Project Two
- ❌ Cannot see Project One
Test SQL Editor Restrictions
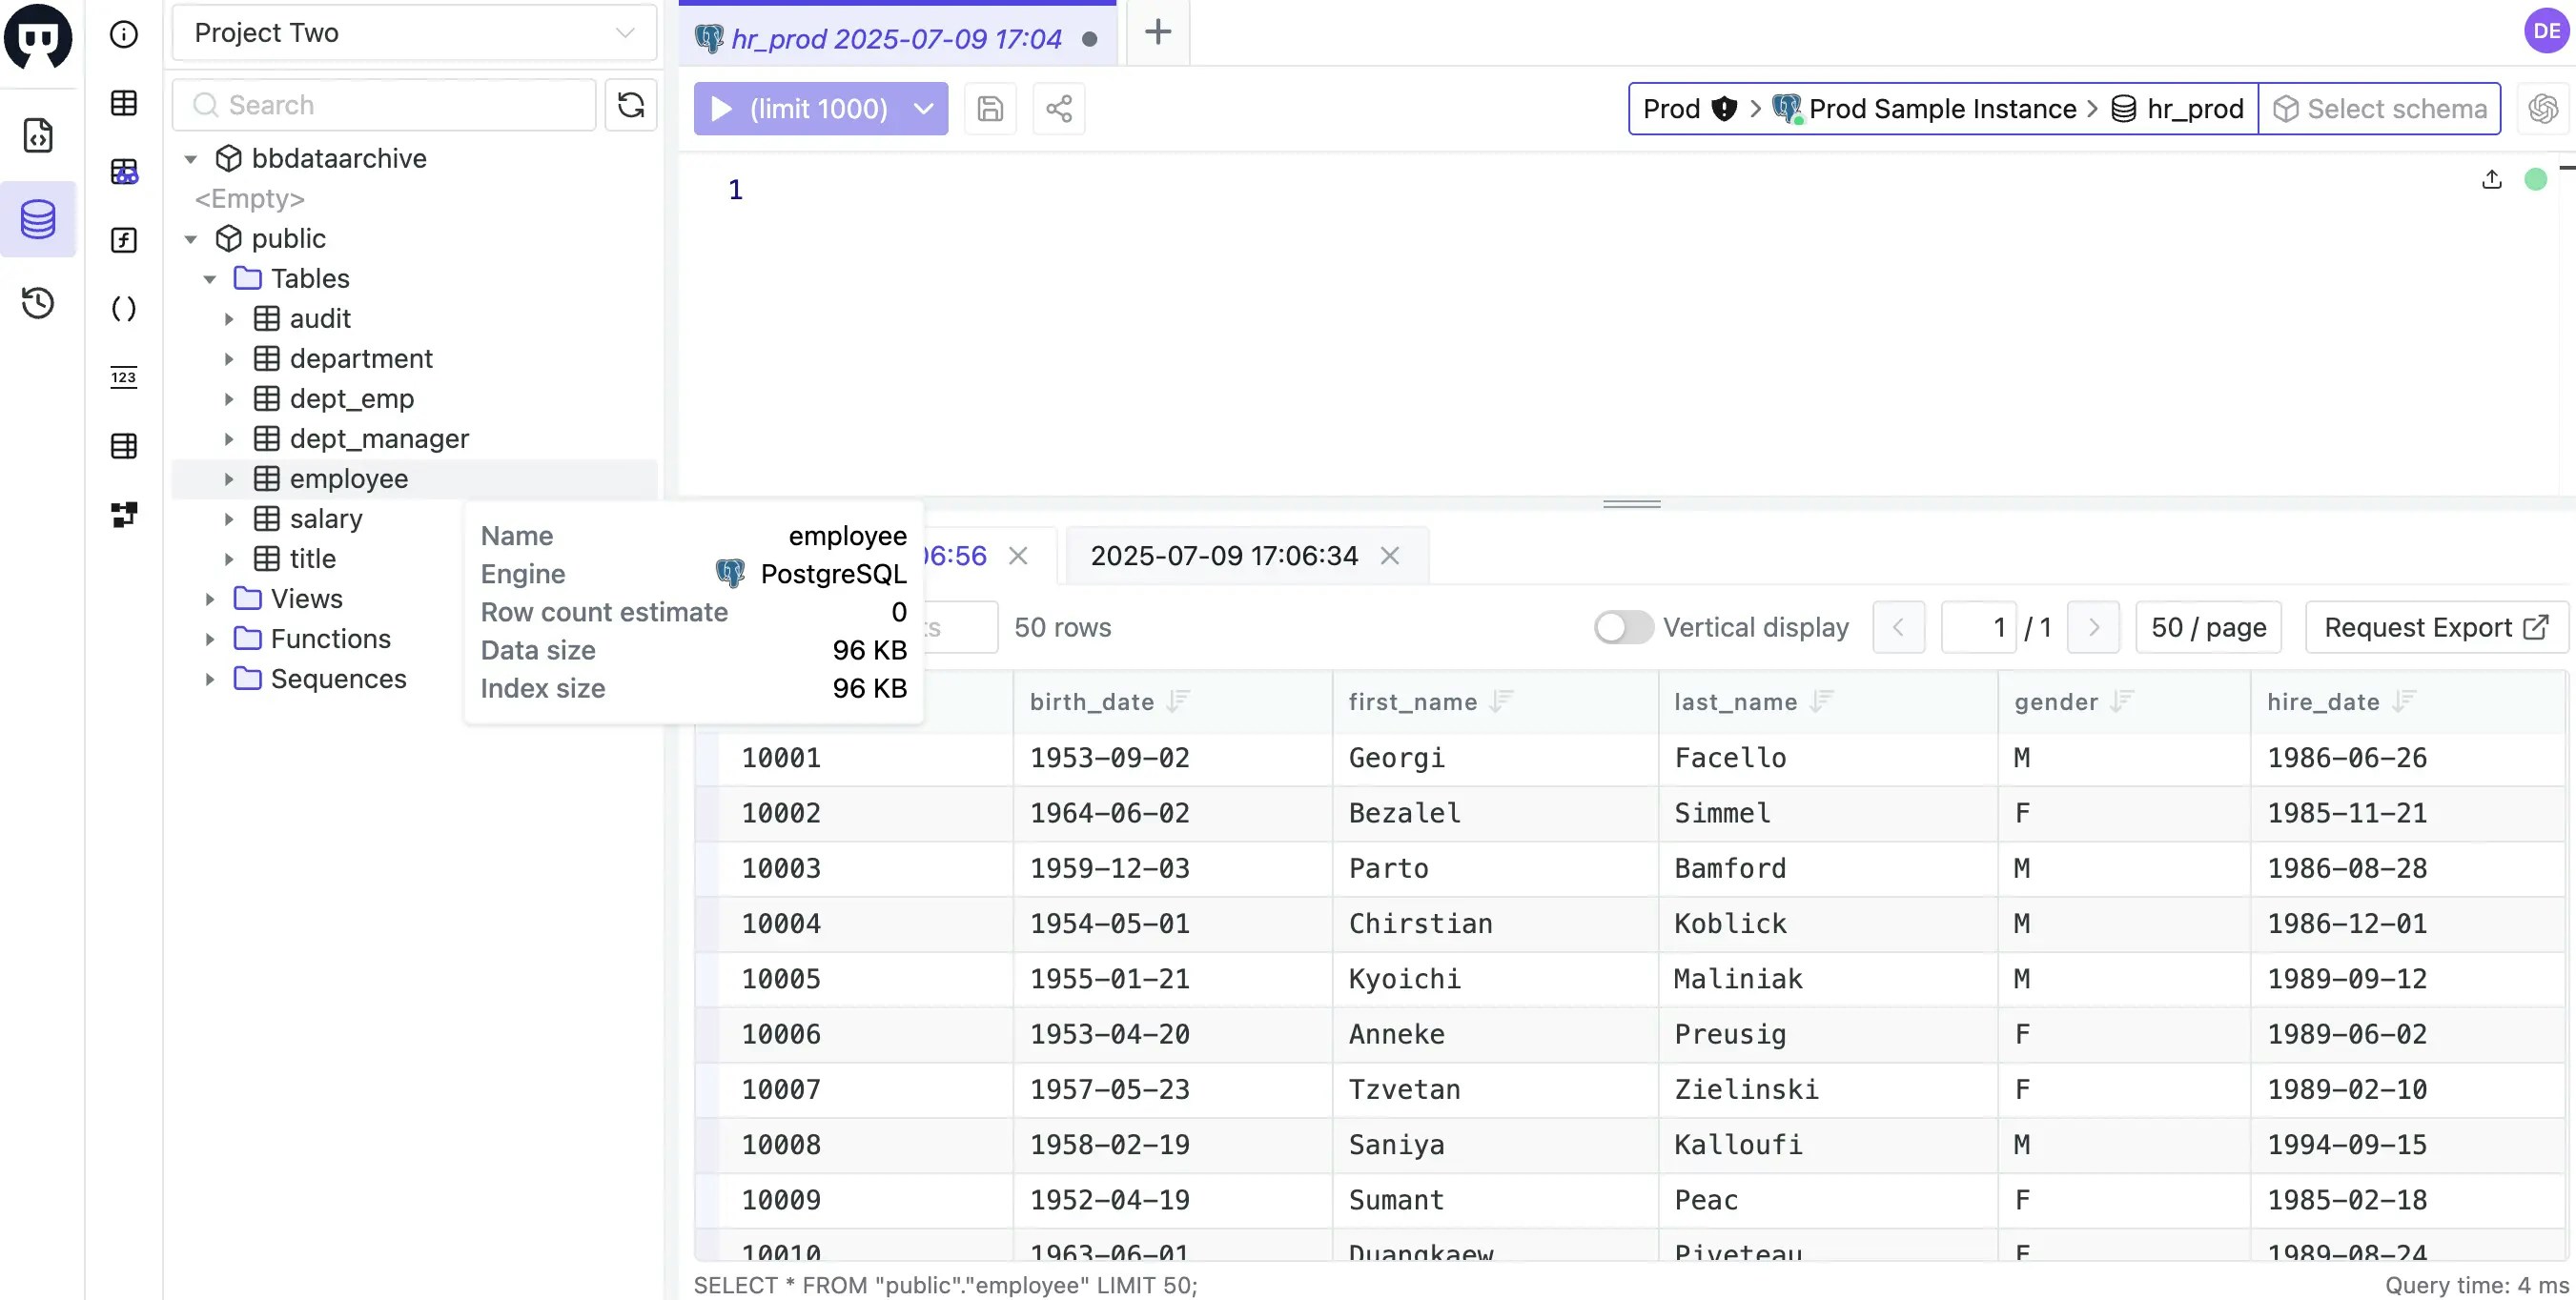
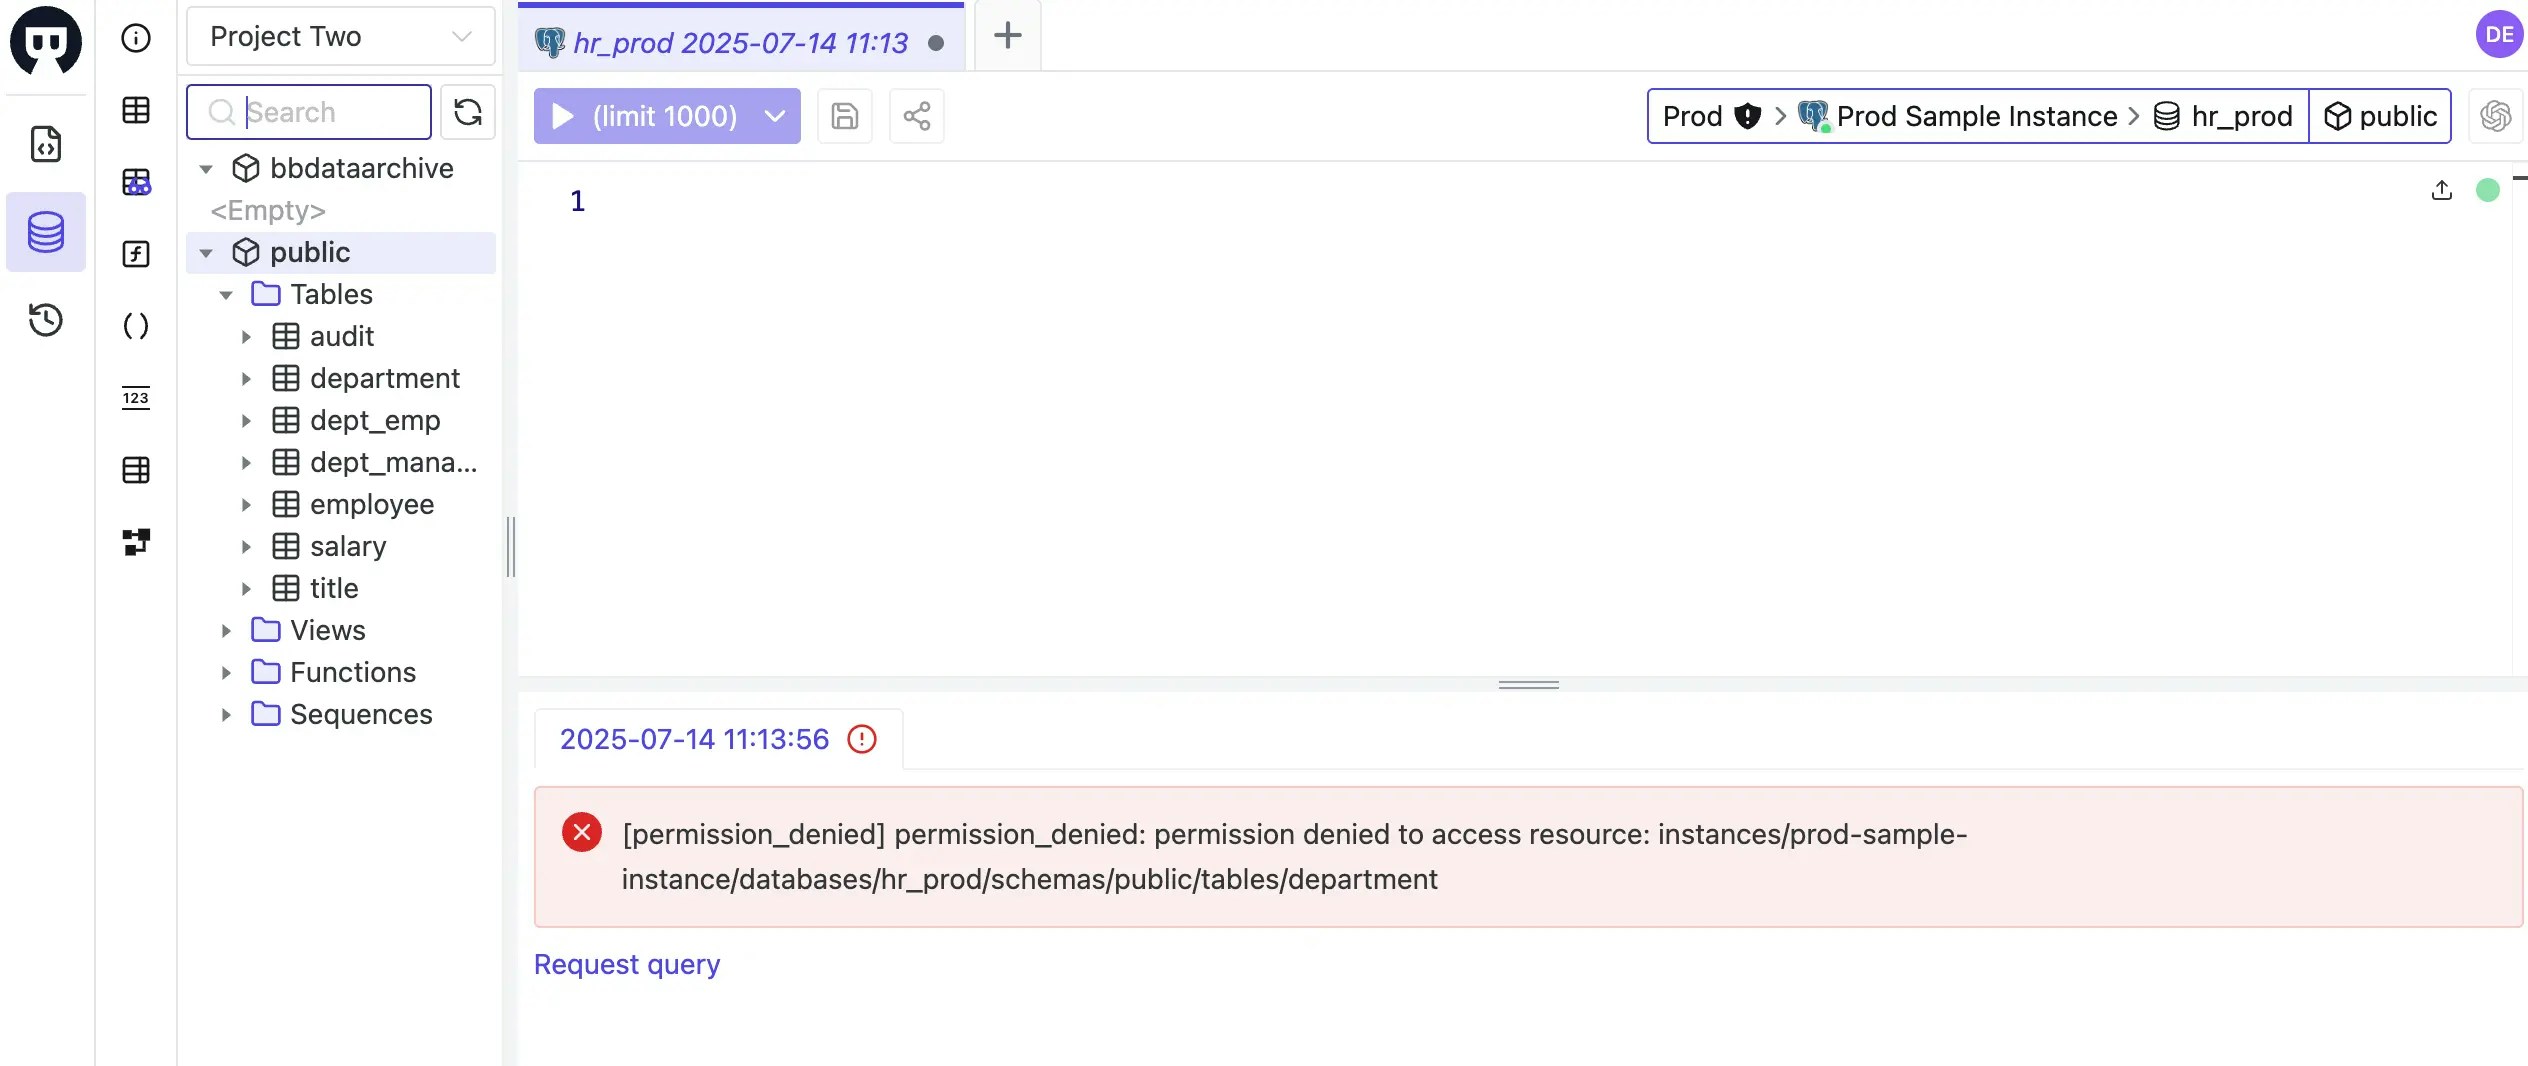
- Navigate to SQL Editor.
-
Connect to
Prod > Prod Sample Instance > hr_prod. -
Test table access:
- ✅ Query
employeetable - Should work - ✅ Query
salarytable - Should work - ❌ Query
departmenttable - Should fail with permission error
- ✅ Query
Common Access Control Patterns
This tutorial demonstrates several best practices:- Separation of Duties: DBAs have owner permissions, developers have restricted access
- Group-Based Management: Use groups instead of individual user assignments
- Least Privilege: Grant only necessary permissions at the appropriate level
- Conditional Access: Time-limited, table-specific permissions for sensitive data
- Inheritance: Workspace-level project roles apply to ALL projects
Key Points
- IAM Hierarchy: Workspace policies apply globally, project policies are scoped to specific projects
- Project Roles at Workspace Level: When assigned in workspace IAM, project roles (like
projectViewer) apply to ALL projects - Group Benefits: Manage permissions for teams rather than individuals
- Conditional Bindings: Fine-grained access control down to table level with expiration
- Role Inheritance: Higher roles include permissions of lower roles