- Database GitOps with GitHub Actions
- Database GitOps with Azure DevOps Pipeline
- Database GitOps with GitLab CI
- Database GitOps with Bitbucket Pipelines
- State-based Database Schema Management with GitHub Actions (this one)
Learn to implement state-based database schema management using GitHub Actions and Bytebase. This approach declares the desired schema state and automatically generates necessary migrations, eliminating manual script writing. What you’ll build:
- Declarative schema definitions in SQL files
- AI-powered SQL reviews on pull requests
- Auto-deployment of state changes on merge to main
Important: State-based workflow currently only supports PostgreSQL.
Repository
https://github.com/bytebase/example-gitops-github-flowPrerequisites
- A Bytebase instance (Bytebase Cloud or self-hosted)
- For self-hosted version, you need Docker to run Bytebase.
State-based vs Migration-based
Migration-based: Write incremental scripts that transform the database step-by-step. You track which migrations have run. State-based: Declare the desired schema state. The system automatically generates migrations by comparing current and desired states.Setup
Step 1 - Set up Bytebase
- Cloud
- Self-Hosted
Use Bytebase Cloud for instant setup without infrastructure management. CI/CD services can connect immediately.Best for: Quick testing, evaluation, and small teams
Step 2 - Create Service Account
-
Log in as
Workspace Admin, and go to IAM & Admin > Users & Groups. Click + Add User, fill in withapi-sample, and assign theWorkspace MemberandGitOps Service Agentroles, which are sufficient for this tutorial, then click Confirm. -
Find the newly created service account and Copy Service Key. We will use this token to authenticate the API calls.

Step 3 - Fork the Example Repository and Configure Variables
-
Fork https://github.com/bytebase/example-gitops-github-flow. There are two workflows in this repository for this tutorial:
.github/workflows/declarative-release-action.yml: Deploy release in Bytebase after the PR is merged to themainbranch..github/workflows/declarative-sql-review-action.yml: Lint the generated SQL migration after the PR is created with AI configured.
-
Go into the workflow files and update the
envsection with your own values:- BYTEBASE_URL: Your Bytebase instance URL (e.g.,
https://bytebase.your-company.comor your Bytebase Cloud URL) - BYTEBASE_SERVICE_ACCOUNT:
api-example@service.bytebase.com(the service account you created in the previous step) - BYTEBASE_PROJECT:
projects/project-sample(the sample project in Bytebase) - BYTEBASE_TARGETS:
instances/test-sample-instance/databases/hr_test,instances/prod-sample-instance/databases/hr_prod(the two default databases in the sample project) - STATE_FILE_PATTERN:
schemas/*.sql(the pattern for state definition files)
The workflows runbytebase-action checkandbytebase-action rollout, which verify version compatibility before executing. For Bytebase Cloud, usebytebase/bytebase-action:cloud; for self-hosted Bytebase, use the image tag matching your Bytebase server version, for examplebytebase/bytebase-action:3.14.0. - BYTEBASE_URL: Your Bytebase instance URL (e.g.,
- Add the service account password as a secret named BYTEBASE_SERVICE_ACCOUNT_SECRET in Settings > Secrets and Variables > Actions.
-
The
GITHUB_TOKENis automatically provided by GitHub during workflow execution. - Go to Actions tab and enable workflow runs.
Step 4 - Configure AI Review
- Go to Bytebase console, click Settings > General > AI Assistant.
- Enable AI and choose your provider (OpenAI, Azure OpenAI, Gemini, or Claude).
- Enter your API credentials and test the connection.
- Create a
.bytebase/sql-review.mdfile in your repository and write your team’s SQL standards in natural language - no special syntax required. Here is an example:
- Update
.github/workflows/declarative-sql-review-action.ymlto use the.bytebase/sql-review.mdfile.
Deploy the State Changes
Step 1 - Export the Schema Definition File
State-based workflows use SQL files that define the complete desired schema.- To manage existing schemas, export them from Bytebase console: navigate to your database and click Export Schema.
-
Navigate to
Sample Project> Database > Databases. Selecthr_prodand export the schema: -
Add a new table, save as
schema.sqlin theschemas/directory:
Step 2 - Create a Pull Request
-
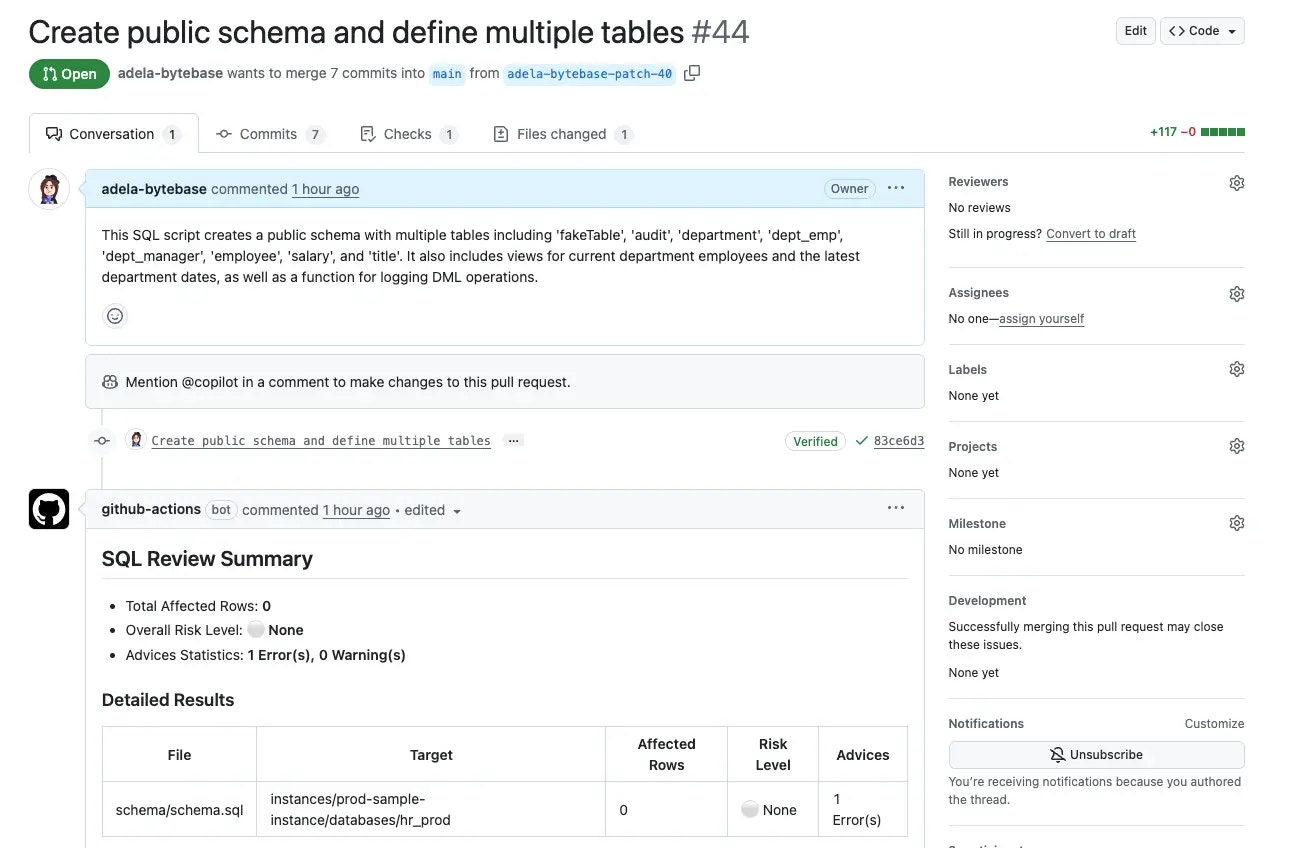
Create a pull request from your branch. The workflow triggers automatically, posting review results as PR comments.
-
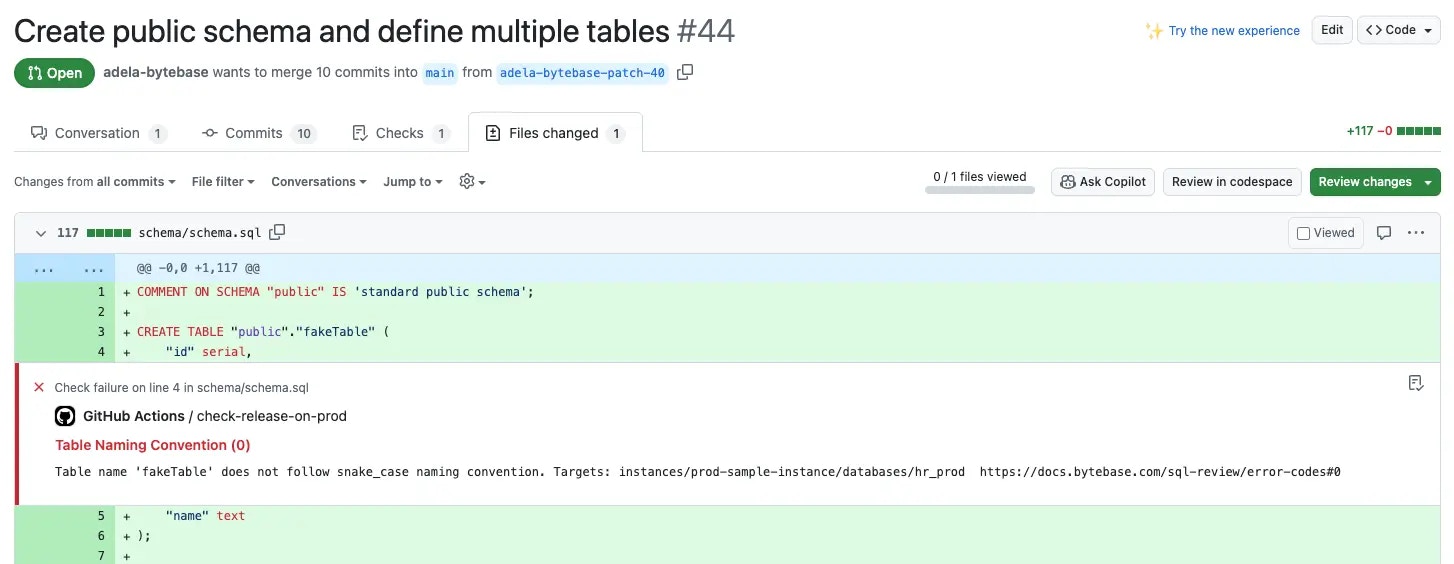
Fix the naming convention warning by updating the table name:
Step 3 - Merge the Pull Request
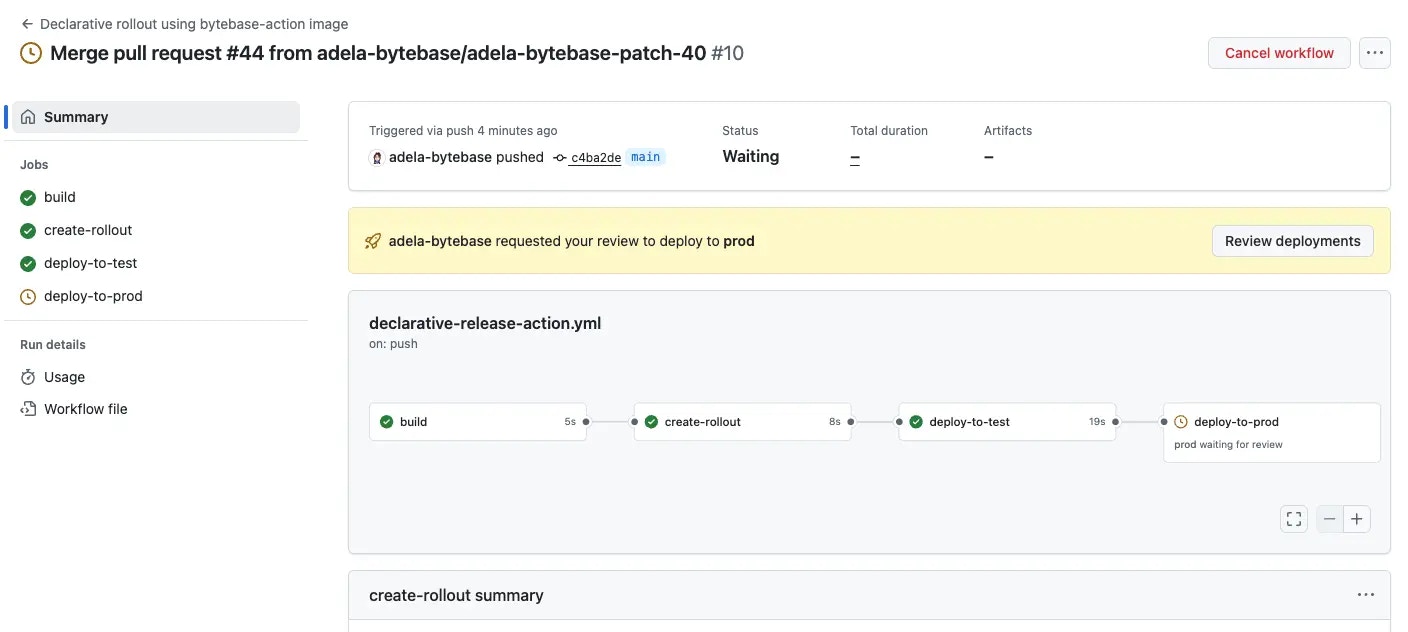
- Push the fix. Once the review passes, merge the PR.
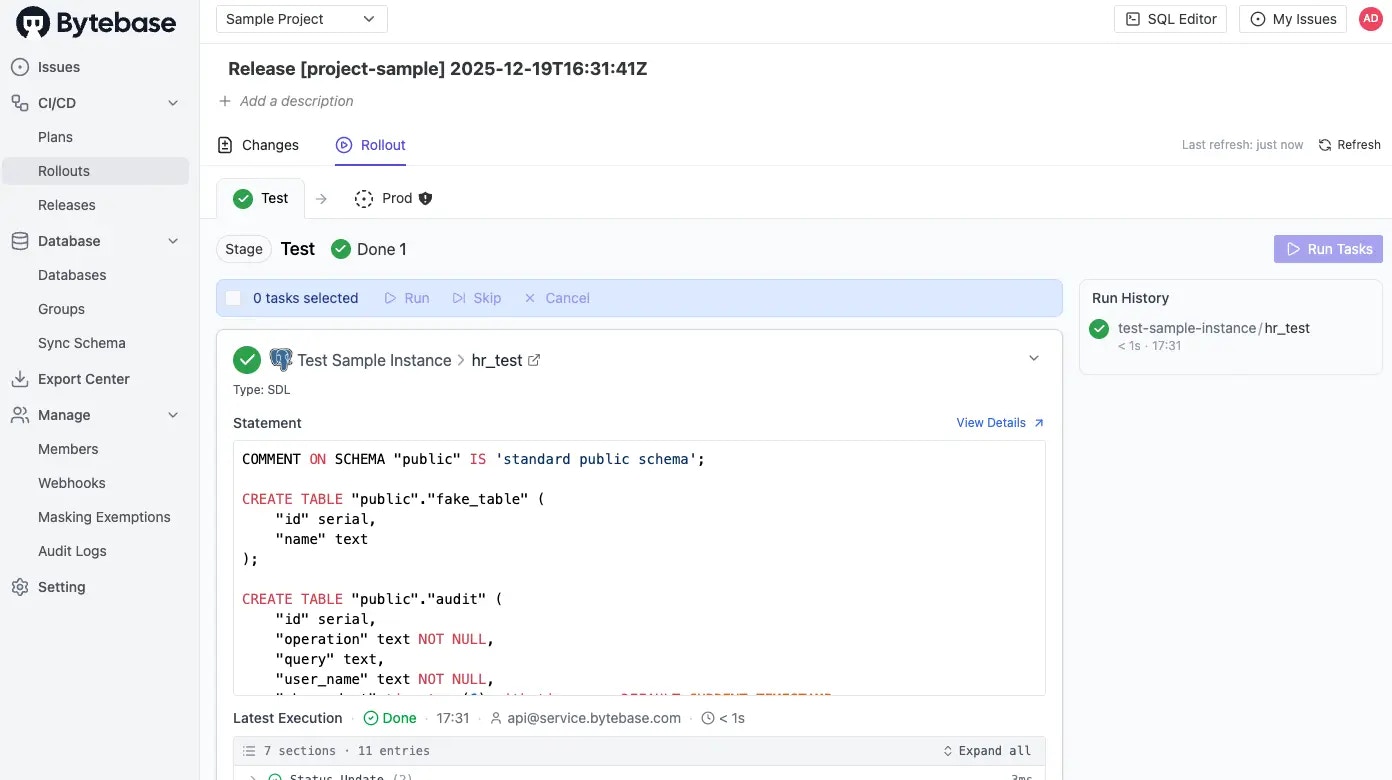
-
Check the Actions tab - test deploys automatically, prod awaits approval.
-
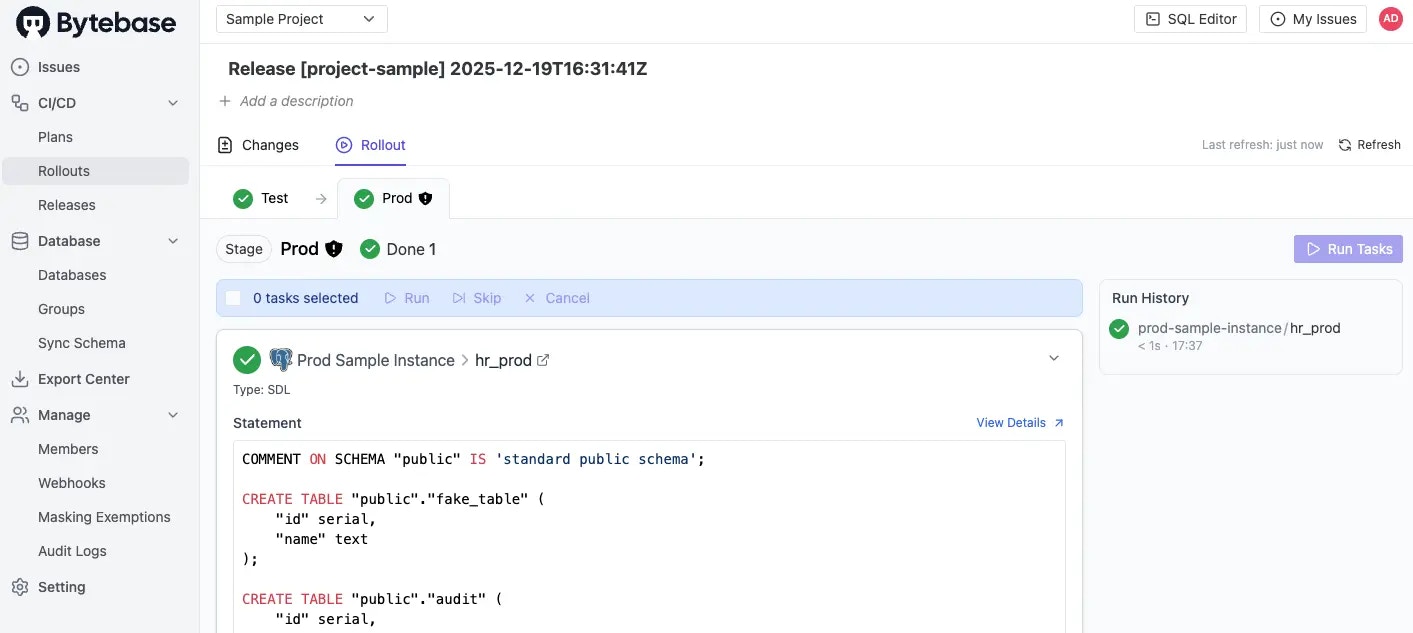
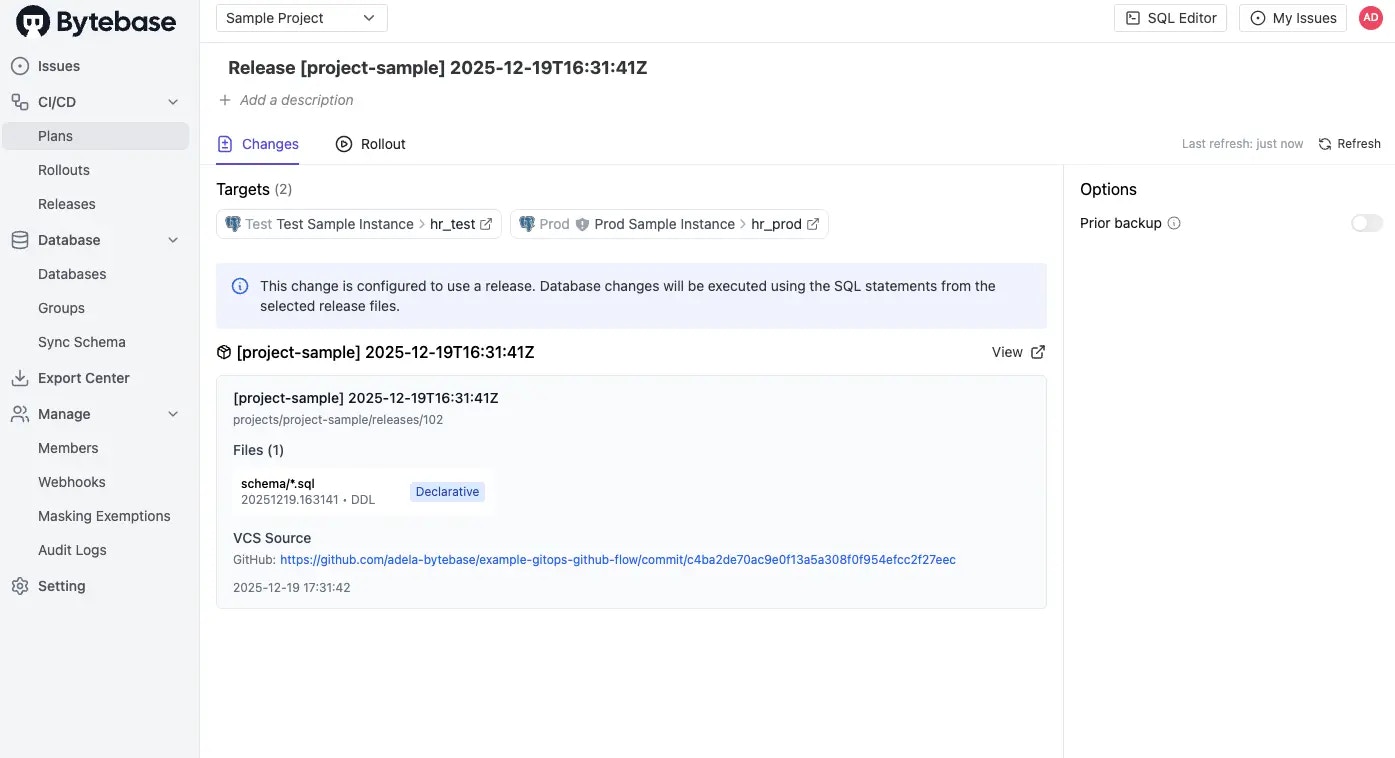
In Bytebase console, verify the release was created and applied to
hr_test.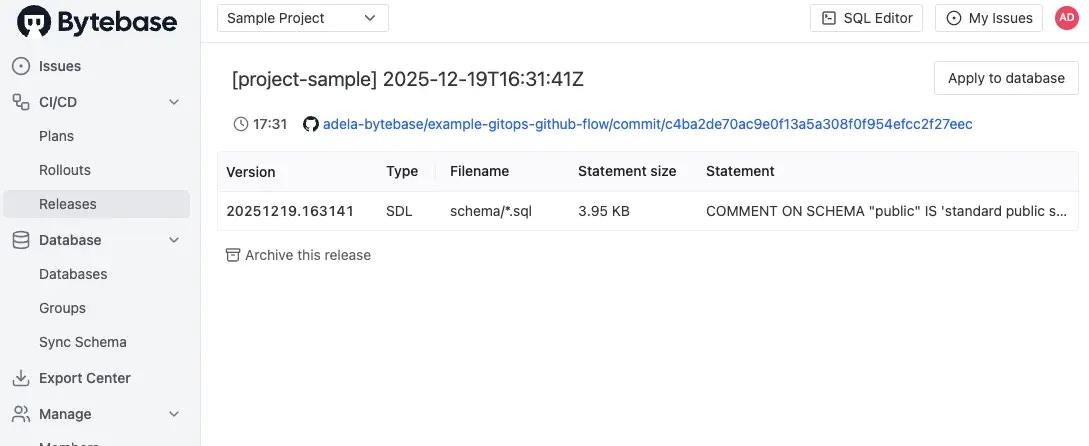
- Return to GitHub Actions and approve the production deployment.
-
Confirm the changes are applied to
hr_prodin Bytebase.